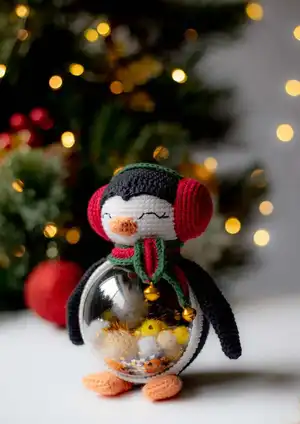
Make a festive Penguin amigurumi with a clear fillable ornament belly — a charming holiday project that doubles as decor or a gift. You will crochet small, detailed pieces and assemble them around an 80 mm clear ornament for a unique transparent body. The pattern guides you through head, wings, feet, tail, headphones and a scarf with step-by-step rounds and helpful photos.
Progress Tracker
0% Complete
— Pattern Instructions :
Info :
When using the original yarn and hook number, the Penguin size is 14cm. Crocheting density of 5 cm - 16 sc for 18 rows. It is important to crochet a sample before you start crocheting a toy because it affects the density of the fit of the crocheted detail to the ball. If your density differs, try changing the hook number or choosing a different yarn.
Infos :
Original materials: 1) Yarn: Friends Cotton 8/4 - 100% cotton, 50g/160m: red (color 41) - 1 pc, black (color 124) - 1 pc. Cotton King 8/4 - 100% cotton, 50g/170m: green (color 25) - 1 pc, white (color 01) - 1 pc, orange (color 14) - 1 pc. 2) Hook 2.0 mm. 3) Stitching needle. 4) Fiberfill / toy stuffing. 5) Clear plastic fillable ornament ball 80 mm. 6) Any sequins and other Christmas fillers to your liking. 7) Stitch markers and pins for sewing (for temporary fixation of parts). 8) Thread floss black for embroidery eyes. 9) Bells for scarf (optional).
— Body :
Info :
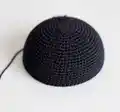
The yarn is black. We crochet the shape of a hemisphere, into which we will later insert the Christmas tree plastic ball.
Round 1 :
6 sc in the amigurumi ring
Round 3 :
(1 sc, inc) x 6 (18)
Round 4 :
1 sc, (inc, 2 sc) x 5, inc, 1 sc (24)
Round 5 :
(3 sc, inc) x 6 (30)
Round 6 :
2 sc, (inc, 4 sc) x 5, inc, 2 sc (36)
Round 7 :
(5 sc, inc) x 6 (42)
Round 8 :
3 sc, (inc, 6 sc) x 5, inc, 3 sc (48)
Round 9 :
(7 sc, inc) x 6 (54)
Round 10 :
4 sc, (inc, 8 sc) x 5, inc, 4 sc (60)
Round 12 :
(9 sc, inc) x 6 (66)
Round 13 :
5 sc, (inc, 10 sc) x 5, inc, 5 sc (72)
Round 14-23 :
72 sc (10 rounds) (picture 1)
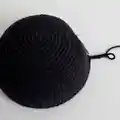
Round 24 :
Crocheting a chain of 5 ch and attach it to the main fabric, skipping 3 sc, we crochet another 69 sc to the end of the round (74) (pictures 2-3)
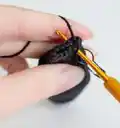
Info :
Change the color to white, cut the black yarn (picture 4-5)
Info :
We finish crocheting sl st, fix the thread, and cut it, leaving a long tip for sewing the head to the body (picture 6).
— Wings (make 2) :
Round 1 :
6 sc in the amigurumi ring
Round 6 :
(1 sc, inc) x 6 (18)
Round 10 :
(2 sc, inc) x 6 (24)
Round 14 :
(2 sc, dec) x 6 (18)
Round 15-21 :
18 sc (7 rounds)
Round 22 :
(1 sc, dec) x 6 (12)
Info :
Fold the wing in half and close the hole with a string of 6 sc (pictures 2-4). Fix the thread and cut it, leaving a long tip for sewing the wings to the body.
— Feet (make 2) :
Info :
The yarn is orange. In the course of crocheting, slightly fill with fiberfill. We crochet in a circle around the chain with ch.
Round 1 :
double chain 3 7 ch
Round 2 :
starting with the second loop from the hook, 5 sc, inc of 3 sc, 5 sc, inc of 3 sc (16) (picture 5)
Round 3-6 :
16 sc (4 rounds)
Round 7 :
(6 sc, dec) x 2 (14)
Round 11 :
(5 sc, dec) x 2 (12)
Info :
We tighten the hole and hide the thread.
— Tail :
Round 1 :
6 sc in the amigurumi ring
Round 2 :
(1 sc, inc) x 3 (9)
Round 3 :
(2 sc, inc) x 3 (12)
Round 5 :
(3 sc, inc) x 3 (15)
Info :
We crochet another sl st, fix the thread, and cut it, leaving a long tip for sewing.
— Head :
Info :
It will consist of two elements, white and black.
First element :
The yarn is white. In the course of crocheting, fill with fiberfill.
Round 1 :
6 sc in the amigurumi ring
Round 3 :
(1 sc, inc) x 6 (18)
Round 4 :
1 sc, (inc, 2 sc) x 5, inc, 1 sc (24)
Round 5 :
(3 sc, inc) x 6 (30)
Round 6 :
2 sc, (inc, 4 sc) x 5, inc, 2 sc (36)
Round 7 :
(5 sc, inc) x 6 (42)
Round 8 :
3 sc, (inc, 6 sc) x 5, inc, 3 sc (48)
Round 9 :
(7 sc, inc) x 6 (54)
Round 10-19 :
54 sc (10 rounds)
Round 20 :
(7 sc, dec) x 6 (48)
Round 21 :
3 sc, (dec, 6 sc) x 5, dec, 3 sc (42)
Round 22 :
(5 sc, dec) x 6 (36)
Round 23 :
2 sc, (dec, 4 sc) x 5, dec, 2 sc (30)
Round 24 :
(3 sc, dec) x 6 (24)
Round 25 :
1 sc, (dec, 2 sc) x 5, dec, 1 sc (18)
Round 26 :
(1 sc, dec) x 6 (12)
Info :
We tighten the hole and close it. Pass the thread through the closed loops through the entire head and bring it opposite, in the amigurumi ring. Thus, we will get a small depression that will allow us to correctly attach the head to the body. Having twisted the thread on the top of the head, fix it and cut it.
Second element :
The yarn is black.
Round 1 :
6 sc in the amigurumi ring
Round 3 :
(1 sc, inc) x 6 (18)
Round 4 :
1 sc, (inc, 2 sc) x 5, inc, 1 sc (24)
Round 5 :
(3 sc, inc) x 6 (30)
Round 6 :
2 sc, (inc, 4 sc) x 5, inc, 2 sc (36)
Round 7 :
(5 sc, inc) x 6 (42)
Round 8 :
3 sc, (inc, 6 sc) x 5, inc, 3 sc (48)
Round 9 :
(7 sc, inc) x 6 (54)
Round 10-18 :
54 sc (9 rounds)
Round 19 :
13 sc, 5 hdc, 7 dc, 1 tr, 1 dtr, 1 tr, 7 dc, 5 hdc, 14 sc (54)
Round 20 :
20 sc, 5 hdc, 1 dc, 1 tr, 1 dc, 5 hdc, 21 sc (54)
Info :
Crochet another sl st, fix the thread, and cut it. Now we put the second element on top of the first and sew it in a circle with ordinary black sewing thread (pictures 10-12).
— Beak :
Info :
The yarn is orange.
Round 1 :
6 sc in the amigurumi ring
Round 2 :
(1 sc, inc) x 3 (9)
Round 3 :
(2 sc, inc) x 3 (12)
Info :
We crochet another sl st, fix the thread, and cut it off, leaving a long tip for sewing the nose to the head.
— Headphones (make 2) :
Round 1 :
6 sc in the amigurumi ring
Round 3 :
(1 sc, inc) x 6 (18)
Round 4 :
1 sc, (inc, 2 sc) x 5, inc, 1 sc (24)
Round 5 :
(3 sc, inc) x 6 (30)
Round 6 :
2 sc, (inc, 4 sc) x 5, inc, 2 sc (36)
Info :
We crochet another sl st, fix the thread, and cut it, leaving a long tip for sewing to the head.
Info :
Additionally, we crochet a connecting element. To do this, with green yarn, we crochet a chain of 20 ch, and starting from the second loop from the hook, we crochet one row of hdc. We fixed the thread and cut it.
— Scarf :
Info :
We will crochet back-and-forth-row and hdc. At the same time, we will crochet each row only for one wall of the chain, the one that is closest to us. We will use red and green yarn.
Round 1 :
Let's start with green yarn. Row 1) crochet a chain with 71 ch
Round 2 :
starting from the second loop from the hook, we crochet 70 hdc
Round 3-4 :
Change the color to red. Rows 3-4) 1 ch, 70 hdc
Round 5 :
Change the color to green. Row 5) 1 ch, 70 hdc
Info :
We fix all the threads and hide them. On both sides, we tighten the edges and attach bells to them. Bells can be replaced with thread pompons.
— Collecting the Penguin :
Info :
Making a muzzle: We outline the location of the beak and sew it to the head. With a thread of black floss in two folds, we embroider the eyes of the Penguin. We outline the location of the headphones and the connecting element for them. First, sew a green strip to the head. Next, having filled the sphere of the headphones with fiberfill, we also sewed them to the head.
Info :
For convenience, and for a symmetrical arrangement of parts, we immediately insert the Christmas ball into the crocheted body. With the help of pins, we outline the location of the wings, tail, and legs. We fasten the tail so that it serves as an additional support for the penguin and it can stand on its own. Sew the wings, tail, and legs to the body. Sew on the head.
Info :
Take out the ball, and fill it with tinsel. We tuck in and fix all the ends that remain after sewing on all the parts. Insert the ball into the finished penguin. Tie a scarf.
This little Penguin combines classic amigurumi shaping with a sparkly transparent belly for a fun holiday twist. It makes an adorable handmade gift or tabletop decoration and looks lovely on a mantel or under the tree. Bring out your festive yarn and tiny bells, and create a charming seasonal friend to enjoy every year. 🧶🎁✨