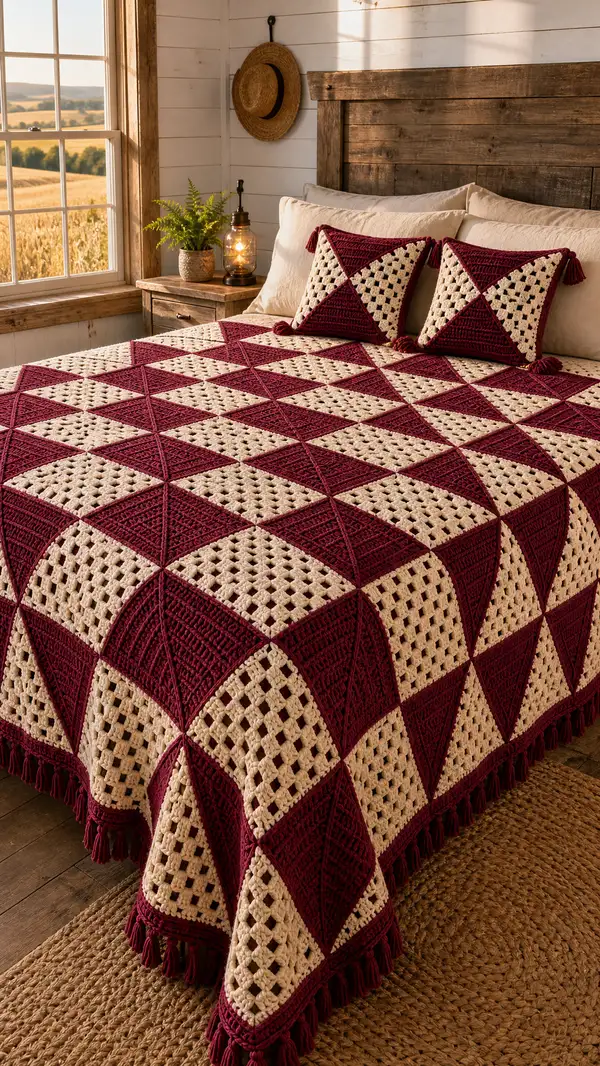
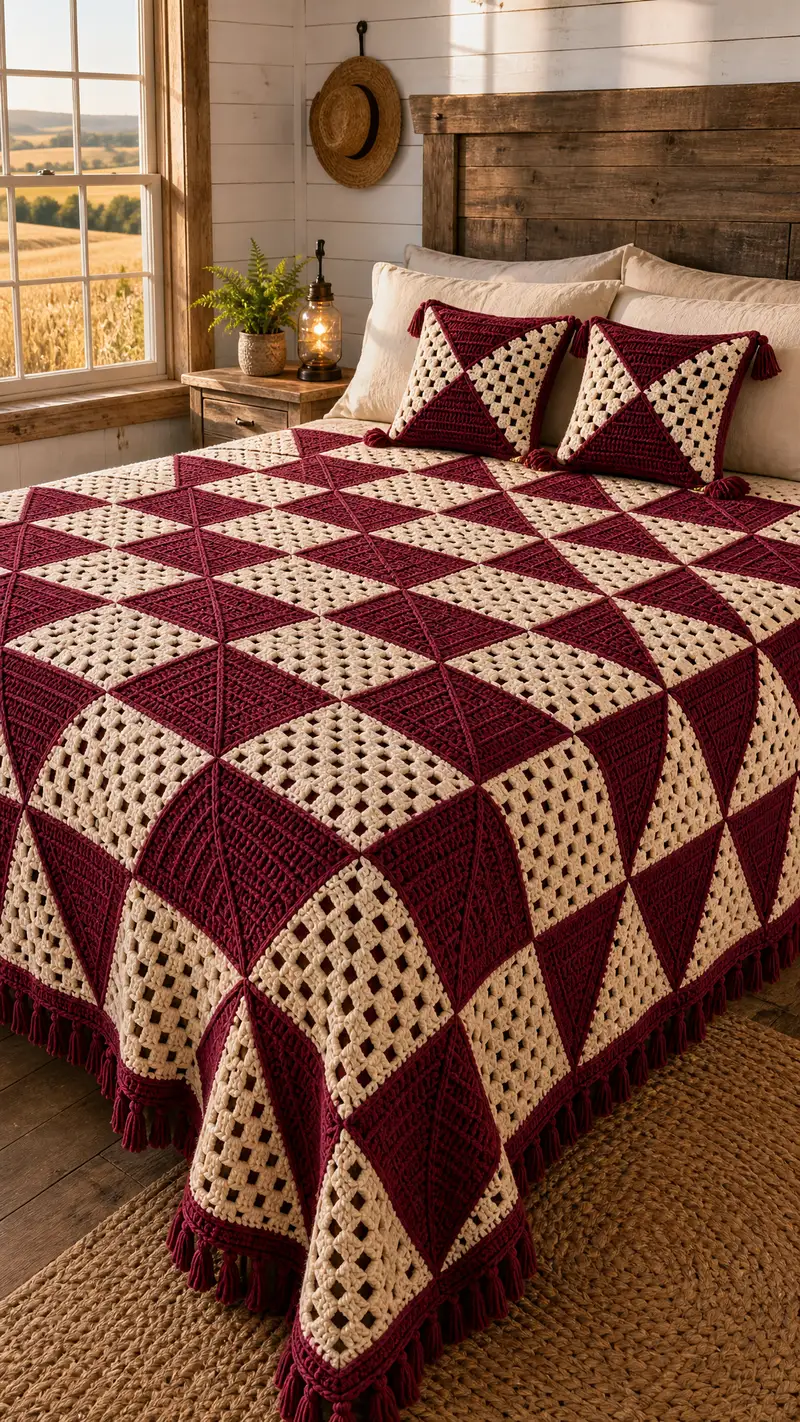
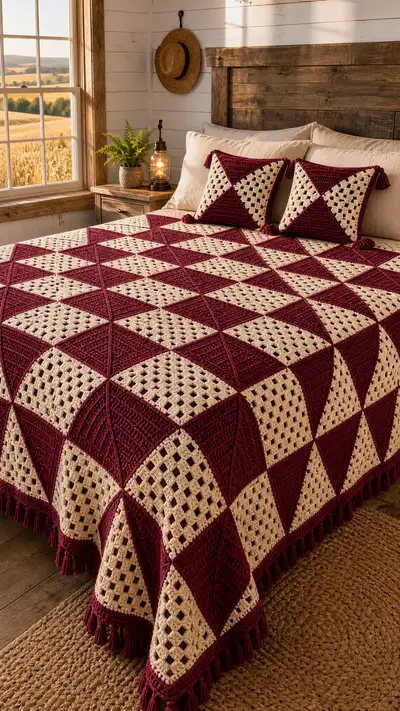
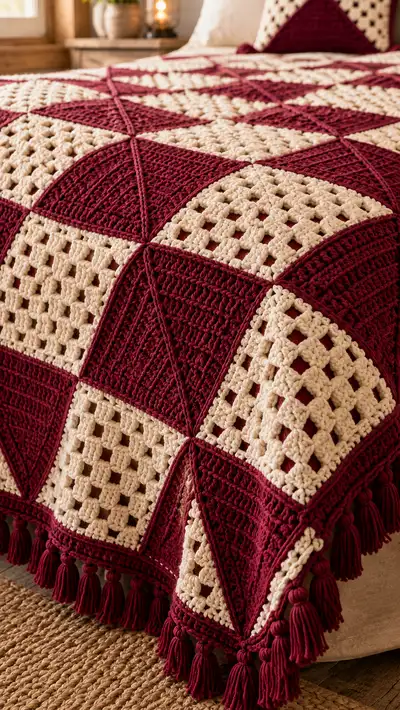
A cozy checkerboard bedspread made of alternating solid burgundy triangles and cream granny triangles assembled into large diamond motifs. This rustic farmhouse-style throw uses textured double crochet triangles and traditional granny clusters for a bold geometric look. Finished edges feature a deep burgundy border and chunky tassels for a handcrafted statement on your bed. Clear, step-by-step modular instructions make this a satisfying long-term project.
Progress Tracker
0% Complete
— Overview & Gauge :
Info :
This pattern is modular and built from triangle units: a textured solid burgundy triangle and a cream granny triangle. Each triangle finishes approximately 10.5" (26.5 cm) along each side when worked with worsted weight yarn and a 5.5mm hook. Two triangles join to form a 10.5" x 10.5" square. Layout shown is 6 squares across by 7 squares down (total 42 squares) resulting in approximately 63" x 73" finished bedspread before border and tassels. Gauge and final size will vary with yarn and tension; block motifs for accuracy.
Info :
Throughout the pattern rounds and rows we use flat rows for triangle construction (these are not joined rounds). For triangle stitch counts we list final stitch counts per row; please recount if you pause or switch yarns.
— Solid Textured Triangle (Burgundy) — Make 42 (or as many as needed):
Info :
Work flat in rows. Each row increases by 2 stitches (one at each end) to create a symmetrical half-square triangle. Beginning chain 3 counts as first dc. Row stitch formula: Row n stitch count = (2n - 1) dc (where n is row number). We will work 26 rows for a triangle with final row 51 dc to match the granny triangle width.
Row 1 :
Ch 3 (counts as first dc), 1 dc in same ch-3 space. Turn. (1 dc)
Row 2 :
Ch 3, dc in same st, dc across to last st, 1 dc in last st (increase at both ends). Turn. (3 dc)
Row 3 :
Ch 3, dc in same st, dc across to last st, 1 dc in last st. Turn. (5 dc)
Row 4 :
Ch 3, dc in same st, dc across to last st, 1 dc in last st. Turn. (7 dc)
Info :
Maintain consistent tension; place a stitch marker in the first stitch of each row if helpful to track increases at the ends. The turning chain counts as the first dc.
Row 5 :
Ch 3, dc in same st, dc across, 1 dc in last st. Turn. (9 dc)
Row 6 :
Ch 3, dc in same st, dc across, 1 dc in last st. Turn. (11 dc)
Row 7 :
Ch 3, dc in same st, dc across, 1 dc in last st. Turn. (13 dc)
Row 8 :
Ch 3, dc in same st, dc across, 1 dc in last st. Turn. (15 dc)
Info :
Starting around Row 8 you can add surface texture: for every right-side row (odd-numbered rows) work all dc in BLO to create horizontal ridging. This is optional but replicates the textured panels in the photo. If you choose this, note the texture will slightly shorten rows — maintain counts by working full dc in BLO each odd row.
Row 9 :
Ch 3, dc in same st, dc across, 1 dc in last st. Turn. (17 dc)
Row 10 :
Ch 3, dc in same st, dc across, 1 dc in last st. Turn. (19 dc)
Row 11 :
Ch 3, dc in same st, dc across, 1 dc in last st. Turn. (21 dc)
Row 12 :
Ch 3, dc in same st, dc across, 1 dc in last st. Turn. (23 dc)
Info :
At Row 12 insert a removable stitch marker in the center stitch if you want to check for symmetry; center stitch position will shift by one when using BLO on alternating rows — this is expected.
Row 13 :
Ch 3, dc in same st, dc across, 1 dc in last st. Turn. (25 dc)
Row 14 :
Ch 3, dc in same st, dc across, 1 dc in last st. Turn. (27 dc)
Row 15 :
Ch 3, dc in same st, dc across, 1 dc in last st. Turn. (29 dc)
Row 16 :
Ch 3, dc in same st, dc across, 1 dc in last st. Turn. (31 dc)
Info :
Keep edges straight: your increases should be the first and last dc of each row. If the side appears wavy, try tightening the very first and last two stitches slightly on those rows.
Row 17 :
Ch 3, dc in same st, dc across, 1 dc in last st. Turn. (33 dc)
Row 18 :
Ch 3, dc in same st, dc across, 1 dc in last st. Turn. (35 dc)
Row 19 :
Ch 3, dc in same st, dc across, 1 dc in last st. Turn. (37 dc)
Row 20 :
Ch 3, dc in same st, dc across, 1 dc in last st. Turn. (39 dc)
Info :
If you are using BLO for texture on odd-numbered rows, make sure to complete the BLO dc across the entire right side; you can work even-numbered rows in regular dc to give alternating texture bands as seen in the photo.
Row 21 :
Ch 3, dc in same st, dc across, 1 dc in last st. Turn. (41 dc)
Row 22 :
Ch 3, dc in same st, dc across, 1 dc in last st. Turn. (43 dc)
Row 23 :
Ch 3, dc in same st, dc across, 1 dc in last st. Turn. (45 dc)
Row 24 :
Ch 3, dc in same st, dc across, 1 dc in last st. Turn. (47 dc)
Info :
When you reach larger row counts the fabric will broaden quickly; keep the piece flat and avoid stretching when turning — fold gently and keep turning chain consistent in height (ch-3 recommended for dc rows).
Row 25 :
Ch 3, dc in same st, dc across, 1 dc in last st. Turn. (49 dc)
Row 26 :
Ch 3, dc in same st, dc across, 1 dc in last st. Turn and fasten off. (51 dc)
Info :
At Row 26 your triangle base (last row) should measure the same width as the granny triangle base (51 stitch equivalents). Fasten off leaving a 12" tail for assembly. Block triangle flat to match measurement before joining.
— Granny Triangle (Cream) — Make 42 (or as many as needed):
Info :
The cream triangle uses traditional granny-cluster rows worked in a triangular shape. Each row adds one cluster unit at the outer edge to grow the triangle. Clusters are groups of 3 dc worked in the same space separated by chain-1 spaces; counts are given in clusters and stitch-equivalents to match the solid triangle width. We will work 17 cluster rows to reach a base approximately equivalent to 51 dc.
Row 1 :
Ch 4 (counts as ch-1 + ch-3 foundation), dc-3 in 4th ch from hook (or make a 3-dc cluster in first cluster position). Turn. (1 cluster)
Row 2 :
Ch 3, turn, 2 dc in same space as last cluster (forming first cluster), ch 1, 3 dc in same space — this creates a little fan at the point. Turn. (2 clusters total)
Row 3 :
Ch 3, turn, 3 dc in first cluster base, ch 1, *3 dc in next cluster base; rep across to end, 1 extra 3-dc at turning end to create new outer cluster. Turn. (3 clusters)
Info :
Because granny triangles are built in clusters, the stitch-unit measurement differs from dc counts. Count clusters rather than individual dc when tracking rows. Each cluster roughly equals three stitches wide when measured across the row; our goal is to reach a final cluster count that matches the solid triangle's width after blocking.
Row 4 :
Ch 3, turn, 3 dc in first cluster, ch 1, 3 dc in next cluster, ch 1, 3 dc in next cluster. Turn. (4 clusters)
Row 5 :
Ch 3, turn, replicate cluster pattern across, adding one new cluster at the outermost edge. Turn. (5 clusters)
Row 6 :
Ch 3, turn, work clusters across following the established pattern with ch-1 spaces between clusters. Turn. (6 clusters)
Row 7 :
Ch 3, turn, continue adding one cluster to the outer edge. Turn. (7 clusters)
Info :
To keep a straight outer edge, make sure the first cluster in each row sits centered in the existing edge space — granny triangles often taper more naturally when clusters are added evenly. Use a stitch marker to mark the first cluster if needed.
Row 8 :
Ch 3, turn, work established cluster pattern adding 1 cluster. Turn. (8 clusters)
Row 9 :
Ch 3, turn, work established cluster pattern adding 1 cluster. Turn. (9 clusters)
Row 10 :
Ch 3, turn, continue cluster increases. Turn. (10 clusters)
Row 11 :
Ch 3, turn, continue cluster increases. Turn. (11 clusters)
Info :
At Row 11 check width: if the base seems narrower than the burgundy triangle, keep adding cluster rows until the base measures equal when blocked. We plan to reach approximately 17 cluster rows to reach equivalent width after blocking.
Row 12 :
Ch 3, turn, continue cluster increases. Turn. (12 clusters)
Row 13 :
Ch 3, turn, continue cluster increases. Turn. (13 clusters)
Row 14 :
Ch 3, turn, continue cluster increases. Turn. (14 clusters)
Row 15 :
Ch 3, turn, continue cluster increases. Turn. (15 clusters)
Info :
If you prefer open squares more like the photo, leave ch-1 spaces between clusters. If you want a denser cream area, you can substitute ch-2 spaces on alternate rows — be consistent across all cream triangles.
Row 16 :
Ch 3, turn, continue cluster increases. Turn. (16 clusters)
Row 17 :
Ch 3, turn, continue cluster increases until base width equals the burgundy triangle after blocking. Fasten off leaving a 12" tail for assembly. (17 clusters)
Info :
Block the cream triangle flat and measure across the base after blocking; aim to match the burgundy triangle base (51 stitch-equivalents). If needed add one more cluster row to match width precisely.
— Joining Triangles Into Squares (Make 21 complete squares for 6x7 layout) :
Info :
Each square is two triangles joined along the long side (the hypotenuse). Join using whip stitch, mattress stitch, or single crochet seam. The photo shows visible raised seams in burgundy over the cream triangles; replicate this by using burgundy yarn to crochet a decorative joining ridge on the right side. Always pin triangles together and check alignment of the base edges before joining.
Step 1 :
Lay one burgundy triangle and one cream triangle with right sides up so they form a square (hypotenuses together). Align edges carefully and pin every 6-8 stitches to keep seams even.
Step 2 :
Using burgundy yarn and a yarn needle, whip stitch through the edge loops from one triangle to the other along the hypotenuse. Make stitches close together (about every 2-3 dc) to create a tight seam. Leave tails woven in on wrong side.
Step 3 :
After whipping all edges, flip to right side and work one round of surface single crochet or reverse single crochet (crab stitch) along the seam in burgundy to create the raised ridge visible in the photo. This step is decorative and helps hide slight mismatches.
Info :
For a neater visible ridge, use a 4.5mm hook to work the surface slip stitched ridge; this will pull the seam slightly tighter and produce a crisp raised line between triangles.
— Bedspread Layout & Assembly :
Info :
The pictured layout is 6 squares across and 7 squares down (6x7 grid) with alternating orientation so the burgundy triangles create diamonds across the field. Plan your layout before assembly: alternate squares so each square's burgundy triangle points alternate left/right giving the checkerboard diamond effect.
Step 1 :
Arrange completed squares on a large flat surface in rows of 6. Make sure seam ridges line up and the pattern alternates consistently row-to-row for the diamond motif.
Step 2 :
Join squares into rows using a whip stitch or single crochet join from right side to create visible seam ridges. Join squares in each row first, then join rows to each other. Use burgundy yarn for joining so seams are visible and consistent with the photo aesthetic.
Step 3 :
When joining rows, pin intersections where four corners meet and take care to align corner points. Sew through corner stitches to lock intersections in place. For added strength, use two passes of whip stitch at corner intersections.
Info :
If you prefer an invisible join, use mattress stitch on wrong sides with matching cream yarn on cream-to-cream joins and burgundy on burgundy-to-burgundy joins — but this will alter the look compared with the pictured visible seams.
— Outer Border (Worked in Burgundy) :
Info :
After the grid is assembled and blocked, work the border in rounds around the entire bedspread. The photo shows multiple border rounds including a flat band and a textured ridge before tassels. We'll provide 10 rounds for a substantial border that echoes the motif texture.
Round 1 :
With right side up and burgundy yarn, attach with sl st to any edge corner seam, ch 1, work 1 sc evenly along edge working 3 sc in each square corner to keep border flat. Join with sl st to first sc. (Edge stitch count will vary with layout; work sc evenly so border lays flat.)
Round 2 :
Ch 2 (counts as hdc), hdc in each st around working 3 hdc in each corner st. Join with sl st to top of starting ch-2. (Even round; stitch count similar to previous round)
Info :
Work even rounds across edges — if you see corners cupping or ruffling, adjust by adding or skipping 1-2 stitches in that side's round to maintain flatness. Pin and steam-block if necessary between border rounds.
Round 3 :
Ch 3 (counts as dc), dc in each st around; 3 dc in corners. Join with sl st to top of ch-3. (Even round)
Round 4 :
Ch 1, sc in each st around working 3 sc in corners. Join. (Even round)
Round 5 :
Ch 2, fpdc (front post double crochet) around each dc of previous dc-round to create a raised textured band; on corners work fpdc around center dc and 3 fpdc in corner to keep turn smooth. Join. (Even round)
Info :
Front post rows create a deep textured border like the ridges in the photos. If fpdc is unfamiliar, insert your hook from front to back to front around the post of the stitch from the previous round, yarn over and complete as a dc.
Round 6 :
Ch 1, sc in each st around (including fpdc posts treated as single stitches); 3 sc in corners. Join. (Even round)
Round 7 :
Ch 3, dc in each st around for a clean wide face band. Join. (Even round)
Round 8 :
Ch 1, sc in each st around. Join. (Even round)
Round 9 :
Ch 2, work shell stitch edge: *skip 2, 5 dc in next st, skip 2, sc in next st; rep across side; work 5 dc cluster in corner space to form scallop. Join.* (This creates a decorative scallop before tassels.)
Round 10 :
Ch 1, sc around entire piece working even into scallops to stabilize. Fasten off and weave ends. This completes the structural border work before tassel application.
Info :
If you prefer a narrower border, omit Rounds 5-7. If you prefer a wider fringe area for tassels, add two additional dc rounds before starting scallops.
— Tassels & Fringe :
Info :
The finished bedspread shows deep burgundy tassels spaced across the bottom edge. Plan tassel spacing by measuring border perimeter and dividing by number of tassels desired — for 6x7 layout you might place tassels about every 3" to 4" along the lower edge. Create chunky tassels from multiple plies of yarn for fullness.
Step 1 :
To make one tassel: wrap yarn around a 4" wide piece of cardboard 20-26 times depending on desired thickness. Cut at one end to create fringe, gather top and tie secure with a piece of yarn. Trim bottom evenly. Each tassel uses approximately 12-16 yards of yarn depending on size.
Step 2 :
Attach tassels by folding top loop and inserting through the border edge space, pulling ends through loop and tightening to form a lark's head knot. Space tassels evenly around the three outer edges (sides and foot) of the bedspread as shown. For corner tassels, add an extra tassel at each corner for symmetry.
Info :
For a clean professional finish, pre-make all tassels and lay them next to the edge to determine spacing before attaching. Use a ruler or tape measure and mark positions with removable pins.
— Finishing & Blocking :
Info :
After assembly and border, block the entire bedspread flat on a large blocking surface using blocking mats and pins. Use steam or a damp cloth over each section and pin square corners and edges to true shape. Allow to dry fully before trimming tassels and weaving ends.
Step 1 :
Weave in all ends along seams and border using a yarn needle. Make sure seam tails are secured on the wrong side and do not show on the finished surface.
Step 2 :
Lightly steam the surface if your yarn allows; avoid direct high heat on acrylic. Cotton yarn can be lightly damp-blocked and pinned to preserve squareness and firmness.
Info :
Check all seams for stability and add reinforcement stitches if the seam feels loose. Store the bedspread folded with acid-free tissue if gifting to preserve shape.
— Scaling & Customization Notes :
Info :
To scale the bedspread up or down change the number of squares in the grid (for example 5x6 or 7x8). If you change triangle row counts, make sure both triangle types match in blocking to ensure perfect joins. Color swap: you can invert the colors for a cream-dominant bedspread or add a narrow contrasting stripe round between squares for a lattice look.
Info :
Optional: Add a thin cream pickup round between squares after joining to add an outline around each diamond. Work sc in cream along seam ridges to create thin light outlines for a different visual effect.
This burgundy and cream checkerboard bedspread is a truly rewarding modular project that transforms small repeating pieces into a dramatic, cozy statement for your bedroom. The rich contrast and textured ridges create depth while the open granny sections keep the blanket breathable. As you join triangles into squares and assemble the field, the pattern reveals itself like a quilt made of yarn — a wonderfully tactile experience. Enjoy each meditative motif and the satisfaction of seeing them come together into a beautifully finished piece. 🧶💤