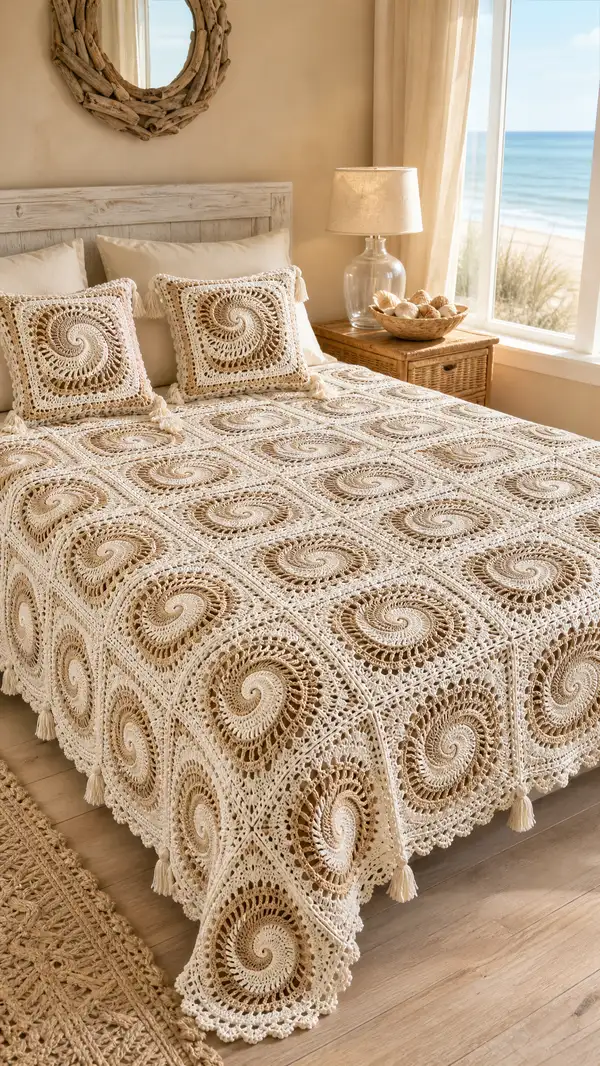
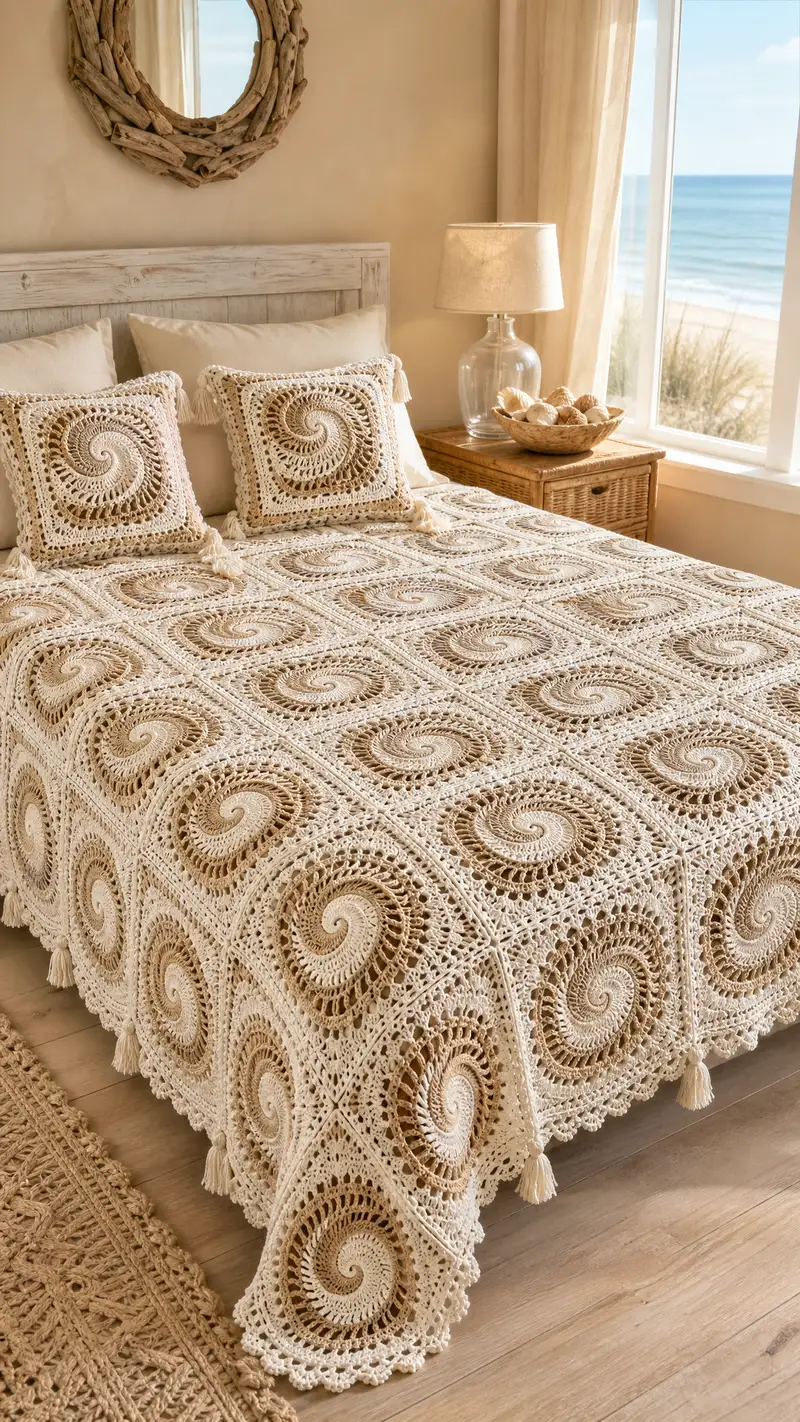
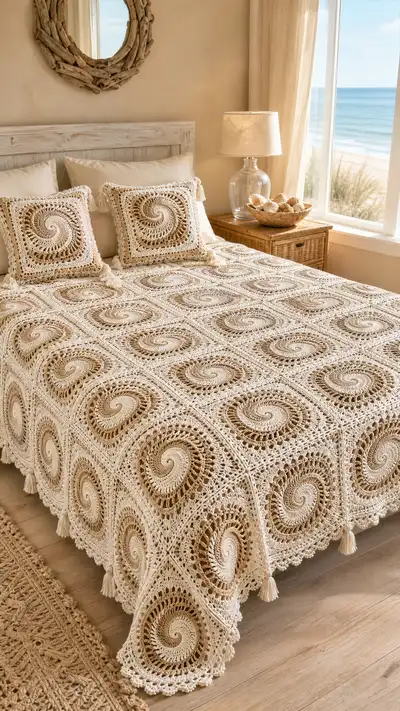
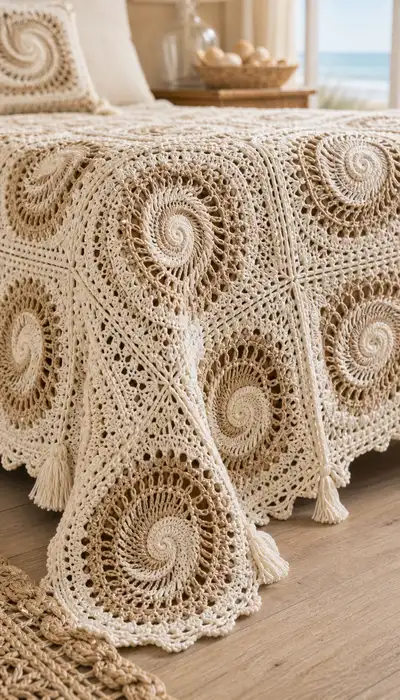
A warm, coastal-inspired bedspread made from repeating spiral square motifs in two soft neutrals. This pattern combines textured spirals, open lace rounds, and a delicate scalloped border to create a light, breezy bed covering. Each square finishes with a tassel at the corner for a relaxed, handmade look — perfect for a beach house or a serene bedroom. Detailed instructions guide you through motif construction, joining, edging, and pillow covers.
Progress Tracker
0% Complete
— Overview :
Info :
This pattern forms the bedspread from repeating spiral-square motifs. Each motif is worked in two colors to create a high contrast spiral center that graduates into lace and finally a squared frame. Make as many motifs as needed to fit your bed size — this sample uses 5 x 6 motifs for a full draped bedspread (30 squares). Each motif is joined with a join-as-you-go method and finished with a scalloped border and tassels at corner points.
— Motif (Spiral Square) :
Round 1 :
6 sc in magic ring (6)
Round 3 :
(1 sc, inc) x 6 (18)
Round 4 :
(2 sc, inc) x 6 (24)
Round 5 :
(3 sc, inc) x 6 (30)
Round 6 :
(4 sc, inc) x 6 (36)
Round 7 :
(5 sc, inc) x 6 (42)
Round 8 :
(6 sc, inc) x 6 (48)
Info :
These first rounds establish a tidy, even circle. Work into the front loop only for the final stitch of Round 8 if you desire a small ridge that helps define the spiral start.
Round 9 :
(7 sc, inc) x 6 (54)
Round 10 :
(8 sc, inc) x 6 (60)
Round 11 :
(9 sc, inc) x 6 (66)
Round 12 :
(10 sc, inc) x 6 (72)
Info :
Change to contrasting tan/beige color here to start building the spiral center. Carry the cream color along the wrong side if you prefer not to cut, or fasten off and rejoin later for cleaner color changes.
Round 13 :
Join tan color with sl st, ch1, 1 sc in same st, 1 sc in each st around (72)
Round 14 :
1 sc in each st (72)
Round 15 :
Change to cream color. Join with sl st and ch2 (counts as hdc), *hdc in next 2 sts, ch1* repeat around to create tiny chain peaks. End with hdc in last st (72)
Info :
The spiral effect is built by offsetting where you work taller stitches and chain loops every round. Keep stitch counts consistent here and through the next even rounds to maintain a round shape before square shaping begins.
Round 16 :
1 sc in each st (72)
Round 17 :
Work in BLO: 1 dc in each st BLO (72)
Round 18 :
Change to tan color. Ch3 (counts as dc), *skip next st, (dc, ch2, dc) in following st (shell made into a spacing shell), skip next st; dc in next st* repeat around. You will create chain arches that sit above the BLO round. Because shells and skipped stitches replace stitches, the stitch count conceptually remains as 72 anchor points; treat this as (72 anchor points).
Info :
When working open shell arches, the 'stitch count' is maintained by counting anchor points rather than individual crochets. The previous round's 72 stitches become 72 anchor locations; the openwork will flow around these points.
Round 19 :
Change to cream. Join in any anchor point, ch2 (hdc), hdc in each anchor around into spaces and stitches to maintain 72 anchors. Where there is a (dc, ch2, dc) shell from previous round, work (hdc, ch2, hdc) into that ch2 space to keep the pattern balanced (72)
Round 20 :
1 dc in each anchor/st around (72)
Round 21 :
*1 dc in next 3 anchors, 1 tr cluster (3 tr) in next anchor* repeat around — this will expand the texture while keeping one cluster per 4-anchor repeat. Repeat 18 times total = total stitches variable by cluster type but balanced into 72 anchor positions.
Info :
At this stage the spiral is clearly visible. Use surface slip-stitch accents if you want a raised ridge running along one spiral arm by working a line of sl sts following chain loops — optional and purely decorative.
Round 22 :
Change to tan. 1 sc in each anchor around (72)
Round 23 :
Work a round of picots for delicate texture: *sc in next 6 sts, (ch3, sl st in top of last sc)* repeat around (72 picot points)
Round 24 :
Switch to cream. 1 sc in each stitch around to tidy picot bases (72)
Info :
Now is a good point to check your spiral orientation. The spiral center should look like a raised swirl with the tan color spiraling outward. If you prefer the spiral more prominent, add an extra round of treble clusters in the contrasting color before square shaping.
Round 25 :
Preparing to shape to a square: Work in cream. *sc 15, (sc, ch3, sc) in next anchor to form a corner* repeat 4 times across the round. Math: 4 corners each consume 2 sc and create ch3 corner; sc sections equal 15 x4 =60 sc, plus 8 corner sc =68 total worked stitches plus ch3 spaces at corners (68 plus 4 ch3 corners).
Info :
Because we are converting a round to a square, the round's structure now uses corner chain spaces to force a 4-point geometry. Count and place corner spaces evenly across the round so the spiral sits centered within the eventual square. Adjust the number of sc between corners to match your row gauge if necessary.
Round 26 :
In tan: Work along the edge: into each sc along side work 1 hdc. Into each corner ch3 work (2 hdc, ch2, 2 hdc) — corner increases (estimate stitches along sides will be 68 hdc + corner increases making 76 hdc anchor points)
Round 27 :
1 dc in each hdc around, placing 3 dc in each corner ch2 space to widen the square (total stitch count approximates 76 dc anchor points)
Info :
The counts will now reflect a square outline. If your motif looks more circular still, gently block shaping into a square before continuing. Pin the four corners on a blocking board and steam lightly or wet-block to set form.
Round 28 :
Switch to cream. Ch3 (counts as dc), *dc in each dc along side until reaching corner, (dc, ch3, dc) in corner ch2 space* repeat 4 times (keeps the corner ch3 spaces). Treat this as a square lace foundation (anchor point count follows side stitch total).
Round 29 :
1 sc in each dc around working evenly across sides and 1 sc in each dc of corner clusters; end with total anchor sc equal to side counts (maintain symmetry).
Round 30 :
Begin decorative lace: *ch4, skip 2 sc, sc in next sc* repeat along each side; in corners work ch5, sc to maintain corner openness. This creates chain netting across sides; anchor count remains consistent with previous round.
Info :
These rounds create the airy panels visible around the spiral center. If your yarn shows too much open space, use smaller chain loops (ch2 or ch3) instead of ch4 to tighten the lace. Keep tension consistent for each motif.
Round 31 :
Change to tan. Work into chain loops: *(sc, ch3, sc) into ch4 loops* across each side so each loop becomes a shell; in corners work (sc, ch4, sc) to expand corner shells. This rounds out the square with visual continuity between motifs (anchor shell count equals number of chain loops previously made).
Round 32 :
Switch to cream. Work a round of 1 dc in each st and 3 dc in each corner space to define the square edges; stitch count increases proportionally to number of shells but is even around each side.
Round 33 :
1 sc in each dc around to tidy edges and prepare for lattice rounds (anchor sc count matches side stitches).
Round 34 :
Lattice round: *ch6, skip 3 sc, sl st into next sc* around each side creating a long chain lattice; in corners form ch8 loops to ease corner drape.
Round 35 :
Switch to tan. Into each ch6 loop work (sc, ch3, sc) to form triangular chain shells that echo the spiral curves. Corners: (sc, ch4, sc) into ch8 corners.
Info :
At this point each motif has a clearly defined spiral center, a rounded-to-square transition, and open lace sides. Repeat rounds 34-35 on each motif for consistent texture across the bedspread before starting the edging and joining rounds.
Round 36 :
Change to cream. 1 sc in each stitch around to stabilize the lattice and bring stitch counts into uniform anchor points along the sides.
Round 37 :
Decorative filet and picot: *dc 2, ch1, skip 1, dc 2* repeat along sides; in corners work dc clusters to maintain boxy shape. Finish this round with neat picots at interval of every 8 stitches if desired.
Round 38 :
Switch to tan. Work a round of 1 sc in each stitch to set the motifs for joining (maintain anchor count consistent across motifs).
Round 39 :
Join preparation round: In cream, work 1 sc along each side but stop 1 stitch short of each corner to allow for join points. Mark midpoint and quarter points with stitch markers for accurate alignment when joining.
Round 40 :
Fasten off and weave in ends for the motif. Block square flat with corners pinned to set crisp angles. Repeat to make required number of motifs for your bedspread (sample uses 30 squares, arranged 5 x 6).
Info :
Blocking is key. Wet-block each square and clamp corners to achieve identical size. Measure each square after blocking; aim for uniformity. If squares vary, trim with additional rounds to match the largest square before joining.
— Join-As-You-Go Assembly (JAYG) :
Info :
The join-as-you-go method gives a seamless, flat join. Lay out your blocked squares on a large surface in final arrangement. Join squares row by row — work along one side of the square and join to the previously completed square by slip-stitching into corresponding anchors.
Round 41 :
Attach cream at a corner of a completed square. Ch1, sc into corner stitch, sc along side until you reach the corner of the adjacent square to be joined. For each anchor of the completed square, insert hook into corresponding anchor of the adjacent square and sl st to join, then sc into next anchor of working square. Continue across entire side; create corner sc as usual (no increase) and continue until side fully joined.
Round 42 :
When joining a long row, anchor at the end with an extra sl st and ch1, then rotate to join the next square below using the same method. Maintain consistent tension so joins are flat and not pulling squares inwards.
Info :
When joining, ensure spiral centers line up visually and that lace patterns meet symmetrically. If your motifs are slightly different in size, stretch the smaller to meet anchors of the larger, or add a small filler loop to equalize spacing.
Round 43 :
After joining each row horizontally, join rows together by joining along the long side in the same manner. When you reach intersections where four corners meet, secure with an extra sl st through both seam loops to make a neat 4-way join.
Round 44 :
Edge reinforcement: Once all motifs are joined, work one full round of 1 sc in each stitch in cream around the entire outside edge to stabilize the joins and provide a foundation for the scalloped border. This round evens out differences in row heights.
Info :
Take time to pin the whole assembly onto a bed or blocking surface to see the drape. The blocking and joining rounds greatly influence the final appearance and allow you to adjust the spread to desired dimensions.
— Border and Scallop Edging :
Round 45 :
Foundation: ch1, 1 sc in same st and evenly around sides into each sc and into each corner ch2 space work (sc, ch3, sc). Maintain even stitch counts to keep border flat.
Round 46 :
Switch to tan. *Ch4, skip 2 sc, sl st into next sc* repeat to create a decorative open arc; at corners work ch6 arc to wrap corner elegantly. Repeat around whole bedspread.
Round 47 :
In cream, work (sc, ch3, sc) into each ch4 loop and (sc, ch4, sc) into ch6 corners to form a shell-lace frame. This anchors the arcs with shell clusters that will be scalloped in the next round.
Round 48 :
Scallop round: *sl st into next st, skip 1, (5 dc) in next st, skip 1, sl st into next st* — this makes distinct scallops across each arc. In corners work (7 dc) or (9 dc) to produce a fuller corner scallop. Count scallops across each side to keep symmetry.
Info :
Scallop size can be adjusted: for smaller loops use 3 dc shells, for more pronounced scallops use 7-9 dc. Keep shell counts consistent on all four sides to avoid rippling.
Round 49 :
Finish with a tidy round of crab stitch (reverse sc) in cream along the outside edge to give the bedspread a crisp finish and slight weight to the edge. Work evenly and avoid pulling too tight.
Round 50 :
Fasten off and weave in ends thoroughly. If desired, work a second decorative row of picots spaced between scallops for additional detail.
Info :
After edging, re-block the entire bedspread lightly if possible to set the final shape. The lightweight cotton will relax and drape prettily across the bed after a final blocking and steam if needed.
— Tassels and Finishing Touches :
Round 51 :
Make tassels: Cut 10–14 strands of yarn 14" long for each tassel. Fold in half and use a small loop to attach through the corner ch3 spaces of the outermost scallop. Secure with a knot and wrap the head with additional yarn to tidy. Trim ends evenly.
Info :
Place tassels at each corner of the outside motifs and at each internal outer corner where you prefer a decorative repeat. The sample shows tassels at every external corner at the bedspread perimeter for a balanced look.
— Matching Pillow Covers (Make 2) :
Round 52 :
Make a single spiral square motif as per rounds 1–40, blocking and finishing. For a 20" pillow choose to make one motif per side or two small motifs joined for a 20" square depending on motif size after blocking.
Round 53 :
For a single-motif pillow: Back panel — make a second identical motif. Using cream yarn, position both motifs back-to-back and slip-stitch through both loops around three sides leaving one side open for inserting pillow form. Finish with a row of crab stitch for a neat edge and add tassels on corners consistent with bedspread.
Round 54 :
For two-motif pillow: join two motifs side by side and work three rounds of 1 sc around both to form a larger rectangle; create back using same method and join with slip-stitches leaving opening for insert. Fasten off and weave in ends.
Info :
Use a pillow insert slightly smaller (1" smaller) than the case to give a plumped, tailored look. Sew a hidden zipper into the open side if desired for easy removal and washing.
— Optional Weighting, Care & Maintenance :
Info :
To keep edges draping nicely, you can attach small curtain weights or sew in a narrow cotton tape with weights into the outermost scallop. When washing, hand-wash cold or machine-wash on gentle in a mesh bag; reshape and lay flat to dry. Cotton shrinks slightly so check before final trimming.
Round 55 :
Extra: If you want a heavier, warmer bedspread, consider making larger motifs by continuing the lace rounds to add two extra rounds of shells and lattice — add about 2" per motif side and adjust motif count accordingly.
Info :
Throughout assembly, measure frequently and compare against bed dimensions: sample bed uses motifs blocked to approx 14" square (after blocking) so 5 x 6 layout = ~70 x 84" plus scallop border drape. Adjust motif count for desired coverage and drape.
Round 56 :
Finishing: Weave in all ends using a yarn needle, taking care to hide tails within lace holes. Trim excess and steam-block final product with low heat setting to set beads and scallop shapes.
Info :
Keep a notation of where each color change occurred and which motifs used which color sequences if you want to reproduce the exact visual arrangement shown in the sample. Make a small scrapbook photo to remember orientation of spirals when joining.
This Coastal Spiral Bedspread is a beautiful blend of texture, open lace, and calm neutrals, perfect for a breezy bedroom makeover. The modular motif approach makes it endlessly customizable — make a throw, a twin spread, or a full draped bed set, and add coordinated pillows for a polished look. Each spiral square is rewarding to complete and becomes more mesmerizing as the blanket grows. 🧶🌊 Enjoy the slow-making process and display your finished piece with pride — it will be a treasured handmade heirloom. ✨