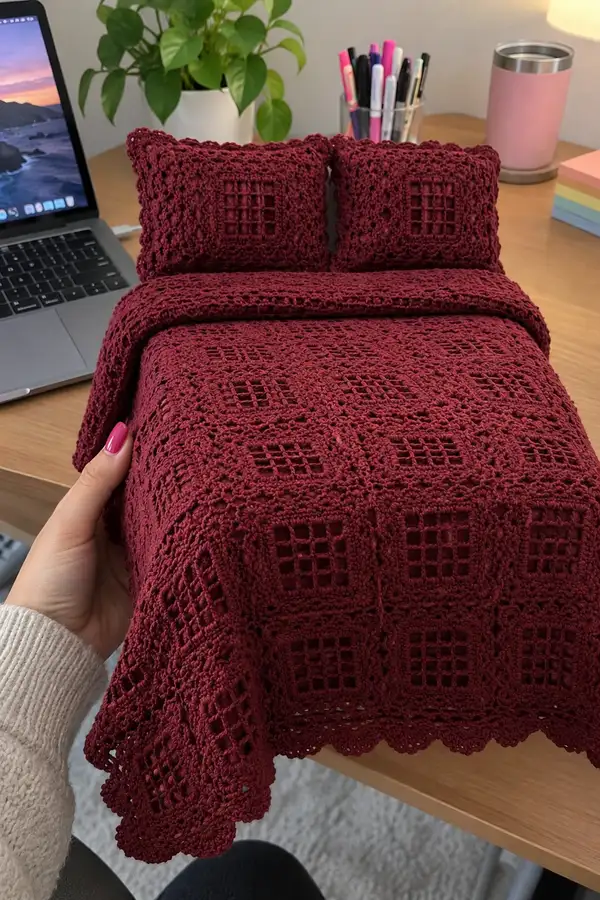
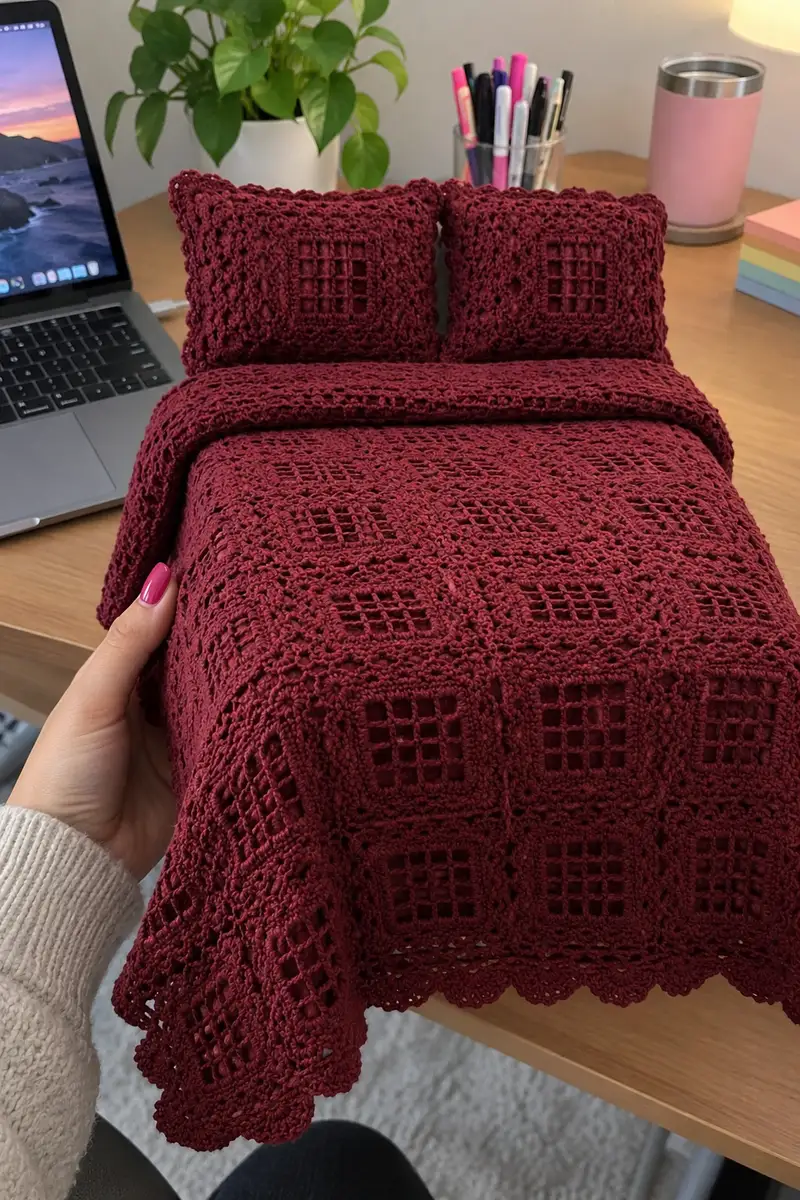
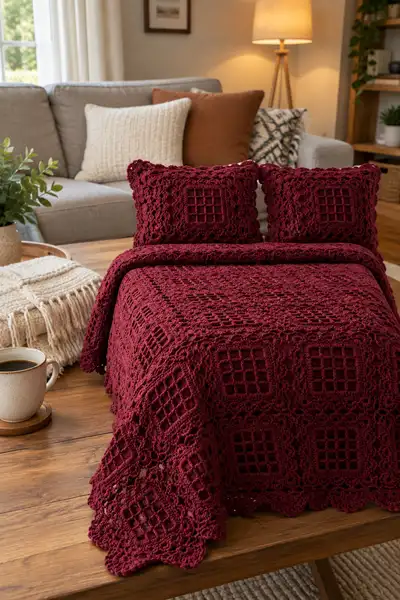
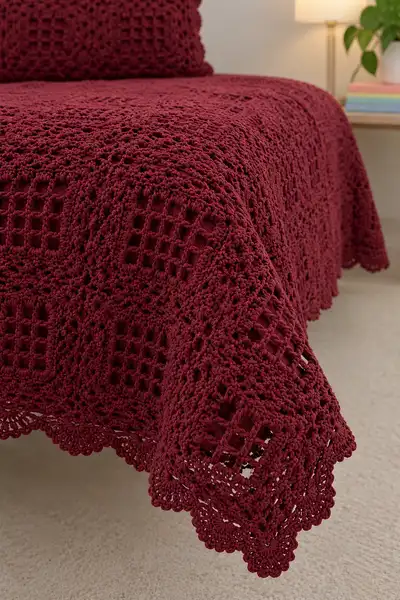
A richly textured burgundy lace bedspread made from joined square lace motifs and a scalloped shell border. This pattern recreates the deep wine-red spread and matching pillow shams you see — open lattice centers, decorative picot/shell rounds, and a flowing scalloped edge. Modular and beautiful, it works up into a warm layered bed covering with gorgeous drape and handmade charm.
Progress Tracker
0% Complete
— Lace Window Square Motif (make multiple)
Notes :
This motif forms the repeating unit for the bedspread and pillow shams. Gauge and blocking determine final size. After blocking each square should measure approximately 10.5" (26.5 cm) using worsted weight yarn and 5.00mm hook — adjust hook if necessary. Work motifs with RS facing; joins will be made on RS unless otherwise noted.
Round 1 :
Ch 8, join with sl st to form a ring. Ch 3 (counts as dc), 11 dc in ring. Join with sl st to top of ch-3. (12 dc)
Round 2 :
Ch 4 (counts as dc + ch-1), *dc in next st, ch 1; repeat from * around to end, join with sl st to 3rd ch of starting ch-4. (12 dc, 12 ch-1 sps)
Info :
The ch-1 spaces in Round 2 will mark the positions for the lattice grid. Keep tension even to form neat, even spaces.
Round 3 :
Working in each ch-1 space from previous round: *ch 5, skip next dc, sc in next ch-1 space; repeat from * around to create long chain loops. Join with sl st into base of first ch-5. (12 chain-loop groups)
Round 4 :
Sl st into first ch-5, ch 3 (counts as dc), (2 dc, ch 2, 3 dc) into same ch-5 to form first corner shell. *Sk loop, (3 dc, ch 2, 3 dc) into next loop; repeat from * around forming 4 corner shells evenly spaced. Join with sl st to top of ch-3. (4 corners of 7 dc each)
Info :
Round 4 establishes the square corners. Count shells: there should be 4 shell groups evenly spaced around; if spacing looks off, adjust loop positions slightly to maintain square formation.
Round 5 :
Ch 3 (counts as dc), dc in next 2 dc, ch 1, skip ch-2 corner; in corner ch-2 work (3 dc, ch 2, 3 dc). Repeat across each side: [dc in next 3 sts, ch 1] to corner, corner shell in ch-2. Join with sl st to top ch-3. (approx 28 dc and 4 corner ch-2)
Round 6 :
Ch 1, sc in same st, *ch 3, skip next 3 dc and ch1 space, sc in center dc of next side group; repeat from * across; when you reach corner ch-2 work (sc, ch 3, sc) into corner ch-2. Join with sl st. (creates open lattice starters on each side)
Info :
Round 6 builds the first row of the open lattice. If your ch-3 loops are too large/too small, adjust tension — even loops keep the grid uniform.
Round 7 :
Ch 3 (counts as dc), dc in next sc, ch 1, dc in next sc, ch 3, dc in next sc, ch 1, dc in next sc — across each side working dc and ch-1 alternations into the sc and ch-3 spaces; into each corner work (3 dc, ch 2, 3 dc). Join with sl st to top ch-3. (keeps stitch count balanced: approx 36 dc)
Round 8 :
Ch 1, sc in same st, *ch 5, sc in center ch-3 of side (this creates the central lattice window); repeat along each side. In corner ch-2 work (sc, ch 5, sc). Join with sl st. (12 ch-5 lattice loops around)
Info :
The ch-5 loops will become the bold open lattice grid when worked next rounds. Keep loops consistent in size — they form the squared window effect at motif center.
Round 9 :
Sl st into first ch-5, ch 3 (counts dc), work 7 dc evenly around the ch-5 loop; sl st to top of turning ch. Repeat into each ch-5 around so each loop is filled with 8 dc total (including starting ch-3). Join with sl st. (12 loops x 8 dc)
Round 10 :
Ch 1, sc in same st, *(ch 3, skip 2 dc) x2, sc in next dc; repeat from * across each filled loop; when you reach corners work sc into corner dc and ch-2 as noted, ensuring corners remain ch-2 spaces. Join with sl st. (creates small mesh squares inside the filled loops)
Info :
Round 10 begins to form the internal grid within the filled loops. The pattern alternates chains and short draws to produce the small square openings of the lattice center. Keep counting to ensure each loop yields the same number of small mesh spaces (typically 4 per filled loop).
Round 11 :
Ch 3 (counts dc), dc in next 2 sts, *ch 1, skip next ch-3 space, dc in next dc; repeat across the side to keep the lattice balanced. In corners continue (3 dc, ch 2, 3 dc) into the corner ch-2 space. Join with sl st. (approx 44 dc)
Round 12 :
Ch 1, sc in same st, *ch 1, sk next st, sc in next; repeat across to form a close even ground along sides and connect the lattice edges. In corner ch-2 work (sc, ch 1, sc). Join. (foundation for decorative rounds)
Info :
From Round 9–12 the motif's central grid becomes stable and squared. If your motif begins to curl, block now before continuing with outer decorative rounds — blocking keeps edges crisp and corners square.
Round 13 :
Ch 3 (counts dc), 2 dc in next 2 sts, *ch 3, skip next 3 sts, (3 dc, ch 2, 3 dc) into corner ch-2; repeat across each side inserting ch-3 corner spacing between side clusters. Join with sl st. (creates decorative clusters with ch-3 spacer between)
Round 14 :
Ch 1, sc in same st, *ch 5, sc between cluster groups to form an open lattice border; in corners work (sc, ch 5, sc) into corner ch-2. Join. (12 ch-5 spaces between corners)
Round 15 :
Sl st into first ch-5, ch 3 (counts dc) and work 9 dc evenly around each ch-5 loop to create denser decorative loops; join to top ch. Repeat into each ch-5 loop around. Join. (12 filled loops of 9 dc)
Info :
These rounds (13–15) create a lacy frame around the center lattice. They will be visually prominent when squares are joined, so keep them tidy and even.
Round 16 :
Ch 3, dc in each dc around the motif until you reach corner; in corner work (3 dc, ch 2, 3 dc) into corner to enlarge corners for easier joining. Join with sl st. (stitch count increases with each side; approximate total 76 dc)
Round 17 :
Ch 1, sc in same st, *ch 2, sk next dc, sc in next dc; repeat across each side but maintain ch-2 in corner (work sc, ch 2, sc). Join. (creates small open arches along sides)
Round 18 :
Ch 3, dc in next 2 sts, [ch 1, dc in next 3 sts] across each side to create a slightly raised texture; in corners work (3 dc, ch 2, 3 dc). Join. (approx 96 dc)
Info :
At this point you have a finished square motif with a strong ornamental border suitable for joining. Block motifs to 10.5" (26.5 cm) square before joining for consistent assembly.
Round 19 :
Ch 1, sc in same st, *(ch 3, sc) in each dc group along sides to create scalloped connecting points; in corner work (sc, ch 3, sc) into corner ch-2. Join with sl st. (these ch-3 scallops will be used if you choose join-as-you-go)
Round 20 :
Finishing round: Ch 1, sc in same st, *hdc in next 3 sts, 3 sc in next ch-3 loop (forming picot-style raised bump), hdc in next 3 sts; repeat across each side. In corner work 5 sc across corner ch-2 to maintain square corner. Join and fasten off. Weave in ends. (final neat edge)
Info :
Fasten off leaving tails if you plan to use whip-join later. If joining-as-you-go (JAYG) continue without fastening off and use the ch-3 scallops/loops as join points.
— Joining Motifs (two methods)
Method A :
Join-As-You-Go (JAYG) using slip-stitch join to connect motifs on RS as you complete the last round of a new motif. Position new motif with RS facing up, and connect to previously blocked motif by working sl st through corresponding stitches: sl st into ch-3 scallop of motif A, sl st into corresponding st on motif B, continue across side. For corners use sl st into 3 sts of corner shell to secure. This produces an invisible, flat join.
Method B :
Sewn ladder join: Lay two motifs RS together or RS facing up (depending on desired seam appearance). Align edges and use a tapestry needle with matching yarn to sew through the front loops of both motifs using a mattress or ladder stitch for a near-invisible seam. Fasten off securely.
Info :
For a bedspread that will be laundered often, choose sewn ladder join with a reinforcing row of slip stitches over the seam on the RS for extra durability. Always pin motifs and double-check alignment before joining.
Joining Round 21 :
If using JAYG: With RS of new motif facing you and last round active, attach to an adjacent completed motif by working ch 1, sc into corner ch-2 of new motif, sl st into corner ch-2 of placed motif, continue alternating (sc in new motif, sl st in joined motif) across side. Work corners as (sc, sl st into corner, sc). Fasten off at end of side. Repeat for all sides that connect. (no numerical stitch total — match stitch-per-side counts to motif)
Info :
When joining multiple motifs in a grid, start by joining rows horizontally, then join rows vertically. This keeps tension even and prevents skewing. Pin rows on a blocking board as you go.
— Bedspread Layout & Assembly
Info :
Determine the size of the bedspread by counting how many motifs you need. Example approximate layout: Twin = 6 x 8 motifs, Full/Double = 8 x 10 motifs, Queen = 9 x 12 motifs, King = 10 x 14 motifs. The example imagery shows an approximate queen-size spread made up of 9 x 12 motifs — adjust numbers to your desired finished size.
Round 22 :
As you join motifs in rows, leave edges unjoined where border will be applied — you can join edge motifs at their outermost stitches or leave a small seam allowance of 1–2 stitches for decorative border application. When joining rows horizontally, use the same join method (JAYG or sewn ladder join) to maintain uniform seam lines. No specific stitch total — join edges stitch-for-stitch across motif sides.
Round 23 :
Once all motifs are joined into the full panel, check overall dimensions. Block the entire spread to even out joins: pin edges square, steam or wet-block according to yarn manufacture instructions. Allow to dry completely before working main border.
Info :
Blocking the entire assembled spread is critical to make seam joins relax and the scalloped edge appear uniform. Use lots of pins along outer edges and settle the fabric overnight if possible.
— Main Scalloped Border (worked once panel is assembled)
Round 24 :
Attach yarn anywhere on RS along outer edge with sl st. Ch 3 (counts as dc), work 1 dc in each stitch evenly around the entire spread, placing (3 dc, ch 2, 3 dc) into the outer corner spaces to form defined corners. Join with sl st to top ch-3. (stitch count varies with spread dimensions; count per side = number of side stitches across assembled motifs)
Info :
Work dc evenly so border lays flat; avoid pulling the first border round too tight or too loose. If panels ripple, adjust by adding or removing a few dc along sides to even the tension before continuing.
Round 25 :
Ch 1, sc in same st, *ch 3, sk 2 dc, sc in next dc; repeat across each side placing (sc, ch 3, sc) into corner ch-2. Join. (creates arches that will be scalloped)
Round 26 :
Into each ch-3 arch: work (sc, hdc, 3 dc, hdc, sc) — this forms a classic 7-shell scallop. At corners work (sc, hdc, 5 dc, hdc, sc) for a wider corner scallop. Join and fasten off. (repeat across entire edge; scallops count equals number of ch-3 arches around panel)
Info :
Round 26 defines the scalloped edge you see in the photos. If you prefer a deeper scallop, increase central dc count to 5 or 7; reduce if a smaller scallop is desired. Keep shell counts consistent around the spread.
Round 27 :
Optional picot finish: With RS facing, rejoin yarn in the center dc of each shell and work *ch 3, sl st into same st (picot), sl st into next shell center; repeat across the edge securing each picot. Fasten off and weave ends. (adds delicate points to scallops)
Info :
Blocking after border is complete will help the scallops settle and lay uniformly. Use pins under each scallop to shape and dry thoroughly.
— Pillow Sham (make 2)
Info :
Pillow shams use four motifs each (2x2) worked exactly as the square motif above. Join four motifs in a 2x2 square to create one sham front. You can make an envelope back or a zippered back depending on preference.
Round 28 :
Make 4 motifs for each sham and block to 10.5" (26.5 cm). Join motifs with your chosen method to form a 2x2 block measuring approximately 21" x 21" (53 x 53 cm). This will produce a standard decorative sham suitable for a 20" pillow insert after finishing seams.
Round 29 :
Border for sham front: Work one round of dc evenly around the assembled 2x2 block, placing (3 dc, ch 2, 3 dc) in each corner. Join. (follow stitch counts as needed per side)
Round 30 :
Work ch 3, skip 2 dc, sc in next dc around to set up scalloped edge, and into each ch-3 space work (sc, hdc, 3 dc, hdc, sc) for a small scallop. Join and fasten off. Weave in ends.
Info :
For a pillow sham backside: Option A: Make an envelope-back by crocheting two rectangular panels that overlap the sham back opening by 4-5". Option B: Add a zipper pouch to the back by sewing a fabric back panel to the crocheted front.
— Alternate Border: Crocheted Lace Fringe (Optional)
Round 31 :
Instead of scallops, you can create a lace fringe by working: Ch 1, *sc in next st, ch 8, sc in next st; repeat along edge. At corners work (sc, ch 8, sc) across corner space. Join. (creates long loops for fringe)
Round 32 :
Trim fringe loops to desired length and even them with scissors, or weave through yarn through each loop to make tassel-like fringes. Fasten off and weave in ends.
Info :
Fringe creates a boho look and increases overall length. Make sure to secure each fringe firmly with additional knots or weaving to prevent shred in washes.
— Care & Finishing
Round 33 :
Weave in all ends through the back of motifs and seams, trimming close. Use a tapestry needle to bury ends under several stitches for longevity. If seams were joined with slip-stitch, consider reinforcing with a second row of stitches for heavy use.
Round 34 :
Block the whole spread: pin to a flat surface, shape scalloped edges with pins, and steam gently or wet block according to yarn instructions. Allow to dry completely (this sets the shape forever and improves drape).
Info :
If you will launder the spread, choose machine-washable yarn and wash on gentle cycle inside a large mesh bag. Re-block after washing to restore scallop shapes.
— Troubleshooting & Adjustments (Extra rounds & tips)
Round 35 :
If your motifs are smaller/larger than target, change hook size and re-test: smaller hook reduces motif, larger increases motif. To keep bedspread proportions, when changing motif size you must recalculate number of motifs required for chosen bed size.
Round 36 :
To make a denser spread (less openwork), after Round 12 of motif, work two additional rounds of dc around before starting decorative rounds. This will reduce openness of lattice and add warmth. Count increases accordingly: each side will add approximately +6–12 dc depending on motif scale.
Info :
Many crocheters prefer to assemble a small 3 x 3 swatch to check gauge and border behavior. Make one sample motif and three border repeats to visualize how the ensemble will look on the completed spread.
Completing this burgundy lace bedspread is such a satisfying, meditative journey — from the first lacy square to the final scalloped edge. Each motif stitches into the next like a small victory, and the finished spread feels both cozy and heirloom-quality. I hope you enjoy the rhythmic stitchwork and the warm, elegant finish as much as I do. 🧶❤️✨