🧢 Beautiful ✨ Detailed πŸ’ Adorable

Checker It Out Crochet Bag Pattern

Checker It Out Crochet Bag Pattern
4.3β˜… Rating
5-7 Hours Time Needed
3.7K Made This
βœ‚οΈ

Beginner Friendly Level

Perfect for those just starting their crochet journey, with clear instructions and simple techniques

⏱️

Weekend Treat

Takes 5-7 hours, making it an enjoyable project to finish over a couple of days.

🏑

Cozy Accent

A warm touch for your space that transforms ordinary corners into inviting nooks filled with handmade charm.

About This Checker It Out Crochet Bag Pattern

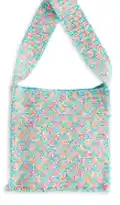
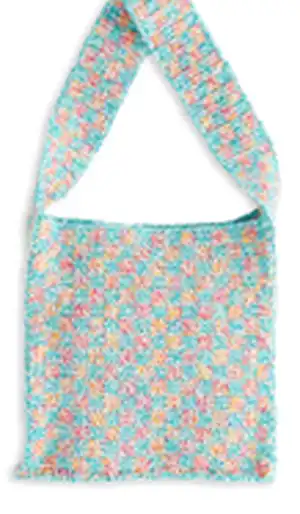
This pattern creates a 12" x 12" crochet tote worked in a simple charted single crochet pattern using Caron Coconut Cakes. The bag features a long, sturdy strap and worked panels that are joined for a neat, finished look. The design uses two contrast colors carried alongside each row for a tidy, even texture and charming multicolored effect.

Checker It Out Crochet Bag Pattern crochet pattern - detailed view of completed project

Youll use a chart pattern for consistent stitch placement and carry colors along the row for clean color changes. The pattern includes clear joining and finishing instructions to assemble the base, sides, and front/back panels.

Why You'll Love This Checker It Out Crochet Bag Pattern

I absolutely love this pattern because it turns a simple single crochet chart into a vibrant, textured bag that looks much more complex than it is. I enjoy how the color-carrying technique keeps edges tidy and creates a consistent gauge across panels. The long strap construction makes the bag comfortable to wear and easy to customize for length. Sewing the pieces together is satisfying and fast, so you get a beautiful handmade accessory without a huge time investment.

Checker It Out Crochet Bag Pattern step 1 - construction progress Checker It Out Crochet Bag Pattern step 2 - assembly progress Checker It Out Crochet Bag Pattern step 3 - details and accessories Checker It Out Crochet Bag Pattern step 4 - final assembly and finishing

Switch Things Up

I love customizing this bag with different color combinations; swapping the two contrast colors instantly changes the mood and makes each bag unique.

I sometimes use a solid color cake instead of two contrasts for a tone-on-tone look that highlights texture rather than color contrast.

To make a smaller or larger bag, I change the starting chain and number of repeats in the chart, keeping the chart sequence intact while adjusting width and height.

I often alter the strap length by stopping earlier or continuing the chart until the strap reaches my desired shoulder length, adding or removing marker placements as needed.

For a sturdier base I add a lining or insert a cut-to-size piece of plastic canvas or interfacing between the base layers before joining.

I like to add pockets to the inside by crocheting small rectangles and sewing them to the panel before final assembly for phone or keys.

Want a different handle style? Make two short handles and attach them to the top instead of a long strap to convert the bag to a handheld tote.

I sometimes embellish the finished bag with tassels, pom-poms, or small crocheted flowers to give it a playful accent.

Try using a hook one size smaller for a denser, more durable fabric if you plan to carry heavier items in the bag.

I recommend experimenting with carrying only one color occasionally to create subtle stripes or block effects within the chart for added variety.

Common Mistakes & How to Fix Them

βœ— Carrying the unused color loosely can create uneven tension and sloppy edges; carry the inactive yarn across the top of the previous row and work stitches around it for even gauge. βœ— Forgetting to place stitch markers at strap ends or panel corners makes joining tricky; place markers at each end of the last strap row to align panels accurately during assembly. βœ— Skipping the gauge check can lead to a bag that is too big or too small; make a 4" gauge swatch of the chart pattern and adjust hook size to match 16 sc and 16 rows = 4". βœ— Not fastening off or finishing color transitions correctly causes loose tails and unraveling; when changing color work to last 2 loops, draw new color through both loops, then continue in the new color and weave ends securely.

Checker It Out Crochet Bag Pattern

Make a colorful, reusable crochet tote using Caron Coconut Cakes yarn. This easy pattern guides you through a simple charted stitch pattern to create a 12" x 12" bag with a long strap. Youll enjoy the laid-back texture and quick assembly, perfect for gifting or everyday use. Clear chart notes and finishing instructions help you complete a polished bag.

Beginner Friendly 5-7 Hours

Materials Needed for Checker It Out Crochet Bag Pattern

β€” Main Fabric

  • 01
    Caron Coconut Cakes (8 oz/227 g; 481 yds/440 m) - main cake yarn
  • 02
    Contrast A: Tutti-Frutti (84002) - 1 ball or 335 yds/307 m
  • 03
    Contrast B: Sugar Teal (84005) - 1 ball or 350 yds/320 m

β€” Tools Required

  • 01
    Crochet hook size U.S. 7 (4.5 mm) Susan Bates Silvalume or size needed to obtain gauge
  • 02
    Susan Bates yarn needle
  • 03
    Susan Bates stitch markers
  • 04
    Scissors
  • 05
    Tapestry needle for weaving ends
  • 06
    Pins for assembly (optional)

Progress Tracker

0% Complete

β€” Bag Base :

Info :

With A, ch 13. Work Chart, noting each square of chart is equal to 1 sc and reading RS rows from right to left and WS rows from left to right. Carry color not in use across top of entire previous row and work sts around it. Carry both colors up side of work. See Chart on page 2.

1st row :

(1st row of Chart - RS). 1 sc in 2nd ch from hook. 1 sc in each ch to end of chain. Turn. 12 sc.

2nd row :

(2nd row of Chart - WS). Ch 1. 1 sc in each sc to end of row. Turn.

Info :

Rep last row until 6th row of chart is complete.

Info :

Rep last 6 rows of Chart Pat until Bag Base measures approx 12" [30.5 cm], ending with either 3rd row or 6th row of chart. Fasten off.

β€” Strap & Sides :

Info :

With A, ch 13. Work Chart as noted for Bag Base.

1st row :

(1st row of Chart - RS). 1 sc in 2nd ch from hook. 1 sc in each ch to end of chain. Turn. 12 sc.

2nd row :

(2nd row of Chart - WS). Ch 1. 1 sc in each sc to end of row. Turn.

Info :

Rep last row until 6th row of chart is complete.

Info :

Rep last 6 rows of Chart Pat until Strap measures approx 12" [30.5 cm], ending with either 3rd row or 6th row of chart. PM on each end of last row. Cont in Chart Pat, until Strap measures approx 36" [91.5 cm], ending with either 3rd row or 6th row of chart. PM on each end of last row. Cont in Chart Pat until Strap measures approx 48" [122 cm], ending with 3rd row or 6th row of chart. Fasten off.

β€” Front & Back Panels :

Info :

With A, ch 49. Work Chart as noted for Bag Base.

1st row :

(1st row of Chart - RS). 1 sc in 2nd ch from hook. 1 sc in each ch to end of chain. Turn. 48 sc.

2nd row :

(2nd row of Chart - WS). Ch 1. 1 sc in each sc to end of row. Turn.

Info :

Rep last row until 6th row of chart is complete.

Info :

Rep last 6 rows of Chart Pat until work from beg measures approx 12" [30.5 cm], ending with either 3rd row or 6th row of chart.

Next row :

With B only, 1 sc in each sc to end of row. Fasten off.

β€” Join Strap & Sides to Bag Base :

Info :

With RS of Base facing, place beg edge of Strap & Sides behind short edge of Base with WS of work tog, aligning corner of Bottom with corner of Strap.

1st row :

Join B with sl st. Ch 1. Working through both thicknesses, work sc evenly across edge. Fasten off.

Info :

Rep to join opposite end of Strap & Sides to Base.

β€” Join Strap & Sides to Front & Back Panels :

Info :

Align top corners of Front and Back Panels to rows marked with st markers on Strap & Sides. Pin pieces tog if desired.

1st row :

Beg at bottom right corner of Front Panel, join B with sl st. Ch 1. Working through both thicknesses, work sc evenly up edge of Front Panel, across single edge of Strap, and down opposite edge of Front Panel. Fasten off.

Info :

Rep for other side.

β€” Finishing :

Info :

Join Bag Base to Front & Back Panels: With RS of Base facing, place lower edge of Front Panel behind long edge of Base with WS of work tog, aligning corner of Base with corner of Front Panel.

1st row :

Join B with sl st. Ch 1. Working through both thicknesses, work sc evenly across edge. Fasten off.

Info :

Rep to join Base to Back Panel.

β€” Chart & Color Notes :

Info :

This will ensure even gauge as all sts will be worked around an extra strand of yarn held across top of previous row. Carry both colors up side of work. See Chart on page 2.

Assembly Instructions

  • With RS of Base facing, align short edge of Strap & Sides behind short edge of Base (WS together) aligning corner of Bottom with corner of Strap, then join using Contrast B with slip stitch, ch 1 and single crochet evenly through both thicknesses across the edge. Fasten off.
  • Repeat joining to attach opposite end of Strap & Sides to the other short edge of the Bag Base so the strap forms the sides of the bag.
  • Align top corners of Front and Back Panels with the rows marked by stitch markers on Strap & Sides, then join using Contrast B: join at bottom right corner of Front Panel with slip stitch, ch 1 and single crochet evenly up the edge, across the strap edge, and down the opposite edge. Fasten off and repeat for other side.
  • Join the lower edge of the Front Panel to the long edge of the Base with WS together, joining with Contrast B using slip stitch, ch 1 and single crochet evenly across both thicknesses. Fasten off and repeat to join the Back Panel to the Base.
  • Pin pieces together before sewing to ensure corners and edges align and to prevent shifting while joining.
  • Weave in all ends securely and trim excess. Block or steam lightly if needed to even out edges and shape the bag.

Important Notes

  • πŸ’‘Use stitch markers to mark the ends of the strap and any key rows for accurate alignment during assembly.
  • πŸ’‘Work a gauge swatch in the chart pattern to ensure 16 sc and 16 rows = 4"; change hook size if necessary to obtain gauge.
  • πŸ’‘Carry the unused color across the top of the previous row and work stitches around it to maintain even tension and clean color changes.
  • πŸ’‘Pin all panels and strap pieces in place before joining to ensure accurate alignment and symmetrical seams.

This colorful Checker It Out Crochet Bag uses Caron Coconut Cakes to create a lively, textured tote thats perfect for everyday use. Its easy-to-follow chart and simple single crochet construction make it a relaxing weekend project. Make one for yourself or a friend and enjoy the bright handmade charm! 🧢✨

You ask,

we answer.

FAQs

What size will the finished piece be?

The finished bag measures approximately 12" x 12" x 3" [30.5 x 30.5 x 7.5 cm], excluding the strap, when using the recommended yarn and hook size.

Can I use different yarn weights for this pattern?

You can substitute yarn but it will change the final size; check gauge and adjust hook size accordingly to match 16 sc and 16 rows = 4" in the chart pattern.

Do I need to know how to read a chart for this pattern?

Yes, this pattern uses a charted stitch pattern for color placement; the instructions explain how to read RS rows right-to-left and WS rows left-to-right.

How long does this project typically take to complete?

Most crocheters complete this project in 5-7 hours, though time may vary depending on experience and customization.

Are the colors carried or changed each row?

The pattern suggests carrying both colors up the side and carrying the unused color across the top of the previous row, working stitches around it to ensure even gauge.