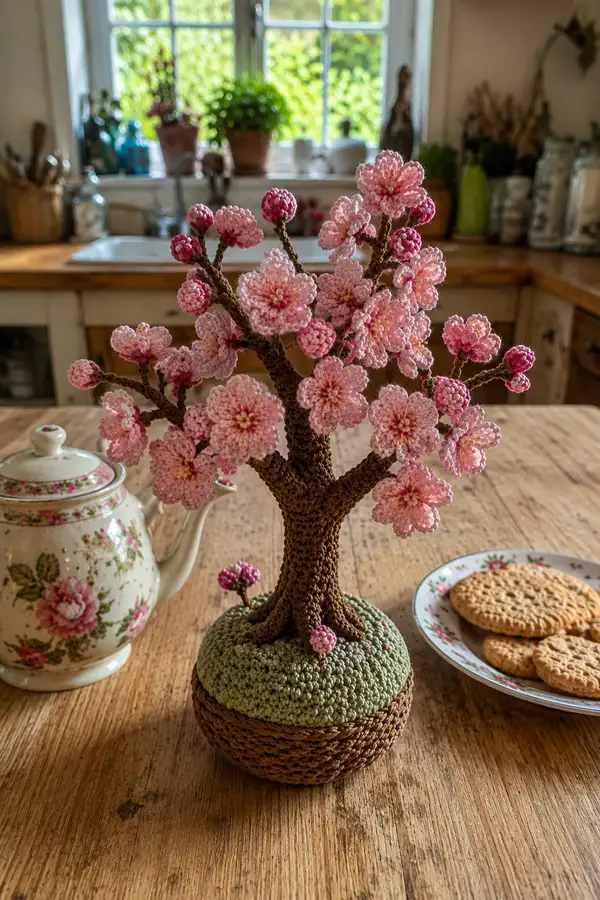
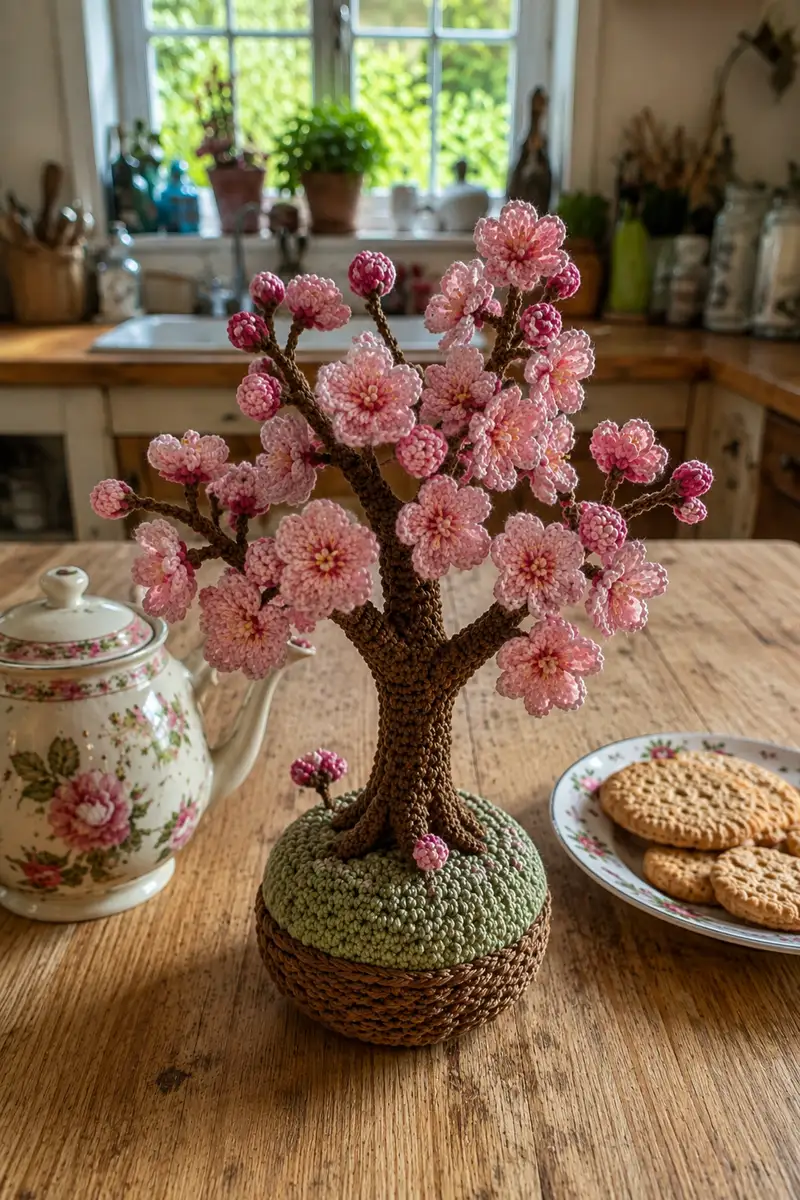
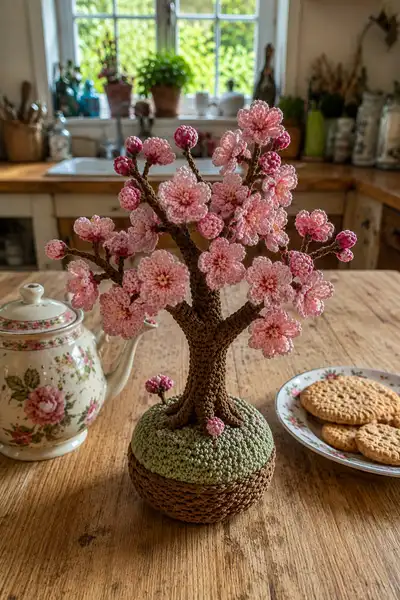
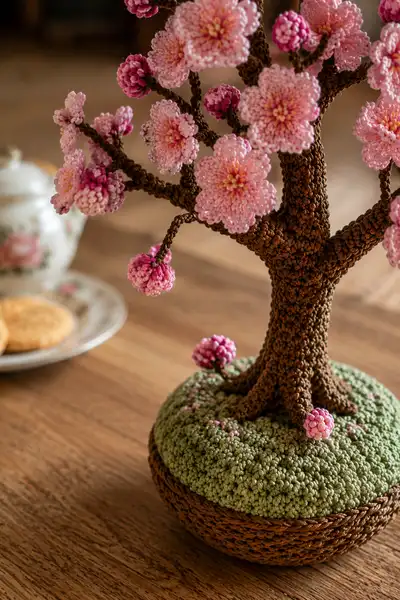
Create a delicate tabletop cherry blossom branch bouquet with this detailed pattern. The design features a textured brown trunk and branches, a plush green moss cushion, dozens of layered pink blossoms and tiny buds. Perfect as a spring centerpiece or a special handmade gift — each blossom is built petal by petal to capture authentic cherry blossom charm.
Progress Tracker
0% Complete
— Pot Base (work 1) :
Round 1 :
6 sc in magic ring (6)
Round 3 :
(1 sc, 1 inc) x 6 (18)
Round 4 :
(2 sc, 1 inc) x 6 (24)
Round 5 :
(3 sc, 1 inc) x 6 (30)
Round 6 :
(4 sc, 1 inc) x 6 (36)
Round 7 :
(5 sc, 1 inc) x 6 (42)
Round 8 :
(6 sc, 1 inc) x 6 (48)
Round 9 :
(7 sc, 1 inc) x 6 (54)
Round 10 :
(8 sc, 1 inc) x 6 (60)
Info :
At this point the base should be a flat circle. If your tension is loose, add one more increase round to reach a firmer diameter. This base will become the underside of the pot; keep fabric tight so it sits flat on a table.
Round 11 :
1 sc in each st (60)
Round 12 :
1 sc in each st (60)
Round 13 :
1 sc in each st (60)
Round 14 :
1 sc in each st BLO (60)
Info :
Working Round 14 in BLO creates a slight ridge that becomes the pot's rim starting point. If you want a visible rim contrast, change to a darker brown now and work the next 2 rounds in that color.
Round 15 :
1 sc in each st (60)
Round 16 :
(9 sc, 1 inc) x 6 (66)
Round 17 :
1 sc in each st (66)
Round 18 :
1 sc in each st (66)
Round 19 :
(9 sc, 1 inc) x 6 (72)
Round 20 :
1 sc in each st (72)
Info :
Stop after this round and try the base on your work surface. The pot wall will be built up from here: we will continue in rounds to create a shallow bowl shape with a firm wall to hold moss and trunk. If you'd like a shallower pot, stop increases earlier.
Round 21 :
1 sc in each st (72)
Round 22 :
1 sc in each st (72)
Round 23 :
1 sc in each st (72)
Round 24 :
1 sc in each st (72)
Info :
Stuff the base lightly as you build up the wall. The pot should be sturdy but not overstuffed — we will add more stuffing into the moss cushion later. Use small amounts of fiberfill to avoid lumps.
Round 25 :
(8 sc, 1 dec) x 8 (64)
Round 26 :
1 sc in each st (64)
Round 27 :
1 sc in each st BLO (64)
Round 28 :
Fasten off leaving a long tail. Weave the tail through the final round and pull to close slightly to tidy the top edge of the pot. Leave the dressing open — we'll sit the moss cushion inside and sew across the edge to secure.
— Moss Cushion (work 1) :
Info :
Use green yarn for this cushion. The cushion is crocheted as a dome that sits inside the pot and covers the top. Work tightly in the round for a firm, slightly raised cushion. We'll create a dome about 7-8 cm in diameter to fit the pot interior.
Round 1 :
6 sc in magic ring (6)
Round 3 :
(1 sc, 1 inc) x 6 (18)
Round 4 :
(2 sc, 1 inc) x 6 (24)
Round 5 :
(3 sc, 1 inc) x 6 (30)
Round 6 :
(4 sc, 1 inc) x 6 (36)
Info :
If your pot interior is larger or smaller than specified, adjust the number of increase rounds until your cushion diameter matches the pot opening. It's better to test and fit before stuffing fully.
Round 7 :
1 sc in each st (36)
Round 8 :
1 sc in each st (36)
Round 9 :
1 sc in each st BLO (36)
Round 10 :
1 sc in each st (36)
Round 11 :
1 sc in each st (36)
Info :
Begin stuffing the cushion firmly but not completely — leave a small opening. The cushion needs enough body to push against the pot rim and hold the trunk in place, yet soft enough to accommodate branch wires and trunk insertion.
Round 12 :
(4 sc, 1 dec) x 6 (30)
Round 13 :
(3 sc, 1 dec) x 6 (24)
Round 14 :
(2 sc, 1 dec) x 6 (18)
Round 15 :
(1 sc, 1 dec) x 6 (12)
Round 16 :
6 dec (6) - Fasten off leaving long tail. Stuff remaining firmly and use tail to close. Weave tail to underside of cushion and secure.
Info :
Optional: sprinkle a few tiny pink French knots or small surface-stitched dots across the moss to represent fallen petals. Use a contrasting pink scrap and a yarn needle to secure each dot.
— Trunk Base (work 1, then split into branch tubes) :
Info :
The trunk is worked from the pot upward in continuous rounds to create a relatively tall, slightly tapering tube. We will then split the top into branch tubes. Use brown yarn and a slightly tight tension to achieve bark-like density. If you prefer extra stability, insert a central length of wrapped wire down through the cushion into the pot and anchor it to the pot base with a few hot glue dots before crocheting the main trunk around it.
Round 1 :
6 sc in magic ring (6)
Round 3 :
(1 sc, 1 inc) x 6 (18)
Round 4 :
(2 sc, 1 inc) x 6 (24)
Round 5 :
(3 sc, 1 inc) x 6 (30)
Round 6 :
(4 sc, 1 inc) x 6 (36)
Round 7 :
1 sc in each st (36)
Round 8 :
1 sc in each st BLO (36)
Info :
The BLO round creates a subtle ridge that simulates bark texture. Continue to alternate a few BLO rounds every so often to increase texture. If you plan to wrap wired core, insert the wire before Round 7 and begin crocheting around it, ensuring the wire is centered.
Round 9-14 :
1 sc in each st (36) (work 6 rounds)
Round 15 :
(5 sc, 1 inc) x 6 (42)
Round 16-22 :
1 sc in each st (42)
Info :
At Round 15 we add a few increases to let the trunk flare slightly as it emerges from the moss. Continue building height by working even rounds. Monitor the circumference to match the scale of your blossoms; a trunk too thin will look out of proportion.
Round 23 :
(6 sc, 1 inc) x 6 (48)
Round 24-30 :
1 sc in each st (48)
Round 31 :
(6 sc, 1 dec) x 6 (42)
Round 32-36 :
1 sc in each st (42)
Info :
We are now approaching the area where the trunk will begin to split into multiple branches. Use stitch markers at the start and at 1/3 and 2/3 of the round to mark three positions where primary branches will emerge. This helps position the splits symmetrically.
Round 37 :
1 sc in each st (42)
Round 38 :
1 sc in each st BLO (42)
Round 39 :
(5 sc, 1 dec) x 6 (36)
Round 40 :
1 sc in each st (36)
Round 41 :
1 sc in each st (36)
Info :
Stop here to prepare branching. We will create branch tubes separately and join them into the top rounds of the trunk with slip stitches and sewing. If you prefer an entirely continuous layout, instead work three tube extensions from the top by chaining and crocheting around the chain — however separate tubes are simpler for wiring and shaping.
— Primary Branch Tubes (make 3-5 branches of different lengths) :
Info :
Each primary branch is a narrow tube crocheted around a length of floral wire so it can be posed. Use brown yarn. Start with a small diameter and lengthen; increase and decrease slightly to create natural tapering. We'll describe a medium-length branch of 36 rounds; make branches varying in length from 20 to 50 rounds.
Round 1 :
6 sc in magic ring (6)
Round 3 :
1 sc in each st (12)
Round 4 :
1 sc in each st BLO (12)
Round 5-8 :
1 sc in each st (12)
Info :
Before you continue, insert a pre-cut length of florist wire through the center of the tube and secure its end by wrapping with a short length of brown yarn or florist tape. The wire should extend the full planned length plus extra to anchor into the trunk. Leave ~4-6 cm extra at the trunk-attachment end to be wrapped into the trunk interior.
Round 9 :
(3 sc, 1 inc) x 3 (15)
Round 10-18 :
1 sc in each st (15)
Round 19 :
(3 sc, 1 dec) x 3 (12)
Round 20-24 :
1 sc in each st (12)
Round 25 :
(2 sc, 1 dec) x 3 (9)
Round 26-30 :
1 sc in each st (9)
Round 31 :
(1 sc, 1 dec) x 3 (6)
Round 32-36 :
1 sc in each st (6) - Fasten off leaving long tail for sewing into trunk. Bend and twist the wire to shape natural curves.
Info :
Make 3-5 primary branches of varying rounds. Longer branches may keep 12 sts for longer rounds before tapering. The small final tube width (6 sc around) will accept buds/flower clusters sewn directly onto the tip and sides.
— Secondary Branches and Twigs (make 8-12 small twigs) :
Info :
Secondary branches are short tubes that attach to primary branches or directly to the trunk. They are typically 8-18 rounds long and have a diameter of 6-12 sts. Work them around shorter wire pieces for poseability.
Round 1 :
6 sc in magic ring (6)
Round 3-6 :
1 sc in each st (12)
Round 7 :
(3 sc, 1 dec) x 3 (9)
Round 8-12 :
1 sc in each st (9)
Round 13 :
(1 sc, 1 dec) x 3 (6) - Fasten off leaving long tail. Insert and shape wire. Sew onto trunk or primary branch with tail.
Info :
When attaching twigs, stagger their positions and angle them slightly upward to mimic natural branching. Pin in place before sewing to check overall silhouette.
— Large Flower (Layered Cherry Blossom) (Make 12-16) :
Info :
The layered blossom is worked flat in rounds to create a disk of petals with two or three petal layers. Each petal is formed by short clusters and shaped edge rounds. We will make one detailed flower that you will repeat 12-16 times and arrange in clusters on the branches.
Round 1 :
6 sc in magic ring with pale pink yarn (6)
Round 3 :
(1 sc, 1 inc) x 6 (18)
Round 4 :
(2 sc, 1 inc) x 6 (24)
Round 5 :
1 sc in each st (24)
Info :
These initial rounds form a tiny disk that will become the foundation for petal layers. Keep tension slightly looser than trunk but still snug so the petals lay flat and are pliable for shaping.
Round 6 :
*ch 2, skip 1 st, sc in next st* repeat around to create 8 chain-spaces for petals (24 -> 8 ch-spaces)
Round 7 :
In each ch-2 space: (1 sc, ch 2, 3 dc, ch 2, 1 sc) — this forms the first petal cluster (work 8 petals)
Round 8 :
Slip stitch to join each petal base and work around petals: *sl st into petal top, ch 1, 5 sc into ch-2 loop (or along the curved edge) to shape petal edge* repeat 8 times creating rounded petal edges
Info :
Petal shaping can be varied: for slightly cupped petals, use 5 dc instead of 5 sc in the edge. If using a smaller hook (2.5mm) for petals, your flower will be tighter and more dimensional.
Round 9 :
Change to a slightly lighter or blended pale pink yarn (optional) by pulling through at the start of the round. Work: *behind each petal, ch 1, (hdc, 1 dc, hdc) in the base to create a second petal layer under first petals* repeat 8 times (creates 8 layered mounds)
Round 10 :
1 sc in each st around working into petal bases and around edges to tidy (work to maintain approximately 48 sts across the circumference depending on how many sts you created; if needed: sc evenly to make a tidy round of ~40-48 sts)
Round 11 :
Surface stitch small 6-8 tiny French-knot-like stamen by using yellow yarn: using yarn needle, insert 6-10 short stitches into the center and secure — alternatively you can crochet a tiny stamen cluster: ch 2, 6 sc into ring, sl st to first, fasten off and sew to center
Info :
For an authentic clustered look, make the outer petal layer more open and the inner layer slightly smaller. Press each flower lightly between your fingers to cupl the petals so the shape resembles a cherry blossom. If you prefer, use a tiny drop of fabric glue to anchor each petal layer.
Round 12 :
Weave in ends neatly or leave a long tail for sewing to branch tip. Fasten off.
Info :
Repeat this entire flower for 12-16 blossoms. Vary the yarn between pale pink and a slightly darker pink for natural variation. Make some flowers with only two petal layers (omit Round 9) for diversity.
— Small Bud (Make 12-18) :
Round 1 :
6 sc in magic ring using darker pink (6)
Round 3 :
1 sc in each st (12)
Round 4 :
(1 sc, 1 inc) x 4 (16)
Round 5 :
1 sc in each st (16)
Info :
The bud will be a compact textured sphere. To create the textured cluster look seen in the photo, we will work short bobbles or popcorn-like clusters around the outside ring in the next rounds. Keep the fabric tight so stuffing is not visible.
Round 6 :
*(sl st into next st, ch 2, 3 dc in same st, sl st into the same st)* repeat around to create little bumps; end with sl st to first bump (approx 16 bumps)
Round 7 :
1 sc in each st around to tidy and hold bumps in place (16)
Round 8 :
(3 sc, 1 dec) x 4 (12)
Round 9 :
(1 sc, 1 dec) x 4 (8)
Round 10 :
4 dec (4) - Fasten off leaving long tail. Insert a short nub of wire or leave end of wire emerging from twig and sew bud securely to twig tip with long tail. Stuff minimally if needed.
Info :
Make many buds and vary their size slightly. For a deeper, two-tone bud, start Round 1 with darker pink and change to the main pale pink on Round 4 to create gradient tips.
— Tiny Petal Clusters (sprigs, make 20-30) :
Info :
These tiny clusters consist of 3-4 tiny overlapping petals and are used to fill in gaps and add the impression of many small blossoms. They are fast to make and add density.
Round 1 :
4 sc in magic ring (4)
Round 2 :
Ch 2, in next st: 3 dc, sl st to base — repeat 3 times to create three tiny petals. Fasten off leaving tail for sewing (no numeric global stitch count necessary since petals are surface clusters)
Info :
Sew these clusters along smaller twigs for visual fullness. They are quick and require little yarn — make many to get the dense effect seen in the photo.
— Flower Center / Stamen Cluster (Make for each large flower) :
Round 1 :
Using yellow yarn: ch 2, 6 sc into second chain from hook, sl st to join (6)
Round 2 :
Work 2 rounds of 1 sc in each st (6, 6). Pull ring tight and fasten off leaving long tail to sew to center of flower.
Info :
Optionally you can make a tuft of short yarn strands. Cut 8-10 short yellow strands (approx 1 cm), fold in half and use a latch hook method to pull into the center and knot on the back. Trim ends so they appear like stamens poking from the center.
— Textured Bark Surface (Optional extra texture for trunk) :
Info :
For an extra textured bark look, work occasional slipped single crochet ridges in spiral around the trunk: insert hook into second loop of a stitch, sl st in same stitch, then 2-3 sl st into following stitches, creating irregular ridges. Add these after trunk is completed and before final shaping.
Round 1 :
Working around trunk surface, pick up approximately 1 sl st per 6 sc to create sparse ridges. This is decorative; there is no global stitch count change.
Info :
Use this technique sparingly to avoid flattening the trunk. It creates the look of bark fissures and adds realism in photos or display settings.
— Assembly and Final Wiring :
Info :
Assembly is the most time-consuming but rewarding part. Plan the layout: pin the main trunk into the cushion at a slightly forward angle. Pin primary branches to the top of the trunk using the extra wire ends left from branch wires. Wrap the wire ends around trunk wire and secure with florist tape or brown yarn to hide the joins.
Round 1 :
Attach trunk bottom to cushion: insert trunk end into cushion opening and sew the trunk base around the cushion's top opening using backbone whip stitch with the trunk's long tail. Make multiple passes to secure. There is no stitch count here — use even stitches to hold firm.
Info :
Position primary branches by pushing their anchored wires into the cushion and trunk interior, then wrap and twist wires with trunk wire. Bend branches into pleasing arcs using pliers; do minor adjustments after attaching flowers so the weight distribution stays balanced.
Round 2 :
Sew primary branches along the trunk seam: using the long tails left on branch tubes, whip stitch the branch base to the trunk around 8-12 evenly spaced stitches to create a secure seam. Make sure the seam sits flush and is hidden by the bark texture.
Info :
Sew secondary twigs and flower-clustered twigs into position next, starting near the trunk top and working outward. Pin each blossom with a sewing pin to check overall silhouette before committing to the final stitches. Trim any excess wire after securing inside trunk.
Round 3 :
Sew large flowers to branch tips and sides: position a flower, use the long tail from the flower to stitch through the branch tube material and around the branch wire, making 6-8 secure stitches. If desired, add a dab of glue inside to prevent rotation.
Round 4 :
Sew buds and tiny clusters into gaps using long tails. Cluster multiple small buds near the base of large flowers to recreate the dense floral nodes you see in the photo.
Info :
Once all flowers are attached, gently bend petals and shape blossoms so they face slightly upward. Press and hold each petal arrangement and if necessary apply a tiny dab of fabric glue to keep them cupped.
Round 5 :
Finish by tucking the moss cushion into the pot. Sew the cushion rim to the pot rim with evenly spaced whip stitches using green yarn so the cushion does not shift. Optionally glue the underside of the cushion to the pot base for extra security.
Info :
Sprinkle a few detached tiny petal clusters onto the moss for a natural fallen-petal look. Trim any visible tails and weave ends into the interior trunk or pot to hide them.
— Finishing Touches and Adjustments :
Info :
Step back and inspect symmetry, fullness, and balance. Push the trunk slightly into the cushion if it wobbles. Adjust branch angles and the position of heavier flower clusters to ensure the piece stands upright. If the tree leans, add a small hidden weight into the pot base or add extra stuffing to the pot exterior to change center of gravity.
Round 1 :
If desired, add a thin wash of watered-down tea dye or pink pastel dusting to outer petals to give slight color variance — test on a scrap flower first.
Info :
Final secure all ends and weave into the body of the pot. If gifting or shipping, wrap the branches gently in tissue to protect petal shapes. Display on a stable surface away from direct sunlight to prevent color fading over time.
This Cherry Blossom Branch Crochet Bouquet brings the gentleness of spring indoors with tiny handcrafted flowers and a textured trunk. Each petal, bud, and twig is made with care to create a lifelike miniature tree that will brighten any table or shelf. The pattern is meditative and rewarding — perfect for savoring slow craft time and creating a keepsake that lasts. 🧶🌸 Place it in a sunny corner and enjoy the blossoms all year round! 😊