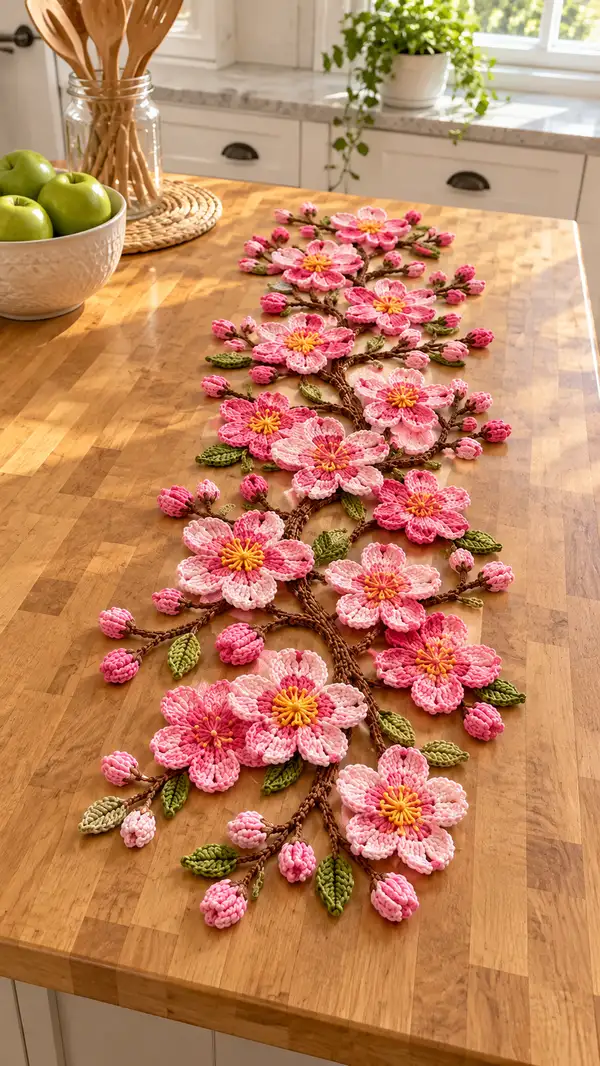
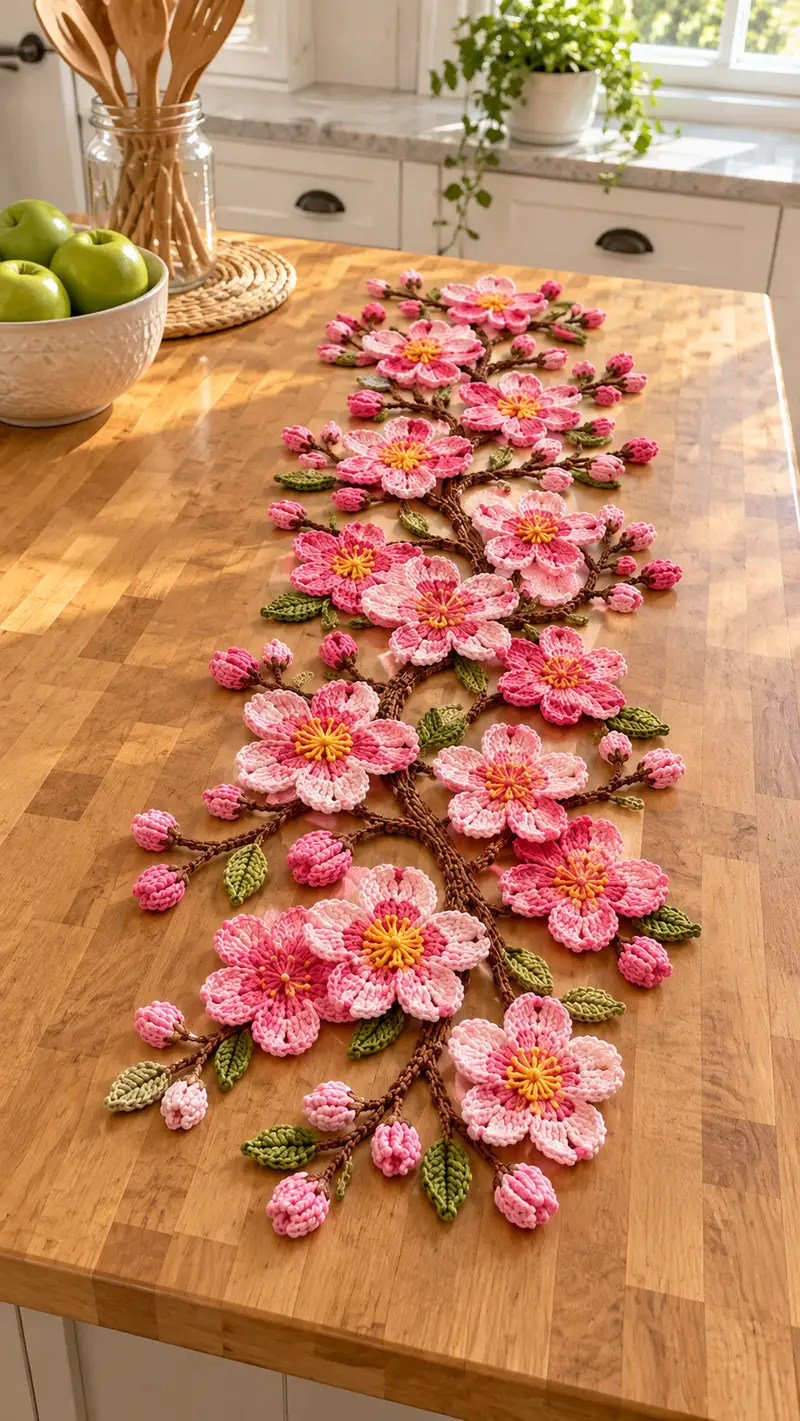
Bring springtime to your table with this elegant Cherry Blossom Branch table runner. Layered pink blossoms, delicate buds, and sculpted green leaves cascade along a textured brown branch for a lifelike, dimensional centerpiece. This pattern uses simple motifs assembled into a long runner, perfect for dining tables, sideboards, or seasonal decor. Detailed step-by-step instructions guide you through petals, centers, buds, leaves, and branch assembly for a stunning finished piece.
Progress Tracker
0% Complete
— Materials & Gauge :
Info :
Use worsted weight (#4) yarn with a 3.5mm hook for crisp petal definition. Make a sample petal and measure: each large layered flower (6 petals) should measure approximately 10-11 cm across when lightly blocked. Adjust hook size to refine the size.
— Flower Petal (Make 6 per large flower) :
Round 1 :
6 sc in magic ring (6)
Round 3 :
(1 sc, inc) x 6 (18)
Round 4 :
(2 sc, inc) x 6 (24)
Round 5 :
(3 sc, inc) x 6 (30)
Info :
At this point you have a small disc. Keep tension even. Change color now if making variegated petals: carry the new color in and work the next round with it.
Round 6 :
1 sc in each st (30)
Round 7 :
1 sc in each st BLO (30)
Round 8 :
(4 sc, inc) x 6 (36)
Info :
Work rounds 6-8 fairly tight to build a slightly cupped base for each petal. If creating two-tone petals, switch to lighter pink at the end of round 7 so the outer rounds show the highlight.
Round 9 :
Sc in next 3, hdc in next, dc in next 3, tr in next 3, dc in next 3, hdc in next, sc in next 3 — repeat across (36) forming a petal top texture (work stitches into groups of 6 to form scallops)
Round 10 :
Working around the scalloped top, work 1 sc in each base stitch to secure edge and shape petal (36)
Info :
If you want a more pronounced ruffle, in round 10 work (sc, hdc, dc) in each 6-stitch group and you will create more volume. For a flatter petal, keep single crochets only.
Round 11 :
(5 sc, dec) x 6 (30)
Round 12 :
(4 sc, dec) x 6 (24)
Info :
Fasten off leaving a long tail (~20-25cm) for sewing the petal to the flower base. Lightly block petals flat toward the outer edge so they cup naturally; pin and mist with water or steam, then let dry.
— Layered Petal Variation (Inner Petals, Make 6) :
Round 1 :
6 sc in magic ring (6)
Round 3 :
(1 sc, inc) x 6 (18)
Round 4 :
(2 sc, inc) x 6 (24)
Round 5 :
1 sc in each st (24)
Round 6 :
Work (sc, hdc, 3 dc, hdc, sc) evenly across 6 groups to form 6 small lobes (24)
Round 7 :
1 sc in each st around (24)
Info :
These inner petals are slightly smaller and shallower than outer petals. Use a slightly darker pink for inner petals to simulate the deep center seen in the photo. Fasten off and leave a long tail for sewing.
— Flower Center (Stamens, Make 1 per large flower) :
Round 1 :
6 sc in magic ring using yellow (6)
Round 3 :
1 sc in each st (12)
Round 4 :
Working in FLO, (2 sc, inc) x 3 around front rim to create a raised edge (15)
Info :
For realistic stamens, cut 12 lengths of yellow yarn ~7 cm long. Use a tapestry needle to fold each strand in half and insert the fold into the center, pulling the ends through to form a little tassel. Knot each pair at the base or secure with a dab of fabric glue.
Round 5 :
Inserting the base of the tassels, work 1 sc around center rim to secure tassel bases (15)
Round 6 :
Fasten off leaving a long tail for sewing the center to the inner petal ring
— Bud (Closed Blossom, Make many as seen) :
Round 1 :
6 sc in magic ring (6)
Round 3 :
(1 sc, inc) x 6 (18)
Round 4 :
1 sc in each st (18)
Info :
To make compact buds, use tighter tension and smaller hook (3.25mm) for these pieces. Stuff lightly with a small amount of fiberfill so they hold a rounded shape.
Round 5 :
(2 sc, dec) x 6 (12)
Round 6 :
1 sc in each st (12)
Round 7 :
(1 sc, dec) x 4 then 4 sc (8)
Round 8 :
6 dec (3) - shape and close tightly
Info :
Fasten off leaving long tail. You can leave a loop tail to sew or attach to a branch with a small length of yarn acting as a stem. Make some buds small (3 rounds closed) and some slightly larger for variety as pictured.
— Large Leaf (Make multiple) :
Round 1 :
6 sc in magic ring using moss green (6)
Round 3 :
(1 sc, inc) x 6 (18)
Round 4 :
1 sc in next 4, hdc in next 4, dc in next 4, hdc in next 4, sc in last 2 (18)
Round 5 :
Work 1 sc around entire leaf shaping point by adding decreases toward the tip: (4 sc, dec) x 3 (15)
Info :
Fold leaf lengthwise and make a stitch down center to form a subtle midrib. Alternatively, use surface slip stitch to draw a vein pattern after blocking.
Round 6 :
(3 sc, dec) x 3 (12)
Round 7 :
(2 sc, dec) x 3 (9)
Round 8 :
Fasten off leaving long tail for sewing. Lightly stuff if you want plumper leaves and block for shape.
— Small Leaf (Make several) :
Round 1 :
6 sc in magic ring (6)
Round 3 :
(2 sc, dec) x 3 (9)
Info :
Small leaves may be left flat or sewn slightly folded. Make a mix of olive and moss greens for natural variation.
Round 5 :
Fasten off leaving long tail for attaching to branches
— Branch Segment A (Main textured branch, Make 3 long segments) :
Info :
The branch is constructed as a long crocheted tube with surface slip-stitch 'bark' texture worked around it. Each segment is ~30-40 cm long depending on stitch tension; three segments are assembled to make a continuous branch.
Round 1 :
Ch 60 (or desired branch length in chains) leaving a long tail at the start for later joining
Round 2 :
Row 1 back along chain: 1 sc in 2nd ch from hook and in each ch across (59)
Round 3 :
Ch1 turn, 1 sc in each st across (59)
Round 4 :
Repeat Round 3 for a total of 6 rows (59) to create a rectangular strip
Info :
Make sure the strip is not too wide; the aim is a narrow tube when folded and seamed. Adjust chain length for longer or shorter segments depending on table size.
Round 5 :
Fold strip lengthwise with wrong sides together and whip stitch along one long edge to form a tube (59)
Round 6 :
Working around the tube, sl st in each sc evenly (59)
Round 7 :
Surface texture: working on right side, *yo, insert hook under front loop of next st, pull up loop, sl st* across to create bark lines (59)
Round 8 :
Repeat Round 7 on opposite rows intermittently to create irregular bark texture (59)
Info :
To make the branch look organic, vary where you add surface slip stitches: concentrate them in groups and leave smoother stretches. You can also add small knots by wrapping yarn around the tube and securing with a few stitches.
Round 9 :
Fasten off leaving long tails for joining segments. If joining to another segment, sew ends together with mattress stitch and blend seam with surface slip stitches.
— Branch Twig (Small offshoots, Make many) :
Round 1 :
Ch 12 (or desired twig length)
Round 2 :
1 sc in 2nd ch from hook and in each ch across (11)
Round 3 :
Ch1 turn, 1 sc in each st back along (11)
Round 4 :
Fold and seaming: fold strip and whip stitch long edge to form narrow twig tube (11)
Info :
Twig lengths vary: use some short (6-8 chains) and some longer (12-20 chains) to create variety. Leave yarn tails on ends to attach buds and leaves easily.
Round 5 :
Work a few surface slip stitches or wrap yarn around sections to suggest small nodes and texture (11)
Round 6 :
Fasten off leaving long tail for attaching to main branch
— Connecting Cord & Branch Joints :
Info :
You will join twig offshoots and buds to the main branch using yarn tails and sewing. For a more sculptural branch, braid two narrow tubes together prior to attaching them to the main tube.
Round 1 :
For braid: make 3 narrow tubes (ch 20 each, 1 sc each ch back and forth, fold and seam) then tie ends and plait them for about 10-15 cm, stitch the braid down tightly (approx 3 tubes)
Round 2 :
Sew braid ends into the main branch tube with mattress stitch, then hide tails by weaving them into the branch interior
Info :
Arrange twig junctions with some overlapping to conceal seams. Use short whip stitch passes through both pieces to create a stable joint. You may reinforce joints with small amounts of glue if desired for display-only pieces.
— Assembly: Creating a Single Large Flower (Assemble one set) :
Round 1 :
Make 6 outer petals and 6 inner petals as directed. Lay the 6 inner petals into a ring and position evenly around an imaginary center leaving ~2-3 mm between them.
Round 2 :
Using long tail from inner petal #1, sew the inner petals together at their bases with whip stitch, joining inner petal base to base. Work around until all six inner petals are connected into a circular inner ring.
Round 3 :
Position 6 outer petals slightly offset between inner petals so outer petal tips overlap inner ones; pin each petal in place.
Info :
Stagger outer petals so layering looks natural — outer petals should tuck slightly under the next petal clockwise to create a flowing look. Use blocking pins to flatten and shape petals as you assemble.
Round 4 :
Sew outer petals to inner petal bases with small whip stitch passes, catching both petal bases and forming a secure ring (use long tails left from petals).
Round 5 :
Place the yellow stamen center into middle and sew through the center back to the inner petal bases, securing the tassel bunches. Hide tails inside the center and weave ends.
Round 6 :
Lightly steam or block the assembled flower to shape petals outward and set the curve. Trim any excess tails.
— Assembly: Attaching Buds and Leaves to Twigs :
Round 1 :
Use the long tail of each bud to sew it to the tip or side of a twig segment. Sew through the last 2-3 rows of the twig to secure the bud firmly.
Round 2 :
Attach small leaves near buds using long tails. Sew at a slight angle to give leaves a natural outward flare.
Info :
Vary distances between buds and leaves. Place clusters of 2-4 buds near a larger flower to mimic how blossoms appear on a natural branch.
— Assembly: Attaching Flowers, Buds and Twigs to Main Branch :
Round 1 :
Lay the main branch segments on your work surface and arrange flower clusters and twig offshoots along one side of the branch to form an S-shaped composition similar to the inspiration image.
Round 2 :
Pin each flower base to the branch: the flower base should sit over the branch seam or near a yarn-wrapped node. Using the long tail from the branch or flower, sew through branch tube and flower base with a ladder stitch to create an invisible join.
Round 3 :
Attach twig offshoots under and along the branch by sewing the twig tail to the branch seam. For extra strength, sew through branch, twig seam and then back into branch several times.
Info :
Place blossoms in clusters of 2-4 with small buds and leaves surrounding each cluster for a natural look. Use long tails and sew through at least 3 points per joint to secure decorative weight for tabletop display.
Round 4 :
Blend seams by working a few surface slip stitches with brown yarn across the attachment area to hide visible stitches and create bark continuity (work 1-3 cm of surface slip stitches as needed).
Round 5 :
When all pieces are attached, gently press and steam the petals once more in place. Do not over-wet — a light mist will set shapes without distorting attached joins.
— Finishing Touches & Edge Trimming :
Round 1 :
Inspect the runner for loose threads, uneven assemblies or tails poking out. Weave any visible ends into the branch interior or into large petals for invisibility.
Round 2 :
Optional: edge with small decorative leaves or tiny single crochet looped vines to provide a soft edge and to fill gaps along the runner sides.
Info :
For larger tables make additional branch segments and motifs then repeat the assembly to reach the desired runner length. The pattern is modular — you can scale length up or down by adding or reducing flower clusters and branch segments.
— Variation: Making a Mini Runner or Centerpiece Cluster :
Round 1 :
Use fewer flowers (3-5) with 2 branch segments for a compact centerpiece. Keep proportions identical and follow assembly instructions but skip one or two branch junctions.
Info :
Because each motif is made separately you can rearrange them before final sewing. Create multiple small clusters and place them in glass cloches for seasonal displays.
— Care Instructions :
Info :
Hand wash gently in cool water with mild detergent. Reshape petals while damp and air dry flat. Avoid machine washing or high heat. Spot clean with cloth and mild soap for small stains.
Round 1 :
If storing, lay runner flat between layers of acid-free tissue to prevent compression of petals. Avoid heavy stacking on top of the runner.
Info :
If gifting, include a small card with care instructions and a note about blocking to maintain shape after washing.
Completing this Cherry Blossom runner is truly rewarding — every petal and bud you crochet adds personality and springtime charm to your table! The careful assembly creates a lifelike, lasting bouquet that brightens any room. 🧶🌸 Enjoy arranging and re-arranging your motifs as you sew, and take pride in a centerpiece that will be admired for years. Happy stitching — your handmade blossom branch is ready to delight guests and family! ✨