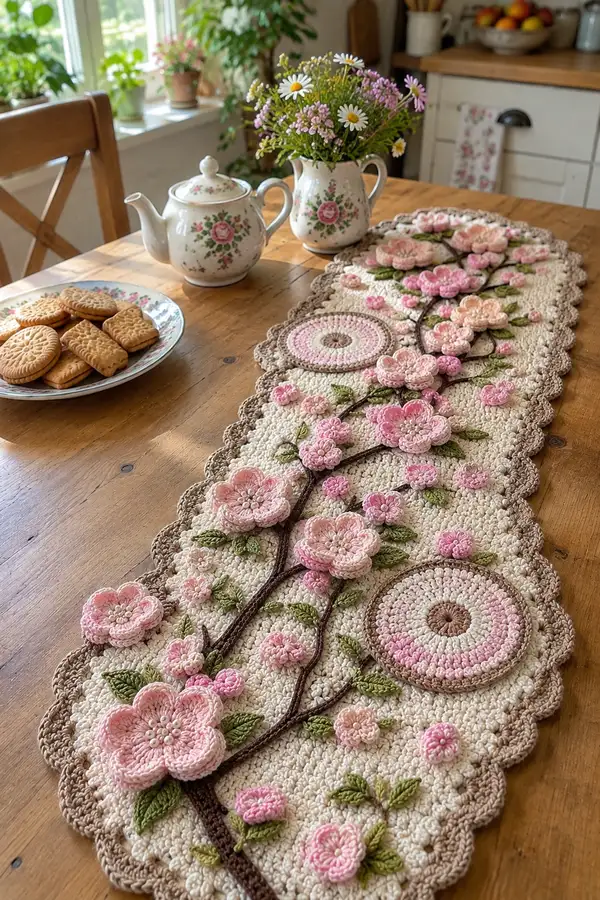
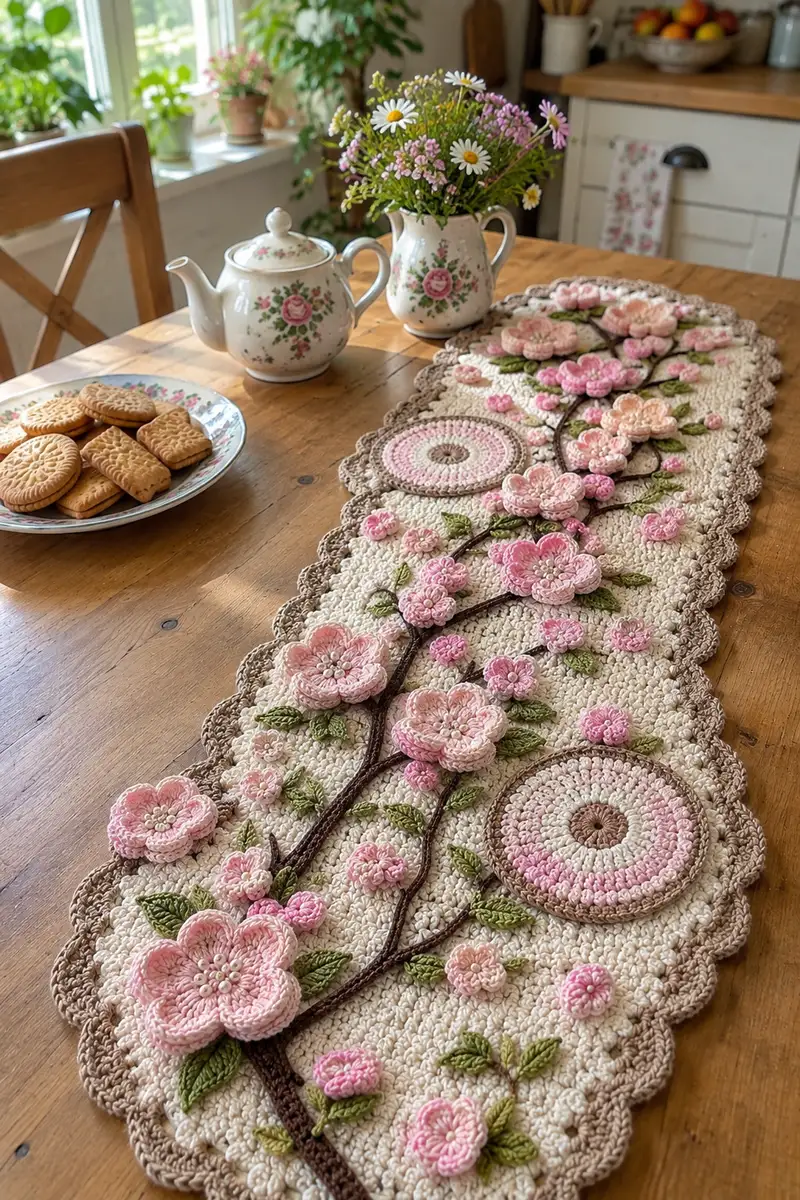
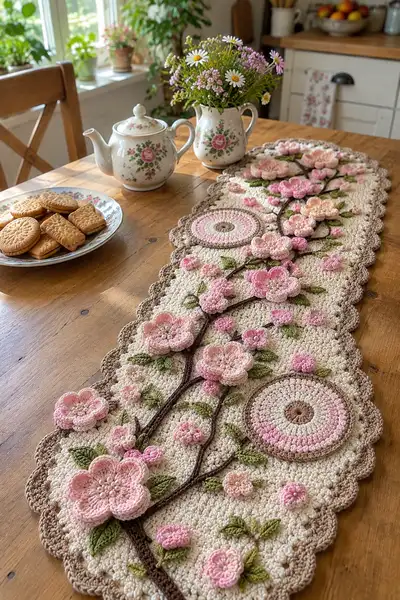
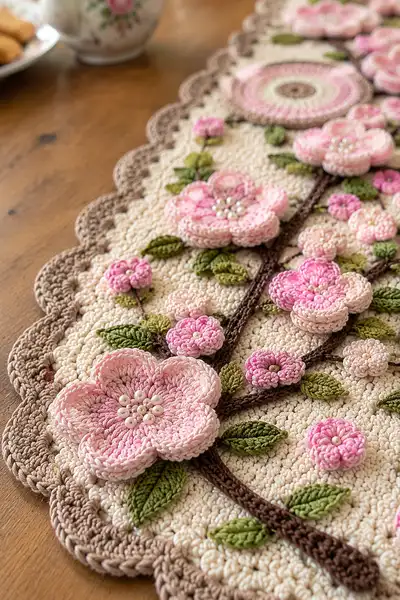
Create a timeless cherry blossom table runner with layered 3D flowers, leafy vines and scalloped edging. This pattern shows how to build a textured cream background, soft pink blossom appliques, olive leaves and brown raised branches for an elegant centerpiece. Finished runner is richly dimensional with pearl bead centers and a neutral scalloped border to frame any table.
Progress Tracker
0% Complete
— Materials & Gauge :
Info :
Gauge is not critical for design, but recommended: 18 sc = 10 cm in single crochet with 3.5mm hook. Finished runner in photos is approximately 95cm long x 28cm wide using worsted cotton and 3.5mm hook
— Base Runner (Elongated Oval Background) :
Round 1 :
Foundation: ch 40, join with sl st to first ch to form a ring, being careful not to twist (40)
Round 2 :
Work 1 sc in each ch around 1x40, then 3 sc in same first ch to start the oval curve, turn and working on the opposite side of foundation ch work 1 sc in each ch across 40, then 3 sc in last ch to join. Total (40 + 3 + 40 + 3) = 86 sc (86)
Info :
Round 2 forms an oval with 2 curved ends (3 sc clusters). Place a removable stitch marker at the first sc of each round; this will be your round start marker and helps keep track of increases on the curved ends
Round 3 :
1 sc in each st around (86)
Round 4-6 :
1 sc in each st around (86)
Info :
Change to working in BLO on Round 7 if you want a faint ridge texture line (optional) — this creates subtle depth before the textured pattern begins
Round 7 :
1 sc in each st BLO around (86)
Round 8-12 :
Textured stitch pattern: Alternate rounds of 'cluster' and 'sc' to build a pebbled, dense surface. Round 8: *sc 1, sk 1 ch, 3 dc cluster in next st; rep from * across, finishing with sc. (Maintain 86 effective stitches but clusters occupy space; work clusters into the next available stitch as you go)
Info :
The textured pattern below is written so each 'textured row' occupies approximately the same width. Use spare scrap yarn to swatch and test the density before committing to 20 rounds. Maintain 86 'working positions' each round by treating clusters as occupying one working position when counted for placement
Round 13 :
1 sc in each st around (86)
Round 14-18 :
Repeat Round 8 and Round 13 alternations: Even rounds sc, odd rounds textured cluster (maintain 86 working positions)
Info :
Start placing medallion anchors and flower placement templates at Round 16-18 — mark with yarn scraps where each large medallion and flower cluster should sit across the runner to balance composition
Round 19-28 :
Continue alternating texture as above. Work 10 rounds total of textured pattern (86 working positions each round). Every 5 rounds check that edges remain even; adjust by adding a single sc in the center of the curved ends if the oval begins to narrow
Info :
If you prefer a denser base to contrast the softness of petals, use 3.0mm hook for these rounds then switch back to 3.5mm for appliques. Keep tension consistent — the background should be firm so appliques sit on top
Round 29-34 :
Work 6 rounds of even sc in each st around (86). These rounds will act as the field where branches are surface-sewn and appliques attached
Round 35-40 :
Work 6 rounds of sc in BLO to create a subtle horizontal ridge near the border area (86)
Info :
Fasten off background after Round 40 and weave in tails, leave long tail if you plan to join the scalloped border by crocheting directly into edge
— Scalloped Border (worked around the oval) :
Info :
Join taupe yarn to any stitch at the edge of the oval and work in continuous rounds around. Shells will be worked into the outer edge to form scallops. Keep stitch count consistent by working 1 sc in each base round stitch between shells
Round 1 :
Join taupe yarn with sl st, ch1, sc in same st, *sk 2 sts, (5 dc) in next st (shell), sk 2 sts, sc in next st; rep from * around, adjusting last spacing to fit curve. Expect approximately 14-18 shells depending on tension (work evenly to create balanced scallops)
Info :
In curved ends, work shells closer together: sk 1 between shells if needed to keep scallop shape; increase shells at very ends by adding one extra shell on each curve
Round 2 :
Ch1, *sc in top of shell (center dc), ch2, sk to next shell center; rep around. This secures shells and gives neat edge (same shell count)
Round 3 :
Join: in each shell work (sl st, ch1, 3 sc) to make a rounded picot-like outer loop. Work evenly around, adjust where necessary to keep scallops even
Info :
Fasten off and weave ends. You can also make two rounds of shells for more depth — a second row of shells staggered between first round will add a pronounced scallop
— Circular Medallions (Make 2) :
Round 1 :
With Taupe (center) MR, 6 sc in MR (6)
Round 2 :
Inc in each st around (12)
Round 3 :
(1 sc, inc) x6 (18)
Round 4 :
(2 sc, inc) x6 (24)
Round 5 :
Switch to Cream yarn. (3 sc, inc) x6 (30)
Round 6 :
Switch to Light Pink. (4 sc, inc) x6 (36)
Round 7 :
Switch to Medium Pink. 1 sc in each st around (36)
Info :
Change colors to create concentric rings. Carry yarn neatly behind where possible or fasten off between rings to avoid bulk. Block medallion flat before attaching
Round 8 :
To create a raised rim: (sc in next 2, BLO sc in next) x12 to create slight ridge (36)
Round 9 :
Optional decorative edge: *ch1, dc shell in every 4th st around to mirror scallop motif; rep to finish. Fasten off and weave tails (36)
Info :
Make two medallions and position them along the runner marked earlier. Sew down around inner rings using matched cream yarn for a flat secure join
— Large Blossom (Make 5 assorted sizes/tones) :
Round 1 :
With Light Pink (primary), MR, 6 sc in MR (6)
Round 2 :
Inc in each st around (12)
Round 3 :
(1 sc, inc) x6 (18)
Round 4 :
(2 sc, inc) x6 (24)
Info :
Rounds 1–4 form a sturdy base disk. Keep center fairly flat by working tight sc. Place a stitch marker at start of Round 5 to align petals evenly
Round 5 :
Petal foundation: ch1, *(sc in next st, ch3, sk 1), rep from * around, ending with sc; you will have 12 ch-3 loops as petal spaces (24 petal foundations counting both sides)
Round 6 :
1st petal row: In each ch-3 space work: (sc, hdc, 3 dc, hdc, sc) — this forms rounded petal points. Work this into each ch-3 loop around. (12 petals)
Info :
If you want fuller petals, use puff stitches for the center of each petal (yarn over, insert, pull up loop 5 times, yarn over and pull through all loops) — here petals are worked with dc clusters to keep a delicate edge
Round 7 :
Secure petals and add slight curl: sl st to base of first petal, *ch2, (1 sc in middle top of petal, ch2) ; rep around forming a decorative picot between petals. Fasten off light pink, weave ends
Round 8 :
Optional layered second row of petals: Join Medium Pink at base of each first petal and work a smaller petal: (sc, 2 hdc, 3 dc, 2 hdc, sc) in alternating petals to stagger rows. This creates depth (12 petals second row)
Round 9 :
Finish: Sew a cluster of small pearls to center: use 7–9 small beads sewn securely through center stitches. Knot thread and weave tail to the back of disk
Info :
For the largest, fluff petals with steam or block each petal with pins onto a mat to shape slightly cupped petals. Stuff lightly behind central disk with tiny bit of fiberfill for lift if desired
— Medium Bloom (Make 8) :
Round 1 :
MR, 6 sc in MR (6)
Round 2 :
Inc in each st around (12)
Round 3 :
(1 sc, inc) x6 (18)
Round 4 :
Petal formation: *ch3, sk1, sc into next; rep for 6 ch-3 loops
Round 5 :
In each ch-3 loop work (sc, 3 dc, sc) to make 6 broader petals. Fasten off and sew 3–5 small beads in center
Info :
Vary yarn tone between Light and Dusty Pink to get depth. You can stack 2 medium blooms slightly rotated for a fuller appearance
— Small Bud (Make 12-16) :
Round 1 :
MR, 6 sc in MR (6)
Round 2 :
Inc in each (12)
Round 3 :
1 sc in each st around (12)
Round 4 :
Ch2, in next st work 4 dc together (cluster) across to form closed bud effect, fasten off, leave tail for sewing. Add a single bead or small bullion stitch in center if desired
Info :
Stuff bud minutely with a tiny pinch of fiberfill if you want them to pop slightly. Sew them onto runner at the base of petal clusters and along vines
— Leaves (Make 24 assorted) :
Round 1 :
With Leaf Green, ch8. Row 1 (foundation): sc in 2nd ch from hook, hdc, dc, trc, dc, hdc, sc across — turning leaf base. (7 sts across)
Round 2 :
Work along one side of chain: sc, hdc, dc, trc in corresponding stitches to create a tapered teardrop; at tip work sl st, then work back on other side symmetrically to join at base. Fasten off. (Approx 14 working stitches; leaf shaped)
Info :
Create a central ridge by working 1 sc down the center of the leaf in FLO after blocking. Use a blunt darning needle to embroider a midrib with surface slip stitch if desired
Round 3 :
Smaller leaf option: ch6, sc in 2nd ch, hdc, dc, hdc, sc, fasten off. Make a mix of sizes and shapes for natural looking foliage
Info :
Block leaves flat with light steam and shape midrib with pins; this makes sewing and placement much neater
— Raised Vines (Surface Crochet & I-cord) :
Round 1 :
Using Brown yarn, create an i-cord style tube: ch3, in 2nd ch from hook work sc across, then continue working around the chain without joining by slip-stitching into the back loops creating a narrow tube. Work to desired vine length, about 50–90 cm total across pieces; make several vine segments to mimic pictured branching
Info :
Alternatively work vines with surface slip-stitch: Insert hook from back to front, pull up loop and sl st along marked line on runner to form an attached raised stem. For dimensional branches, i-cord tubes sewn on top provide a more sculptural look
Round 2 :
If making braided vines: make 3 i-cord tubes then plait lightly and secure ends. Fasten off leaving long tails for sewing
Info :
When sewing vines, pin them in place first and use invisible whip stitch along underside of cord to secure into the background without visible top stitches
— Small Petal Accents & Beaded Centers :
Round 1 :
Tiny petals: MR, 5 sc, join (5). Fasten off leaving tail and flatten slightly; sew 1 bead in center
Round 2 :
Pearl centers: Use needle and thread to sew 5–7 small pearl beads into the center of each large bloom in a circular cluster. Stitch through the bloom base multiple times to secure bead cluster
Info :
For realism, vary bead counts: larger flowers 7–9 beads, medium 4–6 and small 1–3. Use bead color matching off-white or pale cream
— Assembly & Placement Guide :
Info :
Before sewing anything permanently, lay out the background flat and arrange medallions, vines, blooms, buds and leaves according to the pictured composition: two circular medallions spaced along the runner, a main sinuous vine from one end to the other with branch offshoots, large blossoms at focal points with clusters of medium blooms and buds between
Round 1 :
Pin vines first: position the brown i-cord or surface vine along the marked line. Tack at 1–2cm intervals with small whip stitches using matching brown yarn (this is not a crochet round; it's assembly step recorded here as a 'Round')
Info :
Technique Note :
Avoid sewing through the textured raised clusters of the background; instead penetrate just the loop of the background to keep the top surface uninterrupted. Use a blunt needle for better control
Round 2 :
Attach medallions: place medallions on runner where marked; whip stitch through the peripheral rounds of medallion into background securing tightly but not pulling fabric in (use up to 8–10 small stitches around each medallion)
Round 3 :
Sew large blossoms: position large bloom at focal points near medallions and on vine junctions. Use yarn tail to sew through the base disk and into the background with several stitches around the inner disk so petals remain free to curve up
Info :
For a 3D effect, sew only through the disk base and keep stitches off petals; this allows petals to remain unfastened and hover above the background
Round 4 :
Sew medium blooms and buds: cluster them near large flowers and along branches. Secure leaves after blossoms are fixed: sew leaf bases under petals or at vine junctions so leaves appear to originate naturally from branches
Round 5 :
Finish by embroidering small vein details on leaves with a single strand of darker green using a surface slip stitch. Add tiny specks of blush using a safe fabric pastel if desired
Info :
Check spacing frequently; step back and view runner from a distance to ensure visual balance. Adjust by moving small blooms or buds before final sewing
— Additional Decorative Petal Layer (Optional for extra depth) :
Round 1 :
Create petal crescents by crocheting short arcs then sewing them behind each large petal row. Example small arc: ch6, work (sc, hdc, 2 dc, hdc, sc) across, fasten off and sew under base of larger petals
Info :
Adding this layer increases bulk; use sparingly for focal flowers only to avoid overcrowding surface
— Finishing Touches and Securements :
Round 1 :
Weave in all yarn tails neatly on wrong side using tapestry needle, burying each tail across several stitches before trimming
Round 2 :
Inspect bead attachments: add extra securing stitch through each bead cluster from back side to front then back and knot. Apply a tiny dot of fabric glue to back of knots for extra security if runner will be laundered lightly
Round 3 :
Block runner flat: pin the entire runner onto blocking mat to achieve even scallops and to level petals; lightly steam with cloth or spray with blocking solution, let dry completely
Info :
Light steaming will slightly relax cotton fibers and give petals a soft rounded look. Avoid heavy steam or ironing directly onto beads
— Variation Notes & Colorwork Tips :
Info :
Use tonal pink variegated yarn for some petals to get a watercolor effect similar to the photo. Carry accent yarns for medallion rings to reduce ends; fasten off only when color changes are distant to avoid clutter
Round 1 :
If making smaller runner scale: reduce foundation chain by 10 ch increments (keeping symmetry) and repeat background rounds fewer times to shorten length while maintaining width
Info :
Always adjust placement of medallions and flower clusters proportionally when scaling size. Make a paper template and mark positions before sewing
— Care Instructions :
Info :
Hand wash separately or gentle machine wash in laundry bag on delicate, reshape while damp and air dry flat. Avoid tumble drying or heavy agitation to protect beads and appliques
Round 1 :
Spot treat bead clusters with damp cloth; sew on extras if any beads loosen over time
This cherry blossom table runner is a delightful heirloom-style project combining texture, color and sculptural floral details. Each applique and leaf comes together to form a charming botanical scene perfect for tea tables, mantels or special occasions. The medallions and scalloped edge frame the design beautifully, giving a vintage yet fresh look that warms a room. 🌸🧶 This pattern is a lovely way to practice small 3D motifs and surface stitching while ending up with a stunning functional centerpiece. Enjoy the slow craft and share your finished runner with pride! 🎀