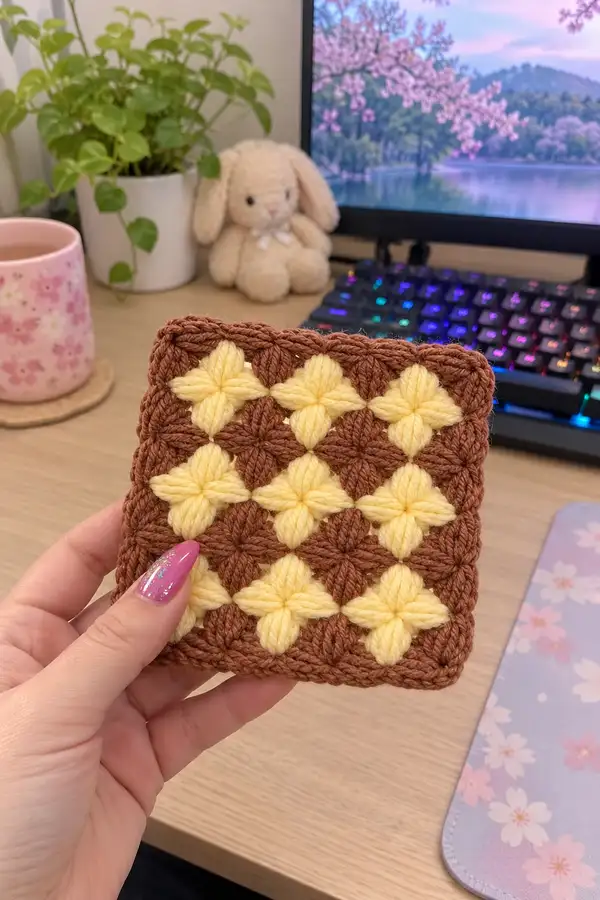
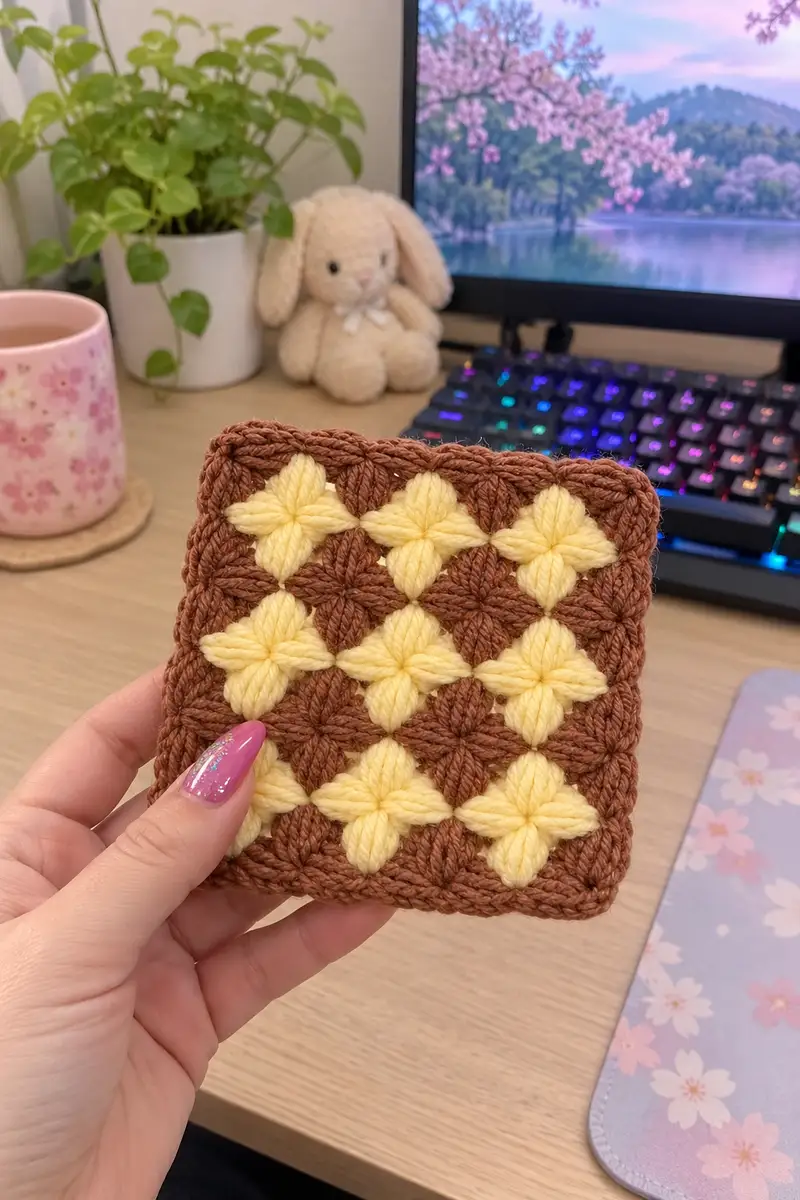
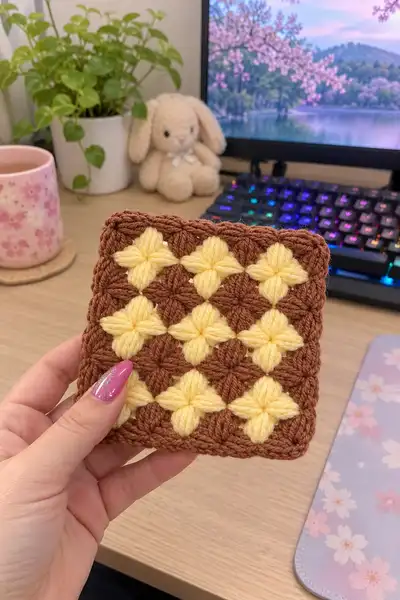
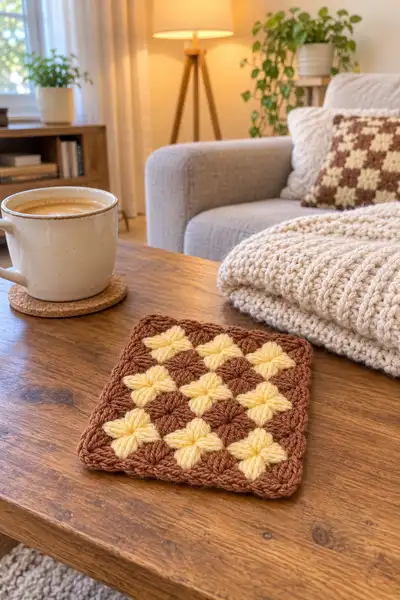
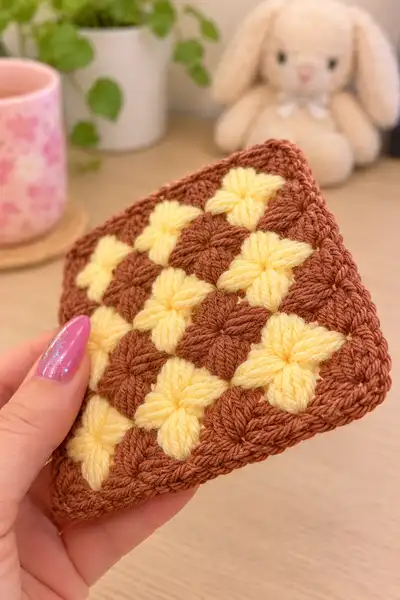
A warm, vintage-inspired bedspread made from chocolate brown and buttery yellow Danish-flower-style granny squares. This pattern shows you how to make the flower-like star clusters, join them into a checkerboard layout, and work a textured, rounded border to finish a cozy bedspread or throw.
Progress Tracker
0% Complete
— Notes + Gauge :
Info :
This pattern is written in US terms. The motif is a Danish-flower-style granny square made from star stitches (sometimes called marguerite or daisy stitches) arranged into a 4x4 petal grid that reads as a small checkerboard. Gauge for one finished motif (before blocking): 11 cm / 4.25 in square = 48 stitches around after round 3 when worked with the suggested yarn and 4.5mm hook. Adjust hook size to match gauge.
Info :
For the bedspread shown (queen/throw sized layout) finished blanket uses approximately 96 motifs (12 x 8 layout) depending on final motif size and border width. Make a sample motif and block it to determine how many motifs you will need for your desired size.
— Special Stitch : Star Stitch (Marguerite / Danish Flower Petal) :
Info :
The star stitch used in this pattern is described step-by-step so you can reproduce the petals shown. The stitch produces a petal cluster with multiple loops pulled up into one stitch and finished with a joining single crochet. Practice a few petals on scrap yarn before starting motifs.
To Work 1 Star Stitch :
Yarn over, insert hook into indicated stitch or space, yarn over and pull up a long loop — repeat this process 5 more times into the same stitch/space so that you have 6 loops on the hook. Yarn over and pull through 2 loops only (this creates a partial cluster). Yarn over and pull through 2 again until two loops remain? (Alternative finishing: after gathering 6 loops, pull yarn through all loops to form a bobble and finish with sl st into same space). In this pattern we finish each petal by pulling yarn through all gathered loops and then doing a single crochet into the same stitch to secure the petal. For a neater flat petal: after pulling through all loops, work 1 sc into top of that petal base.
Info :
Practice to keep the 6 loop pulls fairly even — not too tight or too loose. Consistent loop length creates the uniform star petals pictured.
— Motif : Chocolate/Butter 4x4 Star Granny (Make many) :
Round 1 :
Using color A (butter yellow) make a magic ring. Work 16 star stitches into the ring, finishing each star with 1 sc to secure (16 star petals). Sl st to join to first sc. (16)
Info :
If you prefer, start with ch4 join to ring (for a looser center) then work star stitches into the ring as written. Count your star petals — you should have 16 petals evenly spaced when finished.
Round 2 :
Ch 1, *1 sc between petals (in the joining sc), ch 1, 1 sc at side of next petal* repeat around to create 32 small single crochet points and chain spaces (32). Sl st to join.
Info :
Round 2 creates the small grid of sc & ch spaces that form the 'intersection' points where next round will build the square. Keep even tension so chain 1 spaces are consistent.
Round 3 :
Change to color B (chocolate brown) if following the sample alternation. Ch 1, *(2 sc, inc in next ch-1 sp) repeat across each small section* — specifically: 2 sc in first sc, 1 sc in next sc, (2 sc in the chain-1 space) x 8 across giving you 48 stitches total around. Result (48)
Info :
The increases used here expand the circle into a modest square-ish shape. After round 3 the motif circumference will stabilize and further rounds shape the square edges. This is the point where you can choose which color will read as the petal or the background in the finished checkerboard layout.
Round 4 :
1 sc in each st around (48). Sl st to join. (48)
Round 5 :
1 sc in each st around (48). Sl st to join. (48)
Round 6 :
1 sc in each st around (48). Sl st to join. (48)
Info :
Work these even rounds in the background color (color B) until you have a sturdy frame around the petals — three to five rounds of sc produce the same effect shown. The photos show three even sc rounds before we begin forming the thicker side ridges.
Round 7 :
1 sc in each st BLO around to create a subtle ridge (48). Sl st to join. (48)
Info :
Working BLO (back loops only) on this round helps create the textured seam between motifs when they are joined later. You can skip BLO if you prefer a smoother square border.
Round 8 :
1 sc in each st (48). Sl st to join. (48)
Round 9 :
1 sc in each st (48). Sl st to join. (48)
Info :
At this point your motif should be square with 4 corners. If you see rounding at the sides, add one more even round until the square sits flat when blocked. Block a sample to check sizing before making many motifs.
Round 10 :
Change to color A (butter yellow) if you are alternating petals and background for your checker pattern. Ch 2 (counts as hdc), hdc in next 4 sts, *ch 1, skip 1 st, hdc in next 6 sts* repeat around placing extra hdc near corners, ends should total (48). Sl st to join. (48)
Info :
This color change round can be used to carry the yellow into the matrix of the small square if you want petals to peek out more. The example bedspread alternates predominant petal squares and predominant background squares — you will make two motif colorways: 'petals yellow / background brown' and 'petals brown / background yellow'.
Round 11-14 :
1 sc in each st around (48). (Repeat rounds 11-14) Sl st to join at the end of round 14. (48)
Info :
These rounds stabilize the square and build thickness so your motifs have definition when joined. Once motifs measure consistently, stop and block a motif to flatten and measure precisely for layout planning.
Round 15 :
Optional decorative ridge: 1 sc in next 2 sts, 1 hdc in next st, 1 dc in next st, *skip 1, 1 sc in next 2 sts, 1 hdc, 1 dc* repeat around. Sl st to join. (48)
Info :
The decorative ridge in round 15 gives the finished square the subtle shell-like edge that shows in the photos. You may omit this if you prefer a clean single-crochet edge.
Round 16 :
1 sc in each st around (48). Sl st to join. Fasten off and leave a 20cm tail if you plan to seam conventionally. (48)
Info :
Make half your motifs with a yellow center (color A petals) and brown surrounding rounds (color B background) and the other half inverted (brown petals with yellow surrounding) to create the checked layout shown in the photos. Count how many of each you will need for your desired layout before making all pieces.
— Alternate Motif Colorway (Invert colors) :
Round 1 :
Using color B (chocolate) make a magic ring. Work 16 star stitches into the ring, finishing each star with 1 sc to secure. Sl st to join. (16)
Round 2 :
Ch 1, *1 sc between petals, ch 1* repeat around (32). Sl st to join. (32)
Round 3 :
Change to color A (butter) and work increases to 48 as before: (2 sc, inc) pattern to reach 48 total around. Sl st to join. (48)
Round 4-16 :
Repeat rounds 4-16 as in the first motif, matching the same number of even rounds to ensure motifs are identical size. Fasten off leaving tails for joining or cut and weave in ends if using join-as-you-go. (48)
Info :
Make equal numbers of both colorways to read as a checkerboard. For a queen-sized bedspread using the pictured motif size, plan for 12 across by 8 down = 96 motifs (48 of each colorway). Adjust for your desired size by making more or fewer motifs.
— Blocking Motifs :
Info :
Block each motif gently: pin to a square measuring your desired finished motif size (for example 11 cm / 4.25 in square), steam or wet block as appropriate for your yarn, then let dry. Blocking evens edges and makes joining easier and neater.
— Joining Motifs : Join-as-you-go (JAYG) Method :
Info :
Join motifs as you make them with the final round. The following sequence uses slip-stitch joins worked into the adjacent motif’s stitches and chain spaces to produce invisible seams that echo the raised ridges in the photos.
Round J1 :
On final round edge (working in your chosen edge color), when ready to join to a previously completed motif place the new square RS facing you and the completed square RS facing you. Work to the side where they will meet. For the corner: work sc into corner, ch 1, align with adjacent motif corner and sl st into its corner chain-2 space to join, then continue sc on new motif, sl st into next sc of adjacent motif in each sc position to join across the side. Finish corner by working corner chain-2 join (sl st into neighbour's corner). Continue to other sides as desired. Do not fasten off. (48)
Info :
For a neat checkerboard look, join only along two adjacent sides for each new motif as you build rows. Then join the remaining sides when you attach an entire row to the next row. This keeps the join work tidy and allows the raised petals to nestle neatly.
Round J2 :
If working join-as-you-go across multiple motifs: at each sc position along the joining side, instead of sl st into the new motif, sl st into the corresponding sc of adjacent motif. For corner spaces, sl st into both motifs' corner chain-2 spaces to create a clean corner. Continue until all motifs are joined into strips. (48)
Info :
JAYG gives a continuous, durable seam and eliminates much sewing later. If you prefer a decorative visible seam, use whip stitch or mattress stitch after seaming all motifs together.
— Joining Motifs : Sewn Method (Alternative) :
Info :
Sewn join gives you more control to square and tension each seam. Use mattress stitch or whip stitch with tails left from rounds 16. Pin motifs in the layout on a flat surface, checking orientation carefully for the checkerboard. Sew with matching yarn and weave tails in. For strong seams, sew through the back loops only of both motifs so petals remain raised on the front face.
Round S1 :
Pin two motifs RS together, aligning petals in the checkerboard pattern. Using yarn needle and a length of matching yarn, use mattress stitch through back loops only of both motifs along the joining edge. Space your stitches evenly so the seam stays flat. (Length varies by motif size)
Info :
Sewn seams are slightly less stretchy than JAYG but allow for fine placement and tension control; choose based on your preferred finish and time availability.
— Assembling the Bedspread Layout :
Info :
Plan your layout on the floor — for the pictured layout: 12 motifs wide and 8 motifs long gives a throw/bedspread that covers a double/queen bed depending on motif size. Adjust counts for bed size: single/twin = fewer motifs, king = more motifs and a wider border.
Info :
Assemble motifs into rows first: join motifs horizontally into strips of 12 using JAYG or sewn join. Then join rows together vertically. Press gently after each joined row to keep the job tidy. We recommend joining rows in sets so you can manage the project comfortably.
— Border : Start (Round 1 of Border) :
Round B1 :
With motif assembled to full spread and RS facing, join border color (choose color B or a third neutral) in any corner. Ch 1, work 1 sc evenly around the entire blanket through the outer loops of motif rounds (work 3 sc into each motif corner to stabilize) — approximate stitch count will depend on the number of motifs. If your assembled blanket uses 12 x 8 motifs and each motif edge yields 48 sts, the perimeter rough stitch count is approximately (12 motifs across × motif edge width in sts) × 2 + (8 motifs down × motif edge width in sts) × 2. For the sample blanket this equates to roughly 2300-2600 total sc around. Sl st to join.
Info :
Because the bedspread perimeter stitch count is large, work this first border round at a steady even pace. Make sure you place 3 sc in each corner motif to ensure corners sit square and do not draw in.
Round B2 :
Ch 2 (counts as hdc), hdc in each st around, placing 3 hdc into each corner cluster to preserve square corners. Sl st to join. (Perimeter total remains same; counted as HDCs)
Info :
Rounds B1-B2 give an even foundation for the decorative round that follows. Work one or two even rounds until the border sits square and even around the large spread. Use a stitch marker to mark centers of each side to keep your increases symmetrical if you need to add occasional increases to keep the edge flat.
Round B3 :
Switch to a textured ridge: 1 sc in next 2 sts, 1 hdc in next st, 1 dc in next st, *1 hdc, 1 sc, 1 sc* repeat around. Place 3-stitch clusters in corner as before. Sl st to join.
Info :
This round begins the braided/rounded border effect seen in the photos. The mix of sc, hdc, and dc produce a soft but visually interesting edge that feels sturdy and drapes well.
Round B4-B8 :
1 sc in each st around (perimeter). Repeat rounds B4-B8 until border depth equals approximately 5-6 cm / 2-2.5 in or to your desired depth. Sl st to join at the end of each round.
Info :
Work even sc rounds to build height and give visual weight to the border. For the rounded look in the photo we used five even sc rounds after the textured foothold round.
Round B9 (Decorative Final Round) :
Optional rope-like scallop: *Ch 3, skip 1, sl st in next 2, ch 3, sl st in next sc* around to create small loops, then return with sc in each loop to create a rounded finish. Alternatively, work single crochet crab stitch (reverse single crochet) around for tidy finishing. Sl st to join. Fasten off and weave ends. (Perimeter count equals loop count)
Info :
The final decorative round is where you can personalize the edge. The sample uses a slightly raised rounded braid look created by a combination of stitches; using a crab stitch creates a neat rope finish that photographs beautifully.
— Large Project Finishing Rounds (Optional extra texture) :
Round F1 :
Optional surface braid: With RS facing, using 3.5mm hook slip-stitch across one sc, then skip one, work sl st across the top loops of the stitch to create a subtle diagonal chain. Repeat around for a faint surface crosshatching. Sl st to join.
Info :
Surface braid techniques add an extra cozy texture to a large blanket without changing its drape. Only attempt if you have time and enjoy decorative finishing.
Round F2 :
Secure all loose ends by weaving them at least 5-6 cm into the back of the fabric, then trim flush. If using multiple tails from join-as-you-go, weave them through the seams to lock joins more securely. (No specific stitch count)
Info :
Carefully weaving ends and blocking the entire spread after completion gives the crisp checkerboard look shown in the photos. For best results wash gently according to yarn instructions and lay flat to dry.
— Edge Correction / Modifying Size :
Info :
To make the bedspread wider or longer, add additional columns or rows of motifs. To change motif size and therefore number of motifs required, swap yarn weight or hook size and re-sample gauge. Every two-hook-size change roughly adjusts motif dimensions by 10-20% depending on yarn.
Info :
If after joining the spread you notice the perimeter is slightly wavy, add an even sc round, placing increases at evenly spaced intervals along each side (for example, 4 increases spaced evenly along a long side) to flatten the edge. For a pulled-in edge, reduce one sc round or use a smaller hook for border rounds to draw the edge gently inward.
— Care + Maintenance :
Info :
Worsted-weight acrylic and acrylic blends are easiest to care for—machine wash gentle, tumble low or lay flat. Natural wool will felt; hand wash and lay flat to dry. Always check yarn label for specific care. After laundering, lightly reshape and pin to square dimensions if needed while damp.
Info :
Frequent use can flatten star petals over time; if you want to refresh the texture, steam-block the top lightly (use a press cloth).
This chocolate-and-butter granny square bedspread brings cozy vintage charm to any bedroom. Each star-petal motif nestles together to form a warm checkerboard that looks beautiful draped over a bed or sofa. The textured petals and soft border make it both decorative and practical—perfect for snuggling on chilly evenings. 🧶✨ Share your progress and enjoy the slow, meditative rhythm of making a big project one square at a time. Happy hooking! 🛏️💛