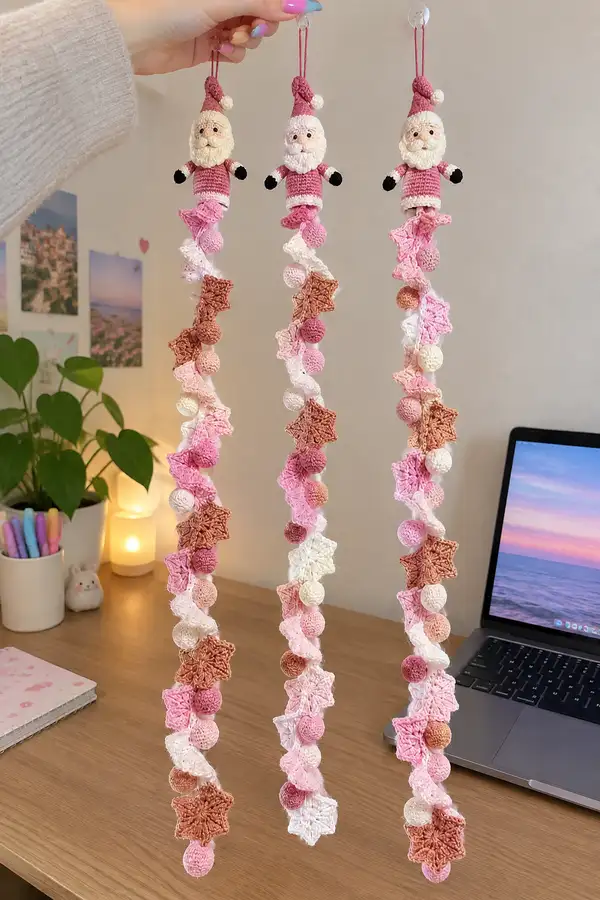
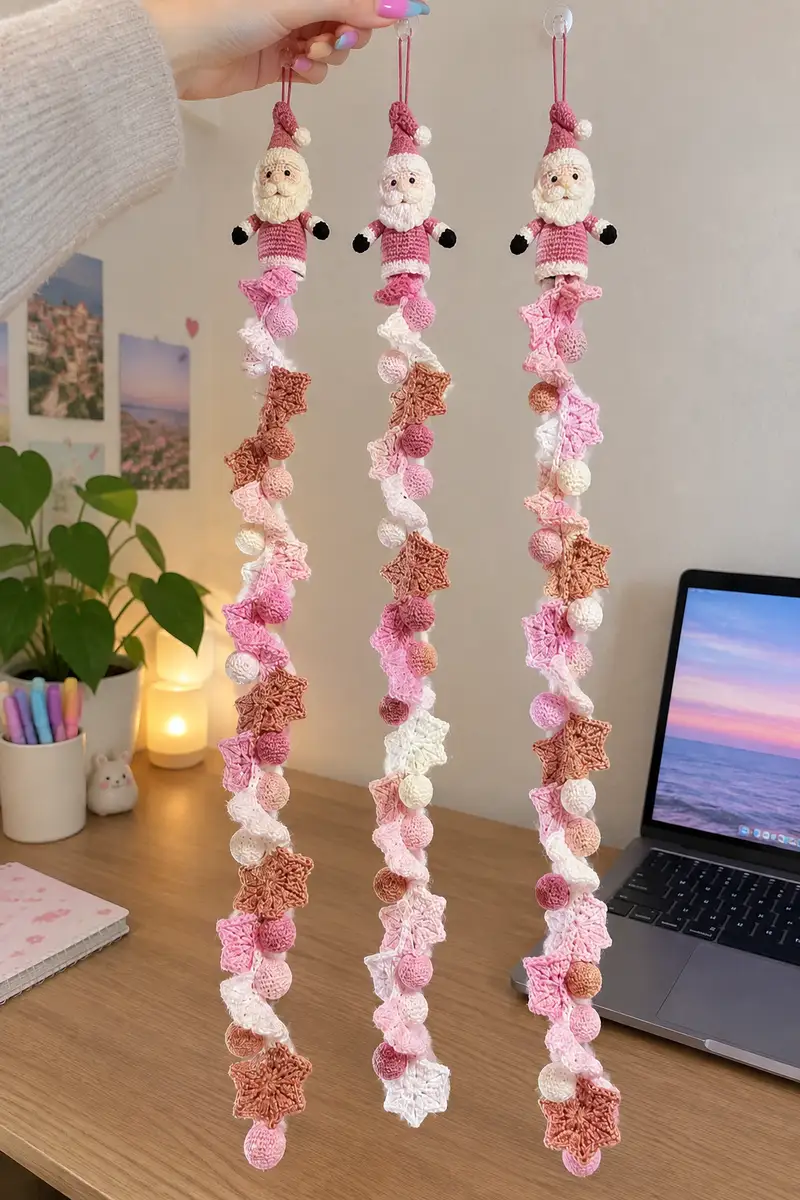
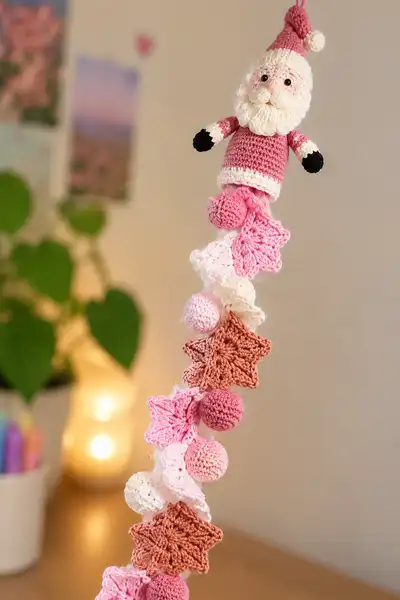
Create a whimsical pink Christmas spiral garland topped with a tiny Santa amigurumi. This pattern includes step-by-step instructions for the Santa topper (head, beard, hat, body, arms), spiral connecting chain, crocheted stars and spherical baubles, and final assembly. Soft pinks, cream and warm rose tones make this garland a delicate, modern holiday accent. Great for doorways, windows, or as a charming wall hanging.
Progress Tracker
0% Complete
— Materials & Gauge :
Info :
Use a 3.0mm hook for most parts and 2.5mm for very small detail pieces for a firm fabric. Gauge is not critical, but with worsted cotton and 3.0mm hook you should get approximately 6 sc per inch. Work tightly for amigurumi so stuffing does not show through.
— Head :
Round 1 :
6 sc in magic ring (6)
Round 3 :
(1 sc, inc) x 6 (18)
Round 4 :
(2 sc, inc) x 6 (24)
Round 5 :
(3 sc, inc) x 6 (30)
Round 6 :
(4 sc, inc) x 6 (36)
Round 7 :
(5 sc, inc) x 6 (42)
Round 8 :
(6 sc, inc) x 6 (48)
Info :
By round 8 you should have a broad head circumference of 48 sts. Maintain consistent tension. Switch to flesh/peach color for face if using separate face color, otherwise continue in cream for pale face.
Round 9 :
1 sc in each st (48)
Round 10 :
1 sc in each st (48)
Round 11 :
1 sc in each st (48)
Round 12 :
1 sc in each st (48)
Info :
Place safety eyes between rounds 13-14 and approximately 9-10 stitches apart measured across the front of the head for a doll-like expression. If using 6mm eyes they will sit neatly; for smaller eyes increase spacing slightly or embroider eyes later.
Round 13 :
1 sc in each st (48)
Round 14 :
1 sc in each st (48)
Info :
Nose placement: leave a central 1-2 stitch gap between eyes. For a 3D nose piece, make and sew following the nose section. Stuff head lightly before adding nose to ensure cheeks are slightly firm.
Round 15 :
1 sc in each st (48)
Round 16 :
1 sc in each st (48)
Round 17 :
(6 sc, dec) x 6 (42)
Info :
Begin to shape the lower head where the beard will attach. Mark the front center before decreasing so beard pieces align symmetrically. Start stuffing gently — head should be firm but still pliable.
Round 18 :
(5 sc, dec) x 6 (36)
Round 19 :
(4 sc, dec) x 6 (30)
Round 20 :
(3 sc, dec) x 6 (24)
Info :
At round 20 the face will begin to narrow under the beard zone. Stuff firmly around eye area and forehead to preserve shape. Leave the neck opening unstuffed for attachment to body later.
Round 21 :
(2 sc, dec) x 6 (18)
Round 22 :
(1 sc, dec) x 6 (12)
Info :
Fasten off leaving a long tail for sewing to the body. Finish stuffing through the neck hole if needed, but keep the neck slightly narrow for a clean join. The beard will be attached later around rounds 14-20 area of the head.
— Nose :
Round 1 :
4 sc in magic ring (4)
Round 3 :
1 sc in each st (8)
Round 4 :
(1 sc, dec) x 2 (6)
Round 5 :
1 sc in each st (6)
Info :
Stuff lightly; shape into a rounded button. Sew nose centered between eyes on round 13-14 area with a few short stitches through head to secure. Use matching flesh/peach yarn and a blunt needle for neat finish.
— Beard (make 5 scallop pieces and 2 lower fringe pieces) :
Info :
Beard is constructed as multiple small scallop/curved segments sewn around the lower face to create a textured curly beard. Make five upper scallops and two larger lower scallops. Work in cream/off-white.
Scallop Round 1 :
ch 6, sl st to form ring, ch 1, 6 sc into ring (6)
Scallop Round 2 :
inc in each st around (12)
Scallop Round 3 :
(1 sc, inc) x 6 (18)
Scallop Round 4 :
Turn scallop to work edge: ch 1, 1 sc in first st, *ch 2, 5 dc in next st (shell), ch 2, 1 sc in next st* repeat across to make 3 small shells forming the curl edge
Info :
Make five small scallops (use 2.5-3.0mm hook for tighter curl). The shell edge creates the look of small curls. Block lightly if necessary and position them overlapping around head lower front.
Lower Scallop Round 1 :
ch 8, sl st to form ring, ch 1, 8 sc into ring (8)
Lower Scallop Round 2 :
inc in each st around (16)
Lower Scallop Round 3 :
(1 sc, inc) x 8 (24)
Lower Scallop Round 4 :
Work edged shells: *1 sc, ch 2, 7 dc in next st, ch 2, 1 sc* repeat to create 3 larger shells (for dramatic bottom beard)
Info :
Sew all scallops around the lower two-thirds of the head with yarn needle, overlapping slightly to create a full beard. Use small whip-stitches and hide tails inside the head. Add a few small loose chain-curls if desired for extra texture.
— Cheeks & Blush Embroidery :
Info :
Lightly embroider small blush circles using pale pink yarn or use blush powder applied with a small brush. Embroider mouth as a small horizontal 'v' under the nose using darker cream or pale peach.
— Body (Torso) :
Round 1 :
6 sc in magic ring (6)
Round 3 :
(1 sc, inc) x 6 (18)
Round 4 :
(2 sc, inc) x 6 (24)
Round 5 :
(3 sc, inc) x 6 (30)
Round 6 :
(4 sc, inc) x 6 (36)
Round 7-10 :
1 sc in each st (36)
Info :
Change to dusty rose/pink yarn on round 11 to create the Santa jacket color. If you prefer a white-trimmed jacket, continue and add two rounds of cream at the hem later using BLO for a neat ridge.
Round 11-14 :
1 sc in each st (36) in dusty rose (work even to create torso height)
Round 15 :
(4 sc, dec) x 6 (30)
Round 16 :
(3 sc, dec) x 6 (24)
Info :
At round 16 the torso begins to narrow toward the waist/neck join. Keep the opening at the top large enough to insert the head. Stuff the torso moderately — firmer than arms but not rock solid. Leave open for sewing head on.
Round 17 :
(2 sc, dec) x 6 (18)
Round 18 :
(1 sc, dec) x 6 (12)
Round 19 :
6 dec (6) — close if you plan to attach directly to spiral
Info :
Fasten off leaving long tail for sewing to head. If you prefer a flat bottom to glue onto a wooden ring for hanging, stop at round 18 and attach base disc as described below.
— Arms (Make 2) :
Round 1 :
6 sc in magic ring (6)
Round 3 :
(1 sc, inc) x 6 (18)
Round 4 :
1 sc in each st (18)
Info :
Work the hand/mitten in black for the last 3 rounds of the arm (or add a small slip-stitch color change) to create gloves. You can also sew a separate small mitten if desired.
Round 5-7 :
Change to black for glove tip: 1 sc in each st (18) for 3 rounds
Round 8 :
Change to dusty rose: 1 sc in each st (18)
Round 9-12 :
1 sc in each st (18)
Round 13 :
(2 sc, dec) x 4 (12)
Round 14 :
(1 sc, dec) x 4 (8)
Round 15 :
1 sc in each st (8) — leave long tail for sewing to torso (do not fully close)
Info :
Stuff hands firmly and arms lightly. Sew arms to the torso at rounds 10-12 for natural placement. Use pins to check symmetry before sewing. Optionally insert thin wire if you want slightly poseable arms; fold wire ends back to avoid poking through.
— Hat :
Round 1 :
6 sc in magic ring (6)
Round 3 :
(1 sc, inc) x 6 (18)
Round 4 :
(2 sc, inc) x 6 (24)
Round 5-8 :
1 sc in each st (24)
Info :
For the slouchy Santa hat shape, work even for several rounds then begin tapering slightly. Use dusty rose for main hat and cream for the brim and pompom.
Round 9 :
(3 sc, dec) x 6 (18)
Round 10 :
(2 sc, dec) x 6 (12)
Round 11 :
1 sc in each st (12)
Round 12 :
Switch to cream: work 1 sc in each st BLO for 2 rounds to create a rim ridge (12)
Round 13 :
Switch back to dusty rose: ch 1, *sl st in next 2 sts* around to create a tight narrow slouch shape. Fasten off leaving tail to sew to head top.
Pom Round 1 :
6 sc in magic ring with cream (6)
Pom Round 3 :
1 sc in each st (12) — fasten off and lightly stuff, sew onto hat tip
Info :
Sew hat onto head covering the very top rounds, and secure with a few mattress stitches. Make sure the brim sits slightly over the forehead and beard for a cozy look.
— Star Motif (Make 12 or desired number) :
Info :
These 5-point stars are worked flat and then given a small underside to sit slightly 3D. Work in worsted cotton using 3.0mm hook for crisp points.
Round 1 :
ch 5, sl st to first ch to form ring, ch 2 (counts as first dc), 14 dc into ring (15 dc total) — sl st to top of ch-2 to join (15)
Round 2 :
*ch 2, 1 dc in next st, ch 2, sl st into next st* repeat around to create 5 loops (work 5 times, spacing evenly). You will have 5 loop positions
Round 3 :
Working into each loop: (sl st into loop, ch 3, 3 dc, ch 3, sl st into loop) to form a point. Repeat for all 5 points. Fasten off leaving tail for joining.
Round 4 (Optional underside) :
To add slight body: join yarn on back, work sc around edge into spaces between points, making 5 sc groups to create a shallow cup. Fasten off and weave ends.
Info :
Block stars slightly using a damp cloth and pins if you want crisp points. Make stars in alternating colors (soft pink, cream, terracotta) as shown in the photo so the garland reads as a soft ombre.
— Small Spherical Bauble (Make 12 or desired number) :
Round 1 :
6 sc in magic ring (6)
Round 3 :
(1 sc, inc) x 6 (18)
Round 4 :
(2 sc, inc) x 6 (24)
Round 5-6 :
1 sc in each st (24)
Round 7 :
(2 sc, dec) x 6 (18)
Round 8 :
(1 sc, dec) x 6 (12)
Info :
Stuff firmly before final decreases so the ball is round. For a slightly larger ball repeat round 4 increasing to 30 sts and adjust decreases proportionally. Leave long tail to sew onto spiral chain or thread through with a crochet hook before fully closing.
— Spiral Ribbon Chain (Main structural ribbon) :
Info :
The spiral ribbon is formed by a long chain with shell groups worked along one side so that the chain twists naturally into a spiral. Use a consistent tension and 3.0mm hook. Make the chain long enough to accommodate alternate stars and balls (the sample garland uses 12 stars and 12 balls across a 60-80cm length).
Foundation :
Using dusty rose, ch 150 (or desired length) — this forms the central spine
Round 1 :
Starting in 4th ch from hook, *1 dc, skip 1 ch, 1 dc* along to end to give body. At the end sl st into last ch. Fasten off
Round 2 (Shell spiral) :
Rejoin in the 4th ch from hook along the top edge, *skip 2 ch, (ch 2, 5 dc in same ch, ch 2), skip 2 ch, sl st in next ch* repeat along chain. The shells will cause the chain to curl into a spiral. Make shells roughly every 3-5 stitches to keep a steady spiral.
Info :
Work shells on one side only so they sit like petals. If your spiral lies flat rather than twist, increase shell spacing or add extra dc on the spine. You can also pull gently on the spine as you block to accentuate the twist.
Round 3 :
Work a second pass of smaller shells between the first shells if you want extra density: join yarn into ch space between shells, *ch 3, 3 dc in space, ch 3, sl st into next space* repeat. Fasten off and weave ends.
— Attaching Stars & Balls to Spiral :
Info :
Decide on spacing before assembling. Alternate star then ball then shell cluster down the spiral. In the photo spacing is roughly 3 shells between each star/ball pair. Use a tapestry needle to sew through the point of each star to the spine. For balls, either sew directly to the spine or thread the chain through the ball before final closure so it hangs freely.
Attachment Step 1 :
Sew stars: place a star on the front of a shell cluster and sew its central back through to the chain with 6-8 secure stitches. Hide tail into the spiral.
Attachment Step 2 :
For balls: before fully closing the ball add a loop of thin yarn or pass the spiral spine through a small hole created in the ball and finish closing. This allows the ball to sit snugly against the spiral without extra bulk.
Info :
Alternate colors as you go for ombre effect: cream, pale pink, dusty rose, terracotta. This creates a soft gradient and makes the garland feel balanced in color weight as it cascades.
— Santa Topper Assembly :
Info :
Sew head to torso: insert head neck opening over torso top or sew neck rounds directly to body opening using mattress stitch. Align the beard so the bottom beard scallops overlap slightly on the torso chest area. Sew hat on top of head and sew pompom securely.
Round 1 :
Position arms: attach each arm to torso at rounds 10-12 using tapestry needle and same-color yarn for invisible join. Secure with 8-12 stitches around the seam for stability.
Round 2 :
Create hanging loop: attach two strands of dusty rose yarn through the very top of the hat with a long loop and knot inside. Optionally insert a short piece of floral wire inside the loop to keep shape and allow hanging.
Info :
Sew Santa topper to the top end of the spiral: position center of torso to the top of the spiral spine (the first ch of the foundation chain). Sew through the spine and through the bottom torso rounds several times to create a stable join. Hide all ends into Santa body.
— Optional Decorative Variations :
Info :
Add a sewn bead or button on Santa's jacket for extra detail; embroider a tiny smile or stitch a small belt using brown and gold thread. Add small bells between star/ball clusters for gentle jingling.
— Finishing & Blocking :
Info :
Weave in all ends. Lightly steam-block the stars to flatten and crisp points (do not iron cotton directly; use steam and pin to shape). Position the spiral so it hangs freely and check that star/ball spacing feels even. Trim any stray fibers and ensure stuffing is evenly distributed.
— Full Project Notes & Tips :
Info :
Make multiple garlands or vary the number of stars/balls to create shorter or longer hangings. Keep a consistent sequence while assembling (for example: star, ball, shell cluster, star, ball) to maintain rhythm. For child-safe version, embroider eyes rather than using safety eyes and avoid small pom-poms or bells.
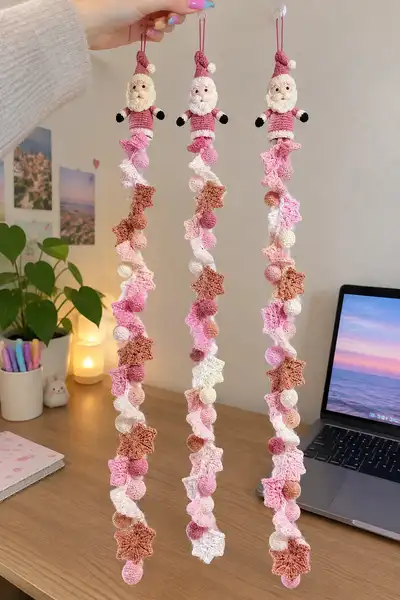
This charming spiral garland blends a tiny Santa amigurumi with delicate stars and baubles for a modern festive accent. Each piece comes together stitch by stitch to create a drifting ribbon of handmade charm that will brighten any corner. Whether you hang one in a window or group three together like in the photo, the garland makes a beautiful seasonal decoration or heartfelt gift. 🧶✨ Add your personal palette and enjoy the mindful process of making something whimsical and warm. 🎀