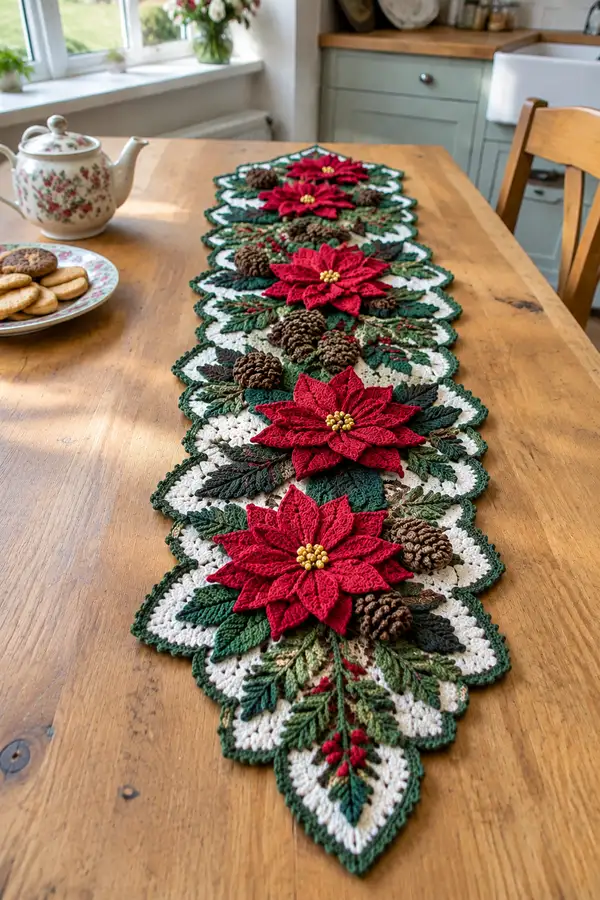
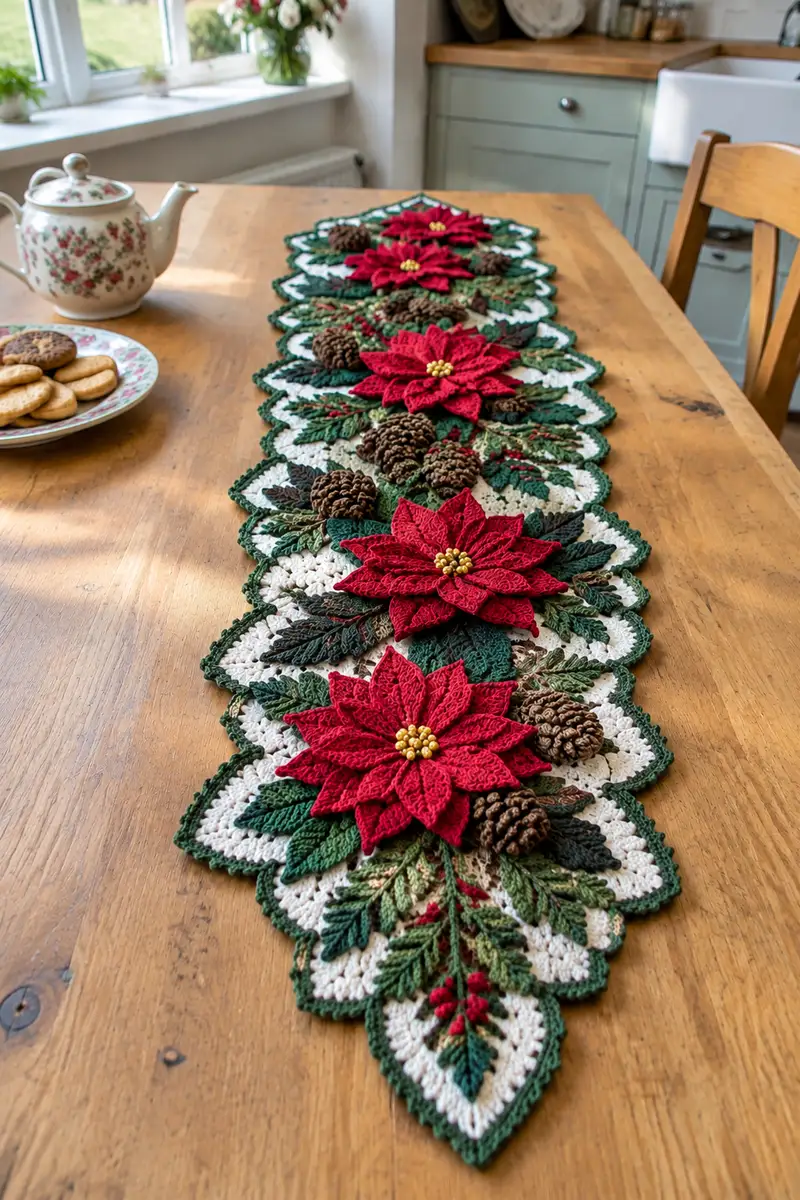
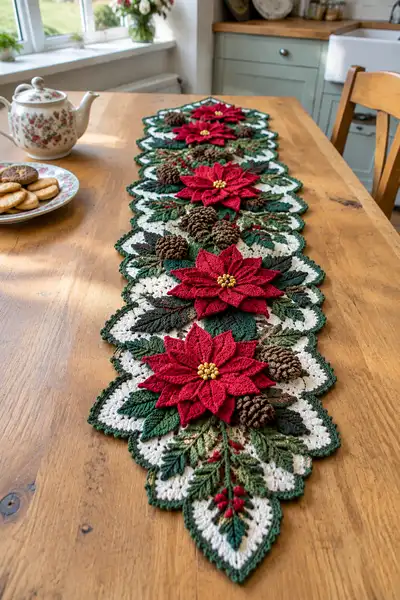
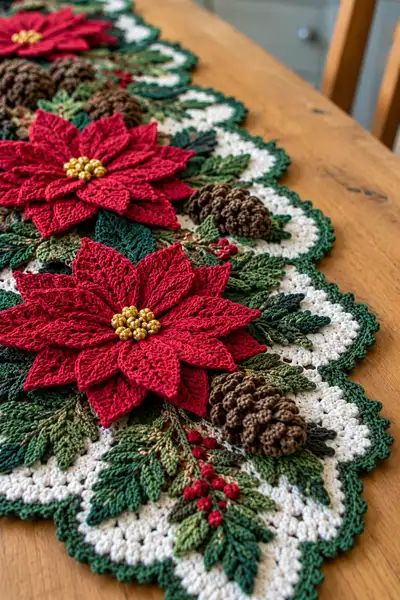
Create a stunning holiday table runner featuring layered poinsettias, textured pinecones and cascading evergreen sprigs. This pattern builds a long scalloped base with rich red poinsettia flowers, 3D pinecones and multi-tonal leaves for a realistic, heirloom finish. Perfect for a festive centerpiece on a large table, the runner combines solid rounds, overlay petals and dimensional accents for a luxurious seasonal display.
Progress Tracker
0% Complete
— Base Scalloped Motif (Make as many motifs as needed for your runner) :
Info :
These scalloped diamonds form the base units of the runner. Each motif measures approximately 10.5" long and 6.5" wide when worked with DK yarn and a 3.5mm hook. Make an even number of motifs for symmetry; the sample runner in the photo uses 6 motifs joined in a line. Work all base rounds in Ivory/Cream unless otherwise noted.
Round 1 :
Ch 6, join with sl st to form ring (or make mr); ch 3 (counts as first dc), 11 dc into ring, join with sl st to top of ch-3 (12 dc)
Round 2 :
Ch 3, 1 dc in same st, 2 dc in each st around; join (24 dc)
Round 3 :
Ch 1, sc in same st, (ch 3, sk next dc, sc in next dc) repeat around to create scallop base; join (12 ch-3 loops)
Info :
This round forms the scalloped edges that later become the pointed lozenge shapes after additional rounds. Keep tension consistent and count ch-3 loops as anchor points for later shaping.
Round 4 :
In each ch-3 loop: (sc, hdc, 3 dc, hdc, sc), join with sl st between loops (12 shells)
Round 5 :
Ch 1, sc in same st, *(ch 3, sc) into center dc of next shell to form small chain arches*; rep around, join (12 chain arches)
Round 6 :
Work into chain arches: sl st into arch, (sc, 5 dc, sc) in each arch across to create pointed leaves; join (12 points)
Info :
At this point you will see a lozenge with 12 pointed scallops. These form the white background leaf shapes. Block each motif lightly to open the scallops before attaching decorations.
Round 7 :
Ch 2, hdc in next 2 sts, 1 dc in each of next 7 sts across point, hdc in next 2 sts, (sc, ch 3, sc) at next seam to create corner chain; continue evenly around to maintain shape. Join. (approx 72 sts around motif)
Round 8 :
Ch 1, sc in each st around in BLO for a firmer surface (72 sc)
Info :
Use BLO here to create a subtle ridge that helps the green border sit neatly. If you plan to join motifs by seam, work an extra round of sc to create a good joining edge.
Round 9 :
Change to Forest Green. Ch 2, *(2 sc in next st, ch 1) repeat to create picot-like edging along scallops, 3 sc along straight edges*; work evenly around to make decorative green edging. Join. (approx 90 sts with picot loops included)
Round 10 :
Ch 1, sc in each st around including around picot ch-1 loops to flatten edging. Join and fasten off. Weave in ends.
Info :
Make as many base scalloped motifs as your table requires. The sample uses 6 motifs; for a shorter runner use 3 or 4 and for a longer table make more. Block each motif flat and allow to dry before beginning embellishments.
— Poinsettia Petals (Make 3 layered poinsettias per motif, each with 10 large petals and 10 small petals) :
Info :
Poinsettia flowers are worked as individual petals that are later joined into a round flower. Each poinsettia in the photo has an inner and outer layer (small and large petals) and a cluster of gold beads for the center. Petals are worked in deep red and blocked/pressed for a raised realistic look.
Round 1 (Petal foundation) :
Ch 8, sc in 2nd ch from hook and across (7 sc). Turn to work along other side: sc back across to form a flat oval, sl st to join into a ring of two-sided sc. (14 sc total)
Round 2 :
Ch 1, 1 sc in each sc around (14 sc). Mark the top center stitch for shaping reference.
Round 3 :
Ch 3 (counts as dc), dc in same st, 1 dc in next 3 sts, tr in next 2 sts, dc in next 3 sts, 2 dc in last st; on reverse side mirror: 2 dc, dc x3, tr x2, dc x4; join to form pointed petal shape (counts approx 18-20 stitches shaped)
Info :
Round 3 uses taller stitches at the center to create a raised ridge—block each petal while damp and pin along the center to create a natural vein.
Round 4 :
Ch 1, sc evenly around petal edge to tidy; 1 sc in each stitch and 2 sc in each corner where necessary for smooth curve. Join and fasten off leaving long tail for sewing. Make 10 petals for an outer layer and 10 for an inner layer (smaller ch foundation of ch 6 for inner petals, otherwise work identical rounds but omit a row of dc to reduce size).
Round 5 :
For inner (smaller) petals: ch 6, repeat foundation and Round 2 as above; Round 3: ch 3, dc x2, tr x1, dc x2 across then mirror—finish with sc edge. Fasten off leaving long tail. Create 10 small petals per flower.
Info :
Make all petals for all flowers before assembly. Blocking is essential: pin each petal with center ridge raised and steam or wet-block lightly. This gives the petals the crisp, realistic shape seen in the photos.
Round 6 (Assembly of outer layer) :
Arrange 10 large petals in a circle, overlapping slightly at their bases. With a long tail and yarn needle sew through petal bases: stitch across the bottom of each petal and through next petal to stabilize, forming a flat ring. Hold petals slightly cupped as you sew so the flower sits dimensional. Tighten thread to create a slight cupping (no counted stitches here—center opening approx 2-3cm).
Round 7 (Attach inner layer) :
Position 10 small petals on top of large layer in the gaps between large petals (offset). Sew the smaller petal bases to the central ring created previously, attaching through the same foundation stitches so the layers are secure. Fasten off and weave ends into back of flower.
Info :
For an extra raised center, sew a small disk of felt to the center back of the flower then attach beads or crocheted cluster to felt before sewing the whole flower to the base motif. This hides stitches and secures beads cleanly.
— Poinsettia Center Beads :
Round 1 :
Thread 7-10 small gold beads onto yarn tail before closing center, or crochet a small bead cluster: mr, 6 sc into ring (6), ch 1 and sl st to form small tight disk. Fasten off leaving tail to sew to center. If using beads, stitch each bead to center with a few passing stitches to anchor.
Info :
If using sewn beads, place them tightly together in a circular cluster of 7 beads (one center bead, six surrounding), and stitch through them multiple times for security. Alternatively, use metallic yarn and tiny bullion knots or French knots (with embroidery floss) to create a similar look.
— Pinecone (Make 2-3 pinecones per motif) :
Info :
Pinecones are created by working spiral layers of overlapping puff or bobble stitches that are folded and seamed into a cone. The sample pinecones are small (approx 2.5-3" long) and worked in warm brown yarn. You can optionally insert a little scrap yarn core for stability.
Round 1 (Cone core) :
Using Brown, mr, ch 1, 6 sc in mr (6). Pull tight and join. This will form the top tip of the cone. Do not stuff heavily.
Round 2 :
Ch 1, inc in each st around (12)
Round 3 :
Ch 1, (1 sc, inc) x 6 (18)
Info :
These rounds make a small tapered neck. Keep the rounds tight; if you want a longer cone, repeat increases once more before starting scale rounds.
Round 4 (Scale base round) :
Ch 1, sc in same st, *skip next st, 5 dc in next st (a puff-style scale), skip next st, sc in next st*; rep around (6 scales). Join. (approx 24 sts when counting sc anchors)
Round 5 :
Ch 1, sc into each sc anchor, and place scales in offset positions above previous: *sc, sl st into center of next scale to sew it in place, sc in next sc anchor*; join. This secures round 4 scales.
Round 6 :
Ch 1, *sc across small anchors, 5 dc in next sc anchor to form next row of scales (offset)*; rep around forming a spiral of scales. (Approximately 24-30 scale stitches depending on spacing)
Round 7 :
Repeat Round 6 for 2-4 additional rows until the cone reaches desired length (approx 6-8 rows of scales total including first scale round). Fasten off leaving a long tail; fold cone slightly and stitch through the back of scales to shape a natural pinecone curve.
Info :
For deeper texture use bobbles instead of simple 5-dc scales: make 5-dc clusters with a final yarn over pull-through to form a small bobble, then secure with sl st. Alternatively, make elongated puff stitches for a rounder scale.
— Small Leaves, Sprigs and Berry Clusters :
Info :
These details are worked in various greens and a small red for berries. Leaves are worked individually then sewn to the base. Use variegated olive yarn for a natural look on sprigs. Each motif has many small fern-like sprigs; plan to make approx 20 small leaves and 8 sprigs per motif.
Leaf Round 1 (Small leaf) :
Ch 8, sc in 2nd ch from hook across to create a two-sided oval foundation (14 sc across both sides). Join as a ring. (14 sc)
Round 2 :
Ch 1, (sc, hdc, 2 dc, 2 tr, 2 dc, hdc, sc) across the top side; on the reverse side mirror stitches back to the starting point; join and fasten off leaving tail for sewing. This forms a single small pointed leaf. Make multiples in two shades of green.
Info :
Sprigs are made by chaining a central spine then attaching tiny leaves worked as short clusters into spine stitches (use surface slip stitching or sewn-on small leaf units). Keep counts consistent: make sprigs with 1 spine of ch 12 and attach 6 small leaves along it.
Sprig Construction :
Ch 12, starting in 2nd ch from hook sl st to create a thin cord; into selected chs along spine, make small leaves by: (sc, 2 dc, sc) into a single ch to simulate a tiny leaf; make 6 leaflets along spine; fasten off and weave in ends.
Berry Cluster :
Make small berry bobbles in red: mr, 6 hdc into ring (6), ch 1, 6 sc around (6), fasten off leaving tail to sew as tight clusters of 3-5 berries. Alternatively use small red beads sewn into place.
Info :
Create a selection of leaves and sprigs in different greens and sizes. Spread them around each motif to create the lush effect seen in the photo. Attach small berries in groups of 3 to add color contrast.
— Large Leaves (Under Poinsettia) :
Round 1 :
Ch 10, sc across foundation both sides to make oval base (18 sc). Join. (18)
Round 2 :
Ch 1, sc in each st, then on top center work 4 dc, tr, 4 dc to create a strong raised midrib and curve. Mirror on other side and join. (approx 22-24 sts)
Round 3 :
Ch 1, 1 sc in each st, then bloom outer edge with hdc/dc clusters: *(hdc, dc, hdc) in next st, sc next st* repeat around for defined edge. Join and fasten off. Make 6-8 large leaves per motif in dark greens.
Info :
Large leaves create the dark backdrop under the poinsettia. Place them radially under the flower so that petals sit on top and leaves peek out between petals for contrast.
— Joining Motifs and Placement :
Info :
Decide your runner length and arrange base motifs edge-to-edge; the scalloped diamonds interlock visually when their points meet. Before sewing, lay out motifs on a flat table and arrange embellishments (poinsettia, pinecones, leaves) to check balance and spacing.
Round 1 (Joining Preparation) :
With motifs blocked, align them with scallop peaks touching. On the back, mark seam positions every 6-8 stitches to match scallop anchors. Use pins to hold motifs together along the seam.
Round 2 (Whip Stitch Join) :
Using Forest Green yarn and a yarn needle, whip stitch through corresponding edge loops of adjacent motifs. Make small evenly spaced stitches to create a decorative seam. Work through two layers at a time to ensure stability. Tie off and weave ends. Repeat for entire runner length.
Info :
For an invisible join, use a mattress stitch through the back loops only. If you prefer a chain join, use the crochet hook to sc through both motifs in matched edge stitches for a sewn-on look.
Round 3 (Securing Embellishments) :
Use matching yarn tails to sew poinsettias to the centers of alternate motifs (or center of each motif as pictured). Attach pinecones in clusters between flowers: sew pinecone base to base motif near seam so they look nestled within foliage. Sew all leaves and sprigs to the base, securing with multiple passes through both piece and base to keep them flat and secure.
Info :
When positioning, offset the large poinsettias so they cascade down the center line: center, then slightly offset to one side for alternate motifs to get the 'cascade' feel shown. Use pins to experiment with placement before stitching permanently.
— Decorative Edge and Final Border :
Round 1 :
With Forest Green, pick up border around entire joined runner edge: ch 1, sc evenly around all edges (work approx 1 sc per 4 mm of edge spacing), placing 3 sc in each outer scallop peak to maintain shape. Join at end and do not fasten off.
Round 2 :
Ch 3, *(skip 1, 5 dc in next st, skip 1, sl st into next sc) repeat along scallop edge to create pointed green scallops; along straight joins use 3 dc clusters spaced evenly. Join and fasten off. Weave in ends.
Info :
Work the border carefully and count clusters to keep symmetry. Add a final slip-stitch scallop round if you prefer a tighter picot finish. Light blocking again will help the border sit flat and neat.
— Optional Surface Embroidery and Accent Stitches :
Info :
To add the fine fern veins and berry stems, use surface slip stitch or thin embroidery thread on top of leaves. For berry stems, a strand of dark red french knots or 3D crochet bobbles add realism. Work these after all pieces are sewn into place so you can see the exact placement.
Round 1 (Surface Vein) :
With contrasting olive, use a yarn needle to couch a long stem yarn down the center of each sprig and attach with small whip stitches. Add small red berry bobbles by sewing small red felted balls or crocheted tiny bobble clusters along stem junctions.
Info :
Surface embroidery is optional but greatly increases the realism. Use lighter and darker green tones for depth. When stitching on petals, only use long running stitches over felt or a sewn-in backing to avoid visible stitches on the front.
— Finishing and Blocking :
Info :
After assembly, pin the entire runner to a blocking board and spray lightly with water. Shape petals and leaves by pinning them slightly raised and allow to dry fully. Gently steam the petals with an iron held above (do not press directly) to set shape if using cotton-blend yarn.
Round 1 :
Check all joins and reinforce any weak spots with additional small stitches. Trim all loose ends close to the work and weave tails into the back of pieces to maintain a clean front appearance.
Info :
Attach beads or small brass pins to flower centers only after the runner is fully blocked and dry. This prevents beads from distorting the shape during blocking. Secure beads with multiple passes of thread and a knot; dab a tiny drop of fabric glue for extra security if gifting.
— Notes on Scaling, Yarn Substitution and Customizing :
Info :
To scale the runner up or down, change yarn weight and hook size. Thicker yarns (worsted #4) will produce a chunkier runner with larger motifs; adjust counts slightly and always make a gauge motif first. You can change poinsettia color to white or cream for a more subtle look or use metallic beads for extra holiday sparkle.
Info :
If you prefer a flatter runner for heavy tableware, reduce the number of scale rows on pinecones and flatten petals slightly during blocking. For a more dramatic 3D look, add an extra layer of small petals and use a small felt disc between layers to build height.
This Christmas Rose and Pinecone Cascade Table Runner brings festive elegance to any table—layered poinsettias, sculpted pinecones and delicate evergreen sprigs combine in a beautiful seasonal statement. Each motif is a small work of art that, when joined, becomes a long, luxurious centerpiece perfect for holidays or special dinners. The construction is modular so you can scale to any table length and add personalized accents like beads or tiny ornaments. Enjoy the calming rhythm of creating each petal and sprig and savor draping your finished runner across your holiday table! 🎄✨