About This Chunky Chain Crochet Pattern
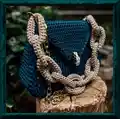
This pattern guides you step-by-step to crochet a chunky chain made from 2 mm cord, ideal for bag handles or necklaces. It uses basic stitches—chain, slip stitch, and single crochet—so you can finish quickly with a polished result. The finished links are sturdy and neat, with a small base trim to hide ends and secure the shape.
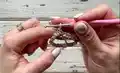
Perfect for beginner crocheters and crafters who love quick, functional projects. Photos and clear notes help you finish each link consistently and securely.
Why You'll Love This Chunky Chain Crochet Pattern
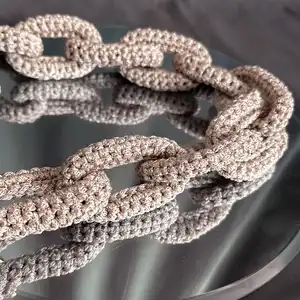
I absolutely love this pattern because it transforms simple cord into a bold, wearable accessory with minimal stitches. I enjoy how quickly a single link comes together and how satisfying it is to join links into a full chain. The design is practical — strong enough for a bag handle but pretty enough to use as a necklace. I find the finishing steps (pulling and hiding the ends, base trim) give a professional look that makes the chain feel like a handmade luxury.
Switch Things Up
I love experimenting with different cord colors to change the whole look; try contrasting colors for each link or an ombre set for subtle shifts.
Want a chunkier link? Use a thicker cord and a larger hook — the chain will become bolder and more sculptural.
Prefer a daintier version? Use thinner cord and a smaller hook to create a delicate chain perfect for pendants or light jewelry.
I often add metal or wooden beads inside the loops before closing a link to introduce texture and weight.
Try pairing your crocheted chain with a real metal chain for mixed-material straps that feel modern and durable.
For a soft wearable, sew a thin fabric lining to the interior of each link to protect delicate clothing when used as a bag handle.
Experiment with different finishes: some cords seal beautifully with a lighter, others look better finished with a dab of fabric glue and tucked ends.
I sometimes attach a lobster clasp or snap hook at each end so the chain is removable and interchangeable between bags.
To make a statement piece, join more links and double up layers, or vary link lengths to create an asymmetrical design.
If you like color blocking, crochet every other link in a different shade for a playful, graphic effect that stands out.
I like to embroider small initials on a flat panel before joining if I want to personalize a handle or create a custom gift.
Finally, switch up the stitch for texture — try HDC or DC rows for a taller link profile if you want more height in each link.
Common Mistakes & How to Fix Them
✗ Skipping the stitch marker can make it hard to tell the start of the row; place a marker in the first SC of each row to keep your counts accurate.
✗ Pulling the cord too tightly when joining the chain creates a distorted link shape; maintain even tension and gently shape each link before finishing.
✗ Not pulling the end through enough loops when hiding it may cause it to slip out later; pull the end through several loops of the first row and secure before cutting and sealing.
✗ Forgetting to use the back loop only for the base trim results in a bulky edge; insert the hook in the back loop only to keep the trim flat and tidy.