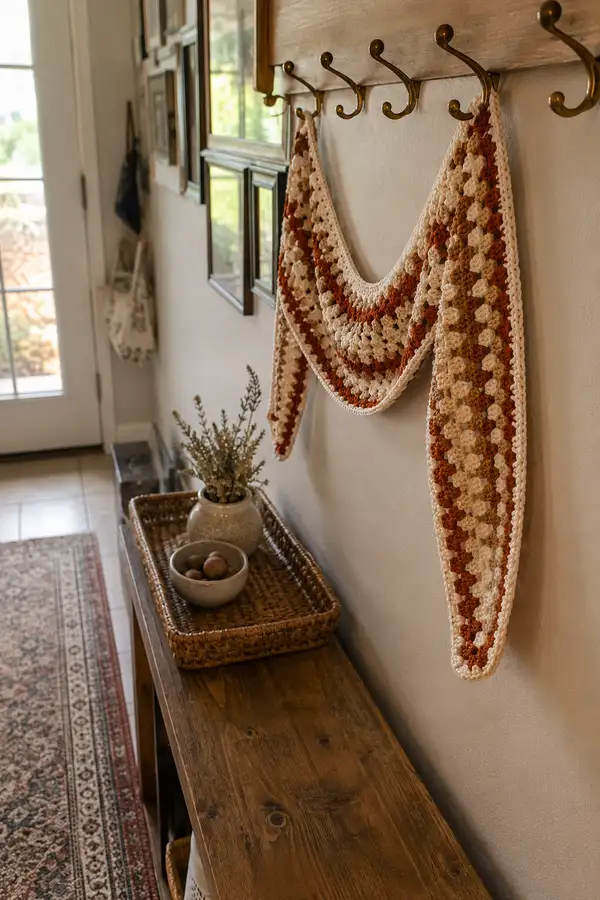
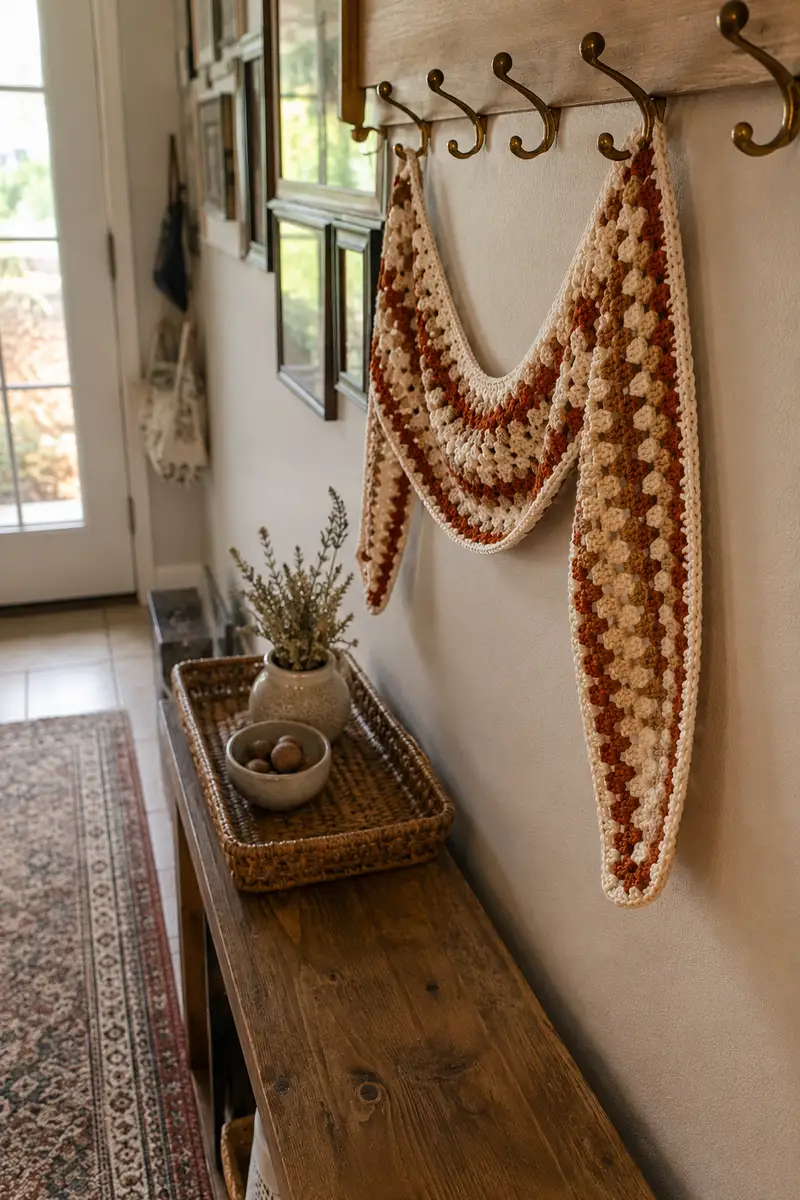
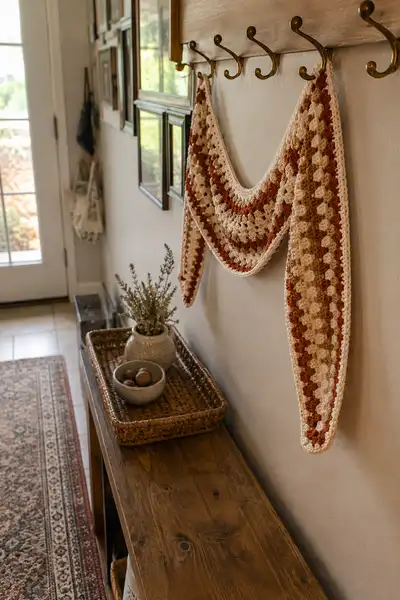
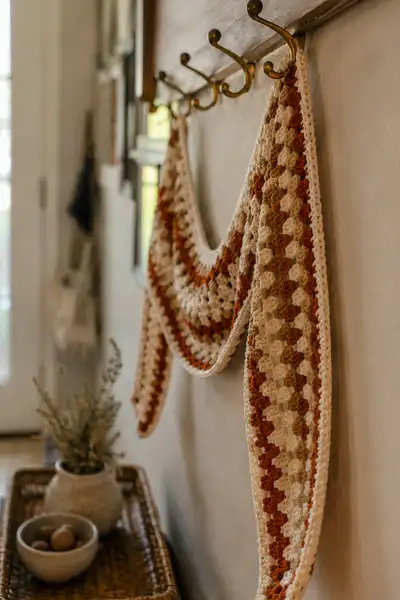
A warm, vintage-inspired granny stripe table runner in cinnamon, cream, and golden hues. This long tapered runner features classic 3-dc granny clusters worked in rows with gradual increases and decreases to create the soft, draped tails and a wide center panel. Finished with a neat single crochet border and optional hanging loops, it adds autumnal charm to a hallway, table, or mantle.
Progress Tracker
0% Complete
— Notes & Gauge :
Info :
This runner is worked flat in rows using classic 3-dc granny clusters (shells) with ch-1 spaces between shells. Stitch gauge for granny cluster rows will vary by tension; expect approximately 10 shells across = ~6-7 inches using 5.0mm hook and worsted yarn. Adjust starting chain if you prefer a wider or narrower runner.
Info :
Terminology: I refer to each 3-dc group as a 'shell'. When I list counts I use the number of shells in that row rather than raw stitches (each shell occupies roughly 3 double crochets plus ch1 spacing). Keep a stitch marker at the first shell of each row.
— Construction Overview :
Info :
You will make the runner as one long flat panel that begins with a narrow tapered tail, increases to a wide center panel, then decreases into a mirrored tapered tail. The color sequence repeats create the cinnamon swirl striping. After the panel is complete, work a single crochet border all around to tidy edges and add hanging loops if desired.
— Materials & Starting Instructions :
Info :
Choose three colors: Color A = Cream (main), Color B = Cinnamon (rust), Color C = Golden Amber (mustard). We'll refer to rows as 'Round X' for continuity; these are actually rows worked back and forth.
Round 1 :
Start: With Color A, ch 12. Turn. This foundation is the very narrow tail tip - we begin with four shells over the following rows. Pattern uses the base width measured in shells; this initial minimal chain is intentionally short to create a tapered tip (approx 3-4 shells start).
Round 2 :
Row 1 - Establishing first shells: With Color A, work shell (3 dc) into 4th chain from hook to make the first shell, ch1, skip next 3 ch, shell in next ch, ch1, shell in last ch. You should have 3 shells (3). This is the very tip of the tapered end.
Info :
Tip: Count shells rather than chains at the end of each row. Add a small stitch marker to the first shell to mark the row start.
Round 3 :
Row 2 - Increase to create taper: Turn. Ch3 (counts as first dc of shell), work 2 dc into the same turning space to complete a shell at the start, ch1, shell into each ch-1 space across. End with a shell in the last chain space. Total shells: 4 (4).
Round 4 :
Row 3 - Continue taper: Turn. Join Color A if changed. Work shell in turning chain to increase at the tip and shell in each ch-1 across. Total shells: 5 (5).
Info :
To increase the taper evenly, add one shell approximately every row for the first portion until you reach 12 shells. Keep turning chains consistent: ch3 at start counts as first dc of the first shell.
Round 5 :
Row 4 - Shell count: Work as previous row. Total shells: 6 (6).
Round 6 :
Row 5 - Shell count: Work as previous row. Total shells: 7 (7).
Round 7 :
Row 6 - Shell count: Work as previous row. Total shells: 8 (8).
Round 8 :
Row 7 - Shell count: Work as previous row. Total shells: 9 (9).
Info :
Color striping begins: we will do a 2-row repeat for each accent color band (two rows of each accent color then a row of cream to separate). Carry unused yarn along the side or fasten off and weave ends - I prefer fastening off at color changes for cleaner stripes.
Round 9 :
Row 8 - Color change to Color B (Cinnamon): Fasten off Color A if you prefer. Join Color B in the first shell. Work shell into the first space as before, ch1, shell across. Total shells: 10 (10).
Round 10 :
Row 9 - Keep Color B: Turn, work 10 shells across (10). End row. This completes a two-row cinnamon band (one of two rows).
Round 11 :
Row 10 - Color A (Cream): Return to Color A. Turn, work 10 shells in Color A (10). This gives a cream separating row.
Info :
When changing colors, join in the first shell's turning space with a slip stitch and then ch3 to begin the first shell. Fasten off previous color and weave tails later in blocks or as you go for neatness.
Round 12 :
Row 11 - Increase: Continue tapering by adding one shell at beginning of row: Work first shell into turning chain, then shells across. Total shells: 11 (11).
Round 13 :
Row 12 - Shell count: 12 shells (12).
Round 14 :
Row 13 - Color change to Color C (Golden Amber): Join Color C. Work 12 shells in Color C (12).
Round 15 :
Row 14 - Keep Color C: Work 12 shells in Color C (12).
Round 16 :
Row 15 - Color A: Work 12 shells in Color A (12).
Info :
At this point you are building the tapered tail. Continue increasing by ~1 shell every row until you reach the planned half-width. I recommend increasing until you reach 38-42 shells for a generous center width. The instructions below will give a structured increase schedule to reach 40 shells across the center.
Round 17 :
Row 16 - Increase: Work 13 shells (13).
Round 18 :
Row 17 - Work 14 shells (14).
Round 19 :
Row 18 - Work 15 shells (15).
Round 20 :
Row 19 - Work 16 shells (16).
Info :
Keep alternating colors in 2-row accent bands: after every 2 rows of an accent color, work 1 row of cream Color A. This creates the cinnamon swirl stripe effect visible in the photo.
Round 21 :
Row 20 - Color B: Work 17 shells in Color B (17).
Round 22 :
Row 21 - Color B: Work 17 shells in Color B (17).
Round 23 :
Row 22 - Color A: Work 17 shells in Color A (17).
Round 24 :
Row 23 - Increase: Work 18 shells (18).
Round 25 :
Row 24 - Work 19 shells (19).
Round 26 :
Row 25 - Color C: Work 19 shells in Color C (19).
Round 27 :
Row 26 - Color C: Work 19 shells (19).
Round 28 :
Row 27 - Color A: Work 19 shells (19).
Info :
Every 6-10 rows, step back and check that both sides of the panel are growing at the same rate. The taper should be smooth; if you see jumps, slow increases to every other row instead of every row.
Round 29 :
Row 28 - Increase: Work 20 shells (20).
Round 30 :
Row 29 - Work 21 shells (21).
Round 31 :
Row 30 - Color B: Work 21 shells in Color B (21).
Round 32 :
Row 31 - Color B: Work 21 shells (21).
Round 33 :
Row 32 - Color A: Work 21 shells (21).
Round 34 :
Row 33 - Increase: Work 22 shells (22).
Round 35 :
Row 34 - Work 23 shells (23).
Round 36 :
Row 35 - Color C: Work 23 shells in Color C (23).
Info :
Keep track of shell counts so your increase cadence remains even. If you'd like a slightly shorter runner, begin tapering the opposing tail earlier by stopping increases sooner and starting decreases.
Round 37 :
Row 36 - Work 24 shells (24).
Round 38 :
Row 37 - Work 25 shells (25).
Round 39 :
Row 38 - Color B: Work 25 shells (25).
Round 40 :
Row 39 - Color B: Work 25 shells (25).
Round 41 :
Row 40 - Color A: Work 25 shells (25).
Round 42 :
Row 41 - Increase: Work 26 shells (26).
Round 43 :
Row 42 - Work 27 shells (27).
Round 44 :
Row 43 - Color C: Work 27 shells (27).
Info :
We are now entering the approach to full center width. Continue increases by one shell every 1-2 rows until you reach your target center shell count (40 shells recommended for a wide runner). The example schedule below leads to 40 shells over the next set of rows.
Round 45 :
Row 44 - Work 28 shells (28).
Round 46 :
Row 45 - Work 29 shells (29).
Round 47 :
Row 46 - Color B: Work 29 shells (29).
Round 48 :
Row 47 - Work 30 shells (30).
Round 49 :
Row 48 - Color A: Work 30 shells (30).
Round 50 :
Row 49 - Work 31 shells (31).
Round 51 :
Row 50 - Color C: Work 31 shells (31).
Round 52 :
Row 51 - Work 32 shells (32).
Round 53 :
Row 52 - Color B: Work 32 shells (32).
Round 54 :
Row 53 - Work 33 shells (33).
Round 55 :
Row 54 - Color A: Work 33 shells (33).
Info :
If at any point your row starts to look too wide or too narrow, add or skip an increase in the next row to balance the shape. The visual in the photo shows a gentle, smooth increase—avoid large jumps.
Round 56 :
Row 55 - Work 34 shells (34).
Round 57 :
Row 56 - Work 35 shells (35).
Round 58 :
Row 57 - Color B: Work 35 shells (35).
Round 59 :
Row 58 - Work 36 shells (36).
Round 60 :
Row 59 - Color A: Work 36 shells (36).
Round 61 :
Row 60 - Work 37 shells (37).
Round 62 :
Row 61 - Color C: Work 37 shells (37).
Round 63 :
Row 62 - Work 38 shells (38).
Round 64 :
Row 63 - Color B: Work 38 shells (38).
Round 65 :
Row 64 - Work 39 shells (39).
Round 66 :
Row 65 - Color A: Work 39 shells (39).
Round 67 :
Row 66 - Increase to final center width: Work 40 shells (40). This completes the final increase into the center panel width.
Info :
Center Panel: From this point we'll hold steady at 40 shells across for the broad, middle section of the runner. This creates the drape seen across the hooks in the photo. Work 36-42 rows at constant width depending on desired length of the center.
Round 68 :
Row 67 - Color B: Work 40 shells in Color B (40).
Round 69 :
Row 68 - Color B: Work 40 shells (40).
Round 70 :
Row 69 - Color A: Work 40 shells (40).
Round 71 :
Row 70 - Color C: Work 40 shells (40).
Round 72 :
Row 71 - Color C: Work 40 shells (40).
Round 73 :
Row 72 - Color A: Work 40 shells (40).
Round 74 :
Row 73 - Work 40 shells (40).
Round 75 :
Row 74 - Color B: Work 40 shells (40).
Round 76 :
Row 75 - Color B: Work 40 shells (40).
Info :
Continue this repeat for a total of 36-40 rows at 40 shells wide for a substantial center drape. The sample pictured has approximately 40 rows at center width, giving generous length to the tails. Adjust the number of center rows to change overall runner length.
Round 77 :
Row 76 - Color A: Work 40 shells (40).
Round 78 :
Row 77 - Color C: Work 40 shells (40).
Round 79 :
Row 78 - Color C: Work 40 shells (40).
Round 80 :
Row 79 - Color A: Work 40 shells (40).
Round 81 :
Row 80 - Color B: Work 40 shells (40).
Round 82 :
Row 81 - Color B: Work 40 shells (40).
Round 83 :
Row 82 - Color A: Work 40 shells (40).
Info :
When your center section reaches the desired length, begin the mirrored decrease to create the second tapered tail. Mirror the increases used at the beginning but in reverse: remove approximately 1 shell every 1-2 rows to achieve the same gentle taper.
Round 84 :
Row 83 - Begin decrease: Work 39 shells (39).
Round 85 :
Row 84 - Work 38 shells (38).
Round 86 :
Row 85 - Color B: Work 37 shells (37).
Round 87 :
Row 86 - Work 36 shells (36).
Round 88 :
Row 87 - Color A: Work 35 shells (35).
Round 89 :
Row 88 - Work 34 shells (34).
Round 90 :
Row 89 - Color C: Work 33 shells (33).
Round 91 :
Row 90 - Work 32 shells (32).
Round 92 :
Row 91 - Color B: Work 31 shells (31).
Round 93 :
Row 92 - Work 30 shells (30).
Round 94 :
Row 93 - Color A: Work 29 shells (29).
Round 95 :
Row 94 - Work 28 shells (28).
Round 96 :
Row 95 - Color C: Work 27 shells (27).
Info :
As you approach the tail tip, you may wish to speed decreases to remove 2 shells on some rows to create a slightly quicker taper. Keep mirroring the color striping pattern so stripes match visually on both tails.
Round 97 :
Row 96 - Work 26 shells (26).
Round 98 :
Row 97 - Work 25 shells (25).
Round 99 :
Row 98 - Color B: Work 24 shells (24).
Round 100 :
Row 99 - Work 23 shells (23).
Round 101 :
Row 100 - Color A: Work 22 shells (22).
Round 102 :
Row 101 - Work 21 shells (21).
Round 103 :
Row 102 - Color C: Work 20 shells (20).
Round 104 :
Row 103 - Work 19 shells (19).
Round 105 :
Row 104 - Color B: Work 18 shells (18).
Round 106 :
Row 105 - Work 17 shells (17).
Round 107 :
Row 106 - Color A: Work 16 shells (16).
Round 108 :
Row 107 - Work 15 shells (15).
Round 109 :
Row 108 - Color C: Work 14 shells (14).
Round 110 :
Row 109 - Work 13 shells (13).
Round 111 :
Row 110 - Color B: Work 12 shells (12).
Round 112 :
Row 111 - Work 11 shells (11).
Round 113 :
Row 112 - Color A: Work 10 shells (10).
Round 114 :
Row 113 - Work 9 shells (9).
Round 115 :
Row 114 - Color C: Work 8 shells (8).
Round 116 :
Row 115 - Work 7 shells (7).
Round 117 :
Row 116 - Color B: Work 6 shells (6).
Round 118 :
Row 117 - Work 5 shells (5).
Round 119 :
Row 118 - Color A: Work 4 shells (4).
Round 120 :
Row 119 - Work 3 shells (3).
Info :
Finalize taper: Fasten off and weave in the final tails of yarn securely. Press or block gently to even out the fabric before edging. The panel should now have two tapered tails and a wide central panel.
— Edging :
Info :
We will crochet a tidy single crochet border around the entire panel to straighten edges and add weight. Use Color A (Cream) for a clean finish. Work single crochet stitches evenly into ends of shells and into chain spaces along sides. Use a 4.0mm hook for a slightly neater border if desired.
Round 121 :
Join Color A at one corner tail tip with a sl st. Ch1, work 3 sc evenly into the tip area to create a rounded point (3 sc).
Round 122 :
Along the first short row edge (end of the shells), work 1 sc into each ch-1 space between shells. For the turning chains and shell tops, work 2 sc into each shell top to keep the border flat. Continue to next edge. Maintain counts approximately equal to the number of shells you pass.
Round 123 :
Along long sides: Work 1 sc into each ch-1 space between shells along the side edge. On the long straight sides there will be one sc per shell spacer. When you reach the center straight edge, work 2 sc into the turning chain points to negotiate the corner and keep the border flat.
Round 124 :
Work sc evenly around the opposite tail tip the same as the first tip: 3 sc into the tip curve, then continue sc along the opposite side. Join with sl st to the first sc. Total: 1 round of sc border complete (continuous).
Round 125 :
Optional second border row: Ch1, 1 sc in each sc around; work 2 sc in each corner tip to maintain shape (this gives a slightly thicker, framed edge). Fasten off and weave ends long enough to weave through the back of the border.
Info :
Hanging loops: If you plan to hang the runner over hooks as in the photo, add one or two small loops at the top center of the runner. Join yarn at the top center, ch 12 (or desired loop length), sl st back to the same spot, fasten off and weave ends. Space loops symmetrically if adding two.
— Finishing :
Info :
Weave in all ends using a yarn needle. Block the runner gently: pin to shape on blocking mat, spray lightly with water or use cloth and steam iron on low, allow to dry completely. Blocking helps shells sit flat and border look crisp.
Info :
Optional: Add small tassels or fringe to each tail tip for a boho look. Use matching Color B or C yarn; fold small lengths and attach with lark's head knots and trim even.
Info :
Care: Wash by hand or gentle cycle in cold water and reshape while damp. Lay flat to dry to keep the runner from stretching out of shape.
Completing this Cinnamon Swirl Granny Stripe Table Runner is such a cozy achievement — the warm cinnamon and golden stripes feel like autumn wrapped in yarn. The tapered tails give a graceful, draped silhouette, and the single crochet border ties everything together neatly. I love how a simple granny stitch repeat can feel both vintage and modern depending on color choices. Enjoy the process and display your runner with pride — your home will instantly feel warmer and more inviting! 🧶🍂