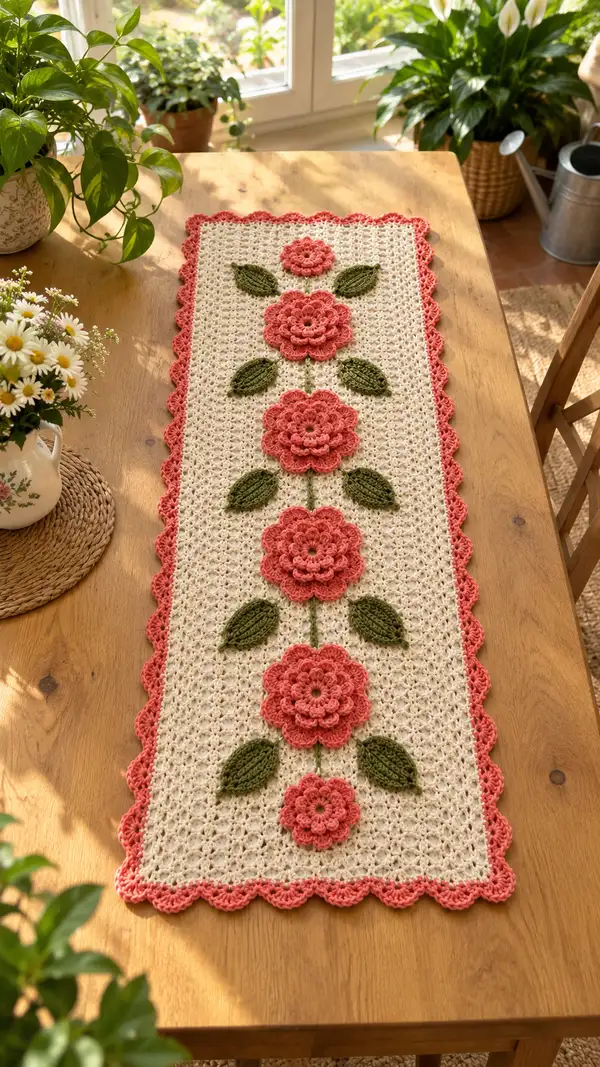
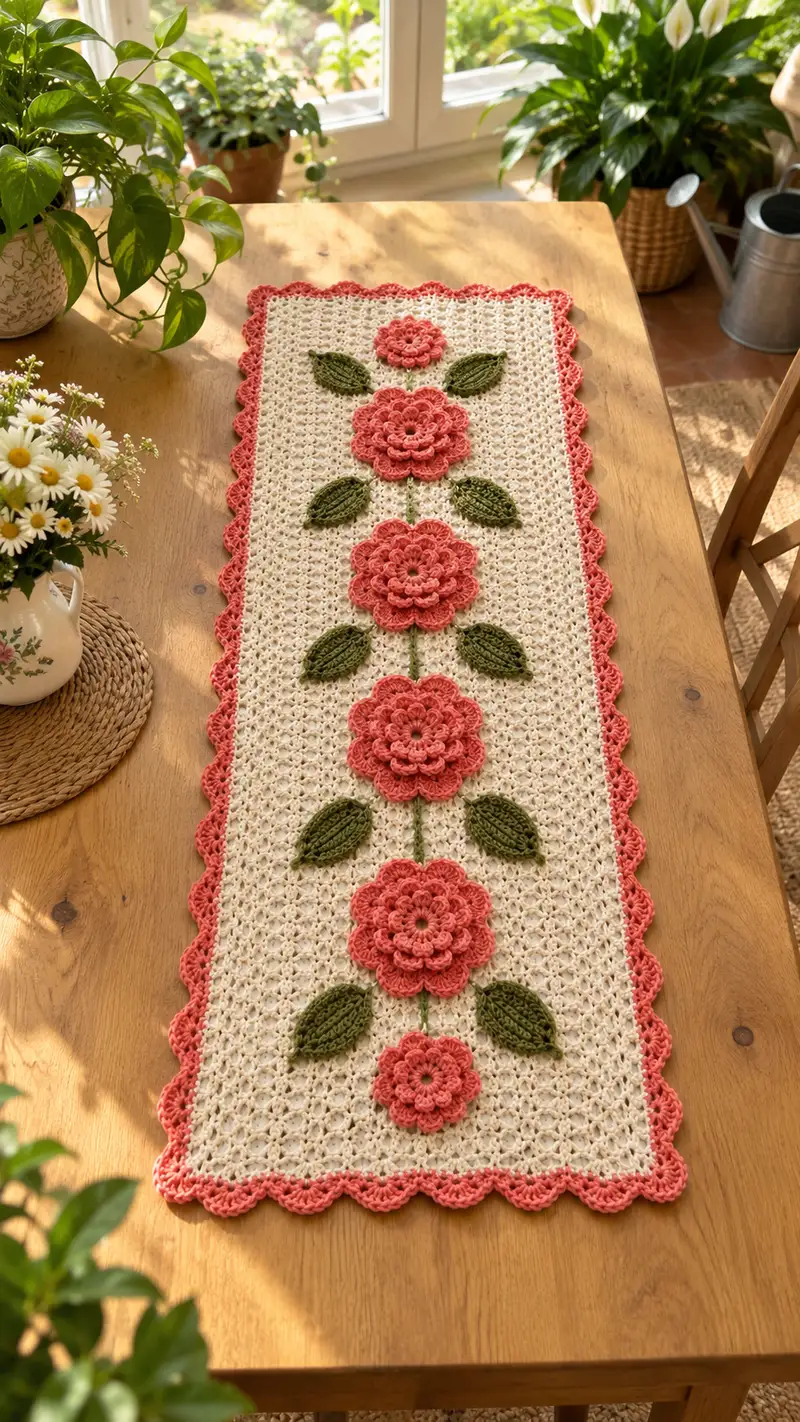
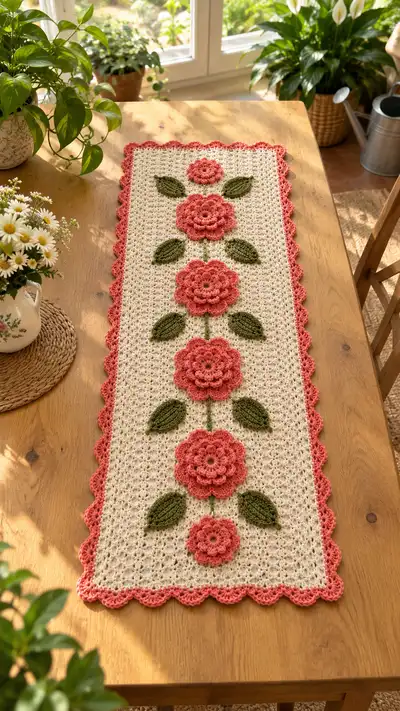
A charming rectangular table runner featuring a delicate lacy cream mesh, a vertical row of layered coral flowers, olive green leaves and a scalloped coral border. This pattern recreates the look of the photographed runner with clear step-by-step instructions and helpful tips for assembly and finishing. Ideal for dresser tops, dining tables, or as a welcoming centerpiece, the textured flowers and leaves add a handmade vintage touch to any room.
Progress Tracker
0% Complete
— Runner Panel (main rectangular mesh) :
Info :
Work the runner as a flat rectangular panel in rows (we call rows 'rounds' through this pattern to maintain consistency with the requested format). The foundation chain below creates the width seen in the photo. Gauge is not critical for length; keep stitches reasonably tight for crisp lace. Base stitch count (foundation points) is 121. You may adjust foundation chain in multiples of 6 to increase or decrease width; keep total foundation count odd for symmetry.
Round 1 :
Ch 121. Turn (counts as 121 foundation points). For foundation, work into each chain as indicated in the following rows; treat each chain as a base stitch for counts (121)
Round 2 :
Row 1 (setup) : Sc in 2nd ch from hook and in each ch across. (121)
Round 3 :
Row 2 : Ch 3 (counts as first dc), *skip next st, (dc, ch 1, dc) in next st (V-stitch made), skip next st; rep from * to last st, dc in last st. Base points remain 121 (visual V-stitches across)
Round 4 :
Row 3 : Ch 1, sc in each st and in each ch-1 space across to maintain base density. (121)
Round 5 :
Row 4 : Ch 3, *V-stitch (dc, ch1, dc) in every 2nd base point to form a staggered lacy mesh across; end with dc in last base point. (121 base positions)
Round 6 :
Row 5 : Ch 1, sc across into each stitch and ch-space to create a secure, even band. (121)
Round 7-10 :
Row 6-9 : Repeat Row 4 and Row 5 sequence twice more to build a steady openwork mesh. Work: (Row pattern: one sc row, one V-stitch row) x 2. (121)
Info :
Keep stitch markers at the first stitch of odd-numbered rows (start of each row) so that long edges remain straight; a long runner is prone to drift without markers.
Round 11-20 :
Work in pattern established: Alternate one sc row (ch1, sc across) and one V-stitch row (ch3, V-stitches across) for ten rounds total to lengthen panel. Maintain base count (121). This creates the lacy mesh center seen in the photograph. (121)
Info :
Check width after Round 20. If your runner is narrower than desired, add 6-chain multiples to foundation and repeat more mesh rows. The sample runner measures approximately 12-13 inches wide after blocking with ch121 when using worsted cotton and 3.5mm hook.
Round 21-30 :
Continue the alternating mesh: Rows 21-30 (repeat sc row, V-stitch row pattern) to reach mid-length for your runner. This will form the central third where several flower motifs will be attached. (121)
Info :
At the midline you will place the central flower sequence. Count rows so the five main flowers are centered vertically — the sample layout places one small flower at each end and five large flowers spaced evenly, so plan spacing roughly every 8-10 mesh rows between flower centers.
Round 31-40 :
Continue mesh pattern rows to create the lower portion of the runner. Keep working alternating sc rows and V-stitch rows. (121)
Round 41-50 :
Repeat mesh rows as above. Work each odd-numbered row sc across; even-numbered rows V-stitch across with ch1 spaces as previously instructed. (121)
Info :
Measure your runner as you work. A typical length for the pictured runner is approximately 36-42 inches before edging. If you prefer a longer runner, continue repeating pairs of rows until you reach your desired length, keeping motifs spaced equally.
Round 51-56 :
Work 6 more mesh rows (3 sc rows and 3 V-stitch rows) to finish the panel portion. After Round 56, fasten off cream/ivory yarn leaving a long tail for attaching the scalloped border and motifs placement if desired. (121)
Info :
Block the panel flat now, pinning straight edges. Blocking evens out the lacy mesh and makes it much easier to attach flowers and leaves symmetrically. Allow to dry completely before assembly.
— Large Layered Flower (make 5) :
Info :
These are the coral layered flowers seen down the runner center. Work each flower in the round, layering petal rows to create the dimensional look. All rounds below begin in a magic ring unless noted. Use coral yarn and 3.25-3.5mm hook for springy petals. Make 5 identical large flowers.
Round 1 :
6 sc in magic ring. Pull ring tight. (6)
Round 2 :
Inc around (2 sc in each st) — 6 inc = 12. (12)
Round 3 :
(1 sc, inc) x 6 = 18. (18)
Round 4 :
(2 sc, inc) x 6 = 24. (24)
Round 5 :
(3 sc, inc) x 6 = 30. (30)
Info :
Rounds 1-5 create a sturdy disc that will act as the central base. Place a small contrasting stitch or safety pin at the center of Round 5 to help orient later petal rounds when layering.
Round 6 :
Ch 1, sc in same st, *ch 3, skip 1 st, sc in next st; rep from * around to form small ch-3 petal loops. (30 loops equivalent)
Round 7 :
Work 3-dc cluster petals in each ch-3 loop: (sl st into ch-space, ch 3 (counts as dc), 2 dc, ch 1, 3 dc) in each ch-3 loop, sl st to join between petals. This forms a 30-petal first layer. Maintain 30 petal positions visually.
Info :
Fasten off or continue without fastening if you want the next layer connected. For the photograph look, the layered petals are separate rows but attached on top of one another so leave a long tail to sew layers together if you fasten off.
Round 8 :
Attach yarn to the back of the flower base at the point between two petals to create a second petal layer offset from the first. Ch 1, sc around base for one round to anchor (30 sc). (30)
Round 9 :
Build a fuller petal by working (sl st into next st, ch 2, 5 dc in same st, ch 2, sl st in next st) across alternating points around to make 15 larger petals that sit between the inner petals. This uses every 2nd base stitch; visually you will create 15 large petals.
Round 10 :
Ch 1, *sc in back loops of petal base across to create a small ridge behind petals for lift; rep across. Fasten off and weave in tail or leave for sewing. This secures the second layer and produces depth.
Round 11 :
Optional decorative round: Rejoin yarn at petal tips and work 'picot' edging: *(sc, ch 3, sl st) into tip of each of the 15 large petals to accent edges. This makes the petals look crisp and scalloped like the photo. Fasten off. (15 picots)
Info :
When you stack petals, sew the second layer to Round 5 base using matched coral yarn and mattress whip stitches from the back to hold layers centralized. Don't pull too tightly; keep a little loft.
Round 12 :
Weave in ends and trim tails closely. Block each flower gently by pinning to a blocking mat to open petals into a circular rosette shape. Allow to dry before assembly. Make 5 of these for the runner center.
— Small Accent Flower (make 2) :
Info :
These small blooms are placed at both ends of the runner in the photo. They are similar to the large flower but compressed. Make 2 small flowers.
Round 1 :
6 sc in magic ring. (6)
Round 2 :
Inc around to 12 (12)
Round 3 :
(1 sc, inc) x 6 = 18 (18)
Round 4 :
Ch 1, *ch2, sl st into next st to create small loops; rep around to create 9 loops. This is the petal base for 9 small petals.
Round 5 :
In each loop work (3 dc, sl st) to form tight tiny petals. Fasten off and weave in ends. Make two small flowers.
Info :
Small flowers require minimal blocking; pin out if needed. Attach these at the runner ends to mirror the photographed placement.
— Leaf (make 10) :
Info :
Leaves are worked flat with increased/decreased rows to form the almond leaf shape. Use olive/leaf green worsted cotton and a smaller hook if you want tighter ribs. Make ten leaves overall: two leaves per large flower (top/bottom spacing) in the pictured layout and additional filler leaves as desired.
Round 1 :
Ch 11. (This creates 11 foundation chains for a medium-size leaf)
Round 2 :
Row 1: Sc in 2nd ch from hook, hdc in next, dc in next 3, hdc next, sc next 3, sl st last. (11 base positions across)
Round 3 :
Row 2: Turn, ch1, sc in first, inc in next (sc2tog? No, work 2 sc in next) to form a slight bulge, hdc in next, (dc, ch1, dc) in center ch to create the leaf ridge, hdc next, sc next, dec over last two to taper, sl st to finish. Count visually: leaf should have tapered ends and a raised center ridge.
Round 4 :
Row 3: Work around the edge with single crochet and slip st points to shape: sc evenly around outer edge of leaf adding 2 sc increments at the widest point to maintain curvature. Fasten off. Each leaf should measure approximately 2.5-3 inches long unblocked.
Info :
Create a central vein by running a line of hdc or surface slip stitch in contrasting green down the center of the leaf. You can also add 2-3 raised ridges using front post hdc along either side for the ribbed texture seen in the photo.
Round 5 :
Optional leaf ribbing: With right side up, join yarn at leaf tip and work FPdc (front post double crochet) rows along the length of the leaf with even spacing (3 ribs total) to add texture. Fasten off and weave ends into the back of leaf. Make 10 leaves.
— Stem (surface crochet connecting line) :
Info :
The stem linking flowers is made by a surface chain or slip stitch line worked directly on top of the panel after it is blocked. This produces the narrow green line visible in the photograph connecting flower centers. You will work the stem after flowers are tacked in place (or before sewing leaves) so it sits neatly centered.
Round 1 :
Using green yarn and a 3.25mm hook, join at the center point of the end-most flower where the stem should extend. Surface slip stitch along the mesh row centers from the top flower to the next, creating a continuous narrow line. Work steadily: insert hook from front to back at stitch base, pull up a loop, insert into next stitch from back to front and sl st to create a visible chain on the surface. Continue this for the full vertical length between flowers. The stem visually resembles a continuous line and does not change base stitch count.
Round 2 :
Secure stem yarn tails at the ends on the wrong side with small whip stitches using yarn needle. Add any tiny embroidered knots where petals meet the stem to hide joins.
Info :
If you prefer a raised stem, work a thin cord (i-cord technique) in green and sew it onto the panel rather than surface slip stitching. That gives a more dimensional stem that will match the depth of layered flowers.
— Attaching Flowers and Leaves (Layout and Sewing Rounds) :
Info :
Lay the blocked panel on a flat surface. Use pins to position the five large flowers evenly along the center vertical line with two small flowers at the ends. In the photo spacing is roughly one large flower every 7-8 mesh rows. Place two leaves around each large flower (one on either side, slightly angled) and a pair of leaves between the large flowers as filler. Pin precisely before sewing.
Round 1 :
Sewing step 1: Thread a length of coral yarn through a yarn needle. From the back of the panel, make evenly spaced whip stitches through the base disc rounds 4-6 of each large flower. Use small, close stitches so thread is not visible from the front. Anchor securely with 5-8 stitches in a circle; tie a small, flat knot on the wrong side and bury the tail.
Round 2 :
Sewing step 2: For the small flowers, use 4-6 anchor stitches around the base. Keep tension light to allow petals to keep their 3D appearance. If petals flare too flat, add a couple extra stitches behind the center to provide lift.
Round 3 :
Sewing step 3: Attach leaves with green yarn: position leaves between and beside flower centers as pictured. Sew the base of each leaf with 6-8 whip stitches, making sure the leaf curve hugs the mesh and that the leaf tip points outward. Hide knots on wrong side.
Info :
After sewing all motifs, double-check that petals are facing up and not twisted. Use a few reinforcing stitches in high-stress points (where a stem meets a flower) to ensure washability and stability.
— Scalloped Border / Shell Edging :
Info :
The scalloped coral border frames the runner and was worked in rounds along the outer rectangle. Work the edge after all motifs are attached and panel is blocked. The shell pattern below produces the scalloped, slightly ruffled coral edge from the photo.
Round 1 :
With coral yarn and 3.5mm hook, join at one corner on the right side by sl stitching through the edge stitch. Ch 1, evenly sc around the entire perimeter in the edge stitches and ch-spaces; place 3 sc in each corner to maintain shape. Count: the perimeter retains 121 base points along width; total stitches around will vary — work evenly placing about 8-10 sc per 1 inch of edge. Fasten off. This creates a uniform base for scallops.
Round 2 :
Join coral at the side you prefer to start scallops. *Skip 3 sc, shell in next sc: (5 dc in same st), skip 3 sc, sl st in next sc; rep from * around, placing shells evenly. Work 3 dc shells into the short end stitches to shape corners. This yields a regular scalloped edge; aim for 20-24 shells along long sides depending on spacing. Fasten off and weave ends.
Round 3 :
Optional: For a deeper scallop, add a small picot trim on top of each shell. Join yarn at shell tip, ch 3, sl st back into shell top to form a picot, sl st into next base stitch; rep across. Fasten off and weave in ends. The coral scallop should sit nicely raised and decorative.
Info :
If your scallops look heavy, reduce shell size to 3 dc instead of 5 dc. If they look small, use 7 dc shells. The photo uses medium-sized shells (5 dc) to achieve the distinct scalloped border.
— Finishing Touches & Blocking :
Round 1 :
Thoroughly weave in all loose ends, including from flowers, leaves, stem and border. Use a tapestry needle and weave tails through several stitches on the wrong side; trim close. Tidy any stray fuzz from cotton yarn for a clean look.
Round 2 :
Final blocking: Lay runner flat on a blocking mat. Gently shape scallops and allow flowers to sit slightly lifted by pinning petal tips lightly if desired. Mist lightly with water and allow to dry completely before unpinning. This ensures the mesh is flat and the scallop edges hold shape.
Info :
Optional: Add a thin spray starch to coral petals to make them hold shape permanently. This is tasteful for decorative runners that will not be laundered often.
— Variation Notes (Color, Size & Modification) :
Info :
You may change the coral to dusty pink, peach, or any color that complements your decor. To make a longer runner, simply add additional mesh row pairs (sc row + V-stitch row) in multiples of two to maintain pattern rhythm, and adjust spacing between flowers proportionally. For a table cloth center instead of a runner, increase foundation chain width in multiples of 6 and continue mesh rows until desired size.
This floral table runner combines lacy mesh, layered blooms, and a scalloped edge to create a sweet vintage-inspired centerpiece. Each section is modular so you can adapt length, color, or number of flowers for your space. Enjoy the calm, meditative rhythm of weaving mesh rows and creating petals, then watching everything come together during assembly. The finished runner adds warmth and character to any table setting — a true handmade treasure. 🌸🧶