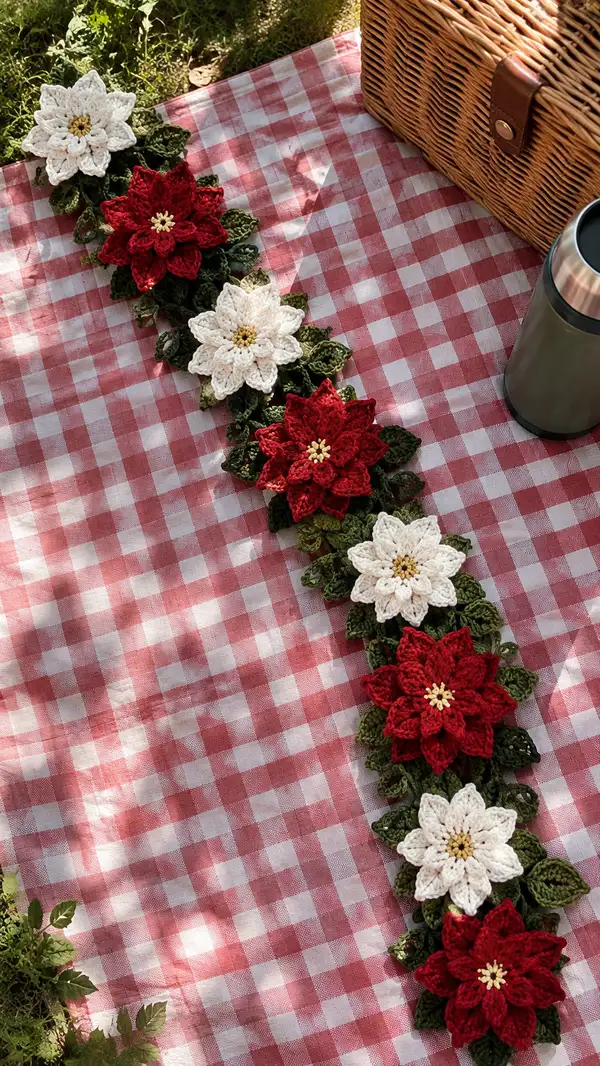
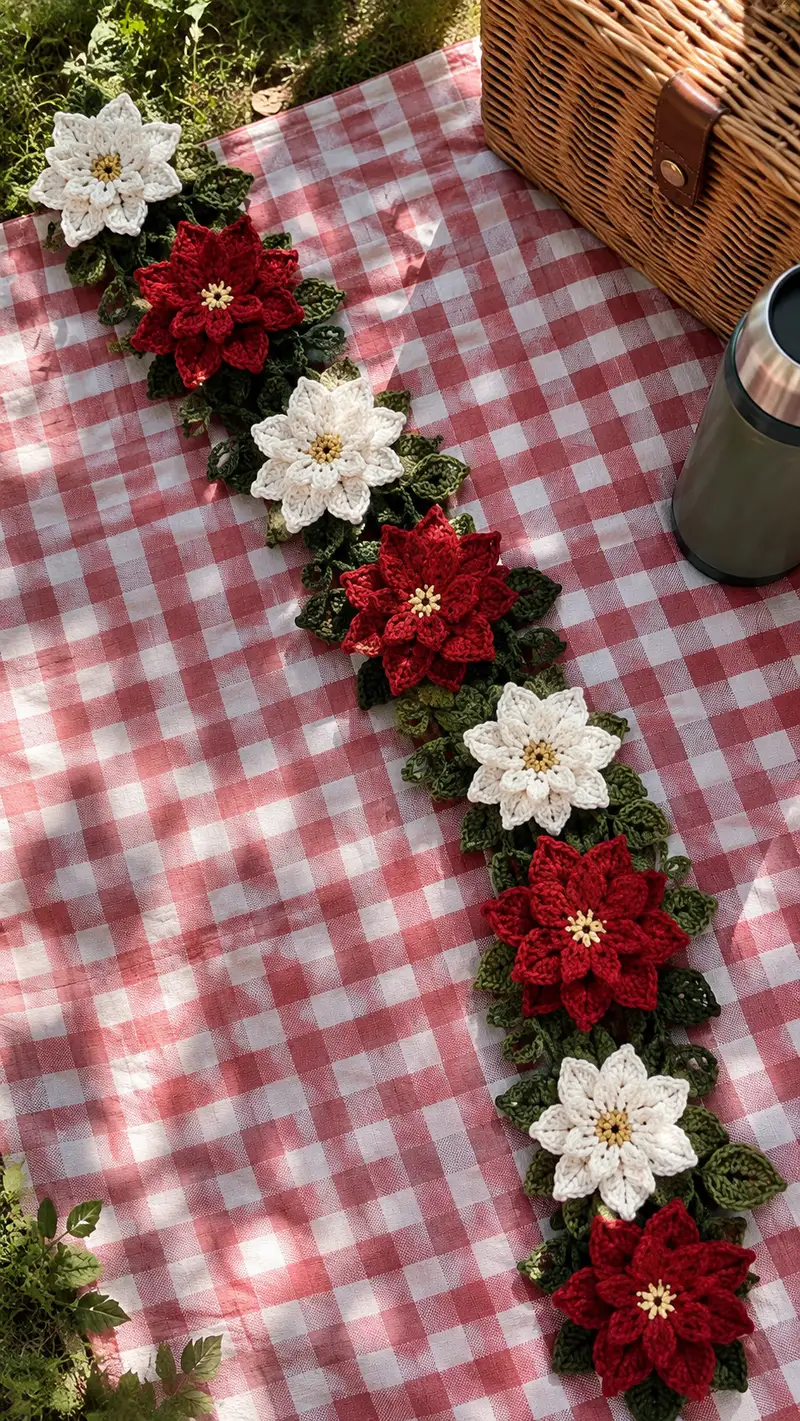
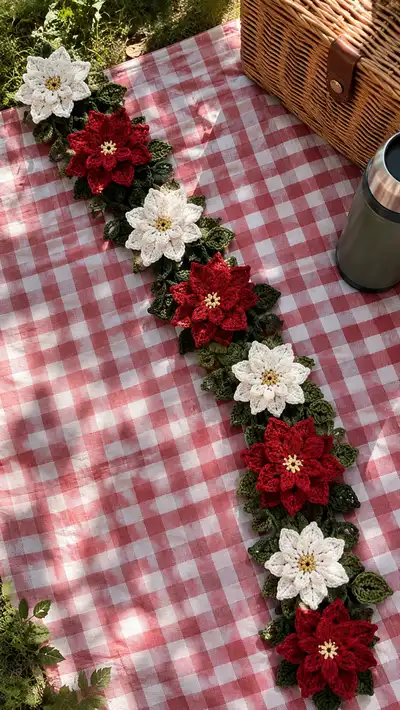
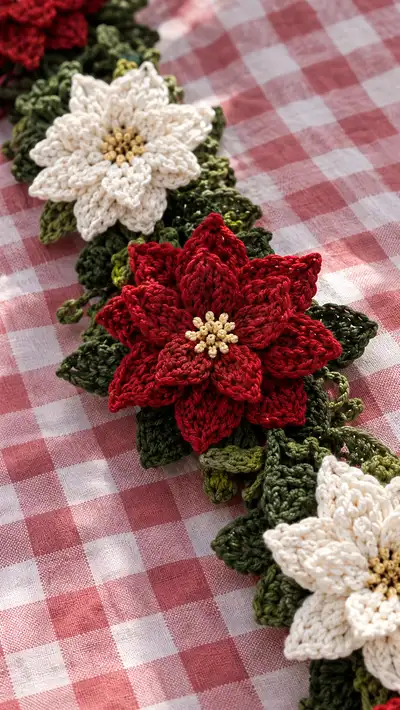
Create a festive poinsettia garland featuring layered red and cream flowers with rich green leaves and a delicate vine. This table-length decorative garland is photographed on a gingham cloth and shows alternating red and cream poinsettias with textured double-layer petals, beaded centers, and clusters of leaves joined by a crocheted vine. The pattern includes full instructions for flower motifs, leaf motifs, filler tendrils and assembly so you can make a garland to fit your space.
Progress Tracker
0% Complete
— Flower Center (Make 1 center per flower) :
Round 1 :
mr, 6 sc into ring (6)
Round 3 :
1 sc in each st around (12)
Info :
If using beads for center: thread 6-12 small beads onto a short length of thin yarn now so they are ready to be sewn into the center. If using embroidery, use mustard/gold thread after center is attached to flower.
Round 4 :
(1 sc, inc) x 4 then (1 sc in next 4 sts) (16)
Round 5 :
1 sc in each st around (16). Fasten off leaving a 20-30cm tail for sewing the center to the flower. Do not stuff; center remains flat.
Info :
The flat 16-st disc serves as the anchor for petals. The long tail will be used to tack the center to the inner petal layer. If using beads, stitch them through center from back to front and back to secure.
— Inner Petal Layer (Small Petals, Make 8 per flower) :
Round 1 :
Join inner petal base: With flower main color, join to any front loop (or into chain loop created in base method) and ch 1, sc in same st
Round 2 :
Ch 6, sc in the same base st to create a loop (this loop forms the foundation for petal). Sl st into next base stitch to anchor. Repeat to make 8 loops total spaced evenly around center (makes 8 petal anchors)
Info :
Make 8 chain loops around the center disc. If your center has 16 stitches, work sl st anchors into every 2nd stitch to maintain even petal spacing; alternate anchors if needed to keep 8 even loops.
Round 3 :
Work first petal in first chain loop: sl st into loop, ch 1, (sc, hdc, 3 dc, hdc, sc) all into loop, sl st to anchor - this completes one small petal. Repeat into each chain loop (8 petals total). Fasten off and weave ends.
Round 4 :
Optional edging: join with contrast thread in FLO around each petal: 8 sc around each petal edge to neaten (not counted into main stitch count)
Info :
Block or steam inner petals flat to shape; these inner petals sit slightly beneath larger outer petals and should be smaller and slightly cupped for depth.
— Outer Petal Layer (Large Petals, Make 8 per flower) :
Round 1 :
Join main color to base between two inner petals: ch 1, sc in same st
Round 2 :
To form foundation loops for larger petals: *ch 8, sl st in next base st* rep 8 times to form 8 large loops anchored around the inner petal layer. You will be anchoring into the base disc or into the joins between inner petals (8 loops)
Info :
Spacing is critical: if your base doesn't provide 8 perfect anchors, make small adjustment chains (ch 7 or ch 9) to keep petals even. Use pins while blocking to maintain symmetry.
Round 3 :
Work first large petal: into first loop: sl st, ch 1, (sc, sc, hdc, 5 dc, hdc, sc, sc) sl st to anchor. Repeat for all 8 loops (8 large petals). Fasten off and weave ends.
Round 4 :
Refine petal shape with an outer ridge: rejoin yarn at the tip of a petal and work 6 sc across outer edge of petal to firm it up; repeat for each petal.
Info :
For extra depth, place the outer petal directly over inner petals so tips are offset; inner petals should peek from behind. Wet block petals so they curve gently towards the center.
— Petal Texture Rows (Optional Crochet Shaping, 4 rounds per petal set) :
Round 1 :
With smaller hook, join at base of any outer petal and work 1 sc in FLO across the base of the petal to create a subtle ridge; fasten off (this is repeated per petal)
Round 2 :
In each outer petal tip, make a picot if desired: ch 3, sl st in 3rd ch to make crisp tip. Repeat for each petal. This is decorative and does not change stitch counts.
Info :
Working in FLO or BLO here creates a ridge line that simulates the petal vein. Do this for 4-8 petals if you want alternate texture across the garland.
— Center Embellishment (Beaded or Knotted Center) :
Round 1 :
Using mustard/gold, take the long tail from the flat center and stitch 6-10 small beads in a circular cluster into the center using running stitches. Tie and secure at the back.
Round 2 :
Alternative: make tiny French knots or bullion stitch clusters using embroidery floss (approx 10-12 clusters) to mimic stamen. Secure ends tightly at back.
Info :
Be careful not to pull bead clusters too tight; they should sit slightly raised above the center disc but not distort the petal anchors. Use a dab of fabric glue if needed to secure beads permanently.
— Leaf Motif A (Large Leaf, Make multiple per flower cluster) :
Round 1 :
mr, 6 sc in ring (6)
Round 3 :
(1 sc, 1 inc) x 6 (18)
Info :
This small disc is the base from which the leaf body is worked; it helps produce a firm center for the leaf 'vein'. Use forest green for large leaves.
Round 4 :
Ch 1, sc in same st, ch 10 to start leaf body, turn to work back along chain: starting in 2nd ch from hook work (sc, hdc, dc, dc, tr, dc, dc, dc, hdc, sc) - this forms a tapered leaf edge. Sl st to base to complete one side of the leaf and repeat on opposite side to form a symmetrical leaf. Fasten off; shape with blocking (counts per side are decorative, final leaf length approx 9-11cm depending on yarn).
Round 5 :
For firmer edge, rejoin yarn and work 1 sc around the perimeter of the leaf in BLO to create a crisp outline.
Info :
Make 2-3 large leaves for each flower depending on fullness shown in photos. Alternate forest green and olive green to mimic natural color variation; slightly variegated yarn also works well.
— Leaf Motif B (Medium Foliage, Make 4-6 per flower cluster) :
Round 1 :
ch 6, join with sl st to form ring (6 ch loop)
Round 2 :
Into ring: ch 1, (sc, hdc, dc, hdc, sc) making a small pointed leaf. Fasten off leaving tail for sewing (5 stitches across the leaf apex)
Info :
These medium leaves fill the space between flowers and the vine; make them in mixed green tones and alternate orientation when attaching to the vine for a natural look.
— Tiny Leaf / Tendril (Make many for filler and loops) :
Round 1 :
ch 8, sl st in 2nd ch from hook and across: (sl st x 6) to create a thin chain leaf. Fasten off.
Round 2 :
For curly tendrils: ch 20, 3 sc in 2nd ch from hook, *3 sc in next ch* across to make spiral curl. Fasten off and steam lightly to set curl.
Info :
Make multiple tendrils to thread between leaves and petals, tucking them under petal layers when joining. These are important to achieve the airy, organic look seen in the photos.
— Vine / Joining Chain (Make vine length as desired) :
Round 1 :
With forest green, ch foundation to desired garland length (for a tabletop runner photographed, ch approx 120-160 depending on spacing between flowers). This chain is the backbone of the garland.
Round 2 :
Row across foundation chain: starting in 2nd ch from hook, 1 sc in each ch across. Fasten off and return along the chain with a second round of sc to make vine 2-stitches wide.
Info :
Make the vine double thickness by working one or two rounds of sc. If you want a flexible, drapey vine, work the sc slightly looser; for a stiffer vine (for tabletop shape) work a tighter tension and consider adding a thin wire threaded through the vine for stability.
Round 3 :
Optional decoration along vine: work small leaf anchors by *ch 3, sl st into vine at intervals of 4-6 sc; repeat* to create loops for attaching leaves.
Info :
Plan flower spacing: in the pictured layout, flowers are spaced approx 12-14 cm apart center-to-center with 2-4 clusters of leaves between each flower. Mark positions with pins or stitch markers on the vine before attaching motifs.
— Assembly Step-by-Step (Pin and join method) :
Round 1 :
Lay vine flat. Pin positions for flowers (mark centers). Place one large cluster (1 flower + 3 large leaves + 4 medium leaves + 2-3 tendrils) at each marker. Pin tightly in place.
Round 2 :
Sew centers first: using the long tail from the flat center, whip stitch the center disc to the vine at the marked location. Sew through vine yarn and center tail several times to secure. Knot at the back and bury ends.
Info :
Sew through both rear rounds of the flower base and into the vine to anchor securely; weave ends at least 4-5 cm into vine to prevent unraveling.
Round 3 :
Attach inner and outer petals: tack inner petal joins to vine and to each other with small whip stitches at the base. Then stitch down outer petals where they overlap leaves so flowers sit flat.
Round 4 :
Attach leaves: position large leaves at the back and sides of the flower, sew through leaf base and vine to anchor. Add medium leaves and tendrils by stitching through their tails to the vine and to the flower base.
Info :
Layering: for a natural look, the large leaves should sit slightly behind and under the outer petals, medium leaves between petals and vine, and tendrils woven on top. Use pins to adjust angles before sewing.
Round 5 :
Secure centers and add beads: sew bead clusters to center now if not added earlier. Use small, neat stitches and a drop of fabric glue on the back if necessary for extra security.
Round 6 :
Repeat this assembly sequence for all flowers along the vine at your marked intervals. Add extra small leaves to fill any visible vine sections for fullness.
Info :
If making a very long garland, assemble in sections of 30-50cm and join sections with a few sc rows and hidden stitches to keep edges tidy. Add hanging loops (ch 8, sl st to vine) every 30cm if you plan to hang it.
— Optional Decorative Extras (Fringe, Beads, Wired Stem) :
Round 1 :
Fringe: add small fringe groupings between flowers by attaching 3 x 10cm lengths of yarn at intervals and trimming to uniform length. Knot and secure on the back of the vine.
Round 2 :
Wired vine: thread thin floral wire through the vine by carefully splitting between sc rows and inserting wire; secure ends by wrapping with leftover yarn and glue.
Info :
Wiring gives the garland structure for draping over mantels or shaping into swags. If you wire, cover wire ends well and do not use for children's play items.
— Finishing and Blocking :
Round 1 :
Block flowers and leaves gently by pinning to shape on a blocking mat. Use a steam iron held 2-3cm above pieces or wet-block gently with a spray bottle. Allow to dry thoroughly.
Round 2 :
Trim all woven ends flush with work and bury tails inside the vine by threading through several stitches with a yarn needle.
Info :
Final shaping will bring petals into the soft lifted look in the photos. Slightly cup inner petals and flatten outer petals. Gently massage beads and centers to sit evenly.
— Sizing Guide and Repeats (How to make a longer or shorter garland) :
Round 1 :
Flower spacing: use 12cm center-to-center for a dense runner; use 16-20cm for a loosely spaced hanging garland. Adjust vine chain length accordingly (approx 8-12 ch per cm in the pictured yarn).
Round 2 :
For a mantel swag, make 6-8 flowers with clusters; for a table runner, 8-12 flowers give a substantial look. Multiply leaf counts proportionally: for each flower add 3 large leaves, 4-6 medium leaves, and 3-6 tendrils.
Info :
Because this pattern is modular, you may make single flowers and use them as coasters, appliques, or ornaments by adding a hanging loop before final weave-in. Use the same assembly steps but reduce vine length to a small loop.
— Troubleshooting and Maintenance :
Round 1 :
If petals are too floppy, block more aggressively or switch to a slightly thicker yarn or smaller hook for more body.
Round 2 :
If centers look loose, add a 2nd disc under the first and sew them both together for a thicker anchor.
Info :
Spot clean with a damp cloth for minor dirt; if washing is necessary, hand wash gently and reshape on a towel to dry flat so beads do not tear yarn.
Finishing this poinsettia garland is such a joyful experience—each layered bloom comes together into a living, festive ribbon of color and texture. The combination of double petals, beaded centers, and mixed green leaves makes for a rich, handcrafted accent you can treasure or gift. I love seeing how the blocking and assembly bring out the shadow and dimension in each motif. 🎄🧶 Make one to decorate a mantel, table, or doorway and share the cozy handmade spirit this season!