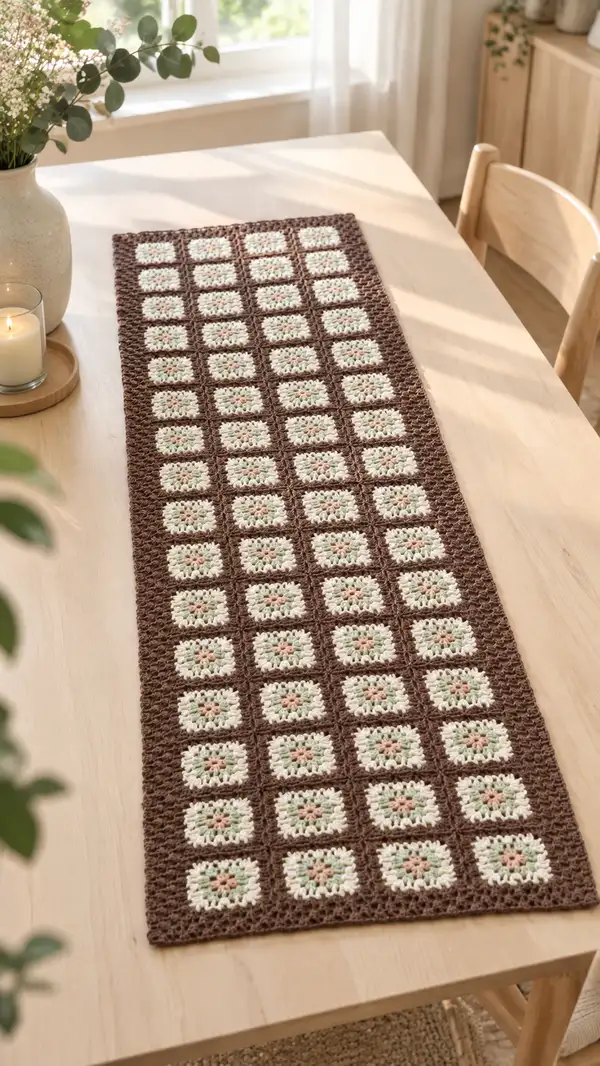
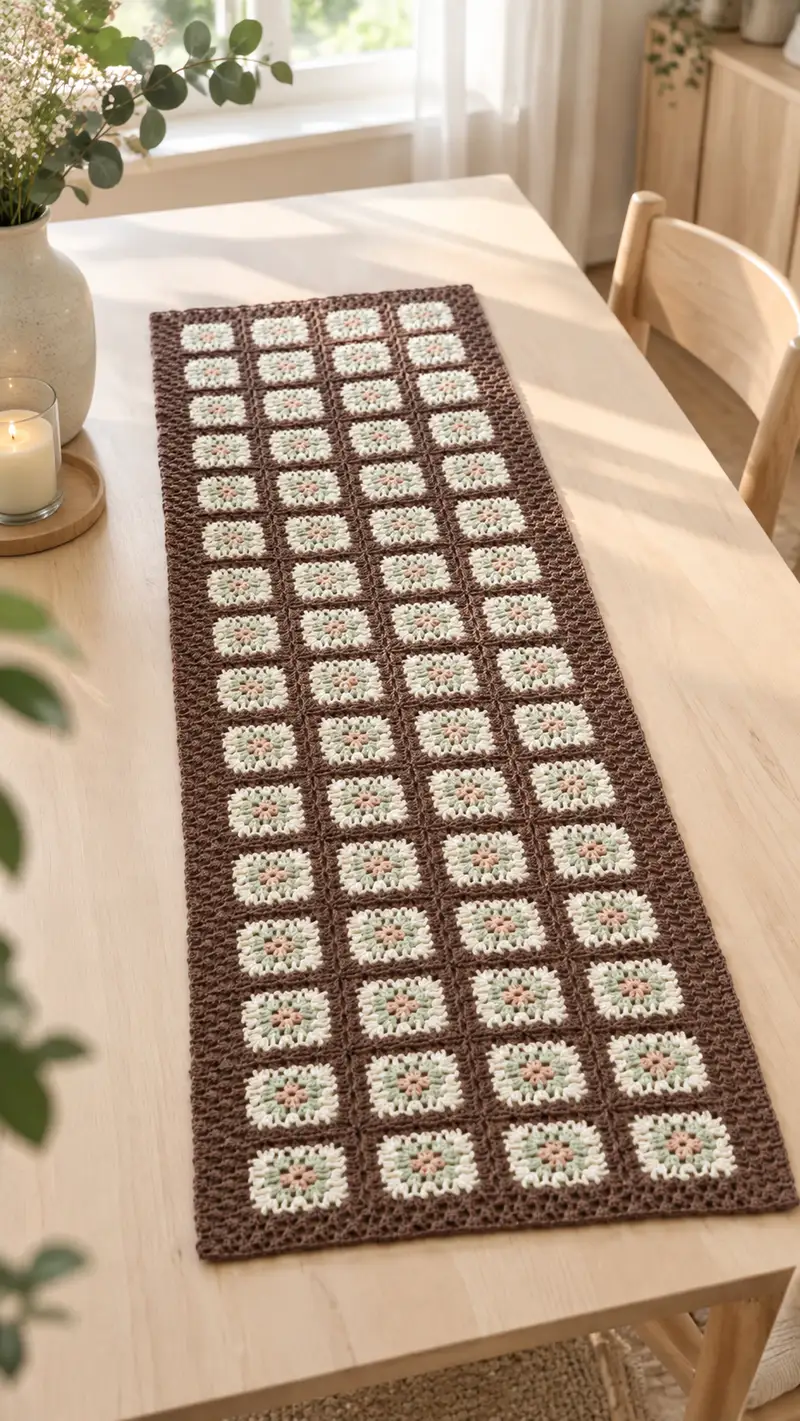
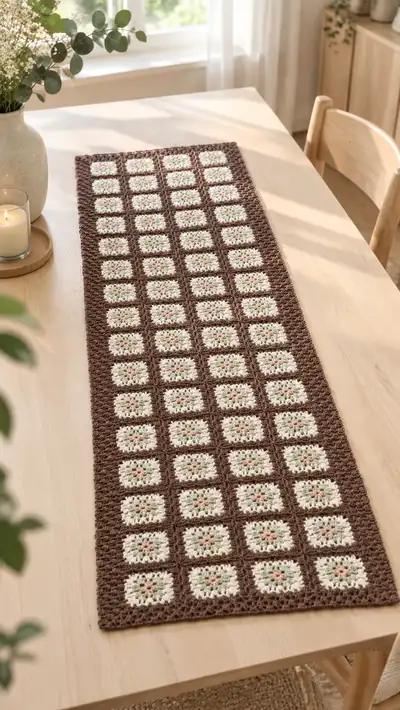
A warm, vintage-inspired table runner made from small granny-style squares joined into a long runner. The design features a soft cream floral center with pale peach and green accents framed by a deep brown background and border. Perfect for farmhouse, rustic, or cozy modern dining decor—this runner lays flat and lends handmade charm to your table.
Progress Tracker
0% Complete
— Motif (Make 91: 7 x 13 grid shown) :
Info :
We will make a classic four-corner granny-inspired square in four colors: center (peach), petal round (mint), flower halo (cream), and frame/joining color (brown). The square below measures approximately 4.5cm (1.75") per motif when using worsted weight yarn and a 4.0mm hook. Adjust hook or yarn weight to change motif size. Make 91 squares for a 7 by 13 runner; adjust counts to fit your table by making more or fewer squares and adjusting rows/columns.
Round 1 :
With center color (pale peach), make a magic ring. Ch 3 (counts as first dc), work 2 dc into ring, ch 2, *(3 dc into ring), ch 2* repeat 2 more times for a total of four 3-dc clusters separated by ch-2 spaces. Sl st to top of ch-3 to join. (12 dc, 4 ch-2 corners)
Info :
Round 1 creates a small flower-like center using four 3-dc clusters. The ch-2 spaces will become the four corners of the square. Keep the clusters loose enough to allow easy insertion for next round.
Round 2 :
Change to petal color (pale mint). Sl st into the next ch-2 corner space, ch 3 (counts as dc), 2 dc in same ch-2 space, ch 1, *(3 dc, ch 2, 3 dc) in next ch-2 space (corner), ch 1* repeat around to form four corners with ch-1 spaces between corners. Join with sl st to top of ch-3. (24 dc, 4 ch-2 corner spaces, 4 ch-1 side spaces)
Info :
Round 2 builds out the petal round and starts the square shaping: the ch-2 spaces become stronger corners. Work the final sl st snug but not tight to maintain an even edge.
Round 3 :
Remain in petal color. Sl st into the next ch-1 side space, ch 3, 2 dc in same ch-1, ch 1, *(3 dc in next side ch-1, ch 1) three times, then at the corner work (3 dc, ch 2, 3 dc), rep sequence around to return to the start. Join with sl st to top of ch-3. (48 dc approx, 4 ch-2 corners, multiple ch-1 side spaces)
Info :
Round 3 begins to square the motif by adding 3-dc clusters along the sides between corners. Ensure clusters sit evenly across each side; use stitch markers at the corners if needed.
Round 4 :
Change to cream/off-white. Sl st into a convenient ch-1 space along a side, ch 1, *[sc, ch 2, sc] across corner ch-2 spaces to accentuate corners, and sc in each ch-1 side space across. Repeat around, finishing with a sl st to first sc. This round forms a neat crisp square halo around the petal round. (Count will vary by small amounts depending on how many side ch-1 spaces were created; roughly 56-64 sts depending on tension)
Info :
This round intentionally uses sc and ch-2 corner accents to square the motif visually. The exact stitch count may vary; the important thing is to create four clearly defined corners for later joining.
Round 5 :
With cream, ch 1, work 1 sc in each st across the round but in each corner work (sc, ch 2, sc) into the ch-2 corner to keep corners flexible. Finish with sl st to first sc. (Even round, stitch count equal to last round)
Info :
Round 5 evens the edges and prepares for the frame color. Work loosely in corners so subsequent join rounds won't pucker.
Round 6 :
Change to frame/joining color (brown). Sl st into any corner ch-2, ch 3 (counts as first dc), work (2 dc, ch 2, 3 dc) in that ch-2 corner to create a larger corner block. Along each side between corners, work: *sk next sc, [3 dc in next sc] then ch 1* or work 4 dc evenly across the side, keeping spacing consistent so that each side between corners has the same number of dc clusters. Repeat for all four sides, joining with sl st to top of ch-3. Expected stitch count after this round: approximately 84 dc (this depends on how many side clusters were added; the goal is a framed square about 4.5cm across).
Info :
Round 6 is the visible brown frame that becomes the grid when motifs are joined. Keep tension even and count clusters along a side; you will want the same number of side spaces on every motif so joins fall evenly.
Round 7 :
With brown, ch 1, work 1 sc in each dc across, and in each corner work (sc, ch 2, sc) into the corner ch-2. This round forms a neat square edge that will be used for join-as-you-go. (Stitch count equals previous round)
Info :
If you prefer smaller motifs, stop here and weave in ends. For the runner in the photo, motifs are framed with two narrow tidy rounds in brown; doing an additional sc round gives a uniform join line.
Round 8 :
Optional neat finish round with brown. Ch 1, work 1 sc in each st BLO across the round to create a subtle ridge; join with sl st and fasten off leaving a 20-25cm tail for joining if not using join-as-you-go. (Same count as previous round)
Info :
Working in BLO for this optional round makes the motif edges sit slightly higher and creates a crisp grid look once assembled. This is the round suggested if you prefer the clearly visible frame shown in the image.
Repeat Motifs :
Make 91 motifs following Rounds 1-8. The photo shows a 7 motifs across by 13 motifs down layout. You can make any layout; keep the same motif stitch count to make joining identical and regular.
Info :
As you make motifs, lay them out in the final configuration to ensure color distribution is even across the runner. Pin motifs to a blocking mat and lightly steam/block them for uniform size if desired.
— Joining (Join-as-you-go method recommended) :
Info :
This section details the join-as-you-go (JAYG) method to assemble the grid so the brown frame appears continuous between motifs. You can also join later using whip stitch or mattress stitch; instructions for whip-stitch joining are in Assembly section. The rounds below are numbered sequentially for the join passes rather than individual motif rounds.
Round 9 :
Prepare your first row: Arrange 7 motifs in a row, right side up. Join motif 2 to motif 1 along one side using JAYG: With brown yarn attached at the side of motif 2, work sc in the edge loops of motif 2 and sl st into corresponding sc of motif 1 every other stitch to create a neat joining ridge. Continue across the side; fasten off. Repeat to join motif 3 to motif 2, and so on until all 7 motifs in the first row are joined (Row 1 assembled). (No global stitch count; join at every matching side st.)
Info :
When joining, match the same number of side spaces between motifs. If motifs have 12 side clusters, make sure you connect matching clusters so corners align perfectly. Keep tension just slightly firmer than motif tension so the seam is firm but not puckered.
Round 10 :
Lay out row 2 of 7 motifs beneath row 1. Join row 2 motifs together across the row using the same side-join technique. Then join each motif of row 2 to the corresponding motif in row 1 by working through the back edge of the top motif and the front edge of the bottom motif: from the right side of motif in row 2, attach brown, sc in edge, sl st through corresponding sc on motif in row 1, continue across. Repeat for the entire row. This forms a firm grid intersection at each corner. Fasten off and weave ends.
Info :
Joining the second row to the first is the core grid action. Work slowly at intersections — when you arrive at a corner, work (sc, ch2, sc) through the corner ch-2 of both squares to keep corners squared and aligned.
Round 11 :
Repeat the row-assembly process for rows 3 and 4: (A) Join the motifs in the row together across their sides using JAYG; (B) Join the row to the row above by matching side stitch locations with sl sts every second sc. Continue until you have assembled rows 1-4 into a rectangular strip. (Maintain consistent join spacing.)
Info :
As the runner grows, lay it flat frequently and adjust tension in join rows if corners or sides start to curve. Block if necessary before continuing to the next rows.
Round 12 :
Assemble rows 5 and 6 in the same way (join within the row first, then join to the previous assembled section). This section-by-section building avoids working across an unwieldy number of motifs at once and ensures even tension across the entire runner.
Info :
Work seated with space on your table: a long runner can be heavy. Use pins to keep corners aligned at intersections, then sew the corner chains into each other using single crochet joins to ensure a neat grid corner.
Round 13 :
Complete assembly of rows 7-13 following the same method: join row internally, then join to the assembled piece above. By the end of Round 13 you will have a complete 7 x 13 motif rectangle. Take care to count joins across the width to confirm all 7 columns are present.
Info :
If you prefer a continuous visible seam identical to the photo, always join through the front loop of the sc-round of the motif and the back loop of the adjacent motif’s sc-round to create the continuous ridge lines.
Round 14 :
After all motifs are joined, work a tidy sc round around the entire assembled rectangle: With brown, join at any corner, ch 1, sc evenly around working (sc, ch 2, sc) at each corner. Keep stitches even and place 1 sc in each motif edge sc and 2 sc in each corner ch-2. Join and fasten off. (Stitch count will equal total motif edge stitches; maintain even distribution.)
Info :
This round evens the outer edge before the decorative border. If your join-as-you-go lines are neat, this sc round will be quick and create a stable base for the next border rounds.
Round 15 :
Optional: Work a repeat of Round 14 in BLO (1 sc in each st BLO) to create a ridge defining the border line. Join and fasten off. This gives the framed look similar to the sample image.
Info :
Using BLO here creates a defined rectangular frame around the grid and helps the outer decorative rows sit neatly.
— Border and Decorative Edge :
Round 16 :
Change to border technique: With brown, join at a corner ch-2. Ch 3 (counts as dc), (2 dc, ch 2, 3 dc) in the same corner. Along each side work: *[sk next sc, 4 dc in next sc] rep across the side so that small shell groups are formed evenly across each motif edge between corners. At next corner, repeat (3 dc, ch2, 3 dc). Join with sl st to top of ch-3. (This creates a textured shell border; stitch count depends on how many shells were placed per side—aim for an even number across each side.)
Info :
Spacing shells evenly across each motif side will create a classic scalloped border spanning the entire runner. Use pins along the edge to ensure shells line up when working around corners.
Round 17 :
Work a second decorative round: Ch 1, sc in each dc and 3 sc in each corner ch-2 space. At each shell place a picot or a small cluster for added texture: sc, ch 3, sl st into 3rd ch (picot) then continue. Join with sl st to first sc. Fasten off and weave in ends. (Even round)
Info :
Picots add a delicate scallop. If you prefer a flatter edge as seen in some modern photographs, work simple sc and hdc rounds instead of picots.
Round 18 :
If you want a wide border similar to a framed photograph, add another round: With brown, ch 2, work 1 hdc in each st around, placing (hdc, ch 2, hdc) in each corner to maintain shape. Join and finish. This gives the runner a weighty, finished edge and helps it lay flat on the table. (Stitch counts match previous round.)
Info :
Multiple rounds of hdc produce a thick border. If your runner is curling slightly, add an extra hdc round to balance tension and flatten the runner.
Round 19 :
Final finishing round (optional): With a contrasting thin line in cream or leave in brown, work 1 sc in each st across the final hdc round, working (sc, ch1, sc) in each corner for a neat boxed finish. This small contrast line can reflect the motif cream and make the runner pop.
Info :
This final edge detail is optional but recommended if you prefer a crisp, tailored finish like the sample runner.
— Alternative Joining: Whip Stitch Method :
Round 21 :
If you choose not to use join-as-you-go, arrange motifs in final layout, right sides up, and use a whip stitch with brown yarn to sew through the back loops of the frame round of adjacent motifs. Use matching stitches at corners (go through corner ch-2 loops with 3 small whip stitches to secure). This method is robust and easy to keep consistent if you prefer sewing to crocheting joins.
Info :
When whip-stitching, use a yarn needle and 20–25cm ends to move quickly. Work through matching loops and keep tension slightly snug so joins stay flat.
— Detailed Stitch and Tension Tips :
Round 23 :
Keep the same hook size for motif and border rounds for consistent gauge. If you prefer a slightly tighter join, drop to a 3.75mm hook during the JAYG joins. For looser drape, stick to the 4.0mm hook throughout.
Round 24 :
When counting stitches for evenness, measure each side of a motif; you should have the same number of side clusters on every motif. If one motif is off by a stitch, remove an extra sc in a non-visible area (back loop) to keep counts even.
Info :
Keeping motif counts identical ensures a tidy rectangular grid once joined; inconsistent counts create slight ripples in the runner's surface.
— Finishing and Blocking :
Round 26 :
Once joined, weave in all ends from motif joins into the brown border using a yarn needle. Block the entire runner flat: dampen lightly or steam with a cloth held above (do not press hot iron directly on acrylic yarn). Pin to a blocking mat to square it, focusing on keeping edges straight and flat. Allow to dry fully before removing pins.
Info :
Blocking evens tiny differences and helps the runner sit flat on the table. For wool yarns, a gentle wet block is best; for acrylic yarns, steam-blocking works well but don’t overheat.
Round 27 :
Final pressing: If the runner is not perfectly flat, a light steam and re-pin with extra starch spray (fabric-safe) can help a crisp finish for display-only runners.
Info :
Don’t overdo starched finishes if the runner will be used frequently—starch reduces flexibility and can crack fibers over time.
— Measurement & Layout Notes :
Round 29 :
The sample runner with 7 x 13 motifs finished at approximately 14" (36 cm) wide by 52" (132 cm) long using worsted weight yarn and a 4.0mm hook. Each motif measured about 1.75" (4.5 cm). Adjust motif count to fit your table: add or subtract columns (width) and rows (length) as required.
Info :
Measure your table and calculate required motifs across and down: Required motifs = (desired width / motif width) x (desired length / motif length). Always make at least one extra motif to test gauge and blocking.
— Troubleshooting Common Issues :
Round 31 :
If your assembled runner is slightly trapezoidal (one edge longer than the other), check motif counts: one or more motifs may have an extra sc along an edge; locate and even out by removing or adding a small sc in the inner cream round so side counts match.
Round 32 :
If corners curl, add a subtle outer hdc round with slightly looser tension to flatten the runner. Re-block after adding the balancing round.
Info :
Small tension adjustments in outer rounds often correct minor shaping issues; avoid altering inner motif rounds unless necessary.
— Optional Embellishments :
Round 34 :
Add small tassels or pompoms to each short end for a boho finish: make 7 tassels across each short end spaced at each column junction, attach using a lark's head knot and hide tails inside border rows.
Info :
Embellishments are optional and should be washed/repaired before occasional washing to keep them tidy.
Round 35 :
Optional: Light embroidery using thin yarn across the motif centers can add subtle floral veins. Use a yarn needle and two strands of contrasting color to stitch small 'X' or chain-stitch details in the center rounds. Secure knots and weave ends thoroughly.
Info :
Embroidery is purely decorative; test on a spare motif before adding to the assembled runner to confirm look and scale.
— Care Instructions :
Round 37 :
Hand wash gently in cool water with mild detergent or machine wash on gentle cycle inside a laundry bag. Reshape while damp and lay flat to dry to keep the runner flat and prevent stretching. Avoid tumble drying for longevity.
Info :
Different yarn fibers may need specific care—follow the yarn manufacturer's washing recommendations if in doubt.
— Extra Rounds for Larger Runners or Heavier Borders :
Round 38 :
If you extend the runner with extra columns or rows, maintain the same motif stitch pattern and repeat joining rounds until you reach desired size. For each additional row of motifs you add, repeat the joining rounds 9–15 accordingly.
Round 39 :
For a more dramatic border, repeat the shell and hdc rounds (Rounds 16–18) one or two more times to add width and weight to the border. This will increase yarn usage—plan for an extra 50–150g of border color per extra 2–4 rounds.
Info :
Adding more border rounds makes the runner sturdier and helps it hold shape on a busy table with centerpieces.
Completing this runner is so rewarding—the many little floral motifs come together to make a statement that feels both vintage and modern. The warm brown frame ties the subtle pastel centers into a cohesive design that looks beautiful on any table. Enjoy the satisfying rhythm of making motif after motif and the proud moment when the entire runner lies flat and finished. 🧶✨ Perfect for gifting or brightening your own dining space. Happy stitching! 😊