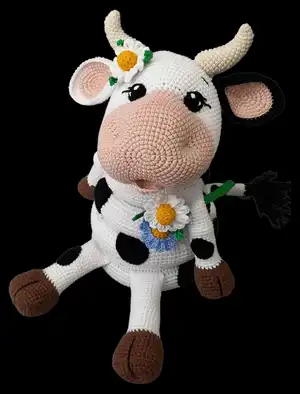
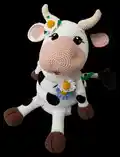
Make a charming cow stacking toy with this complete crochet amigurumi pattern. You will create a stackable body, head, legs, horns, ears, udder and cute accessories step-by-step. The pattern includes full round-by-round instructions, materials list and helpful assembly notes so you can build a lovely handmade toy for gifts or play. Perfect for crocheters who enjoy detailed projects and adorable results.
Progress Tracker
0% Complete
— Materials & Terms :
Infos :
Terms used: MR - magic ring. Ch - chain. sl st - slip stitch. sc - single crochet. inc - increase (2 sc in 1 st). dec - decrease. hdc - half double crochet. dc - double crochet. tr - treble crochet. BLO - back loop only. FLO - front loop only.
Infos :
Materials: White - Alize Cotton Gold 55 (2 balls - 660m / 722 yrd). Black - Alize Cotton Gold 60. Brown - Alize Cotton Gold 493. Light pink - Alize Cotton Gold 161. Ivory - Alize Cotton Gold 67. Yellow, green (optional). Hook: 3 mm (or in accordance with the yarn you use). Fiberfill for stuffing, velcro tape, safety eyes 12mm (optional), scissors, tapestry needle for sewing.
— Base :
Round 4 :
(1 sc; inc)*6 (18)
Round 7 :
(2 sc; inc)*6 (24)
Round 11 :
(3 sc; inc)*6 (30)
Round 16 :
(4 sc; inc)*6 (36)
Round 22 :
(5 sc; inc)*6 (42)
Round 29 :
(6 sc; inc)*6 (48)
Round 37 :
(7 sc; inc)*6 (54)
Round 46 :
(8 sc; inc)*6 (60)
Round 47 :
FLO (9 sc; inc)*6 (66)
Round 48 :
5 sc; inc; (10 sc; inc)*5; 5 sc (72)
Round 49 :
(11 sc; inc)*6 (78)
Round 50 :
6 sc; inc; (12 sc; inc)*5; 6 sc (84)
Round 51 :
(13 sc; inc)*6 (90)
Round 52 :
7 sc; inc; (14 sc; inc)*5; 7 sc (96)
Round 53 :
(15 sc; inc)*6 (102)
Round 54 :
8 sc; inc; (16 sc; inc)*5; 8 sc (108)
Round 55 :
(17 sc; inc)*6 (114)
Round 56-62 :
114 sc (114)
Round 63 :
(17 sc; dec)*6 (108)
Round 64 :
8 sc; dec; (16 sc; dec)*5; 8 sc (102)
Round 65 :
(15 sc; dec)*6 (96)
Round 66 :
7 sc; dec; (14 sc; dec)*5; 7 sc (90)
Round 67 :
(13 sc; dec)*6 (84)
Round 68 :
6 sc; dec; (12 sc; dec)*5; 6 sc (78)
Round 69 :
(11 sc; dec)*6 (72)
Round 70 :
5 sc; dec; (10 sc; dec)*5; 5 sc (66)
Round 71 :
(9 sc; dec)*6 (60)
Round 72 :
connect round 71 with round 47 (BLO) with 60 sc (60) fill with stuffing as you go, then continue to work in rounds.
Round 73 :
(8 sc; dec)*6 (54)
Round 74 :
(7 sc; dec)*6 (48)
Round 75 :
(6 sc; dec)*6 (42)
Round 76 :
(5 sc; dec)*6 (36)
Round 77 :
(4 sc; dec)*6 (30)
Round 78 :
(3 sc; dec)*6 (24)
Round 79 :
(2 sc; dec)*6 (18)
Round 80 :
(1 sc; dec)*6 (12)
Round 81 :
6 dec (6) cut the yarn, pull off hole, hide a tail.
— Legs :
Info :
Make 2. Start with brown color.
Round 3 :
(1 sc; inc)*6 (18)
Round 4 :
1 sc; 2 inc; (4 sc; 2 inc)*2; 3 sc (24)
Round 5 :
2 sc; 2 inc; (6 sc; 2 inc)*2; 4 sc (30)
Round 6 :
3 sc; 2 inc; (8 sc; 2 inc)*2; 5 sc (36)
Round 7 :
BLO (8 sc; inc; 2 dec; inc; 22 sc) (36)
Round 9 :
8 sc; inc; 2 dec; inc; 22 sc (36)
Round 10 :
4 sc; dec; (10 sc; dec)*2; 6 sc (33)
Round 11 :
7 sc; inc; 2 dec; inc; 20 sc (33)
Round 13 :
7 sc; inc; 2 dec; inc; 20 sc (33)
Round 14 :
3 sc; dec; (9 sc; dec)*2; 6 sc (30)
Round 15 :
BLO (3 sc; dec)*6 (24) change to white color
Round 24 :
6 sc; 4 inc; 8 sc; 2 dec; 2 sc (26)
Round 27 :
7 sc; dec; 2 sc; dec; 13 sc (24)
Round 28-35 :
24 sc (24) fill with stuffing 2/3 of the leg
Round 36 :
5 sc; fold in half, connect with 12 sc.
Info :
With black yarn embroider stripe and form the hoof. Sew legs to the front side of the base like in the pictures (pin it before sewing, it really helps:)
— Tail :
Round 13 :
(3 sc; inc)*3 (15) fill with stuffing
Round 22 :
2 sc; inc; (4 sc; inc)*2; 2 sc (18)
Row 15 :
Fold in half and make 9 sc, cut the yarn, leave a long tail for sewing.
Info :
Make an end of the tail using black yarn. Sew the tail to the back of the base.
— Large Ring :
Round 1 :
60 ch; slst in 1st ch (60)
Round 2 :
(9 sc; inc)*6 (66)
Round 3 :
5 sc; inc; (10 sc; inc)*5; 5 sc (72)
Round 4 :
(11 sc; inc)*6 (78)
Round 5 :
6 sc; inc; (12 sc; inc)*5; 6 sc (84)
Round 6 :
(13 sc; inc)*6 (90)
Round 7 :
7 sc; inc; (14 sc; inc)*5; 7 sc (96)
Round 8 :
(15 sc; inc)*6 (102)
Round 16 :
(15 sc; dec)*6 (96)
Round 17 :
7 sc; dec; (14 sc; dec)*5; 7 sc (90)
Round 18 :
(13 sc; dec)*6 (84)
Round 19 :
6 sc; dec; (12 sc; dec)*5; 6 sc (78)
Round 20 :
(11 sc; dec)*6 (72)
Round 21 :
5 sc; dec; (10 sc; dec)*5; 5 sc (66)
Round 22 :
(9 sc; dec)*6 (60)
Info :
Sew round 22 with round 1, fill with stuffing as you go.
— Middle Ring :
Round 1 :
48 ch; slst in 1st ch (48)
Round 2 :
(7 sc; inc)*6 (54)
Round 3 :
4 sc; inc; (8 sc; inc)*5; 4 sc (60)
Round 4 :
(9 sc; inc)*6 (66)
Round 5 :
5 sc; inc; (10 sc; inc)*5; 5 sc (72)
Round 6 :
(11 sc; inc)*6 (78)
Round 7 :
6 sc; inc; (12 sc; inc)*5; 6 sc (84)
Round 8 :
(13 sc; inc)*6 (90)
Round 16 :
(13 sc; dec)*6 (84)
Round 17 :
6 sc; dec; (12 sc; dec)*5; 6 sc (78)
Round 18 :
(11 sc; dec)*6 (72)
Round 19 :
5 sc; dec; (10 sc; dec)*5; 5 sc (66)
Round 20 :
(9 sc; dec)*6 (60)
Round 21 :
4 sc; dec; (8 sc; dec)*5; 4 sc (54)
Round 22 :
(7 sc; dec)*6 (48)
Info :
Sew round 22 with round 1, fill with stuffing as you go.
— Small Ring :
Round 1 :
36 ch; slst in 1st ch (36)
Round 2 :
(5 sc; inc)*6 (42)
Round 3 :
3 sc; inc; (6 sc; inc)*5; 3 sc (48)
Round 4 :
(7 sc; inc)*6 (54)
Round 5 :
4 sc; inc; (8 sc; inc)*5; 4 sc (60)
Round 6 :
(9 sc; inc)*6 (66)
Round 7 :
5 sc; inc; (10 sc; inc)*5; 5 sc (72)
Round 8 :
(11 sc; inc)*6 (78)
Round 16 :
(11 sc; dec)*6 (72)
Round 17 :
5 sc; dec; (10 sc; dec)*5; 5 sc (66)
Round 18 :
(9 sc; dec)*6 (60)
Round 19 :
4 sc; dec; (8 sc; dec)*5; 4 sc (54)
Round 20 :
(7 sc; dec)*6 (48)
Round 21 :
3 sc; dec; (6 sc; dec)*5; 3 sc (42)
Round 22 :
(5 sc; dec)*6 (36)
Info :
Sew round 22 with round 1, fill with stuffing as you go.
— Arms :
Info :
Make 2. Start with brown yarn.
Round 3 :
(1 sc; inc)*6 (18)
Round 4 :
1 sc; 2 inc; (4 sc; 2 inc)*2; 3 sc (24)
Round 5 :
2 sc; 2 inc; (6 sc; 2 inc)*2; 4 sc (30)
Round 6 :
BLO (6 sc; inc; 2 dec; inc; 18 sc) (30)
Round 8 :
6 sc; inc; 2 dec; inc; 18 sc (30)
Round 9 :
3 sc; dec; (8 sc; dec)*2; 5 sc (27)
Round 10 :
5 sc; inc; 2 dec; inc; 15 sc (27)
Round 12 :
2 sc;dec;1 sc;inc;2 dec;inc;dec;7 sc;dec;5 sc (24)
Round 13 :
BLO (2 sc; dec)*6 (18) change to white color
Round 25 :
5 sc; 4 inc; 5 sc; 2 dec (20)
Round 28 :
7 sc; 2 dec; 9 sc (18)
Round 29-38 :
18 sc (18) fold in half, connect with 9 sc.
Info :
With black yarn embroider stripe and form the hoof, the same way as we did with legs. Sew arms to the small ring.
— Small Ring (again) :
Info :
Sew round 22 with round 1, fill with stuffing as you go.
— Head :
Info :
Start with light pink yarn.
Round 3 :
(4 inc; 2 sc)*2 (20)
Round 4 :
2 sc; 4 inc; 6 sc; 4 inc; 4 sc (28)
Round 5 :
4 sc; 4 inc; 10 sc; 4 inc; 6 sc (36)
Round 6 :
(5 sc; inc)*6 (42)
Round 7 :
(6 sc; inc)*6 (48)
Round 8 :
(7 sc; inc)*6 (54)
Round 9 :
(8 sc; inc)*6 (60)
Round 10 :
(9 sc; inc)*6 (66)
Round 11 :
(10 sc; inc)*6 (72)
Round 13 :
60 sc; BLO (8 sc); 4 sc (72)
Round 14-18 :
72 sc (72) change to white
Round 20 :
22 sc; (1 sc; inc)*6; 38 sc (78)
Round 21 :
22 sc; (2 sc; inc)*6; 38 sc (84)
Round 25 :
22 sc; (3 sc; inc)*6; 38 sc (90)
Round 28 :
73 sc; 18 ch(skip 18) put marker and from now on start count from this point
Round 36 :
(13 sc; dec)*6 (84)
Round 37 :
(12 sc; dec)*6 (78)
Round 38 :
(11 sc; dec)*6 (72)
Round 39 :
(10 sc; dec)*6 (66)
Round 40 :
(9 sc; dec)*6 (60)
Round 41 :
(8 sc; dec)*6 (54)
Round 42 :
(7 sc; dec)*6 (48)
Round 43 :
(6 sc; dec)*6 (42)
Round 44 :
(5 sc; dec)*6 (36)
Round 45 :
(4 sc; dec)*6 (30)
Round 46 :
(3 sc; dec)*6 (24)
Round 47 :
(2 sc; dec)*6 (18)
Round 48 :
(1 sc; dec)*6 (12)
Round 49 :
6 dec (6) fasten off.
Info :
Insert safety eyes or sew crochet eyes 10 sc apart
Info :
Now return to the hole that we left between rounds 27 and 28, fill the head with stuffing and continue to crochet in rounds:
Round 5 :
(4 sc; dec)*6 (30)
Round 8 :
(3 sc; dec)*6 (24)
Round 11 :
(2 sc; dec)*6 (18)
Round 13 :
(1 sc; dec)*6 (12)
Round 14 :
6 dec (6) fasten off, push it inside of the head.
— Lip :
Info :
sew the lip to that 8 front loops we left in round 13
Round 3 :
1 ch, (1 sc; inc)*4; turn (6)
Round 4 :
1 ch, 12 sc fasten off, leave a long tail for sewing.
— Eyes :
Info :
Make 2 with black yarn.
Round 2 :
6 inc (12) fasten off, leave a long tail for sewing.
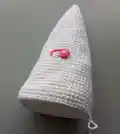
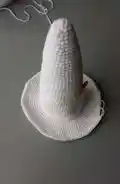
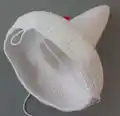
— Horns :
Info :
Make 2 with ivory yarn.
Round 5 :
inc; 3 sc; 2 dec; 3 sc; inc (12)
Round 6 :
inc; 3 sc; 4 hdc; 3 sc; inc (14)
Round 7 :
inc; 4 sc; 2 dec; 4 sc; inc (14)
Round 8 :
inc; 4 sc; 4 hdc; 4 sc; inc (16)
Round 9 :
inc; 5 sc; 2 dec; 5 sc; inc (16)
Round 10 :
inc; 5 sc; 4 hdc; 5 sc; inc (18)
Round 11 :
inc; 6 sc; 2 dec; 6 sc; inc (18)
Round 12 :
inc; 6 sc; 4 hdc; 6 sc; inc (22)
Round 13 :
inc; 7 sc; 2 dec; 7 sc; inc (22)
Round 14 :
8 sc; 4 hdc; 8 sc (20)
Round 15 :
8 sc; 2 dec; 8 sc (18)
Round 16 :
7 sc; 4 hdc; 7 sc (18) fill with stuffing
Round 17 :
BLO (1 sc; dec)*6 (12)
Round 18 :
6 dec (6) fasten off, leave a long tail for sewing.
— Ears :
Info :
Make 2. There will be 2 parts, we crochet them the same way only using for the first one pink yarn for the second white/black yarn. Face both pieces by their wrong sides and join their borders together with white/black single crochet rounds.
Round 3 :
4 inc; 2 sc; 4 inc; 2 sc (20)
Round 4 :
2 sc; 4 inc; 6 sc; 4 inc; 4 sc (28)
Round 5 :
4 sc; 4 inc; 10 sc; 4 inc; 6 sc (36)
Round 6 :
7 sc; 2 inc; 16 sc; 2 inc; 9 sc (40)
Round 7 :
BLO (10 sc; 2 inc; 18 sc; 2 inc; 8 sc) (44)
Round 8 :
11 sc; 2 inc; 20 sc; 2 inc; 9 sc (48)
Round 10 :
BLO 10 sl st, fold and sew 4 sc, cut the yarn, leave a long tail for sewing.
— Udder :
Info :
With light pink yarn.
Round 3 :
(4 inc; 2 sc)*2 (20)
Round 4 :
2 sc; 4 inc; 6 sc; 4 inc; 4 sc (28)
Round 5 :
4 sc; 4 inc; 10 sc; 4 inc; 6 sc (36)
Round 7 :
6 sc; 4 inc; 14 sc; 4 inc; 8 sc (44)
Round 9 :
8 sc; 4 inc; 18 sc; 4 inc; 10 sc (52)
Round 14 :
BLO (10 sc; 2 dec; 22 sc; 2 dec; 12 sc (48))
Round 15 :
9 sc; 2 dec; 20 sc; 2 dec; 11 sc (44)
Round 16 :
8 sc; 2 dec; 18 sc; 2 dec; 10 sc (40)
Round 17 :
7 sc; 2 dec; 16 sc; 2 dec; 9 sc (36)
Round 18 :
6 sc; 2 dec; 14 sc; 2 dec; 8 sc (32)
Round 19 :
make 6 sc fill with stuffing, sew the hole.
Info :
If you want it to be removable crochet stripes from both sides and sew velcro tape, if not just sew the udder to the larger ring.
— Stripes :
Info :
Longer - With light pink yarn.
Row 2-22 :
1 ch, 10 sc, turn (10)
Info :
Shorter - With light pink yarn.
Row 2-7 :
1 ch, 10 sc, turn (10)
— Teats :
Info :
Make 4 with light pink yarn.
— Spots "A" :
Info :
make 3 with black yarn
Round 2 :
inc; 3 sc; 3 sc in 1st ch; 4 sc (12)
Round 3 :
2 inc; 3 sc; 3 inc; 3 sc; inc (18)
Round 4 :
(1 sc; inc)*2; 3 sc; (1 sc; inc)*3; 3 sc; 1 sc; inc (24)
Round 5 :
(2 sc; inc)*2; 3 sc; (2 sc; inc)*3; 3 sc; 2 sc; inc (30)
Round 6 :
(3 sc; inc)*2; 3 sc; (3 sc; inc)*3; 3 sc; 3 sc; inc (36)
— Spots "B" :
Info :
make 3 with black yarn
Round 3 :
4 inc; 2 sc; 4 inc; 2 sc (20)
Round 4 :
2 sc; 4 inc; 6 sc; 4 inc; 4 sc (28)
Round 5 :
9 sc; 4 inc; 12 sc fasten off, leave long tail.
— Spots "C" :
Info :
make 3 with black yarn
Round 3 :
2 inc; 4 sc; 2 inc; 4 sc (16)
Round 4 :
4 inc; 4 sc; 4 inc; 2 sc; 2 inc (26)
Round 5 :
inc; 9 sc; 3 sl st fasten off, leave long tail.
— Spots "D" :
Info :
make 3 with black yarn
Round 2 :
(2 inc; 1 sc)*2 (10)
Round 3 :
1 sc; 2 inc; 3 sc; 2 inc; 2 sc (14)
Round 4 :
1 sc; 4 inc; 3 sc; 4 inc; 2 sc (18)
— Spots "E" :
Info :
make 3 with black yarn
Round 2 :
2 inc; 2 sc; 2 inc (10)
Round 3 :
1 sc; 2 inc; 2 sc; 3 inc; 1 sc (14) fasten off, leave long tail for sewing.
Info :
Sew the spots randomly.
— Flower (optional) :
Info :
Start with yellow yarn for the center, change to green for stem and white for petals as indicated.
Round 6 :
FLO 12 sc (12) turn the piece inside out, fill with stuffing change to green color
Round 7 :
BLO 6 dec (6) fasten off or continue to work in rounds 6sc to make a stem
Round 7a :
FLO (4 sc; 9 ch turn, 8sc, slst in the next front loop of Round 7)*3
Round 6a :
FLO (3 ch; 1 tr; 3 ch; sl st in the next front loop of Round 6)*12
This delightful cow stacking toy pattern is designed to make a lovable handmade companion with plenty of charming details. Whether you add the optional flower or change the spot layout, each cow becomes uniquely yours. Happy crocheting and enjoy every cozy stitch! 🧶🐄