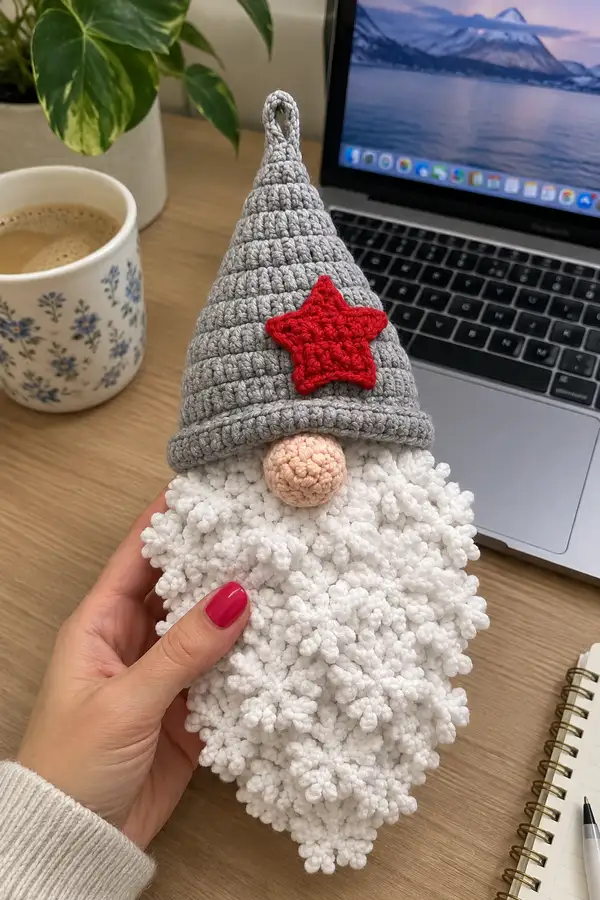
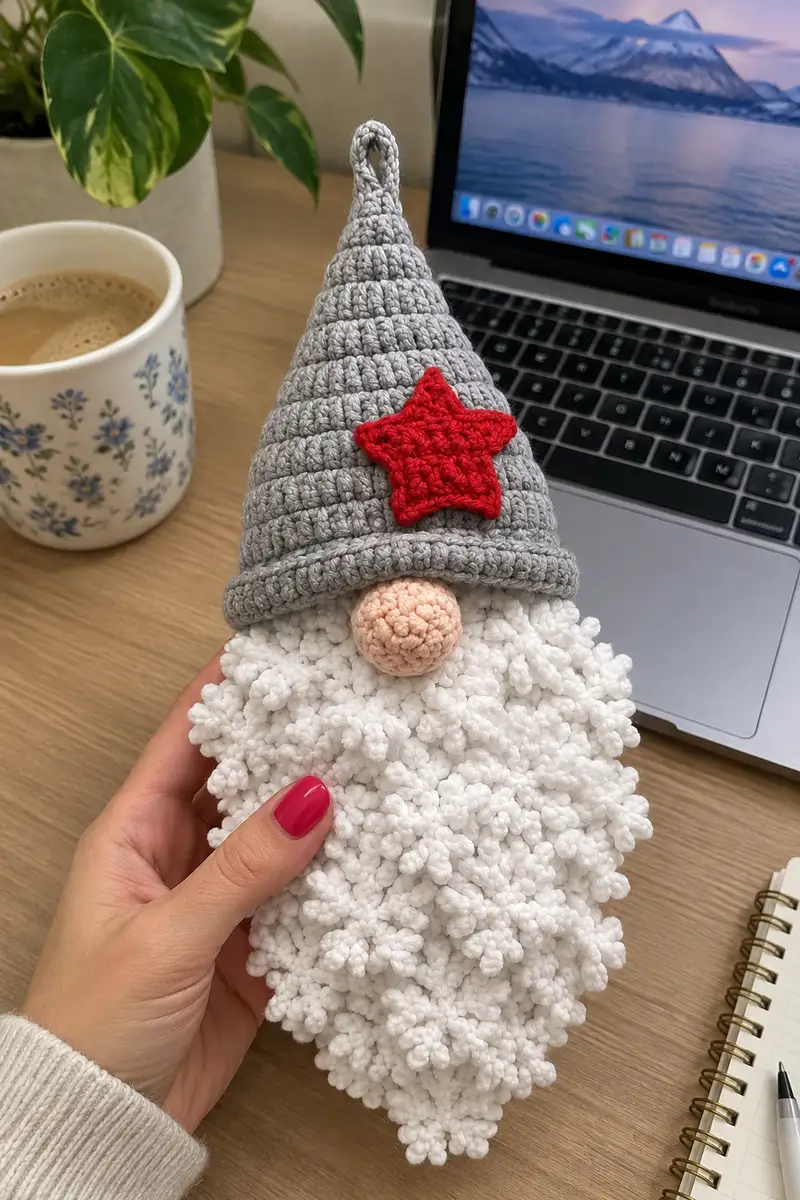
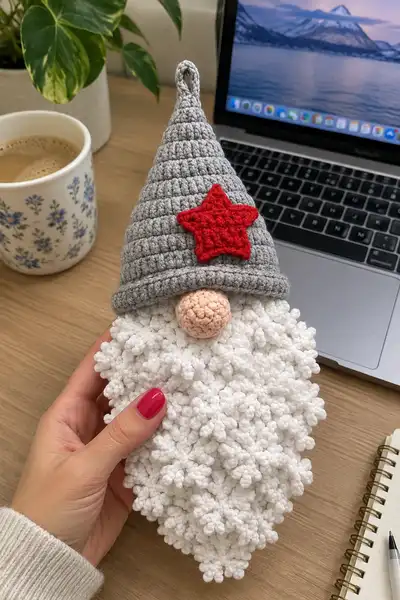
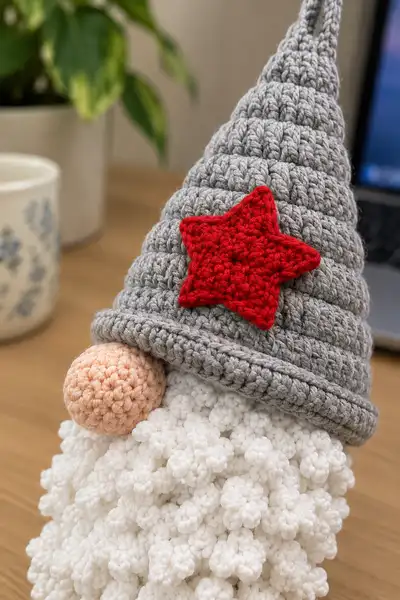
Create a charming tabletop gnome with a tall rolled-brim hat, a fluffy popcorn-style beard, and a tiny star badge. This pattern uses basic amigurumi construction for the head and nose, a textured puff-beard overlay, and a tall crocheted cone hat with a decorative loop. Perfect as a seasonal decoration, shelf sitter, or handmade gift. Written with detailed round-by-round instructions and lots of helpful Info tips.
Progress Tracker
0% Complete
— Notes & Techniques :
Info :
All pieces are worked in continuous rounds unless otherwise stated. Use a stitch marker to mark the first stitch of each round and move it up as you go. Work tightly for amigurumi so stuffing does not show, especially when using lighter yarns. When using plush/chenille, adjust hook according to yarn label to keep clusters defined. Abbreviations: mr, ch, sc, inc, dec, sl st, BLO, FLO, pop, pc. Pop/puff technique: Yarn over, insert hook into stitch, pull up a long loop 5-6 times (depending on puff size), yarn over and pull through all loops, ch1 to close puff (or use instructions below).
— Head (worked as a round amigurumi sphere) :
Round 1 :
6 sc in magic ring (6)
Round 3 :
(1 sc, 1 inc) x 6 (18)
Round 4 :
(2 sc, 1 inc) x 6 (24)
Round 5 :
(3 sc, 1 inc) x 6 (30)
Round 6 :
(4 sc, 1 inc) x 6 (36)
Round 7 :
(5 sc, 1 inc) x 6 (42)
Round 8 :
(6 sc, 1 inc) x 6 (48)
Round 9-14 :
1 sc in each st (48)
Info :
This amigurumi gnome usually hides its eyes beneath the hat brim so eyes are optional. If adding safety eyes or embroidery, place them around rounds 11-12 spaced 6-8 sts apart for a subtle expression. If not using eyes, continue to shape nose placement as reference at rounds 12-13.
Round 15 :
(6 sc, 1 dec) x 6 (42)
Round 16 :
(5 sc, 1 dec) x 6 (36)
Info :
Begin light stuffing from this round. Use small amounts of fiberfill and distribute evenly to avoid lumps. Keep head slightly firmer than body for stability under the hat.
Round 17 :
(4 sc, 1 dec) x 6 (30)
Round 18 :
(3 sc, 1 dec) x 6 (24)
Round 19 :
(2 sc, 1 dec) x 6 (18)
Round 20 :
(1 sc, 1 dec) x 6 (12)
Info :
Fasten off leaving a long tail (approx 30-40 cm) for sewing the head to the body later. Finish stuffing firmly and close the opening using tapestry needle and yarn tail, sewing through the front loops for a neat finish.
Round 22-27 :
Optional neck tube if you prefer an integrated head-to-body seam: join with sl st and work 6 sc in each round for 6 rounds (6). This creates a short neck cylinder to sew into the body opening.
Info :
If you prefer the head sewn directly to the body without a neck tube, leave the head as closed sphere and attach by sewing through the base rounds while pinning to the body opening.
— Nose :
Round 1 :
6 sc in magic ring (6)
Round 3 :
(1 sc, 1 inc) x 6 (18)
Round 4 :
1 sc in each st (18)
Round 5 :
(1 sc, 1 dec) x 6 (12)
Round 6 :
1 sc in each st (12)
Round 7 :
(1 sc, dec) x 4, 1 sc, sl st to finish shaping if needed (8)
Info :
Stuff the nose firmly but not overstuffed so it remains soft. Leave a long tail for sewing. Sew the nose to the head just under the hat brim centered horizontally; use photo for vertical alignment (attach where the brim will rest so nose peeks out).
Round 8 :
Fasten off leaving long tail for sewing. Use mattress or whip stitch to attach to head, sewing through the closed head rounds for secure attachment.
— Body (internal stuffed body, hidden beneath beard) :
Round 1 :
6 sc in magic ring (6)
Round 3 :
(1 sc, 1 inc) x 6 (18)
Round 4 :
(2 sc, 1 inc) x 6 (24)
Round 5 :
(3 sc, 1 inc) x 6 (30)
Round 6 :
(4 sc, 1 inc) x 6 (36)
Round 7 :
(5 sc, 1 inc) x 6 (42)
Round 8 :
(6 sc, 1 inc) x 6 (48)
Round 9-14 :
1 sc in each st (48)
Info :
This is the internal body form. Keep the body lightly stuffed for a soft feel but make the base firmer so the gnome sits upright. If you plan the beard to be a separate sewn overlay, leave the top rounds slightly open for sewing the head in place.
Round 15 :
(6 sc, 1 dec) x 6 (42)
Round 16 :
(5 sc, 1 dec) x 6 (36)
Round 17 :
(4 sc, 1 dec) x 6 (30)
Round 18 :
(3 sc, 1 dec) x 6 (24)
Round 19 :
(2 sc, 1 dec) x 6 (18)
Round 20 :
(1 sc, 1 dec) x 6 (12)
Info :
Fasten off leaving a 30-40 cm tail for sewing. If you used the optional neck tube on the head, insert the neck tube into the top opening of the body before sewing; this creates a secure join. Alternatively, sew head directly to body by aligning stitches and using an even whip or mattress stitch.
— Beard (fluffy puff/popcorn overlay) :
Info :
The beard is created as a separate flat triangular/teardrop panel using puff or popcorn clusters worked in rows, then sewn over the front of the body. Use plush/chenille yarn for the clusters. Work with a hook one size larger than recommended for the plush yarn to keep clusters pronounced. This section is given in rows (we still refer to them as rounds for consistency).
Row 1 (Foundation) :
Ch 28 (or adjust width to cover body front). Turn. (27 foundation loops equals approx width for a 48-st body)
Row 2 :
Sc in 2nd ch from hook and each ch across (27). Ch1, turn.
Row 3 :
Sc across 27. Ch1, turn. (27)
Row 4 :
Begin puff cluster row: *yo, insert hook, pull up loop (repeat 4 more times) — 5 loops on hook; yo, pull through all loops, ch1 to secure puff, sk 1 st, sc in next st*; rep from * to * across. Aim for 13 puffs across with 1 sc between puffs. Ch1, turn.
Info :
Pop/puff technique: Insert hook into stitch, yo and pull up a long loop; repeat until you have 5 (or 6 depending on yarn) loops stacked; yo and pull through all loops, ch1 to close the puff. Keeping consistent loop height makes the beard even-looking. For plush yarn you can use 3 loops if loops are thick.
Row 5 :
Sc across in the spaces between puffs (27). Ch1, turn.
Row 6 :
Repeat Row 4 to make a second puff-row (13 puffs). Ch1, turn.
Row 7 :
Sc across (27). Ch1, turn.
Info :
Alternate 1 puff row with 1 plain sc row to build a dense, fluffy texture. Stagger puffs every other puff-row so that puffs nest into the gaps below for a cloud-like beard. Adjust the number of foundation chains and puff count to match the body curve.
Row 8-30 :
Repeat Rows 4-7 sequence, staggering puffs every other puff-row to create a triangular/teardrop shape by decreasing 1-2 chains at the end of every 4th row on both sides: decrease edges by skipping the first or last sc of a plain row as needed to narrow the panel towards the bottom point. Continue until panel measures approx 18-22 cm from top to tip or matches body front length.
Row 31 :
Finish with a sc row to even the edge. Fasten off leaving long tails for sewing the panel onto the body.
Info :
When sewing, place the top edge of the beard panel under the hat brim so the nose and upper puff clusters peek out. Use a mattress or whip stitch and sew only through the body rounds and the top stitches of the beard panel to keep the fluffy face full. Spread and fluff clusters after sewing for maximum coverage.
— Hat (tall cone with rolled brim and loop) :
Round 1 :
6 sc in magic ring (6)
Round 3 :
(1 sc, 1 inc) x 6 (18)
Round 4 :
(2 sc, 1 inc) x 6 (24)
Round 5 :
(3 sc, 1 inc) x 6 (30)
Round 6 :
(4 sc, 1 inc) x 6 (36)
Round 7 :
(5 sc, 1 inc) x 6 (42)
Round 8 :
(6 sc, 1 inc) x 6 (48)
Round 9-12 :
1 sc in each st (48)
Info :
These rounds create the base circumference which should match the head circumference so the hat fits snugly. If your head ended at 48 sts too, the hat will pull slightly over the head and brim will rest just above the nose. Adjust initial increase rounds if your tension differs.
Round 13 :
1 sc in each st BLO (48)
Info :
Work one round in BLO to create a defined line where the brim will roll. This helps the brim keep its rounded rolled appearance.
Round 14-32 :
1 sc in each st (48) - continue working even rounds until hat reaches desired height (approx 14-18 cm from brim base). For a taller slouchier hat add more rounds; for a short hat stop earlier. The photo shows a tall cone with visible row definition; aim for about 18 rounds here to get similar height.
Info :
To create the horizontal ridges on the hat, you can also alternate rounds of hdc or place a front post half double crochet every 4th round. The pictured hat has visible single crochet rows forming the rings; keep tension even for stacked rings look.
Round 33 :
(6 sc, 1 dec) x 6 (42)
Round 34 :
(5 sc, 1 dec) x 6 (36)
Round 35 :
(4 sc, 1 dec) x 6 (30)
Round 36 :
(3 sc, 1 dec) x 6 (24)
Round 37 :
(2 sc, 1 dec) x 6 (18)
Round 38 :
(1 sc, 1 dec) x 6 (12)
Info :
When you reach a small number of stitches at the top, pull yarn through to close and secure. Leave a long tail for weaving the top closed and for creating the hanging loop if desired.
Brim (rolled) :
To make the rolled brim, fold the hat up about 1.5-2 cm from the base or work an additional 2-3 rounds in sc around the base then roll up and sew the inside edge to the hat with invisible stitches. Another option: work 2 extra rounds in BLO and then roll; the BLO round helps form a clean fold.
Loop :
Attach yarn at the top of the hat, ch 12-18 depending on desired loop length, sl st back to base chain to form a loop, fasten off and weave tail inside the hat. Reinforce the loop by sewing it to the top inside of the hat.
Info :
To create the visible concentric rings, you may choose to work alternating rounds of sc and hdc or keep all sc and the rings will be visible due to stitch tension. Blocking or steaming the hat lightly while pinning the brim rolled helps set the shape.
— Star Applique :
Round 1 :
Ch 4, sl st to form ring, ch1, work 10 sc into ring, sl st to first sc (10)
Round 2 :
*Ch3, sl st into next st to form a point base, ch3, sl st into same st, sk1* — rep around to make 5 points. You will form 5 short point tabs spaced evenly.
Round 3 :
Work around each point: (sc, hdc, sc) into the ch3 space to bulk each point slightly and create a star tip. Fasten off and weave tail. Make two identical stars if you want a double layer for thickness, then sew together leaving one edge open to stuff very lightly if you prefer a puffy star.
Info :
Sew a single star to the hat using short secure stitches. If the star flops, back the center with a small piece of felt and sew through for extra stability. We used a bright red star positioned slightly off-center on the hat in the photos.
— Finishing & Assembly :
Info :
Block and shape the hat brim first if needed by lightly dampening and pinning to desired curve. Ensure all pieces are securely fastened and weave in ends before final assembly.
Step 1 :
Position head on top of body opening and sew securely through the base rounds (use the long tail from the head). Use evenly spaced stitches to prevent gaps. If you worked the neck tube option, insert tube into body and slip-stitch or sew around for a flush seam.
Step 2 :
Place the beard panel over the body front and pin in place. The top row of the beard should tuck under the hat brim. Sew the top edge of the beard panel to the body using small stitches only through the top-most loops of the beard and the body rounds so the fluffiness remains intact.
Step 3 :
Sew the nose to the head so it peeks out just below the hat brim and just above the top row of the beard. Use tight mattress stitch and check symmetry in front mirror or by rotating the gnome — it should be centered and slightly tucked under the hat brim.
Step 4 :
Sew the hat to the head/body junction if you want the hat fixed; otherwise, slide the hat over the head and secure with a few stitches at the sides so it can be removed. Make final fluff adjustments to the beard clusters and trim any stray fibers carefully.
Info :
For a more finished look, add a few hand-stitched anchoring stitches from inside the hat down into the head to stop the hat from sliding. Use matching yarn and tie off securely. If you intend to wash the gnome, use colorfast yarns and avoid glue on the star.
— Extra Decorative Options :
Info :
Add tiny embroidered eyebrows or seasonal embellishments like a mini pompom at the hat tip. You can also make the beard denser by adding a second beard panel offset slightly and sewing both layers to the body. Consider lightly brushing plush yarn beard with a soft brush to tease fibers for an even fluffier look.
This cozy gnome comes together like a little handmade hug — the tall hat, dimpled nose, and cloud-like beard create a character full of charm and personality. Sewing the beard overlay and the hat into place gives a polished finish everyone will love. Use it as a festive table sitter, shelf friend, or thoughtful handmade gift. 🧶 Make variations for holidays by changing the star color or hat trim. Happy crocheting and enjoy bringing this little friend to life! ✨🎁