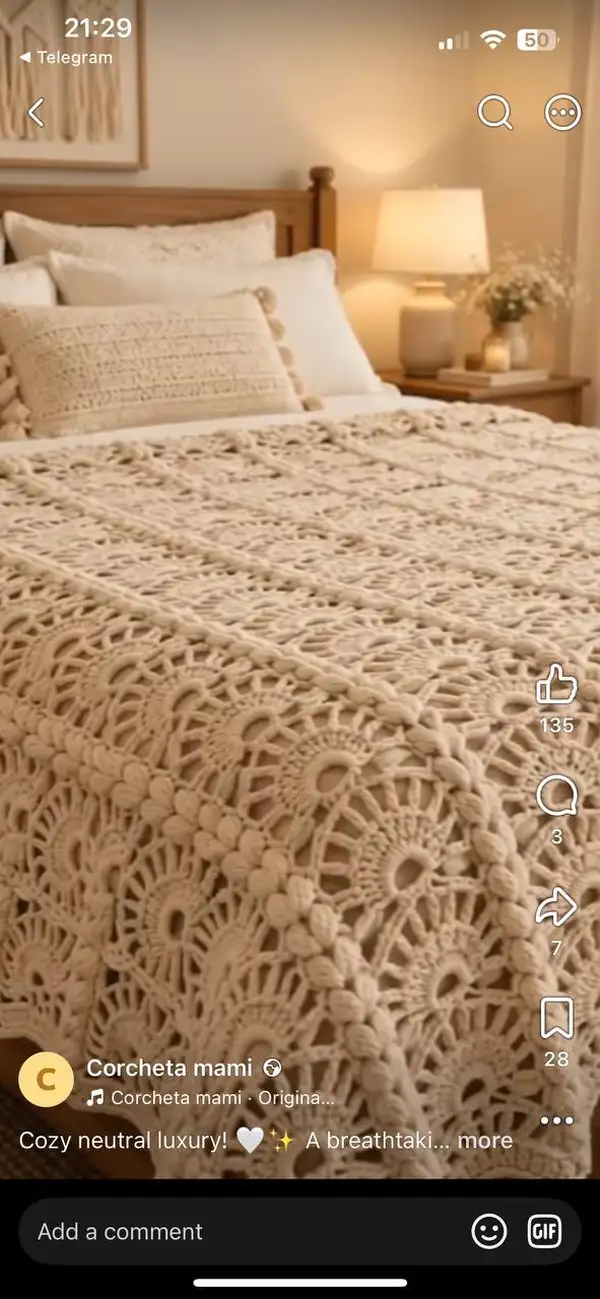
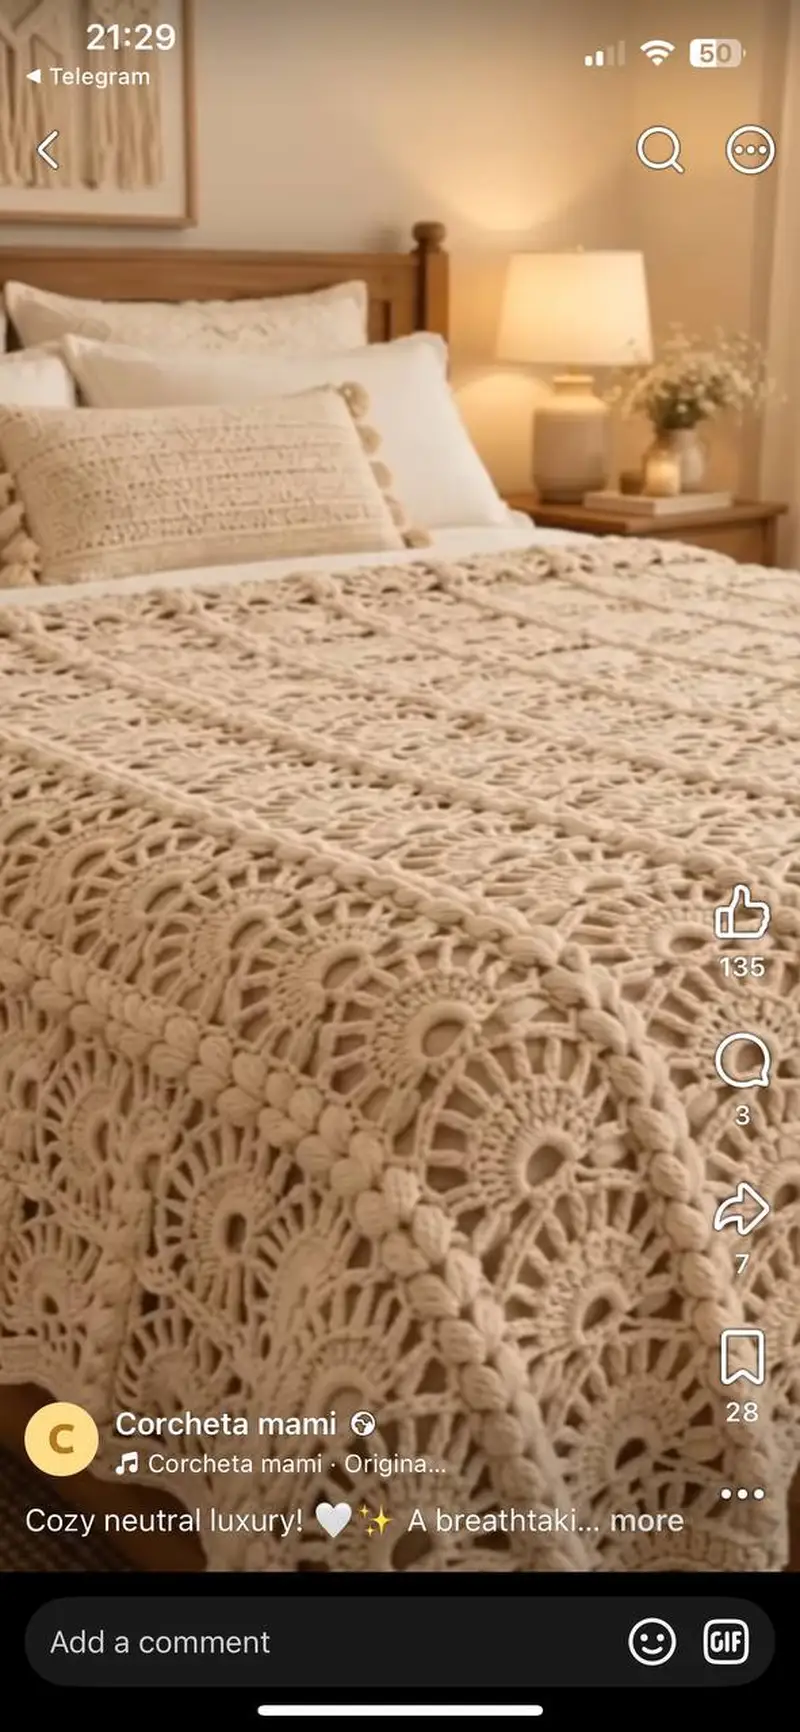
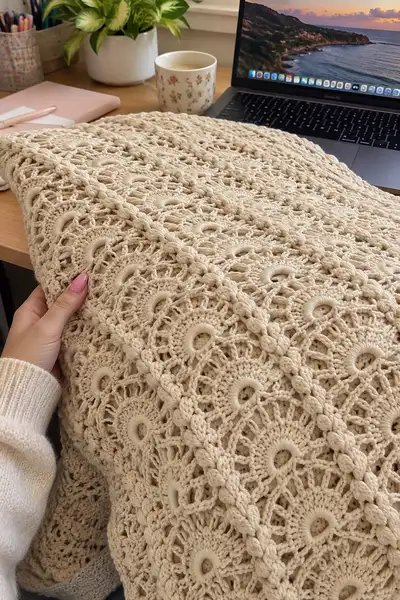
A luxurious cream bedspread worked from round medallions and braided joins to create a cozy neutral statement piece. This pattern reproduces the openwork sunburst medallions, raised bobble joins, and a deep textured border visible in the photos. Detailed stitching, joining and finishing steps let you recreate a full-size bedspread or scale it for smaller throws. Suitable for intermediate crocheters comfortable with clusters, post stitches and continuous joining techniques.
Progress Tracker
0% Complete
— Motif (make as many as needed) :
Round 1 :
Make a magic ring. Ch2 (counts as first hdc), work 11 hdc into ring. Pull ring closed. Join with sl st to top of ch2 (12 hdc)
Round 2 :
Ch3 (counts as dc), dc in same st, 2 dc in each st around. Join with sl st to top of ch3 (24 dc)
Round 3 :
Ch2, *hdc in next st, 2 hdc in next st* repeat from * to * around. Join. (36 hdc)
Info :
This early increase shaping creates a solid disk to anchor later openwork. Keep stitches even; use a stitch marker if needed to mark increases.
Round 4 :
Ch1, sc in same st, *ch4, skip 1 st, sc in next st* repeat around to create 18 ch-4 loops. Join with sl st to first sc (18 ch-4 loops)
Round 5 :
Working into ch-4 loops: Sl st into first ch-loop, ch3 (counts as dc), 11 dc into same loop, sl st to base (12 dc clustered in loop) — repeat in each ch-4 loop around. Join. (18 clusters of 12 dc)
Info :
These clustered fan shells form the characteristic sunburst. Keep tension loose in these long dc stitches so the motif lays flat.
Round 6 :
Ch1, sc in same st, *ch3, sc in center dc of next fan (6th dc of fan), ch3, sc in space between fans* repeat around. Join. (36 sc positions/spaces total)
Round 7 :
Ch4 (counts as tr), tr in next st, ch1, skip next sc, *(tr, ch1, tr) in next sc (forming V), ch1, skip next sc* repeat around. Join. (72 tr clusters including chains)
Round 8 :
Ch2, hdc in each tr and ch space around, maintaining 72 hdc total. Join. (72 hdc)
Info :
Check motif for flatness. If it curls, add one more round of hdc; if it ruffles, tighten tension or remove a few increases. Block flat to the measurement you want (typical motif diameter at this stage ~11-12cm with bulky cotton rope).
Round 9 :
Ch3, dc in next 2 sts, *ch2, skip 2 sts, dc in next 3 sts* repeat around. Join. (groups of 3 dc, with ch2 lacy spaces; maintain total of 72 dc worked into pattern)
Round 10 :
Ch1, sc in each dc and in each ch2 space around (72 sc). Join.
Round 11 :
Ch2, hdc in next 2 sts, *(hdc, ch3, hdc) in ch2 space (creates openwork arch), hdc in next 3 sts* repeat around. Join. (24 arches)
Round 12 :
Into each arch: sl st, ch3, 7 dc, ch3, sl st into same arch (creates fan with 8 dc). Repeat into every arch. Join. (24 fans of 8 dc)
Info :
Work fans loosely. If your yarn is very thick you may reduce dc in fans to 6 to avoid overcrowding; adjust counts consistently in subsequent rounds.
Round 13 :
Ch1, sc in top of each fan and in spaces between fans – total should be 24 sc across fan tops and 24 sc between = 48 sc. Join. (48 sc)
Round 14 :
Ch3, dc in same st, ch2, skip next sc, *(2 dc, ch2, 2 dc) in next sc, ch2, skip next sc* repeat around to create small shell clusters separated by ch2 spaces. Join. (24 shells)
Round 15 :
Ch1, sc in each dc and ch2 space around keeping stitch count consistent (96 sc if each dc counted separately) — reorganize count to maintain flatness. For this pattern simplify to 96 sc distributed evenly. Join. (96 sc)
Info :
At this point the motif is large and the texture is set. Use blocking pins to shape fan arcs so all motifs match before joining.
Round 16 :
Ch4 (counts as tr), *skip next st, (tr, ch1, tr) in next st, ch1, skip next st, tr in next st* repeat around. This creates elongated arches between shells. Join. (approx 96 tr placements)
Round 17 :
Ch2, hdc into each tr and ch space around. Maintain even distribution — target 120 hdc. Join. (120 hdc)
Round 18 :
Ch1, sc in next 3 sts, *puff in next st (yarn over 5 times, pull through, yarn over and draw through all loops), ch1, sc in next 6 sts* repeat around to place puff clusters evenly between sc bands. Join. (approx 20-24 puffs depending on gauge)
Info :
Puff stitches are used to create the raised bobble look visible in the photo's braided separators. Keep them evenly spaced and consistent size; compressed puffs slightly with hook before closing loop to even them.
Round 19 :
Ch2, hdc in each st and ch1 space around to tidy puffs (target 120 hdc). Join. (120 hdc)
Round 20 :
Ch1, sc around working BLO for a defined ridge: sc in each st BLO around. Join. (120 sc)
Round 21 :
Ch3, dc in next 4 sts, *ch2, skip 2 sts, dc in next 5 sts* repeat around creating open lacy spokes. Join. (approx 20 spokes)
Round 22 :
Ch1, sc in each dc and ch spaces around to stabilize. (target 140 sc). Join.
Round 23 :
Ch3, *2 dc in next st, dc in next 6 sts* repeat around to build slight outward flare. Do this evenly to increase approx 20 sts total — if you had 140 sc, finish with 160 dc. Join. (approx 160 dc)
Info :
From this point motifs begin to reach final diameter. Keep track of any added stitches. Make samples and measure motif diameter; adjust final motif rounds if you want slightly larger or smaller motifs.
Round 24 :
Ch1, sc in each dc around (160 sc). Join.
Round 25 :
Ch2, (hdc, ch3, hdc) in every 8th st to create connector arches — count carefully so you place 24 arches evenly around. In remaining spaces place 2 hdc to keep count. End with 160-168 stitches depending on spacing. Join.
Round 26 :
Into each connector arch: sl st, ch3, 9 dc, ch3, sl st (fan of 9 dc in each arch). Join. (24 fans)
Round 27 :
Ch1, sc across fans’ tops and between fans. Target final stitch count around 168-180 sc depending on your gauge. Join.
Round 28 :
Ch3, dc in next 2 sts, *(dc3, ch2, dc3) in top of each fan to make decorative shell, ch1 between shells* repeat around for defined ring. Join and fasten off leaving 20-25cm tail for joining. Final motif diameter should be approx 15-20cm depending on yarn and hook.
Info :
Fasten off and weave end through several stitches on WS. Make as many motifs as needed (example: for a queen bed aim for 6 motifs x 8 motifs = 48 motifs). Block motifs flat and pin to exact diameter before joining.
— Join & Panel Rows :
Round 1 :
Decide layout (e.g., 6 across x 8 down). Lay blocked motifs on flat surface with RS up, aligning motifs so decorative shells align into rows and columns. Use pins to hold.
Info :
Plan your join direction: photo shows braided raised join running vertically between motif columns. We'll replicate by slip-stitch joining across motif edges and then adding raised bobble rope on top.
Round 2 :
Working RS facing, pick two adjacent motifs. With RS together, insert hook through final round loop of motif A and motif B at identical join point. Sl st through both loops to join — work 1 sl st per corresponding stitch around join seam until motifs are joined. Join motifs in each row this way. This is a sturdy invisible join. (Do entire row).
Round 3 :
When row is complete, join rows together by aligning motifs above and repeating sl st seam between rows so you have a full panel of motifs connected with flat sl st seams. Fasten off and weave tails for now. Panels will have small gaps where the decorative shell meets; we'll cover these with braided join rows in following rounds.
Info :
If you prefer a visible join from the start, use a whip stitch with yarn needle to sew motifs through edge loops for a slightly thicker seam; keep stitches small and even.
Round 4 :
Prepare to add braided rope joins overlay: With RS up, attach yarn at center top of a seam (where two motifs meet). Ch1, sc evenly across seam edge around 6-8 stitches to create a base row of sc covering the existing sl st join. Fasten off. Repeat for each vertical seam in panel.
Round 5 :
To make the raised braided join (rope): Re-attach yarn at one end of the sc-covered seam, ch3, (skip 1 sc, puff in next sc, sl st in next sc) repeat down the seam to form a line of puffs and sl sts creating a chain of bobbles. Fasten off. Repeat on all seam lines to build characteristic raised lines pictured. (Each seam will have approx 18-24 puffs depending on motif size)
Info :
Consistency is key: make puff stitches uniform. Practice a test seam to determine how many stitches per seam for even spacing across the panel.
Round 6 :
After completing puff rope on all internal seams, add a small decorative sl st edging along seams: attach yarn and sl st along the edges of the rope to tidy and secure puffs into place. This will also hide any splice or ends from joining. Work carefully to keep rope symmetrical on both sides of seam.
Round 7 :
Optional: for extra thickness, on the wrong side pick up yarn and work a row of sc around each motif edge (through the back of the last motif round) before attaching border. This gives a strong foundation for the outer border. Fasten off and weave in ends.
Info :
At this stage you can check overall panel dimensions and add or remove motifs to reach desired bedspread size. Keep a layout diagram or photo for reference when joining multiple panels.
— Border Preparation & Base Frame :
Round 1 :
With RS facing and working around entire joined panel, attach yarn to any external motif edge. Ch1, evenly sc around the whole outer edge working 2 sc in corners and 1 sc per motif spacing to create a strong frame. Join with sl st. (Total sc count depends on panel perimeter; keep stitches even.)
Round 2 :
Ch2, hdc in each sc around to build a slightly raised frame. Join. (same stitch count as previous round)
Info :
These base rounds create a flat surface for the heavier decorative border to rest on. Use a slightly smaller hook if your edge ripples to tighten the edge.
Round 3 :
Ch1, sc in each hdc around, but in every 8th st work (sc, ch3, sc) to create corner/attachment points for the next decorative band. Join. (evenly spaced)
Round 4 :
Switch to optional smaller hook (5.5mm) if desirable for neater detail. Ch3, dc in next 2 sts, *(dc3 in next st, ch2, dc3 in same st) to create shell popcorns spaced evenly along border* repeat around. Join. (this will form a row of partial shells as the base for bobble clusters)
Info :
Adjust spacing: this row is purely decorative and sets up the bobble/braid border. Ensure shells sit flat before continuing.
— Deep Textured Border (creates the chunky braided look) :
Round 1 :
Attach yarn at one corner point. Ch1, sc in same st, *skip 1, (5-tr cluster) in next st, ch1, sl st in following st* repeat around. This places tall clusters that will be transformed into the braided/rope effect later. (Number of clusters depends on perimeter — for a large panel expect 60-90 clusters)
Round 2 :
Ch1, sc in each st and through each ch1 space around to anchor clusters (stitch count increases slightly if many clusters). Join. (approx perimeter sc count remains consistent)
Round 3 :
Ch3, dc in each st around (work in back loop only on this round to create a ridge for cording). Join. (perimeter dc count)
Info :
Working BLO here creates a ridge that helps define the rope line. If using very chunky yarn, reduce dc to hdc to stop border becoming too tall.
Round 4 :
To construct actual braided rope: working along the ridge, use the chain-loop method: attach yarn, ch30 (or length needed to run along one side between clusters), fold chain and sl st back along its length to create a tight chain rope (approx 30 loops compressed into one rope). Pin rope on top of ridge and sl st through base every 4-6 stitches to anchor. Proceed along entire side, join rope ends at corners. Repeat for each side to create rectangular rope frame.
Round 5 :
For extra bulk, add a second rope row above the first: attach yarn at start, ch30, sl st into rope base as you go, but offset sl st placement between the underlying anchors to create a braided look. Fasten off and weave ends. Repeat around panel perimeter.
Info :
Pin ropes heavily while sewing to keep them straight and equidistant from edge. Use a tapestry needle to whip-stitch rope in place if sl st feels too sparse for bulky yarn.
Round 6 :
Now create exterior bobble row to echo motif seam puffs: Attach yarn at rope outer edge, ch1, *sc in next 3 sts, puff in next st, ch1, skip 1* repeat around creating bobble intervals that match interior motif puffs. Join. (approx 80-100 puffs or as needed)
Round 7 :
Ch1, sc in each st and in each ch1 space around to stabilize puffs. Join. Fasten off but leave long tail for finishing if you plan to edge with a picot row next.
Info :
If you prefer the exact raised braided look in the image, construct a final rope of tightly chained loops and overlay it onto the bobble row, anchoring at every puff to create repeating vertical braided elements like pictured.
— Final Decorative Edge and Finishing Rows :
Round 1 :
Attach yarn to outermost sc. Ch4 (counts as tr+ch1), *skip 1, tr in next st, ch1* repeat around to create open picot-like arches. Join. (consistent count)
Round 2 :
Into each ch-1 arch: (sc, ch3, sc) to create rounded scallops. Join.
Round 3 :
Ch1, sc around working BLO to create a neat underside; this tucks the scallops and gives a finished back. Join. Fasten off and weave in all ends through multiple stitches.
Info :
Block entire assembled spread flat after sewing and completing border. Blocking improves drape and opens lace motifs to the desired look. Use steam or wet blocking depending on fiber instructions for rope yarn.
Round 4 :
If you want extra weight and drape, sew a cotton muslin backing to the wrong side using whip stitch; this also hides joins and gives bedspread a smooth underside.
Round 5 :
Trim any excess tails close after weaving them through at least 3-4cm of stitches. Inspect all seams and reinforce any rope anchors with additional sl sts from behind the rope into the foundation rounds.
Info :
Final pressing with steam will relax ropes and puffs into position. Allow to dry completely on blocking mats before use. Congratulations — your assembled bedspread is complete.
This cream luxury bedspread transforms simple motifs into a sophisticated, tactile statement piece — a soft neutral centerpiece for your bedroom. The repeating sunburst medallions, raised braided joins and chunky border create a high-end, handcrafted look that feels both cozy and refined. Enjoy the meditative rhythm of making each motif, and savor the moment you lay the finished spread on your bed. 🧶🛏️ The result is a heirloom-quality piece you'll be proud to display or gift. Happy crocheting! ✨