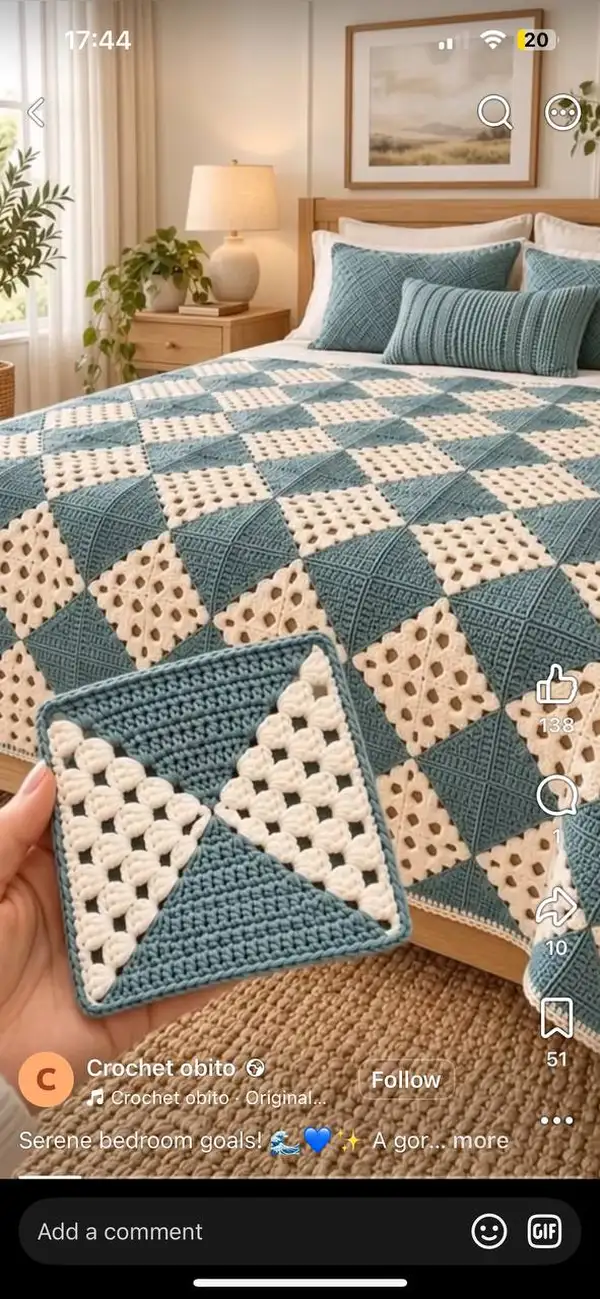
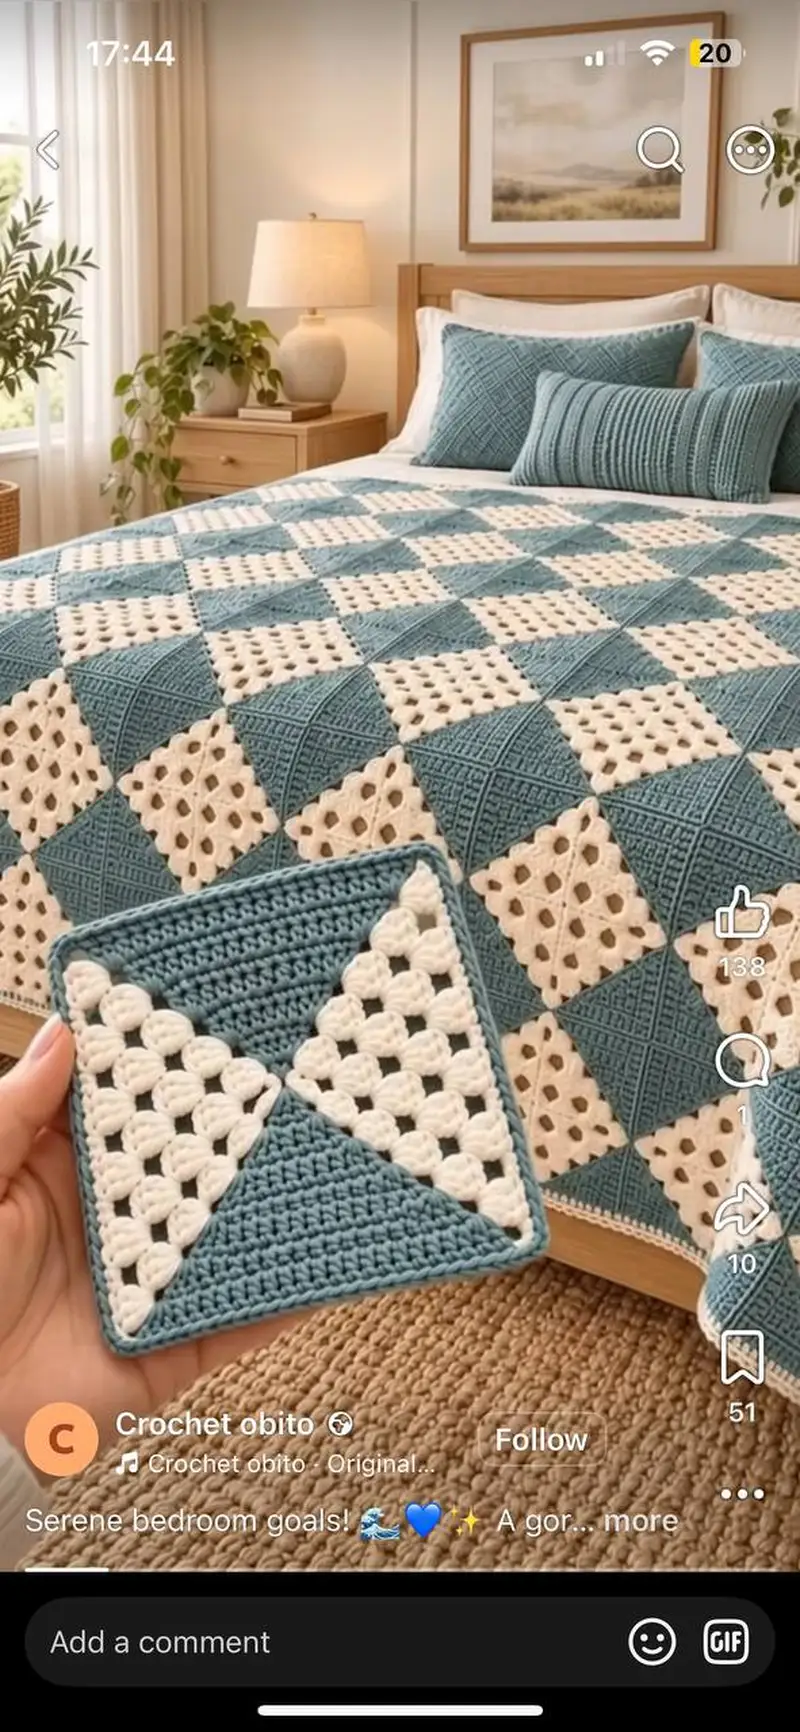
Create a serene, textured bedspread made from cheery creamy-white granny triangles and solid creamy-blue triangle wedges joined into checkerboard diamond squares. This pattern guides you through making the motif, joining squares, and working a substantial multi-round border for a polished bedspread finish. Detailed stitch counts, finishing tips, and assembly instructions are included so you can recreate the soothing diamond grid seen in the photo.
Progress Tracker
0% Complete
— Pattern Overview :
Info :
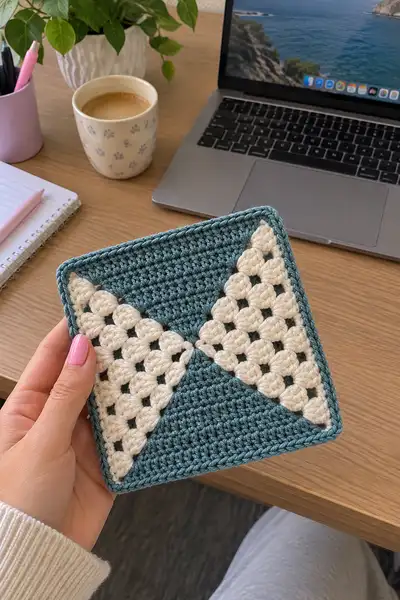
This bedspread is made from modular 4-quadrant squares. Each square is assembled from 4 triangular quarters: two solid teal wedges (dense, worked in rows) and two creamy granny wedges (classic granny cluster triangle rows). Squares are joined in a diagonal checkerboard layout to create the diamond effect. The instructions below cover making one full square, assembling multiple squares into a large spread, and a substantial multi-round border to finish the piece professionally.
Info :
Gauge (optional but recommended): One finished square measures approximately 10.5in (26.5cm) square using worsted weight yarn and a 4.0mm hook; adjust hook size to match your yarn and desired finished size. The sample bedspread photographed uses approximately 10 squares across x 12 squares down for a queen-sized look (estimate). You can scale by adding or removing squares in each direction.
— Solid Triangle Quarter (Make 2 solid wedges per square, teal) :
Round 1 :
Ch 3 (counts as first dc), work 2 dc into same starting ch (3 dc) (3)
Round 2 :
Turn. Ch 2 (counts as first dc), dc in each st across, add 1 dc at end to increase (5) — increase 2 stitches total this row by adding 1 dc at each end
Round 3 :
Turn. Ch 2, dc across, add 1 dc at end (7)
Round 4 :
Turn. Ch 2, dc across, add 1 dc at end (9)
Info :
Each row increases by 2 dc total (one at each outer edge) to create a symmetric isosceles triangle wedge. Keep the starting chain consistent (ch2) to maintain height proportion for each row; counts below follow the formula Row n stitches = (2n+1) with Row 1 = 3 stitches.
Round 5 :
Turn. Ch 2, dc across (11)
Round 6 :
Turn. Ch 2, dc across (13)
Round 7 :
Turn. Ch 2, dc across (15)
Round 8 :
Turn. Ch 2, dc across (17)
Info :
Keep ends neat: work the last stitch of each row as a normal dc in the turning chain or turning stitch to minimize holes at the edges. Maintain even tension so the triangle lays flat; block lightly when finished if necessary.
Round 9 :
Turn. Ch 2, dc across (19)
Round 10 :
Turn. Ch 2, dc across (21)
Round 11 :
Turn. Ch 2, dc across (23)
Round 12 :
Turn. Ch 2, dc across (25)
Info :
Shape check: lay the wedge next to a granny wedge (if already made) to ensure matching height. If your wedge is growing too wide or cupping, try dropping to a 3.5mm hook for tighter fabric or adjust tension.
Round 13 :
Turn. Ch 2, dc across (27)
Round 14 :
Turn. Ch 2, dc across (29)
Round 15 :
Turn. Ch 2, dc across (31)
Round 16 :
Turn. Ch 2, dc across (33)
Info :
At this point your solid wedge should measure half the square diagonal. For a larger or smaller square, add or remove rows equally on both solid wedges to keep symmetry.
Round 17 :
Turn. Ch 2, dc across (35)
Round 18 :
Turn. Ch 2, dc across (37)
Info :
Fasten off leaving a tail for joining the wedge to adjoining quarters. Weave in the tail later after seaming so you can adjust alignment. Make two solid wedges per square (positions: top-left & bottom-right, or top-right & bottom-left, depending on desired checkerboard orientation).
— Granny Cluster Triangle Quarter (Make 2 creamy wedges per square) :
Round 1 :
Ch 5, sl st to first ch to form small ring, ch 3 (counts as first dc), work 2 dc into ring – form first cluster (3 dc cluster in ring) (1 cluster)
Round 2 :
Turn. Ch 3, DC cluster into ring, ch 2, DC cluster into same ring (creates corner), turn to work first row of triangle foundation: you now have 2 clusters separated by ch2 (2 clusters)
Round 3 :
Turn. Ch 3, *cluster in space after previous cluster, ch 1*, rep across to end, end with cluster in final space; ch 2 at the end to form the corner (3 clusters)
Round 4 :
Turn. Ch 3, cluster in each ch-1 space across, add corner ch-2 between sides; at row end cluster into last space (4 clusters)
Info :
These rows are worked like traditional granny triangle rows: each new row increases the number of clusters by exactly 1 per continued row, producing a triangular panel. Each cluster is 3 dc worked in the indicated ch-1 space, and rows are separated by a corner ch-2 at the center junction as needed.
Round 5 :
Turn. Ch 3, cluster in each ch-1 space across (5 clusters)
Round 6 :
Turn. Ch 3, cluster in each ch-1 space across (6 clusters)
Round 7 :
Turn. Ch 3, cluster in each ch-1 space across (7 clusters)
Round 8 :
Turn. Ch 3, cluster in each ch-1 space across (8 clusters)
Info :
Keep cluster spacing even by counting cluster heads each row; granny textures create small triangular holes that contribute to the bedspread's lacy rhythm. When changing color into cream, finish the last stitch of the prior color with the new color to create a cleaner join if you prefer fewer ends to weave in.
Round 9 :
Turn. Ch 3, cluster in each ch-1 space across (9 clusters)
Round 10 :
Turn. Ch 3, cluster in each ch-1 space across (10 clusters)
Round 11 :
Turn. Ch 3, cluster in each ch-1 space across (11 clusters)
Round 12 :
Turn. Ch 3, cluster in each ch-1 space across (12 clusters)
Info :
Fasten off leaving a long tail for joining; if you prefer, make the granny triangles slightly taller or shorter to match your solid wedge height. Trim or add rows to match the exact height of the solid halves before joining. Make two granny wedges per square.
— Assembling Four Quarters Into One Square :
Round 1 :
Arrange the four triangles: place two solid teal wedges diagonally opposite each other, and two cream granny wedges filling the remaining diagonal positions so that triangular seams meet at the exact center. Check orientation to create the diamond/rotated-square visual.
Info :
Pin the four wedges together at center and along the seam lines on a flat surface. Blocking each wedge lightly will help get straight edges and accurate corners. If heights differ slightly, add a small row to the shorter wedge to match the taller one before joining.
Round 2 :
Using tapestry needle and tail from one wedge, whipstitch the seam from center out to one corner: align edges so stitch counts match and sew through both layers evenly. Repeat for the three remaining seams to close the center point. Secure tails and weave in ends. (Center seams x 4)
Round 3 :
Check square dimensions: the assembled square should be roughly 10.5in (26.5cm) across with the sample gauge. Adjust if necessary before adding outer rounds. If you prefer join-as-you-go (JAYG), work the final round of the last quarter attaching it to the previously made quarters as you go; instructions for JAYG are given in the Assembly section.
Info :
When sewing seams, use a whipstitch or mattress stitch for a nearly invisible seam. For a decorative center seam, you may also use a chain seaming slip-stitch seam (sl st) through both layers using contrast color; secure ends well.
— Square Frame & Rounds (Edging each square) :
Round 1 :
With RS facing, join teal (or chosen frame color) at any corner point (pick a corner in the solid wedge area to hide the start), ch 1, work 1 sc in same st, continue 1 sc evenly along edge to next corner turning chain (work approx 37 sc along the solid wedge edge), at corner work (sc, ch 2, sc) into corner point to turn and continue along next side. Work around all four sides to form single crochet frame. (Approx 150 sc around - adjust to fit)
Info :
Work an even number of sc along each side so that the square stays flat. If one side has extra stitches, spread increases evenly to keep edges straight. Use a stitch marker to mark the first sc of the round.
Round 2 :
Join with sl st, ch 2 (counts as hdc), hdc in each sc around, working (hdc, ch 2, hdc) at each corner to maintain square shape (Approx 150 hdc) — this softens the edge and preps for final rounds.
Round 3 :
Sl st to move to a side center if needed so post stitches are aligned, ch 1, work 1 sc in each st around, ensure corners are (sc, ch 2, sc). (Approx 150 sc)
Info :
If you plan to join squares using join-as-you-go (JAYG), work this round as the JAYG join round: when you arrive at a side that will be attached to a previously made square, replace sc in corresponding st with 'sl st into the adjacent square edge st, ch 1' to join. Specific JAYG instructions appear later in the Assembly section.
Round 4 :
Optional: For a crisp piped look, change to contrast color and work 1 sc in each st around, working 3 sc into each corner ch-2 space (Approx 150 sc); finish with sl st to join and fasten off. Weave in ends neatly. (Square framed)
Info :
At this stage each square is complete. Make as many squares as your bedspread layout requires (example layout: 10 x 12 squares for queen size). Keep records of number of squares of each orientation (which diagonal of solids) so that the overall checkerboard alternates correctly.
— Join-As-You-Go (JAYG) Option for Assembling Whole Bedspread :
Round 1 :
Work the square frame rounds as above on the first square. For the second square you intend to join to the first, when you reach the side that meets the already-made square, perform: *sc in next st of current square, ch 1, sl st into next corresponding sc of made square, rep across side until corner*. Finish corner with (sc, ch 2, sc) then continue around. Repeat for each side that meets existing squares. (side joins as worked)
Info :
JAYG requires counting corresponding stitches on both squares so that each sl st aligns with the sc on the adjacent square. If the counts mismatch, use evenly spaced sl sts and scs and adjust spacing with ch-1 between sl st joins. Pin squares before joining to ensure alignment.
Round 2 :
Continue making squares and join each new square to previously joined squares along 1 or 2 sides as you lay them out; work rows of squares across, joining as you go to form a panel of desired width. Once a row is complete, begin the next row below and join along the top edge to the row above using the same JAYG technique. (Row-by-row joining; repeat until panel reaches target width)
Info :
JAYG gives a flat seam without bulky finished seams, excellent for blankets. If you prefer, you can assemble all squares separately and sew them together with whipstitch or mattress stitch — especially useful if you like to block all squares first for perfectly even joins.
— Sewing Join Option (Whipstitch / Mattress Stitch) :
Round 1 :
Lay two square edges together with RS facing up. Using matching yarn and mattress stitch, insert needle under the first single crochet on the edge of square A, then under the first single crochet on square B, and pull through. Repeat evenly spaced across the edge, keeping tension snug but not pulling edges inward. (Attach full side)
Info :
For the mattress stitch, aim to pass under the vertical bars of the sc stitches rather than through the top loops to create an invisible join. Sew in the same direction for each side to keep alignment consistent. Knot securely and weave in tails after full assembly.
— Full Bedspread Layout & Joining Notes :
Round 1 :
Plan layout on the floor: alternate squares so that teal solid wedges form a diagonal diamond grid across the blanket (i.e., rotate every other square so solids are opposite diagonals). For a classic diagonal checkerboard, orient half the squares with solid wedges along NW-SE, and the other half along NE-SW.
Round 2 :
Assemble each row either by JAYG or by sewing: join squares left-to-right to make long strips. After each strip is complete, join strips top-to-bottom aligning seams carefully. Use pins at corner points every 1-2 inches to ensure consistent spacing during sewing. (Strip joining)
Info :
Measure diagonals of the whole assembled panel during joining to detect any skewing early: if diagonals mismatch, blocks may be slightly off; you can ease and reseat a seam or add a row to compensate. Blocking after partial assembly helps realign edges before final joining and border work.
— Outer Border (Worked after assembly) :
Round 1 :
With your chosen border color (sample uses teal), join yarn to any corner sc. Work 3 sc into the corner ch-2 space, then continue working 1 sc in each row end or along each row of sc around the entire afghan, working 3 sc into each corner to keep corners square. (Count will vary by blanket size; typical queen sized sample approx 1200-1400 sc around)
Info :
When working along sides that are composed of many joined squares, place 1 sc into the top of each sc from the square frames. If sides have a visible ladder of sl st joins, sc over the sl st bars for a uniform look.
Round 2 :
Ch 2 (counts as first hdc), hdc in each sc around, placing (hdc, ch 2, hdc) in each corner space. Finish with sl st to join. (hdc around)
Round 3 :
Ch 1, sc in each st around working 3 sc in corners; this tightens the border and gives a neat face for decorative rounds. (sc around)
Round 4 :
Optional textured round: Ch 2, *fpdc around next st, bpdc around next st*, rep around for a ribbed texture; place (fpdc, ch 2, fpdc) in corners to maintain square corners. (textured rib round)
Info :
Alternating front-post and back-post stitches creates a pretty linear rib that echoes the diagonal texture in the solid wedges. Use a 3.5mm hook for this round if you want a tighter, more defined rib.
Round 5 :
Ch 1, sc in each st around for a crisp outer edge (sc around). Fasten off and weave in ends if this is your final round or continue to decorative finishing rounds below.
Round 6 :
Decorative picot round (optional): Join contrast color, *sc 3, picot (ch 3, sl st into 3rd ch), sc 3*, rep around edges and corners; for the corner area, work two picots in the corner to keep all corners filled and decorative. Fasten off and weave all ends. (decorative edge)
Info :
Because the spread is large, ends can add up — weave as you go where possible. Use a blunt tapestry needle for smooth weaving, and keep tails long enough to weave through a few inches of fabric before trimming to avoid unraveling.
— Alternative Border (Wide Scallop for Soft Finish) :
Round 1 :
With RS facing, join contrast color, ch 1, sc evenly around working 3 sc in each corner. (Even sc foundation)
Round 2 :
Ch 3, *skip next 2 sc, 5 dc in next sc (shell), skip 2 sc, sl st into next sc*, rep around; when you reach corners, work an extra shell (5 dc) into the corner sc to keep shape. (shell shells around)
Info :
Shell borders read very cozy and are a flattering frame for the diamond grid. Use this if you want a softer, more decorative boundary rather than a tight ribbed edge. Adjust scale of shells to match blanket size so border doesn't pull in.
Round 3 :
Sl st to move between shells, ch 1, work 1 sc in each stitch around to neaten shells and create a firm outer rim. Fasten off and weave in ends. (neat rim)
— Blocking & Finishing :
Info :
After assembly and edging, block the entire bedspread. Pin to measurements, using blocking wires along long straight edges to avoid scalloped tension differences. Steam-block (if yarn allows) or dampen and pin to dry. This evens seams and relaxes joins for a flat finished spread.
Info :
Weave in all remaining ends using a tapestry needle. Trim ends close to the fabric after weaving at least 2in (5cm) under the surface for security. Inspect seams and add a few extra hidden stitches where joins feel loose.
— Sizing & Scaling Guidance :
Round 1 :
To make a smaller throw, reduce the number of squares (example: 6 x 7 squares). For a larger bedspread, increase the number of squares and/or increase the size of each square by adding rows to both wedge types equally. The basic module is the square; final width = number of squares across x width of one square.
Info :
If you want a heavier bedspread, use a thicker yarn (bulky) and a larger hook; expect gauge and square counts to change. Conversely, to make a more delicate spread, choose a lighter weight yarn and a smaller hook. Always make a test square to determine gauge before committing to the full project.
— Tips for Consistency and Efficiency :
Info :
Work in long sessions producing multiple identical triangles in batches (for example, all solid wedges first, then all granny wedges) to keep color transitions minimal and maintain consistent tension. Label stacks of squares with orientation to speed assembly. Keep a sample square to check tension and stitch counts while working.
Info :
Store completed squares flat and avoid folding them tightly to prevent permanent creases. Use soft storage or stack with tissue paper if you must stack them before blocking. If you run out of yarn mid-project, buy dye lot matched yarn when possible to avoid color discrepancies across the bedspread.
Completing this creamy blue bedspread is a truly rewarding project — each square comes together like a little piece of calm, and the diamond layout reads luxurious yet understated. The mix of solid textured wedges and airy granny clusters creates a cozy rhythmic pattern that feels both modern and timeless. Whether you're gifting this or finishing it for your own bedroom, the slow, meditative process of assembling and edging a bedspread is deeply satisfying. 🧶💙✨