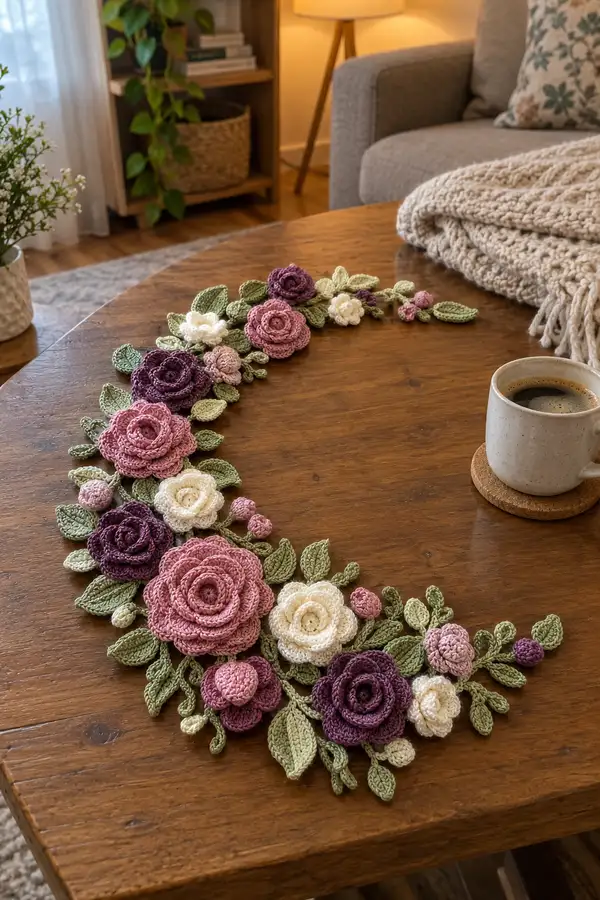
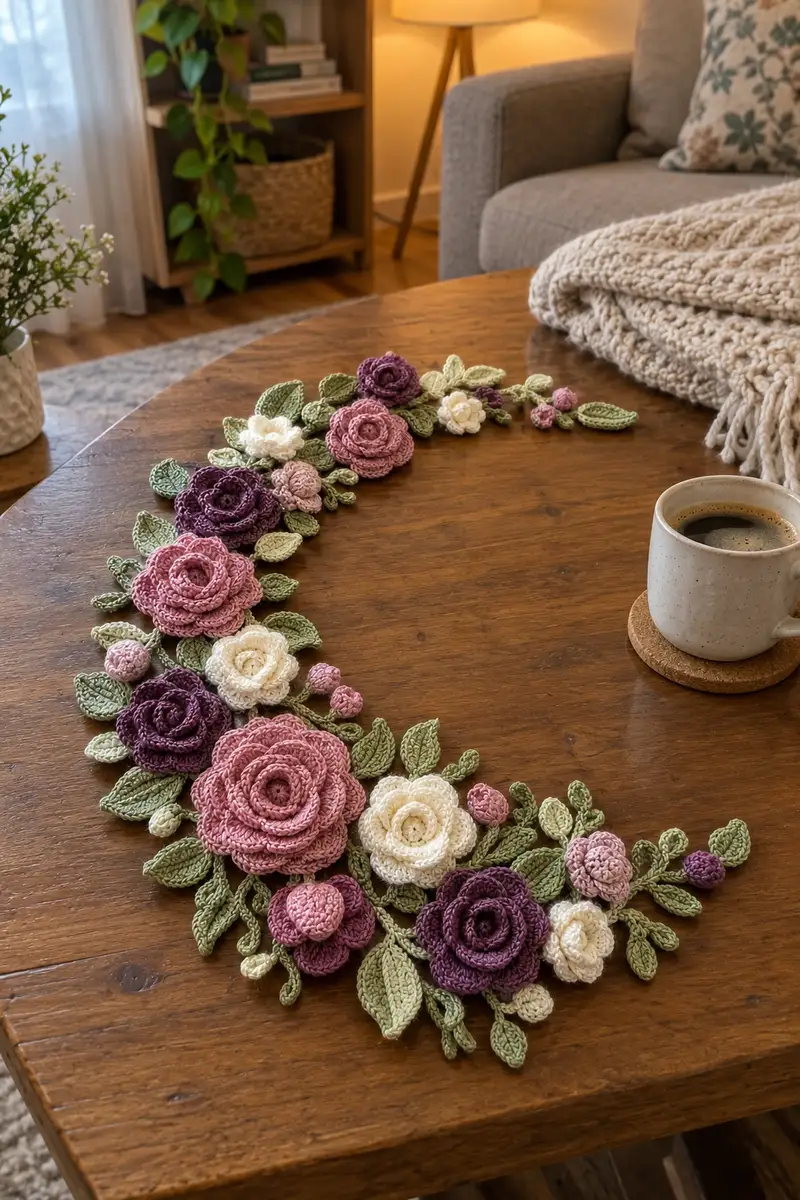
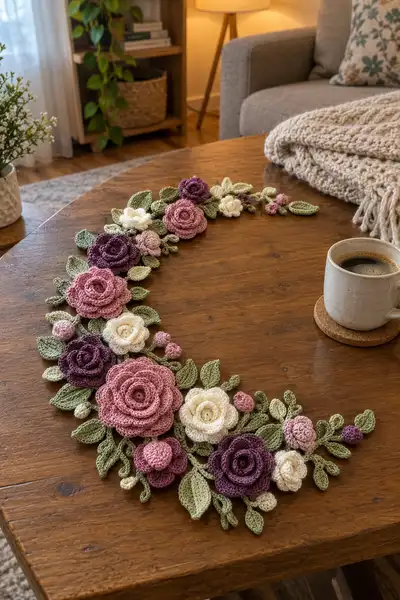
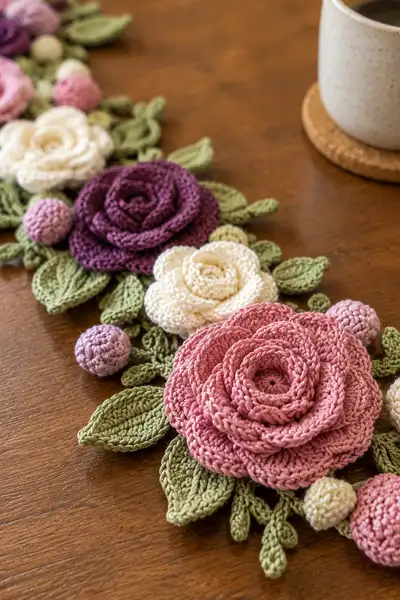
Create an elegant crescent-shaped floral table runner composed of layered crochet roses, buds, and leafy vines. This pattern recreates the photographed centerpiece with detailed petals, textured leaves, and a graceful crescent layout. Uses small-weight cotton for crisp petals and sculpted leaves — perfect for a dining table or mantle accent. Clear, step-by-step instructions guide you through every motif and assembly technique.
Progress Tracker
0% Complete
— Notes & Preparation :
Info :
Work all motifs in continuous rounds where indicated unless a sl st & join is specified. Gauge is not critical but use a hook that creates a firm, structured fabric so petals and leaves keep their shape. Block petals and leaves lightly after finishing to shape them. Leave long tails for sewing. Use stitch markers to mark the start of each round when working spirals.
Info :
All increases shown assume a starting ring. inc = 2 sc in same stitch. Counts shown at end of each round in parentheses. When working rows of petals that form from chains, counts reflect the number of petals created.
— Large Rose (Make 3 - main focal flowers) :
Round 1 :
6 sc in magic ring (6)
Round 3 :
(1 sc, inc) x 6 (18)
Round 4 :
(2 sc, inc) x 6 (24)
Round 5 :
(3 sc, inc) x 6 (30)
Round 6 :
(4 sc, inc) x 6 (36)
Info :
This first disk creates a stable center. Keep rounds tight and even. Finish round 6 with a sl st to first sc and do not fasten off; we will use this as a base for petal spirals.
Round 7 :
Ch 1, *sl st in next st, ch 3, dc in same st as sl st, ch 3, sl st in next st; repeat from * around to create 12 small loops for inner curled petals (36 loops formed by chain spaces). Join with sl st to starting sl st.
Info :
These loops will be worked into petal layers. Keep chain loops consistent in length so petals align. Work the petals in continuous round spirals to avoid joined seams showing at the front.
Round 8 (Inner petals) :
Working into each ch-3 space: *(sc, hdc, 2 dc, hdc, sc) in ch-3 space; sl st into next sl st; rep around (12 petals). Fasten off leaving long tail for sewing. (12 petals)
Round 9 :
Join yarn to outer edge between petal clusters. Ch 1, *(ch 4, sl st in next space between inner petals) x around to form 12 larger loops suitable for outer petals. Join with sl st.
Round 10 (Second petal row) :
Into each ch-4 loop: *(sc, hdc, 3 dc, 3 tr, 3 dc, hdc, sc) — create fuller petals by working taller stitches toward center of petal. (12 petals). Fasten off leaving long tail for positioning.
Info :
Shape each petal by pinching gently and blocking. When layering, offset petals so second row nestles into gaps of first row for fullness.
Round 11 :
Create a long spiral petal strip to wrap around the layered center: Rejoin at outermost edge with ch 1. Ch 30 (approx - length will form multiple rounded petals), turn and work along chain: starting in 2nd ch from hook work across as follows: (sc, hdc, 2 dc, 2 dc in next ch, dc, hdc, sc) repeat along chain to form a wavy petal strip. Fasten off leaving long tail.
Info :
The long spiral is wrapped clockwise around the center, sewing through the center disk between petals to secure. This creates the look of layered rose petals spiraling outward. Adjust ch length to increase or decrease overall diameter; photographed large rose is approximately 10-12 cm diameter.
Round 12 :
Optional: Add a third short spiral for extra density. Ch 18 and work same petal pattern as Round 11; fasten off leaving long tail.
Info :
When sewing spiral strips to the center disk, place the spiral edge against the centers of older petals and use the long tail to stitch through the base stitch, catch a few loops of the spiral, and pull slightly to shape a natural curve. Secure with multiple passes for durability.
— Medium Rose (Make 4) :
Round 3 :
(1 sc, inc) x 6 (18)
Round 4 :
(2 sc, inc) x 6 (24)
Round 5 :
Ch 1, sl st in next st, ch 3, sl st in next st around to create 12 ch-3 loops. Join. (Info: This forms a base for three rounded petals per repeat)
Round 6 :
Into each ch-3 loop: (sc, hdc, 2 dc, hdc, sc) — form medium petals (12 petals). Fasten off leaving long tail for sewing.
Round 7 :
Join at outer edge and ch 1 then ch 20. Work same petal shaping along chain as Round 6 to create spiral. Fasten off leaving long tail and wrap around center base. (Info: photographed medium roses finish approx 6-7 cm diameter)
Info :
For a slightly tighter rose, use a 3.0mm hook for the spiral strip and 3.5mm for the base so the center is compact and outer petals sit nicely.
— Small Rose (Make 6) :
Round 3 :
Ch 1, *(sl st, ch 3) around to make 6 ch-3 loops. Join.
Round 4 :
Into each ch-3 loop: (sc, 2 dc, sc) — makes compact petals (6 petals). Fasten off leaving long tail to sew petals together into a spiral. (Info: small roses approx 3-4 cm)
Info :
These small roses are quick and use short spiral strips: ch 10, work small petal repeat and wrap around base. They are used as filler between larger flowers.
— Mini Rose / Rosette (Make 8-10) :
Round 2 :
Work 6 sc around (6) - do not join if you want a continuous spiral; fasten off leaving a long tail, roll and sew into a tiny rosette. (Info: these measure 1.5-2 cm and are perfect buds)
Info :
To make tiny buds more dimensional, after forming the rosette, add a few strategic stitches through the middle to cup it slightly.
— Round Bud (Make 8-12) :
Round 3 :
Work 1 sc in each st (12)
Round 4 :
(1 sc, dec) x 4 (8)
Round 6 :
Stuff lightly then close by 4 dec (4). Fasten off and pull tail to close. Shape into a small round bud and secure by sewing the base closed. (Info: leave a short tail for attaching to vine)
Info :
These buds are usually seen in blush and cream colors and are arranged at the tips of small stems. Stuff only slightly to maintain a natural pillowy bud.
— Large Leaf (Make 16) :
Round 1 :
Ch 10, sc in 2nd ch from hook, sc in next 3 ch (4), hdc in next ch (1), dc in next 2 ch (2), hdc in next ch (1), sc in last ch (1). Now working down the other side of the foundation chain: sc in next 2 ch, sc in next 3 ch, sl st to first sc. (Total stitches worked along foundation: approx 16)
Round 2 :
Turn and work along entire edge in BLO to create a ridged vein: Join yarn at base, ch 1, 1 sc in base, *(ch 3, sl st in base to make a tiny lobed edge) repeat 3 times, then 1 sc, continue along with sc, hdc, dc, hdc, sc shaping the tip. Fasten off leaving long tail for sewing. (Info: this yields a leaf approximately 5-6 cm long)
Round 3 :
Using surface slip stitch, add a central vein: Attach yarn at base and using sl st work from base to tip along center; pull slightly to create a raised vein. Fasten off. (Info: alternate method is to work FLO on round 1 to make raised ridges)
Info :
Block leaves flat and pin the central vein slightly upward so leaves sit naturally when sewn. Leaves in the photo show a folded edge and central vein — blocking is essential.
— Small Leaf / Leaflet (Make 20) :
Round 1 :
Ch 6, sc in 2nd ch from hook, sc in next 2 ch, hdc in next ch, sc in last ch, then working back along chain sc, sl st at base. Fasten off. (Info: compact leaflet approx 2-3 cm)
Round 2 :
Optional: Work 1 sc along edge to thicken; add central vein with surface sl st. Fasten off leaving tail for sewing.
Info :
Make leaflets in two sizes to create layered foliage. Use lighter and darker greens for depth.
— Tiny Sprig (Make 10) :
Round 1 :
Ch 18. Starting in 2nd ch from hook sc, sc next 4, hdc next 2, dc next 2, hdc next 2, sc next 4, sl st to finish. Fasten off. (Info: a thin vine-like sprig approx 6-7 cm)
Round 2 :
Optional: Add tiny leaflets by attaching small ch 4 loops and sc into them to form tiny leaves along the sprig. Fasten off.
Info :
Sprigs add delicate movement in the composition. Make several and vary orientation when assembling to create a natural look.
— Crescent Base (Foundation arc that holds motifs) :
Round 1 :
Work a foundation chain of ch 90-110 depending on desired crescent length (photo uses approx ch 100). Join into a loose arc - you will not join ends; this chain is a scaffold to attach motifs.
Round 2 :
Working back along chain on the returning edge, work 1 sc in each ch to build a firm strip of fabric for stability. Work 2 rows of sc (Row 2 and Row 3) for a strong base. (100 sc across approx)
Round 3 :
Round 3: Work 1 sc in each st again (100). Fasten off and weave in tail. This creates a thin flat strip that will be hidden beneath flowers and leaves; use a size smaller hook for a firmer base if needed.
Info :
If you prefer a flexible wire backbone, stitch this crochet strip around a length of floral wire and secure with wrapping before attaching motifs. The fabric strip allows you to sew motifs on and maintain a crescent curve.
— Curved Leaf Cluster Panel (Make 6 panels) :
Round 1 :
Ch 24. Work 1 sc in 2nd ch from hook and across (23 sc). Turn and work 1 sc each across for 2 rows to create a mini panel. Fasten off. (Info: each panel is base for small leaf clusters)
Round 2 :
Join yarn and work small leaflets along both sides by chaining 6 and working sc back into the panel edge to create alternating leaves. Continue until panel edge is covered. Fasten off leaving tail for sewing.
Info :
These panels are used to extend foliage under larger roses for a smooth transition; pin and sew firmly to the crescent base to anchor bigger motifs.
— Leaf Vein Texture (Surface Slip Stitch Technique) :
Round 1 :
Attach contrasting or same green yarn at leaf base and work sl st up the center of leaf, pulling slightly to raise the vein. Fasten off. (Info: do this for each leaf to add realistic texture)
Info :
Use the sl st vein on both sides of a leaf for symmetrical texture or only on top for a subtle look. Practice on spare leaves to determine the tension for a raised but not puckered vein.
— Stem & Vine Chain (Make several lengths) :
Round 1 :
Ch 30 for a medium vine. In 2nd ch from hook sc, hdc next 3, dc next 4, hdc next 3, sc next 4, sl st to end. Fasten off leaving long tail for sewing. (Info: chain length determines reach of sprigs)
Round 2 :
For thicker vine, add a second row worked into the back loops of first row: join yarn and work sc in BLO across. Fasten off. (Info: this makes the vine lay flat and provides a stout anchor)
Info :
Sew vines to the crescent base by aligning with edge and stitching with the long tail through both vine and base strip; secure with multiple passes to hold heavier flowers.
— Berry Cluster / Round Pom (Make 8) :
Round 3 :
1 sc around (12)
Round 4 :
(1 sc, dec) x 4 (8)
Round 5 :
Stuff lightly, 4 dec (4). Fasten off, close, and shape into a small round berry. (Info: berries add dimensional interest; photograph shows berries in blush and plum hues)
Info :
Sew berries at clustered junctions between leaves and small roses for a lush composition.
— Petal Shaping & Blocking :
Info :
After finishing petals and leaves, lightly spray with water and pin them into the desired shape on a blocking mat. Allow to dry completely. For more sculpted petals, pin edges upward slightly and let dry; this will give a cupped look.
Info :
For crisp edges, use a small amount of starch or diluted fabric stiffener applied sparingly and re-shaped while damp. Test on a scrap first.
— Final Assembly & Layout Guide :
Info :
Lay crescent base on table and arrange largest roses first: position three large roses spaced along the outer curve to create visual anchor points (one near each end and one center-left as in photo). Pin each rose lightly before sewing. Add medium roses between the large ones to build mass. Tuck small roses and mini rosettes into gaps and fill with leaves, sprigs and berry clusters. Sew pieces using long tails and hidden whip stitch through the crescent base.
Info :
Attach leaf clusters under the edges of roses so the base is concealed. Use back-and-forth whipping stitches to secure heavy motifs and add a dab of fabric glue behind very small pieces if needed to prevent shifting.
Info :
When sewing spirals, catch the base stitches of the spiral and a strand of the center disk to prevent the spiral from unwrapping. Secure spiral end under an outer petal to hide the tail.
Info :
Spacing: Aim for approximate 1-2 cm overlap between petals and leaves to create a continuous, lush look. Step back occasionally to view the whole crescent and adjust placement until it feels balanced.
— Finishing Touches :
Info :
Weave in all tails along the underside of the crescent and trim close. If you used a wire backbone, bend the arc gently to desired curvature. Add a few invisible stitches under larger petals to tether them to the base for stability. Lightly steam once more if needed to perfect petal curves.
Info :
Store flat or gently rolled with tissue between rows of petals to preserve shape when not in use. Hand-wash in cool water if necessary and reshape while damp.
Completing this Crescent Moon Rose Table Centerpiece is such a satisfying reward — layers of petals, textured leaves, and gentle curves come together to create a stunning, handmade focal point. Each stitch adds to the lush, romantic look that brightens any table. Take your time shaping and blocking for the most lifelike results. 🧶🌸 Enjoy displaying your handcrafted crescent and sharing it with friends and family! 🎀