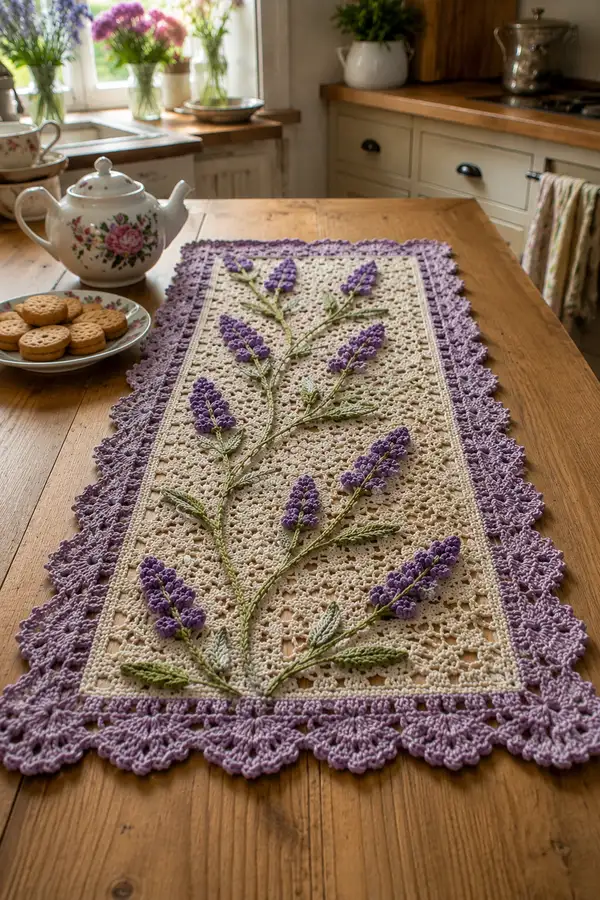
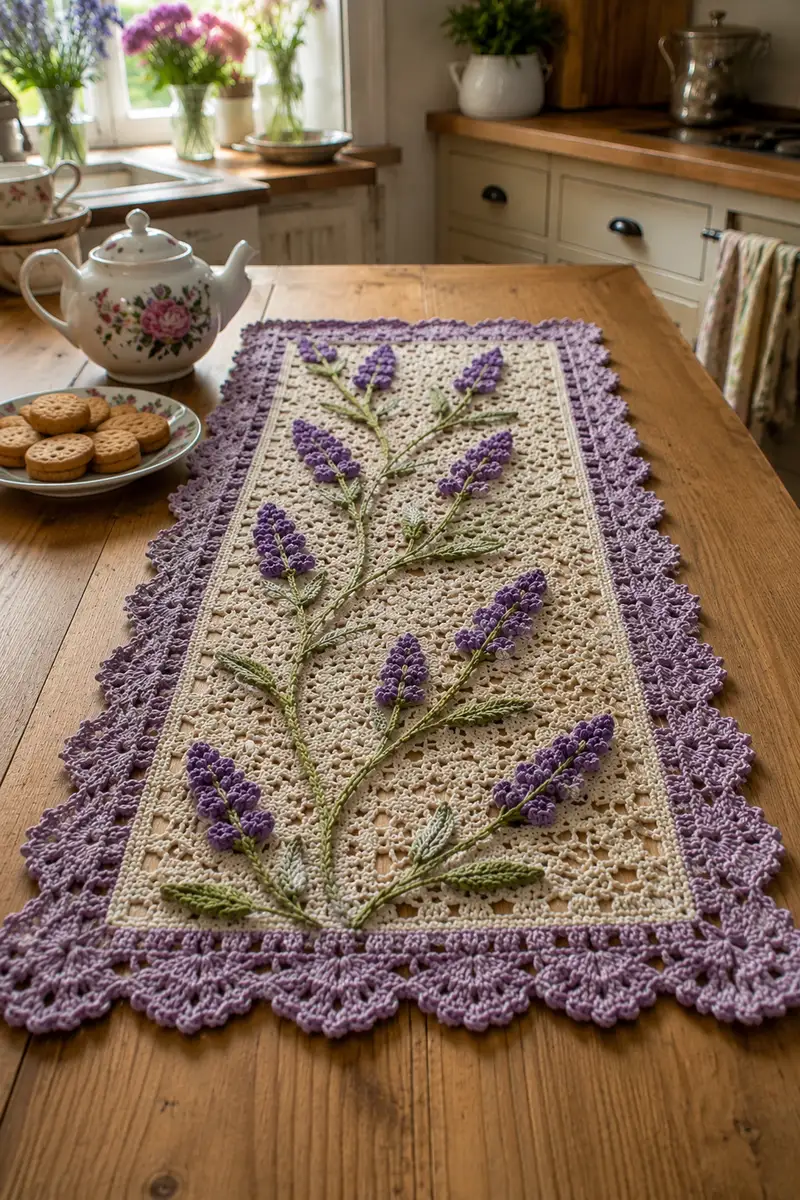
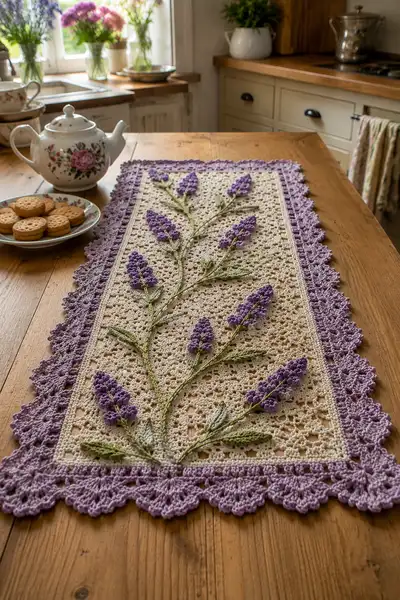
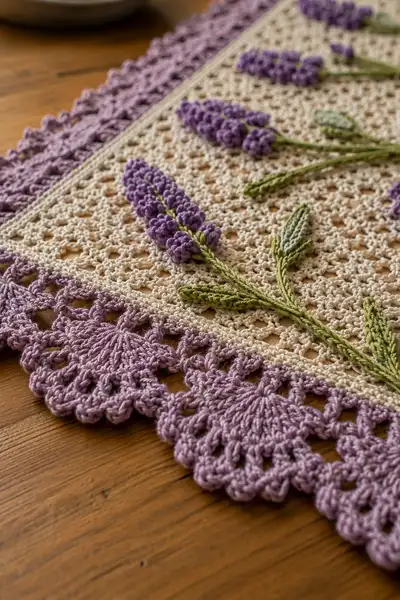
A delicate rectangular lace table runner featuring raised lavender sprigs and leafy vines on a soft cream openwork background, finished with a scalloped lilac border. This pattern combines filet-style lace, textured popcorn blossoms and braided stems to create a vintage-inspired centerpiece perfect for tea time or special occasions. The finished runner lies flat and showcases dimensional floral applique9s sewn onto a lacy rectangle for a striking table display.
Progress Tracker
0% Complete
— Notes & Overview :
Info :
This runner is worked flat as a rectangular lace panel, applique9 motifs are crocheted separately and sewn on after the lace is completed and blocked. Measurements given assume worsted weight cotton held as recommended and a 3.5mm hook. Gauge for the mesh: 18 dc x 10 rows = 4 inches (adjust hook if required). The pattern uses a foundation chain multiple of 6 to create the mesh pattern; the sample runner foundation chain = 126 (multiple of 6) + 3 turning ch = 129 total chains.
— Center Lace Panel :
Row 1 :
Chain 126, ch 3 (counts as first dc), dc into 4th ch from hook and in each chain across to end — 126 dc across (126)
Info :
Count chains carefully before turning. This foundation provides 21 pattern repeats of 6 chains each across the width. Ch 3 at the beginning of each row counts as the first dc.
Row 2 :
Ch 3, turn. *Sk next 2 dc, ch 2, dc into each of next 3 dc; rep from * across to last dc, dc in top of turning ch — pattern creates open mesh (126)
Row 3 :
Ch 3, turn. Dc into first st, *ch 2, sk next ch-2 sp, dc into each of next 3 dc; rep from * across ending with dc in top of turning ch — maintain 126 stitches width in pattern alignment
Row 4-9 :
Repeat Row 3 for 6 rows to establish the mesh foundation — keep corners neat by working last dc into turning ch (126)
Info :
Place stitch markers every 6 pattern repeats along the first row to help maintain the filet alignment over long rows. Blocking will even this mesh later.
Row 10 :
Ch 3, turn. Work across keeping pattern but every 10th repeat work a centered small picot to echo the floral motif: before the dc trio in that repeat, ch 3, sl st into first ch to make tiny picot, then continue dc trio (126)
Row 11-18 :
Repeat Row 3 across for 8 rows creating a tall open lace section; keep tension even (126)
Info :
If you prefer a more open lace, work ch-3 picots every 7 repeats instead; place markers before beginning row to identify repeats that will carry picots.
Row 19 :
Ch 3, turn. Work 1 dc into first st, *ch 2, sk next ch-2 sp, dc into next 3 dc; rep from * across keeping picots where placed previously (126)
Row 20-27 :
Repeat Row 19 for 8 rows to form the central body of the panel — this creates a balanced net for the applique9s (126)
Info :
Measure your panel now; the sample panel after 27 rows measures approximately 12 x 28 inches before blocking. Adjust number of repeats to lengthen or shorten runner.
Row 28 :
Ch 3, turn. Work one row of denser stitches to anchor the applique9s: *dc into next 3 sts, hdc into next st, sc into next st; rep from * across (126)
Row 29-32 :
Repeat Row 28 for 4 rows to form a firm anchoring band — this band will be the inner border where applique9 stems rest (126)
Info :
If attaching lavender stems by embroidery instead of crocheting stems, leave these rows as a firm base and mark stem placement with tailor's chalk before sewing.
Row 33-36 :
Return to open mesh: Ch 3, turn. Work Row 3 pattern for 4 rows to space from the anchoring band towards the outer border (126)
Row 37 :
Ch 3, turn. Work one final dense row: dc across in each st (126)
Row 38 :
Ch 3, turn. Sc in each st across to create an edging foundation row (126)
Info :
Fasten off and weave in ends for the center panel if you are switching colors for the border. Block the panel flat to open the lace before applying applique9 details — pin square/rectangular and spray or wet block according to yarn instructions.
— Lavender Bud (Make 8 - each bud worked in purple/violet) :
Info :
Each lavender bud is worked from the tip down in small rounds using popcorns and clusters to create the textured flower head. Use a 3.0mm hook for tighter texture. Make 8 buds of varying lengths so the sprigs look natural (short, medium, long). Bud lengths sample: 6 short, 2 long in the pictured runner.
Round 1 :
Make a magic ring, ch 1, 6 sc in ring (6)
Round 2 :
(Inc) 6 inc evenly around by working 2 sc in each st (12)
Round 3 :
(1 sc, inc) x 6 (18)
Round 4 :
(2 sc, inc) x 6 (24)
Info :
These first rounds create a small rounded base for the first row of popcorn clusters. Keep stitches tight so the popcorns sit perched on the head.
Round 5 :
*Popcorn: Work 5 dc into same st, remove hook from loop, insert into top of first dc of the 5, pull loop through and sl st to close popcorn; ch 1, sk 1, sc into next st; rep across 8 popcorns evenly around to form the first textured ring (24 - 8 popcorn groups)
Round 6 :
Ch 1, sl st into next st to start, *sc in next 2 sts between popcorns, 3 sc in the center st behind each popcorn to anchor; rep around (24)
Round 7 :
Work a second popcorn ring offset: *popcorn into top of sc group (as Round 5), ch 1, sc into next sc; rep around to create staggered buds (24 - 8 popcorns)
Info :
At this stage the bud should begin to show a tapered elongated shape. For longer buds repeat the popcorn + anchor rounds one or two more times. For shorter buds stop after Round 7.
Round 8 :
Ch 1, sl st to next stitch, sc around entire bud body to tidy protrusions (24)
Round 9 :
Work 1 round of slip stitches across the base stitches to tighten the bottom and create a small neck for sewing: sl st in each st (24)
Round 10 :
Fasten off leaving a 6-8 inch tail for sewing. If you want slightly raised buds, stuff the center of the bud very lightly before closing with tail (optional).
Info :
Make additional buds by repeating these rounds. Vary the number of popcorn rings to create visual interest: short bud = 1 popcorn ring (Round 5), medium = 2 rings (Rounds 5 & 7), long = 3 rings (add additional popcorn round between Rounds 7 and 8).
— Leaf (Make 14 - various sizes) :
Info :
Leaves are crocheted flat in a tapered elliptical shape using front post/back post and short rows of hdc/sc to create texture. Use sage/olive green yarn and a 3.0-3.5mm hook.
Round 1 :
Ch 12, sc in 2nd ch from hook and across to last ch, 3 sc in last ch; rotate and sc along opposite side of foundation ch working 10 sc; 2 sc in first ch to close the leaf base — total approx 26 sc (approx 26)
Round 2 :
Ch 1, turn. Working around leaf edge: sc in first 6 sts, hdc in next 6, sc in next 8, sl st to base to shape the tip; rep on opposite side to mirror for a smooth oval — maintain symmetry (approx 26)
Round 3 :
Work a row of BLO sc around the leaf to create a defined ridge: sc in each st BLO (26)
Round 4 :
Working on RS only: *fpdc down the center line of leaf into previous rounds where possible to create raised midrib; approximately 6 fpdc down the center (6)
Round 5 :
Fasten off leaving a 6 in tail for sewing. Block leaves lightly to flatten and define the rib.
Info :
Make leaves in three sizes: small (use ch 8 foundation), medium (ch 12 as above), large (ch 16 with proportionate increases in round counts). Make enough leaves to place along each sprig as shown in photos (approx 14 leaves total).
— Stem (Make 6 long stems and 2 short stems) :
Info :
Stems in the sample are braided chains worked as a slim cord by crocheting a long chain and working slip stitch or hdc into back loops only to create a twisted/rope look. Stems are then sewn flat to the panel. Use sage green and 3.0mm hook.
Round 1 :
Chain 60 for long stem (create length as needed to place buds as in picture). For short stems chain 36. Ch 1, sc in second ch from hook and in each ch across to make a cord (Long = 59 sc, Short = 35 sc)
Round 2 :
Turn, sc back across the chain through both loops to thicken cord (Long = 59 sc). Optional: work a second pass to create a sturdier stem if your yarn is fine.
Round 3 :
Finish off leaving long tail for sewing. If you prefer a twisted appearance, chain the required length, then join ends and twist lightly before blocking; or work hdc in BLO to create ridged look.
Info :
For sturdier stems you may insert a length of thin floral wire inside the cord before finishing, fold wire ends inward and ensure they are fully covered by yarn for safety. When sewing, secure at multiple points to keep stems flat and stable on the panel.
— Applique9 Placement (Positioning the sprigs) :
Info :
On the blocked center panel, mark the stem lines with tailors chalk or removable fabric pen. The pictured runner shows a diagonal vine running from one lower corner to the opposite upper side with smaller side sprigs. Make a sketch: main vine with 3 large buds, smaller side vine with 2 buds, and two short buds near the ends.
Step :
Pin stems onto the panel following the sketch. Place buds at desired positions, pin leaves adjacent to stems and adjust spacing for natural asymmetry. Baste using large stitches if necessary to secure positions before final sewing.
Info :
Sew the stems down using invisible ladder stitch or whipstitch with matching yarn, placing stitches at every 1/2 inch along the stem to secure it neatly. Sew buds at their base using long tail and bring tail through center of bud and onto stem before finishing to anchor firmly.
— Scalloped Border (Worked in lilac - several rounds) :
Info :
Border is worked around the entire blocked panel in the lilac color. Begin by picking up stitches evenly around the panel edge. The sample border uses a repeated shell and picot motif to produce a scalloped edge.
Round 1 :
Attach lilac yarn with sl st to any corner. Ch 1, evenly work 1 sc in each edge st/pinned space around placing (sc, ch1) in each corner to turn gently. Maintain a total st count equal to the panel width perimeter approx (measure and count). Fasten off. (approx 126 sts on long sides, adjust)
Round 2 :
Attach yarn in center of a long side and ch 3 (counts as dc), *sk 2 sc, (5 dc shell) in next sc, sk 2 sc, sl st in next sc; rep from * across to create repeating shells along each long side and work shells into corners to follow shape — keep shells evenly spaced.
Round 3 :
Ch 1, turn. *In the center dc of each shell work (sc, picot, sc) to create a scalloped peak; between shells work 1 sc into sl st join to balance spacing; rep around (shell peaks across whole perimeter)
Round 4 :
Ch 3, turn. Work a reverse shell row behind each scallop: in each scallop space work (2 dc, ch 2, 2 dc) to accent and add depth — this becomes the decorative fold shown.
Round 5 :
Ch 1, turn. Work 1 sc around each dc and into shell spaces to tidy edge; where scallops meet at corners maintain symmetry by working an extra sc to fill gaps as necessary.
Round 6 :
For an ornate edge repeat Round 4/5 once more to deepen the scallops. For a slimmer border stop after Round 5. Sample runner uses 6 rounds of edging for a pronounced scallop.
Info :
Work the short sides with the same shell count as the long sides but adjust spacing; blocking will help shells sit flat. Count shells on one long side and replicate the same number symmetrically on the opposite side for a balanced appearance.
— Finishing Touches :
Round 1 :
Once all applique9s are sewn and border completed, weave in all tails using tapestry needle; bury yarn ends across several stitches to secure them (no visible tails on RS).
Round 2 :
Lightly steam or wet-block the entire runner to open lace and set scalloped border. Pin scallops carefully to get uniform arcs; allow to dry completely before removing pins.
Info :
For washing, hand wash gently in cool water and air dry flat to maintain shape. If using mercerized cotton the runner will have a slight sheen similar to the photo.
Round 3 :
Optional: add a small stabilizing backing like felt or fusible interfacing only if runner will be used on heavily textured surfaces; this will reduce snags but is not necessary for average use.
Info :
Enjoy the tactile contrast of the airy mesh and the dimensional lavenderbuds — this runner is meant to be seen from above so position buds so they read well at a glance.
This Lavender Sprig and Vine Lace Table Runner brings antique charm to any table with its airy lacework and dimensional lavender applique9s. The combination of open mesh, textured popcorn buds and scalloped edges creates a centerpiece that's both elegant and comforting. Each stage — crocheting the mesh, crafting small blooms and attaching them carefully — is a little meditation in making. Display it for tea, gifts or anytime you want to brighten a surface with handmade beauty. 🧶🌿