About This Crochet Flexagon Pattern
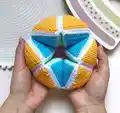
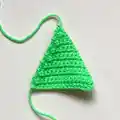
This pattern teaches you how to crochet an interactive flexagon toy using small equilateral triangle motifs. You will make 24 triangles, edge them, sew them into pyramids, and assemble a flexible, twistable toy. The instructions include step-by-step rounds, edging guidance, and assembly tips with suggested seams and filling.
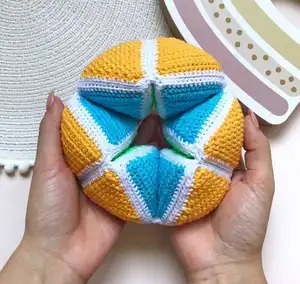
The finished flexagon measures approximately 15 cm across using the recommended yarn and hook. Colorful sections and simple crochet techniques make this a fun weekend project for intermediate crocheters.
Why You'll Love This Crochet Flexagon Pattern
I absolutely love this pattern because it turns simple triangle motifs into a magical, twistable toy that kids and adults adore. I enjoy the satisfying rhythm of making identical triangles and then watching them transform into pyramids and the final flexagon. The project is a great way for me to experiment with color combinations and contrast edging to make each face pop. I also love how the assembly brings everything together — the sewing and shaping are meditative and rewarding.
Switch Things Up
I love to change up the colors to make each flexagon unique; try high contrast colors for a bold look or pastels for a softer toy.
I sometimes use a slightly thicker yarn and a larger hook to make a chunkier version that is more cuddly and tactile.
I often experiment with different edging colors; using a darker border makes each triangle pop while a white border gives a clean, crisp finish.
I like to embroider small motifs or add tiny felt shapes to the triangle faces to personalize the flexagon for a child or friend.
If you want a smaller keychain version, use a finer yarn and smaller hook and reduce stuffing to keep it lightweight.
I sometimes replace the stuffing with eco-friendly fill or fabric scraps for a firmer, denser pyramid feel.
I recommend adding a removable sewn loop if you want to hang the flexagon as a unique decoration.
I also enjoy making matching sets in seasonal colors—try autumn tones or holiday palettes for festive gifts.
I encourage trying beads or embroidery along the seam lines for texture but keep stitches secure so the flexagon remains flexible.
I often make a test triangle to check gauge and assembly before producing all 24 pieces to ensure consistency across the set.
I like to document color placements on paper as I go so the final assembly matches the pictured arrangements and flips correctly.
I sometimes use a slightly different yarn brand for the edging to create a subtle texture contrast that reads nicely in photos.
Common Mistakes & How to Fix Them
✗ Skipping the written note about the decrease technique can cause unclear shaping; follow the decrease instructions step-by-step and practice the single crochet decrease before starting.
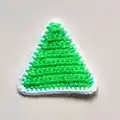
✗ Not making exactly 24 triangles will disrupt the assembly balance; count and set aside 6 triangles of each color (yellow, orange, light green, blue) so you have 24 total before edging and sewing.
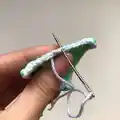
✗ Forgetting to work the white edging neatly will make seams bulky and uneven; attach the white thread and work single crochet evenly along the edge, placing 3 SC at each triangle top for consistent corners.
✗ Understuffing the pyramids results in flat shapes that do not hold their form; fill each pyramid firmly but not overstuffed and use the seam to shape while closing.
✗ Sewing pyramids with the wrong alignment causes the flexagon to not flip correctly; follow the pictured seam placements and sew A to B using the seam formed when seaming pyramids, checking alignment as you go.