Discover a charming collection of crochet flower patterns you can make for decor, bouquets, or gifts. This booklet walks you through petals, pistils, corollas and assembly with clear step-by-step rounds and helpful diagrams. Youll learn shaping with wires and finishing with floral tape so your flowers hold shape and look professional. Perfect for crocheters who love small, rewarding projects and floral creativity.
Progress Tracker
0% Complete
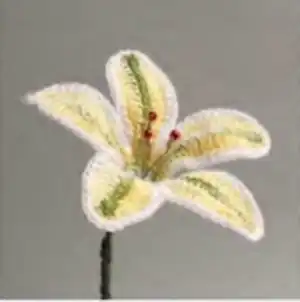
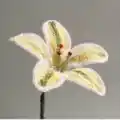
— Calla Lily :
Round 1 :
Begin with 5 ch. Join with 1 st to form ring. Work 2 sc together in each chain. Join with 1 st.
Round 2 :
3 ch + 1 dc together, 2 dc together in each stitch.
Round 3 :
3 ch + 1 dc together, 2 dc together in each stitch.
Round 4 :
3 ch + 1 dc together. *1 dc, 2 dc together*. Repeat**. Join with 1 st.
Round 5 :
3 ch + 1 dc together. *2 dc, 2 dc together*. Repeat**. Join with 1 st. Prepare a 0.6 mm wire.
Round 6 :
Make 39 sc, 3 dc together, 39 sc incorporating wire.
Round 7 :
Work all around petal with sc. Break off yarn.
Item Name (P1) :
PISTIL: Begin with 5 ch. Join with 1 st to form ring. Work 2 sc together in each chain. Work 180 sc in a circle (about 6 cm wide). Join with 1 st. Break off yarn.
Info :
Insert a 0.8 mm wire into the base of pistil and twist the ends of wires. (FIG.1) Insert pistil in the base of petal. (FIG.2) Twist corresponding wires together. Bend base of petal towards the pistil. (FIG.3) Cover stem with green floral tape. See video tutorial. Alternatively, work final round in Crab Stitch.
— Poppy :
Round 1 :
Begin with 4 ch. Work 7 dc in the first chain.
Round 2 :
3 ch, 1 dc, 2 dc together, 2 dc together, 2 dc together, 2 dc together, 2 dc.
Round 3 :
3 ch, 2 dc, 2 dc together, 1 dc, 2 dc together, 2 dc together, 1 dc, 2 dc together, 3 dc.
Round 5 :
1 ch, skip 1 stitch, 2 sc, 10 dc, 2 sc.
Round 6 :
1 ch, skip 1 stitch, 3 sc, 3 dc, 3 dc together, 3 dc, 3 sc. Break off yarn. Prepare wire. Attach yarn in the base of petal.
Round 7 :
Work all around the petal in sc, incorporating wire. Join with 1 st.
Round 8 :
Work all around petal in Crab Stitch. Break off yarn.
Info :
Make 4 petals. COROLLA: Make a crochet button. Chain 3 join with 1 st to form ring. Work 40 sc inside the ring. Break off yarn. Work 5 sc inside the ring. Work 5 times: 1 sc, 5 ch on outer rim of button. (FIG.1) Break off yarn. Insert wire into the back of corolla and twist the ends of wire. (FIG.2) Attach petals to corolla. (FIG.3) Twist corresponding wires together. (FIG.4) Cover stem with green floral tape. See video tutorial.
— Tulip :
Round 1 :
Begin with 15 ch. 1 sc, 1 dc, 10 tc, 1 dc, 9 dc together, 1 dc, 10 tc, 1 dc, 1 sc. Break off yarn. Prepare a 0.6 mm wire.
Round 2 :
Work 15 sc, 1 dc, 3 dc together, 1 sc, 3 dc together, 1 dc, 15 sc, 1 st incorporating wire. Break off yarn.
Info :
Make 4 petals. Insert a 0.3 mm wire into a pearl and twist the ends of wire. (FIG.1) Make 3 pistils and twist the ends of wires. (FIG.2) Attach the petals at pistils. (FIG.3) Twist corresponding wires together. (FIG.4) Cover stem with green floral tape. See video tutorial.
— Rose Bud :
Round 1 :
Begin with 4 ch and work 9 dc in the first chain. Join with 1 st.
Round 2 :
3 ch + 1 dc together, 2 dc together in each stitch. Join with 1 st.
Round 3 :
3 ch + 1 dc together, 2 dc together in each stitch. Join with 1 st. Break off yarn.
Round 4 :
Work all around petal in Crab Stitch. Break off yarn.
Info :
Make 3 petals. Roll up 1 petal. (FIG.1) Join remaining 2 petals and attach them with wire. (FIG.2) Twist the ends of wire together. (FIG.3) Cover stem with green floral tape. See video tutorial.
— Little Rose :
Round 1 :
Begin with 4 ch and work 9 dc in the first chain. Join with 1 st.
Round 2 :
3 ch + 1 dc together, 2 dc together in each stitch. Join with 1 st.
Round 3 :
3 ch + 1 dc together, 2 dc together in each stitch. Join with 1 st. Break off yarn. Prepare wire.
Round 4 :
Work all around petal in sc incorporating wire. Join with 1 st. Break off yarn.
Info :
Make 4 petals. Insert wire into 3 petals. Alternatively, work final round in Crab Stitch.
— Big Rose :
Info :
Make a Rose Bud (see pattern page 8).
Round 1 :
Begin with 4 ch and work 9 dc in the first chain. Join with 1 st.
Round 2 :
3 ch + 1 dc together, 2 dc together in each stitch. Join with 1 st.
Round 3 :
3 ch + 1 dc together, 2 dc together in each stitch. Join with 1 st. Prepare wire.
Round 4 :
Work all around petal in sc incorporating wire. Join with 1 st.
Round 5 :
Work all around petal in Crab Stitch. Break off yarn. Make 6 petals.
Info :
Join the first 3 petals at Rose Bud by twisting corresponding wire. (FIG.1) Join the last 3 petals. (FIG.2) Twist corresponding wires together. (FIG.3) Shape petals decoratively. Cover stem with green floral tape. See video tutorial.
— Pansy :
Info :
FLOWER: Magic Ring.
Round 1 :
Work into the ring *1 sc, 3 ch, 3 dc, 3 ch*. Repeat** (4 petals). Pull loose yarn end to tighten circle. Break off yarn.
Round 2 :
*1 sc in the centre of flower, 2 sc into 3 chains, 1 dc, 2 dc together, 1 dc, 2 sc into 3 chains*. Repeat**. Break off yarn.
Round 3 :
1 st, 2 sc, 2 dc together, 2 dc together, 2 dc together, 2 dc together, 5 sc, 2 dc together, 2 dc together, 2 dc together, 2 sc, 1 st. Break off yarn.
Info :
Insert wire behind the flower. (FIG.1) Twist the ends. (FIG.2)
— Little Flower :
Round 1 :
RECEPTACLE: Begin with 5 ch. Join with 1 st to form ring.
Round 2 :
Rnd 1: 1 ch, 2 sc together in each chain.
Round 4 :
Rnd 3: *2 sc together, 1 sc*. Repeat**.
Round 6 :
Rnd 5: 15 sc. Join with 1 st.
Round 7 :
PETALS: Rnd 6: *Begin 15 ch and work 14 sc in each chain across. Continue with 3 sc*. Repeat **. Break off yarn.
Round 8 :
Rnd 7: *5 sc, 7 dc, 4 sc, 7 dc, 5 sc. Skip 1 stitch, 1 sc, skip 1 stitch*. Repeat**. Join with 1 st. Break off yarn.
— Big Flower :
Round 1 :
RECEPTACLE: Begin with 5 ch. Join with 1 st to form ring.
Round 2 :
Rnd 1: 1 ch, 2 sc together in each chain.
Round 4 :
Rnd 3: *2 sc together, 1 sc*. Repeat**.
Round 6 :
Rnd 5: 15 sc. Join with 1 st.
Round 7 :
PETALS: Rnd 7: *Begin 19 ch and work 18 sc in each chain across. Continue with 3 sc.* Repeat**.
Round 8 :
Rnd 8: *5 sc, 10 dc, 6 sc, 10 dc, 5 sc. Continue with 3 sc.* Repeat**.
Round 9 :
Rnd 9: *5 sc, 10 hdc, 2 sc, 2 sc together, 2 sc together, 2 sc, 10 hdc, 5 sc. Skip 1 stitch, 1 sc, skip 1 stitch*. Repeat**. Join with 1 st. Break off yarn.
Info :
PISTIL: Insert a 0.3 mm wire into a pearl and twist the ends. (FIG.1) Prepare 3 pistils and twist corresponding wires together. Insert a 0.8 mm wire in the back of flower beginning from receptacle centre and reaching the edge of petal. Bend wire and twist the ends together. (FIG.3) Insert pistils into the centre of flower. (FIG.4) Cover stem with green floral tape. See video tutorial.
This Crochet Flower Patterns Book brings a garden of delicate, handcrafted blooms to your home and gifts. Create Calla Lilies, Poppies, Tulips, Roses and more with simple rounds and wire shaping. Each pattern is designed to be satisfying and decorative, perfect for bouquets, hat pins, or table accents. 🌸🧶✨