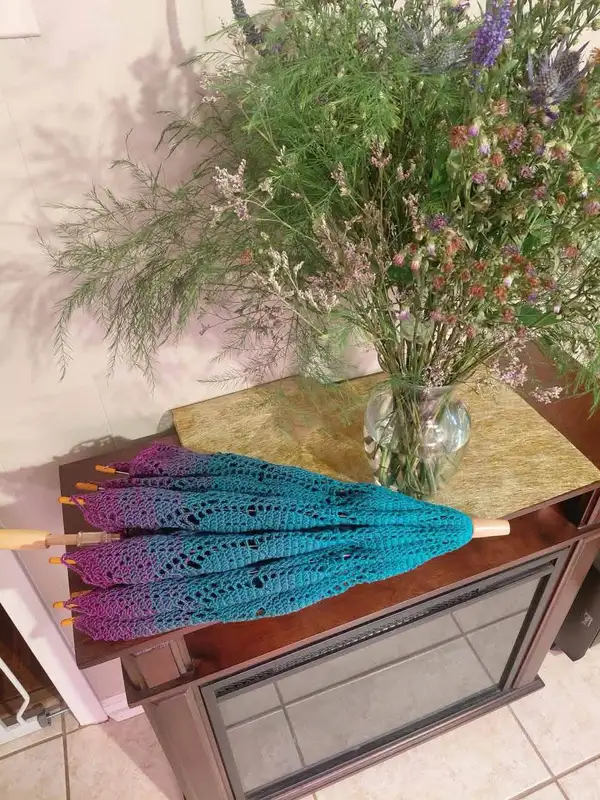
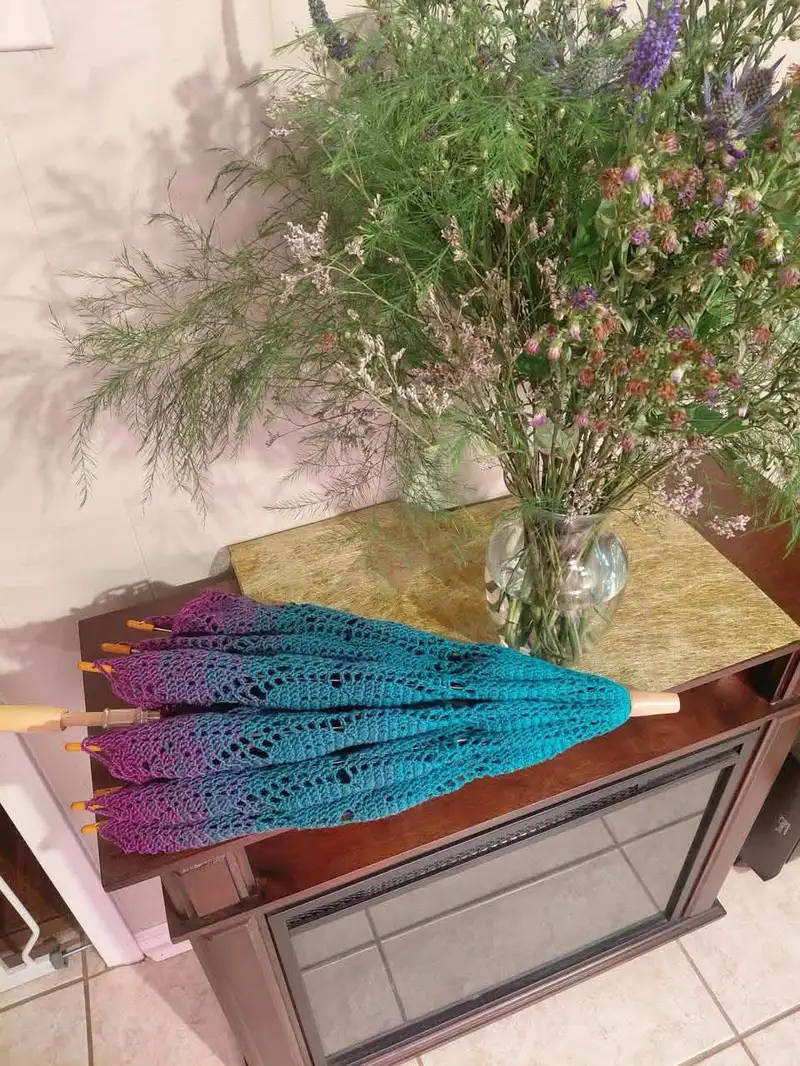
This pattern recreates a delicate, lacy parasol cover worked in gradient yarn, finishing in scalloped pointed panels that drape beautifully over a folding umbrella. The finished cover features long tapered panels with openwork lace, chain-loop rib attachments, and a decorative scalloped edge. Perfect as a decorative parasol cover or lightweight umbrella cozy with a vintage-inspired look.
Progress Tracker
0% Complete
— Notes & Gauge :
Info :
This pattern is written for a standard 8-rib folding umbrella approximately 22-24 inches when closed. If your umbrella has a different number of ribs, adjust the number of panels to match. Use a hook that produces a firm fabric—too loose and the umbrella structure will show through. Gauge is flexible for this accessory; aim for the finished panel base width to match rib-to-rib spacing on your umbrella.
Info :
Construction overview: You will crochet 8 identical wedge panels from a small crown (magic ring) and work outward increasing each round to form a tapered panel. Panels are joined along vertical edges by slip-stitch or mattress stitch to form a full cover. After joining, work a multi-round scalloped edging and create rib loops at the tips of each point to anchor the cover to umbrella tips. Blocking helps panels sit evenly.
— Crown & Apex (Make 1 small center circle that anchors all panels) :
Round 1 :
6 sc in magic ring (6)
Round 3 :
(1 sc, inc) x 6 (18)
Round 4 :
(2 sc, inc) x 6 (24)
Info :
This small round forms the very top of the parasol where each of the wedge panels will join. Keep this tight; you will sew panels to this crown for added stability.
— Single Wedge Panel (Make 8 identical panels; repeat Rounds 1-30 for each panel) :
Round 1 :
Attach yarn to crown at one stitch space (or start new magic ring if you prefer detached panels). 6 sc in starting base (6)
Round 2 :
6 inc evenly around (12)
Round 3 :
(1 sc, inc) x 6 (18)
Round 4 :
(2 sc, inc) x 6 (24)
Round 5 :
(3 sc, inc) x 6 (30)
Info :
Rounds 1-5 expand the little wedge apex into a short cone. Keep stitches even and flat. If you notice the panel cupping, block lightly before continuing; if it waves, tighten tension or go down one hook size.
Round 6 :
(4 sc, inc) x 6 (36)
Round 7 :
(5 sc, inc) x 6 (42)
Round 8 :
(6 sc, inc) x 6 (48)
Round 9 :
1 sc in each st around (48)
Info :
Round 9 stabilizes the base before beginning the lace pattern. Place a stitch marker at the beginning of each round to keep track of panel center and shaping. If you prefer a taller crown area (less flare near the top), add one or two extra even rounds here.
Round 10 :
(6 sc, inc) x 6 (54)
Round 11 :
1 sc in each st around (54)
Round 12 :
(7 sc, inc) x 6 (60)
Round 13 :
1 sc in each st around (60)
Info :
At this stage the panel is beginning to broaden—these rounds control how quickly the wedge grows. Keep consistent increase spacing (one inc every X stitches) so the wedge remains symmetrical on both sides.
Round 14 :
(8 sc, inc) x 6 (66)
Round 15 :
1 sc in each st around (66)
Round 16 :
Begin lace motif: *dc in next 3 sts, ch 2, sk 1 st* rep across to last st, dc in last st (66)
Info :
This lace round creates chain spaces while keeping the stitch count by working dc clusters into consecutive sts and using ch spaces as decorative holes. Count carefully; the stitch count stays the same because chain spaces are worked between clusters without adding or subtracting main sts for the next round (you will work into these dc sts and chains appropriately).
Round 17 :
1 sc in each st and into each ch-2 space across (66)
Round 18 :
(9 sc, inc) x 6 (72)
Round 19 :
1 sc in each st around (72)
Info :
When working the sc rounds after the lace row, ensure you are stitching into the top of the dc clusters and into chain spaces where indicated. This keeps the lace openings aligned vertically in the finished panel.
Round 20 :
Repeat lace pattern with slight variation: *tr in next 2 sts, ch 3, sk 2 sts* rep to end, tr in final st (72)
Round 21 :
1 sc in each st and into each ch-3 space (72)
Round 22 :
(10 sc, inc) x 6 (78)
Round 23 :
1 sc in each st around (78)
Info :
If you would like a more open lace, substitute ch-3 chain spaces with ch-4 on Round 20 and adjust next round to work into ch-4 spaces. Keep increases regular to maintain panel symmetry.
Round 24 :
Decorative open shell row: *sk next st, (dc, ch2, dc) in next st, sk next st, sc in next st* rep across (78)
Round 25 :
1 sc in each st across and into each ch-2 space (78)
Round 26 :
(11 sc, inc) x 6 (84)
Round 27 :
1 sc in each st around (84)
Info :
Continue to check your panel width against a rib section of the umbrella—lay the panel along a rib to ensure each panel will cover one rib with slight overlap at the joins. Adjust number of increase rounds (add or subtract) so the panel base width matches rib spacing when relaxed, not stretched.
Round 28 :
Wide open lace row: *dc in next 4 sts, ch 3, sk 2 sts* rep to end, dc in last st (84)
Round 29 :
1 sc in each st and into each ch-3 space (84)
Round 30 :
Final base round for panel: (12 sc, inc) x 6 (90)
Info :
Fasten off if you will make all panels separately. Weave in the tail or leave a long tail for sewing. Repeat Rounds 1-30 to make 8 identical panels total. If your umbrella requires more or fewer panels (for 6, 10 or 12 ribs), adjust the number of panels accordingly and re-calculate base stitch count so edge width matches rib spacing.
— Repeat Panel Creation :
Info :
Make 7 more panels identical to the first. Use consistent tension and blocking so all panels match. I recommend completing panels one at a time while keeping the stitch marker at round starts to maintain uniform increase points. If using gradient yarn, simply continue rounds until the cake gradient reaches the color transitions you like. For a symmetrical color flow, place panels next to each other so gradient runs consistently around the umbrella.
— Joining Panels (Join 8 panels to form full parasol) :
Round 1 :
Lay two panels right sides together aligning top apex and base edges. With tapestry needle or crochet hook, join by slip-stitch through both loops of corresponding sts along one vertical edge from crown to base—do not pull too tight; maintain lace openness (90 sts join length as per Round 30 count)
Round 2 :
Repeat join between subsequent panel pairs until all panels are joined into a circular assembly. When final seam is complete, join last panel to first panel the same way so you have a full circle.
Info :
When joining at the crown, it can be helpful to attach the crown circle made earlier: position crown inside the top center and seam the inner top of each panel into the crown with small even stitches to hide the join and strengthen the apex. This also hides the small gathering point where the ribs converge.
Round 3 :
After joining panels, make one round of sc around the entire top edge (apex ring) to tidy the join. Work 1 sc in each stitch around the top inner circumference (total will equal number of panel top stitches—work evenly to avoid puckering)
Info :
Try on the cover over the umbrella (closed) at this point to check fit. If the apex is too loose, add one more round of sc or a circle of slip stitches to tighten the crown. If too tight, you may undo a joining seam and relax a few stitches or use a slightly larger hook for the crown round.
— Lower Edge Shaping & Scalloped Points :
Round 1 :
Attach yarn at base of any panel. Work 1 sc in each st around base to create even lower edge (90 sts) (90)
Round 2 :
Edge shaping round: *ch 3 (counts as dc), sk 1 st, dc in next 4 sts, ch 2, sk 2 sts, sc in next st* rep around, adjusting at joins so scallops line up (approx 90)
Round 3 :
1 sc in each st and into each ch-2 space (90)
Info :
This prepares the ground for the scalloped picot and pointed tips. Each panel will form a pointed tip at its end; ensure you align repeats so each point centers on a rib tip position. You may mark rib tip positions with pins to ensure alignment before starting scallops.
Round 4 :
Scallop foundation: *sk next 2 sts, 7 dc in next st (shell), sk next 2 sts, sc in next st* rep around (90)
Round 5 :
Picot and point finishing: Into each shell work: *sl st, ch 3, sl st in 3rd ch (picot), sl st into center dc of shell* to create sharp picot accents. In between shells work 1 sc to maintain spacing (90)
Info :
For the pointed parasol look, increase scarf-like tapering in the last 3-4 rows of the shell formation to emphasize points. If your umbrella has small plastic tip protectors (yellow in the photo), leave enough space to slip those over the rib tips when the cover is on.
Round 6 :
Final decorative round: *sc in each st across, into each picot work 1 slip stitch for shine* Fasten off and weave ends (90)
— Rib Loops & Tip Anchors (Make 8 small loops to anchor cover to ribs) :
Round 1 :
At each pointed tip locate the central top of the shell. Join contrast yarn (or same yarn) and ch 20 (or length to loop over rib tip snugly), sl st back into same st to form a loop. Secure with 1 sc and fasten off. Repeat at each panel point (8 loops)
Info :
Make loops tight enough to slip over rib tips; if your ribs have protective tips or small caps, measure loop length to fit over them. Reinforce each loop by sewing the base of the loop to the point with a few extra secure stitches through both loop and panel shell center.
Round 2 :
If desired, cover the small yellow plastic tip protectors by sewing a short additional neat cap: join yarn at loop base and work 6 hdc around the plastic tip, increase to 12 with (1 hdc, inc)x6, then fasten off and sew cap to rib tip. This is optional and matches photo small yellow tips.
— Decorative Band (Optional reinforcing band at mid-panel) :
Round 1 :
If you want a band to visually separate colors mid-panel, join yarn at approx Round 18 of each panel and work 2 rounds of BLO sc around the entire circumference to create a ridge (work evenly across joins) (total sts will be equal to panel round sts)
Info :
Working BLO creates a subtle raised ridge that frames the parasol and mimics the photo’s neat midsection. Use a color that compliments the gradient or match the darker shade of the yarn cake for a cohesive effect.
— Finishing & Blocking :
Info :
Block each panel lightly by pinning it to a blocking mat and misting with water, or pin it gently and use a warm steam iron held a few inches above. Focus on flattening lace and evening scallop points. Let dry fully before joining or putting onto the umbrella.
Round 1 :
Weave in all ends carefully along seams and lace rows to avoid catching on metal ribs later.
Info :
Test the final cover by slipping it over the closed umbrella. Attach each rib tip through the anchor loops. If a loop is too tight, carefully undo its base and add a couple of chains to lengthen; if too loose, add a reinforcement stitch or extra wrap to tighten.
— Variation: Seamed-on Lining (Optional, 6 rounds) :
Round 1 :
If you prefer less transparency, make a lightweight cotton lining by crocheting 8 quick flat panels in solid color using sc rows to match the size of the outer panels. Each lining panel: ch 6, join to crown, then work even rounds of sc until matching outer panel height (approx 20-25 even rounds).
Round 2 :
Sew each lining panel to the inside of the outer panel along the top 3-4 rounds only to keep fabric soft and slightly flared.
Info :
Use a lighter hook and thinner yarn (cotton sport or fingering) for lining to avoid bulk. The lining provides modesty and slightly waterproofing; do not submerge the lining in water as yarn is not necessarily water-resistant.
— Additional Decorative Options :
Info :
Add beaded picots at point tips by stringing small glass beads onto the yarn before making picots and catching a bead at the tip with a sl st—nice for decorative parasols displayed indoors. You may also embroider small motifs on each panel midsection with contrasting yarn for a personalized embellishment.
Info :
If your umbrella has more than 8 ribs, divide the umbrella circumference by your intended number of panels and repeat the wedge increases until base width matches rib spacing and join count scales accordingly.
This pretty parasol cover brings vintage lace charm into a modern gradient yarn statement. Each panel and scalloped point combine to form a graceful, wearable accessory you'll love to show off. The detailed instructions guide you from the tight crown through lacy panels to finished anchor loops, making assembly satisfying and straightforward. 🧶🌸 Whether for a photo prop, display, or gentle sunshade, this cover will add handmade elegance to any umbrella. Happy crocheting! ☀️