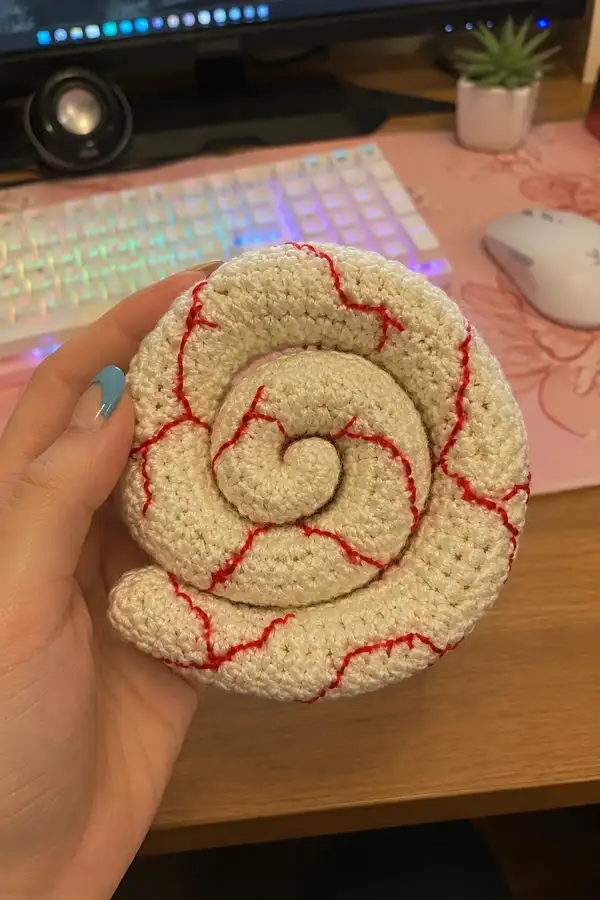
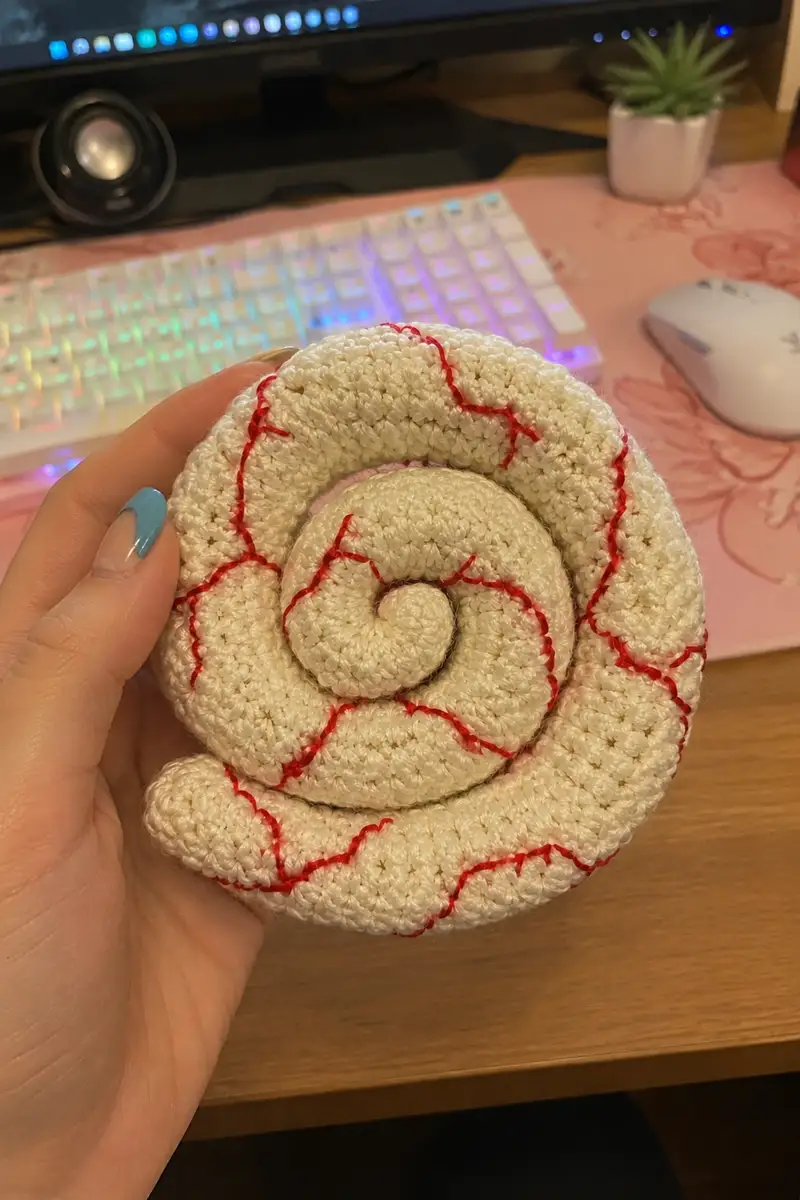
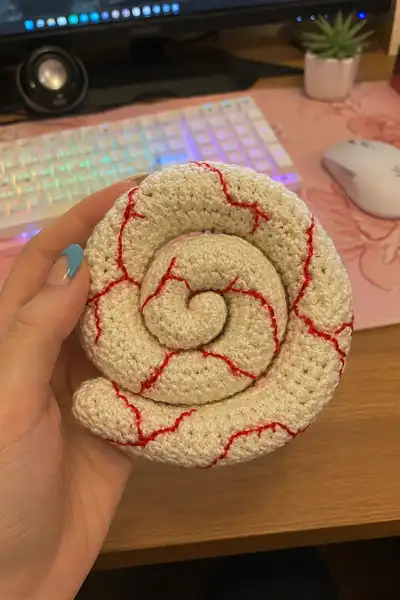
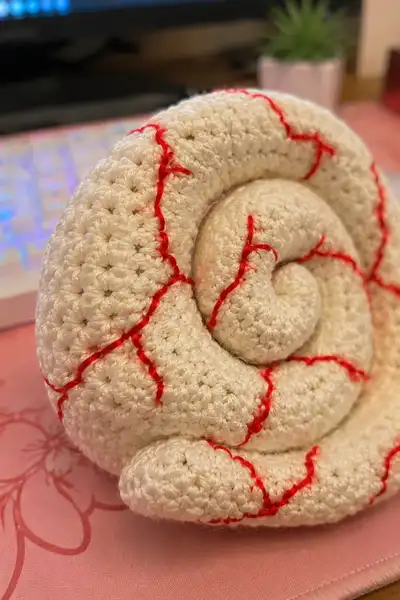
Create a soft, slightly plump spiral coil with smooth tight stitches and thin red embroidered veins winding across the surface. This amigurumi-style spiral is worked in the round as a stuffed tube that is coiled into a spiral and hand-stitched into place. The finished piece has a glossy, unsettling texture and a compact palm-sized footprint—perfect as a tactile art piece or an unusual handmade gift.
Progress Tracker
0% Complete
— Head :
Round 1 :
6 sc in magic ring (6)
Round 3 :
(1 sc, 1 inc) x 6 (18)
Round 4 :
(2 sc, 1 inc) x 6 (24)
Round 5 :
(3 sc, 1 inc) x 6 (30)
Round 6 :
(4 sc, 1 inc) x 6 (36)
Info :
This small ‘head’ section is actually the central spiral core. Keep tension tight and use a slightly smaller hook if stitches look open. Place a marker at the start of each round to keep count.
Round 7 :
(5 sc, 1 inc) x 6 (42)
Round 8 :
(6 sc, 1 inc) x 6 (48)
Round 9-12 :
1 sc in each st (48)
Info :
Work these even rounds to build a short cylindrical core that will become the tight center of the spiral. You can add a tiny amount of stuffing now to keep the shape stable; it will be coiled later.
Round 13 :
(6 sc, 1 dec) x 6 (42)
Round 14 :
(5 sc, 1 dec) x 6 (36)
Round 15 :
(4 sc, 1 dec) x 6 (30)
Info :
Start stuffing lightly now if you haven't already - the core should be firm but not rock-hard. Use small bits of fiberfill pressed into the middle and around the outside where the core will meet the next tube.
Round 16 :
(3 sc, 1 dec) x 6 (24)
Round 17 :
(2 sc, 1 dec) x 6 (18)
Round 18 :
(1 sc, 1 dec) x 6 (12)
Info :
Close the core with a short tail. Fasten off leaving a long tail (approx 25-30cm) for sewing. You'll use this tail to attach the core to the first round of the outer tube when coiling.
Round 20 :
Optional finishing round: if you prefer a slightly squatter core, rejoin and work 6 sc in each st around to increase back to 6 sc x 6 (36) and then fasten off. Otherwise proceed to outer tube.
Info :
Label this small piece the 'core'. It sits at the center and the long tube is wrapped around it. Keep it slightly firmer than the outer tube so the spiral holds its shape.
— Body :
Round 1 :
6 sc in magic ring (6)
Round 3 :
(1 sc, 1 inc) x 6 (18)
Round 4 :
(2 sc, 1 inc) x 6 (24)
Round 5 :
(3 sc, 1 inc) x 6 (30)
Round 6 :
(4 sc, 1 inc) x 6 (36)
Info :
This begins the long spiral tube. We are intentionally widening the tube to a comfortable coil body diameter. Work in continuous rounds (spiral crochet) to avoid visible seams and keep the fabric flexible for coiling.
Round 7 :
(5 sc, 1 inc) x 6 (42)
Round 8 :
(6 sc, 1 inc) x 6 (48)
Round 9-12 :
1 sc in each st (48)
Info :
If you prefer a slightly larger coil, continue increasing by adding (7 sc, 1 inc) x 6 = 54 on the next round. For the pictured piece we stayed at 48 stitches for the main tube to create a compact plump tube.
Round 13 :
1 sc in each st (48)
Round 14 :
1 sc in each st (48)
Round 15 :
1 sc in each st (48)
Info :
From this point you will work many even rounds to create the length of the tube. The more rounds you work the larger the spiral will be. The sample spiral used a long tube equivalent to about 68 even rounds after the initial shaping.
Round 16-25 :
1 sc in each st (48) (work 10 rounds of even stitch)
Info :
Stuffing note: Stuff these sections gradually every 8-12 rounds. Use small, compact amounts of fiberfill and press into the tube with your fingers or a blunt tool. Aim for slightly firmer stuffing near the outer edge so the coil keeps a rounded profile.
Round 26-40 :
1 sc in each st (48) (work 15 rounds of even stitch)
Info :
Keep your tension even. If your gauge tightens as you progress, slip one round where you work every 7th stitch as an inc-equivalent adjustment to maintain circumference uniformity—only if needed to avoid a taper.
Round 41-60 :
1 sc in each st (48) (work 20 rounds of even stitch)
Info :
At about round 55, begin thinking about how large you want the final spiral. The pictured piece used approximately 60 even rounds before beginning the taper and tail. Mark the round where you will begin coiling so you know the relationship between tube length and spiral size.
Round 61-68 :
1 sc in each st (48) (work 8 rounds of even stitch)
Info :
Before tapering, make a small test coil on a flat surface: wrap the tube around the core once, then twice, then three times to see how the coils nest. Adjust the number of even rounds up or down as required for your desired spiral diameter.
Round 69 :
(6 sc, 1 dec) x 6 (42)
Round 70 :
(5 sc, 1 dec) x 6 (36)
Round 71 :
(4 sc, 1 dec) x 6 (30)
Info :
Begin tapering the free tail of the spiral so it can sit flush against the outer arms of the coil. The decreases reduce bulk so the last inch lies flat and tucks under the outer ring.
Round 72 :
(3 sc, 1 dec) x 6 (24)
Round 73 :
(2 sc, 1 dec) x 6 (18)
Round 74 :
(1 sc, 1 dec) x 6 (12)
Info :
Fasten off leaving a long tail (at least 40cm) for sewing the tube into the spiral. If you plan to invisibly join the tail inside the final seam, keep the tail extra long so you can weave it deeply into the fabric.
— Tail :
Round 1 :
Rejoin at the tapered end if you want to create a small curled tip: 6 sc in magic ring (6)
Round 3 :
(1 sc, 1 inc) x 6 (18)
Round 4 :
(2 sc, 1 inc) x 6 (24)
Info :
This tiny tail cap is optional. The pictured spiral has a slightly blunted curled tip—either stuff the tapered end a little less or make this small cap and sew it to the outermost ring.
Round 5 :
1 sc in each st (24)
Round 6 :
(2 sc, 1 dec) x 6 (18)
Round 7 :
(1 sc, 1 dec) x 6 (12)
Info :
Stuff lightly and fasten off leaving a 20-40cm tail to sew the tail/cap to the outer spiral at the chosen final position. Tuck and weave the tail to secure the tip.
— Embroidered Veins :
Info :
Use bright red embroidery floss or a fine red yarn. The veins are worked after coiling and sewing the spiral and are decorative only. Use a blunt tapestry needle and long stitches in a gentle backstitch or running stitch so the red thread lies on top of the stitches and curves naturally. Keep the embroidery tension relaxed to avoid puckering.
Vein Step 1 :
Thread a length of red floss (approx 60-80cm). Knot or leave a 5cm tail to weave in later. Start on the underside of the spiral and bring the needle up where you want the vein to begin.
Vein Step 2 :
Use a loose backstitch: bring needle forward 5-8mm along the spiral edge, then come back half the distance and bring the needle up again beyond the first exit. This creates a continuous line. Follow natural curves around the coil. When you meet a seam or tight curve, make shorter stitches (3-4mm) so the line remains smooth.
Vein Step 3 :
At junctions where the vein appears to branch (seen in the photo), switch direction with a small anchored stitch then proceed on the new path. Secure ends with small knots hidden in the fabric or by weaving the tail into the fabric.
Info :
For a raised vein effect, couch a thin red yarn along the path first with tiny anchoring stitches, then over-sew with floss. Alternatively, use a single strand of embroidery floss (3-4 plies separated) for a more delicate line.
— Assembly and Coiling :
Info :
Before coiling, press tube gently with your hands to create even filling. Lay a clean towel on a flat surface. Place the core in the center and start wrapping the long tube around it. Use pins to hold coils in place while you judge placement. The pictured spiral has three main concentric rings around the core and then a short tucked tail.
Assembly Step 1 :
Place the core at the center. Using the long tail left from the outer tube, align the start of the tube against the core and pin at 6-8 evenly spaced points to hold the first wrap. Use the core's tail to whip-stitch through both core and first wrap for an invisible join.
Assembly Step 2 :
Continue wrapping the tube around the center, pinning often. For each coil, use the long tail from the tube end (kept long on purpose) to sew the adjacent coil edge to the coil below it with small mattress or whip stitches, catching only the surface fabric so the seam is nearly invisible.
Assembly Step 3 :
When you reach the tapered tail, tuck the small cap or tapered end into the inner part of the outer coil or behind the outermost ring and sew through several stitches to anchor. Hide ends by weaving them through several internal rows of the tube.
Info :
Sewing tip: Use the same yarn color for most seams to blend the stitches. Keep your joining stitches small and frequent (every 3-5mm) so the spiral cannot shift or uncoil with handling.
Assembly Step 4 :
Final shaping: gently press the spiral coils into their final rounded profile. Add a few extra anchoring stitches at key stress points (outer rim and the central joint) so the spiral remains stable when picked up.
Info :
Pin and try different coil tightness before committing to final sewing. The photographed piece is fairly tightly coiled; loosen slightly for a softer look or tighten for a compact, glossy finish.
— Finishing Touches :
Info :
After sewing complete, embroider the red veins using the method above. Add a small anchor stitch under each embroidered line's start and end to secure. Weave in all yarn tails at least 6cm deep into the fabric, then trim close to the surface.
Finishing Step 1 :
Weave in all tails: use a yarn needle to thread working tails through 6-8 stitches on the inside or underside of the spiral. Pull gently and trim flush. This prevents ends from coming loose or showing through the fabric surface.
Finishing Step 2 :
Check overall firmness: Add more fiberfill by unpicking a small seam and pushing fiberfill in small amounts if needed, then resew. A small amount of extra stuffing near outer curves helps the spiral keep a rounded plump profile.
Info :
Optional: Gently steam block the outer surface to relax yarn slightly and flatten any unwanted lumps. Do not press excessively if using acrylic yarn; sample a scrap first. Cotton yarn tolerates light steaming well.
This spiral amigurumi pattern turns a simple tube into an intriguing sculptural piece with personality. Once you sew and embroider the veins you'll love how a few small details transform the whole object into something striking and tactile. The step-by-step instructions make the process approachable while leaving room for creative choices—like coil tightness and embroidery style. Enjoy the meditative rhythm of working in rounds and the satisfying moment when the flat tube becomes a compact spiral. 🧶✨