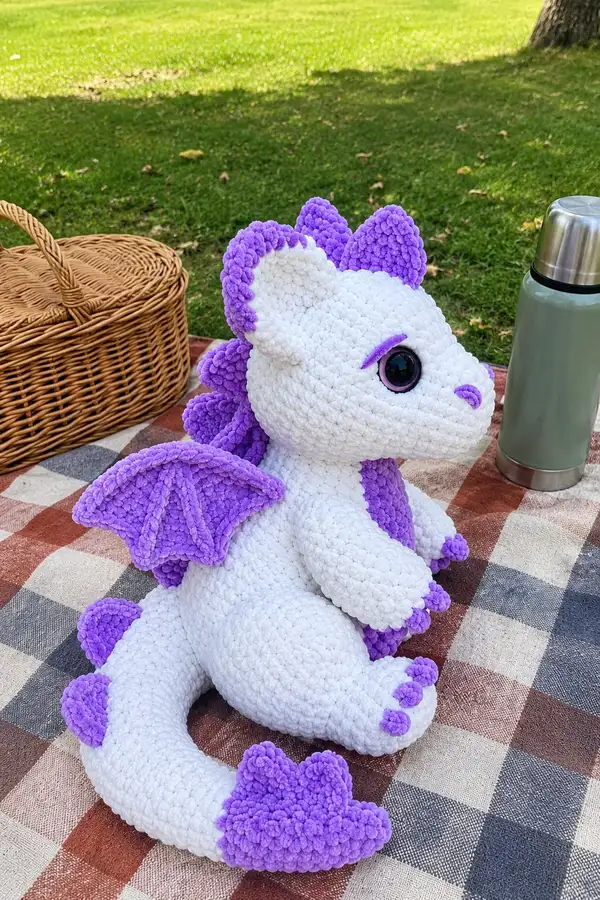
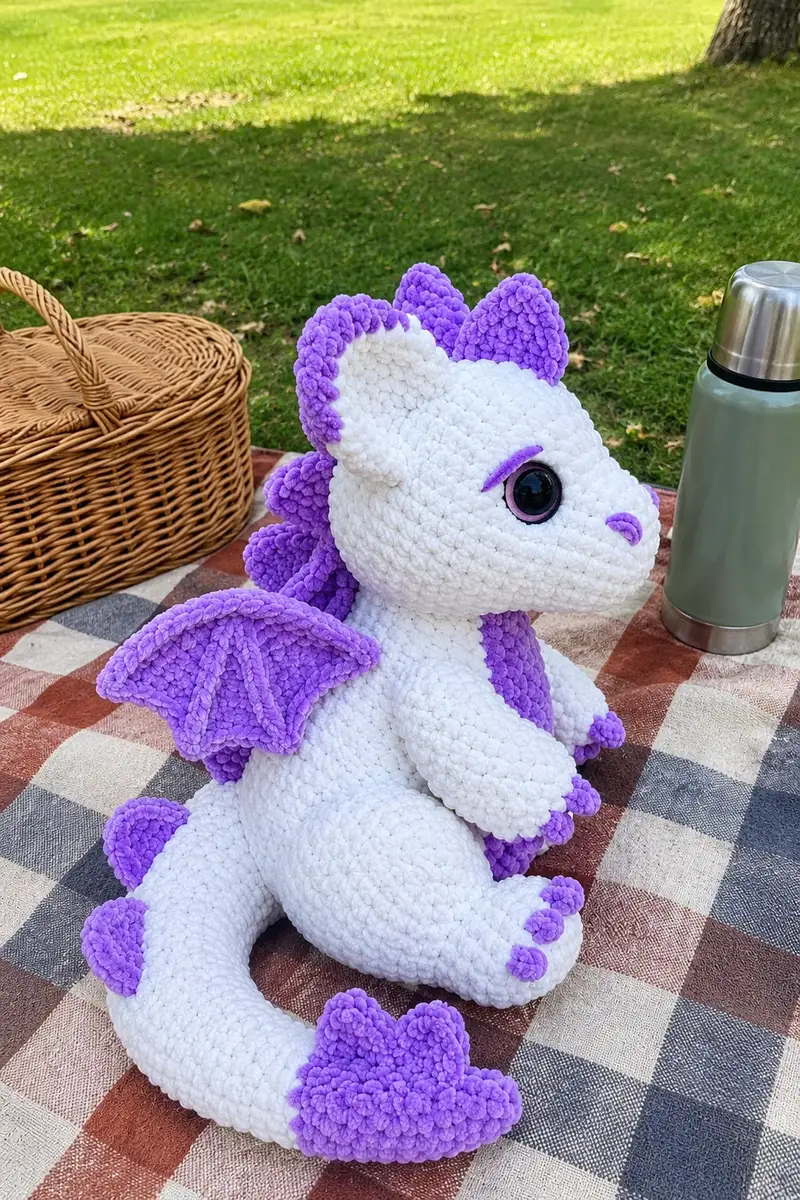
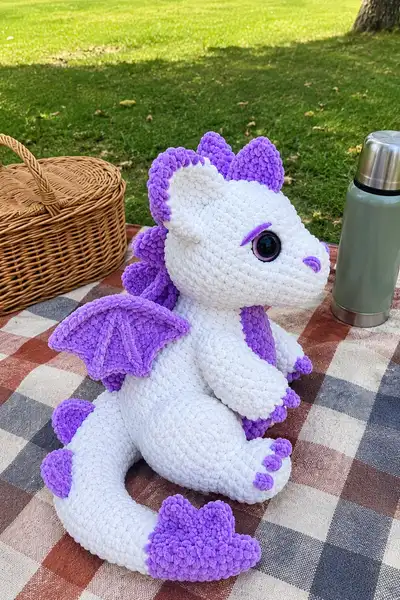
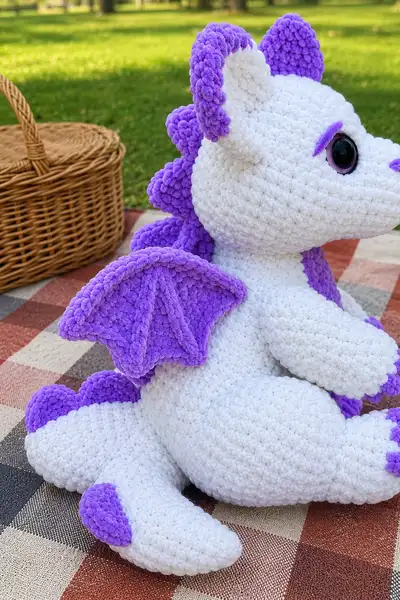
Make this cuddly white and purple dragon amigurumi using velvety chenille yarn for a plush, snuggly finish. Features large expressive safety eyes with embroidered eyelids, scalloped purple spikes down the back, cute wing membranes, a purple belly panel and tiny purple claws. The finished dragon is soft, poseable in limbs, and perfect as a whimsical gift or nursery companion.
Progress Tracker
0% Complete
— Notes & Gauge :
Info :
This pattern is worked in continuous rounds unless otherwise noted. Use a stitch marker to mark the first stitch of each round. Finished size with recommended yarn and hook: approximately 14-16 inches (35-40 cm) from head top to tail tip when seated. Tension is personal with chenille yarn; aim for a tight fabric so stuffing does not show. When changing colors, fasten off or carry yarn inside for short stripes as noted.
— Head :
Round 3 :
(1 sc, inc) x 6 (18)
Round 4 :
(2 sc, inc) x 6 (24)
Round 5 :
(3 sc, inc) x 6 (30)
Round 6 :
(4 sc, inc) x 6 (36)
Round 7 :
(5 sc, inc) x 6 (42)
Round 8 :
(6 sc, inc) x 6 (48)
Round 9-14 :
1 sc in each st (48)
Info :
Place safety eyes between rounds 11 and 12, approximately 10-12 stitches apart (center to center) depending on eye size and desired look. For 16-20mm eyes, a spacing of 10-12 sts gives the large expressive look seen in the photo. Attach eyes now before stuffing; back the eyes with washers securely.
Round 15 :
(6 sc, dec) x 6 (42)
Round 16 :
(5 sc, dec) x 6 (36)
Info :
Begin light stuffing at this point, just enough to support the eye placement and keep head shape. Continue adding more stuffing as you close the head to avoid lumps.
Round 17 :
(4 sc, dec) x 6 (30)
Round 18 :
(3 sc, dec) x 6 (24)
Round 19 :
(2 sc, dec) x 6 (18)
Round 20 :
(1 sc, dec) x 6 (12)
Info :
Do not fully close the head here. Fasten off leaving a long tail for sewing to the body later OR optionally continue with neck rounds to create a short neck tube for sewing. Keep stuffing firm but soft to match body density.
Round 22 :
Join to next st and work 1 sc in each st around to make a neck tube if desired (6) — work 6-10 rounds even to form neck length (repeat this round as needed until neck measures desired length, typically 4 rounds)
Round 23-26 :
1 sc in each st (6) (neck tube rounds; do 4 rounds for a short neck)
Info :
If you leave head opening of 6 sts for sewing, use long tail to ladder stitch closed to the body later; if you worked the neck tube, leave a tail to sew the neck into the body's neck opening. Weave in ends a bit later after full assembly.
— Snout (Make 1) :
Round 3 :
(1 sc, inc) x 6 (18)
Round 4 :
1 sc in each st (18)
Round 5 :
(2 sc, dec) x 6 (12)
Round 6 :
1 sc in each st (12)
Round 7 :
(1 sc, dec) x 4, leave last 4 sts unworked for attaching to head (8)
Info :
Lightly stuff snout, then sew to front of head beneath eyes and slightly forward to create the profile. Sew evenly around the base; small ladder stitch brings a clean finish. Add small embroidered nostrils with lavender yarn using backstitch (see Nostrils section).
— Eye Surrounds & Eyelids :
Info :
This dragon has a stitched eyelid detail in purple. Create two small oval crocheted eyelid strips to sew above each eye for the sleepy, friendly expression.
Round 1 :
ch 6, sc in 2nd ch from hook and across (5)
Round 2 :
ch 1, turn, sc across, 1 sc in last st to round the end. Continue working in rounds to create a short tube: sc in each of the 5 sts for 3 rounds (5)
Round 3 :
Fasten off leaving a long tail for sewing. Slightly curve and sew above eye to create the eyelid. Repeat for second eye. Optional: embroider a short line under the eyelid for cheek expression.
Info :
Make sure eyelids are mirrored and symmetrical; pin each in place and adjust curve before sewing. A small dab of fabric glue behind eyelid helps keep placement while sewing.
— Nostrils & Nose Accent :
Round 1 :
With lavender yarn, embroider two small half-moon nostrils on snout tip using a short satin stitch. Alternatively, crochet two tiny ovals: 6 sc in mr, join and flatten, sew as nostrils.
Info :
Embroider softly so the chenille yarn nap accepts the stitches; use a blunt tapestry needle to catch loops without splitting yarn. Make nostrils small (approx 4-6 sts length) to stay proportional.
— Body :
Round 3 :
(1 sc, inc) x 6 (18)
Round 4 :
(2 sc, inc) x 6 (24)
Round 5 :
(3 sc, inc) x 6 (30)
Round 6 :
(4 sc, inc) x 6 (36)
Round 7 :
(5 sc, inc) x 6 (42)
Round 8 :
(6 sc, inc) x 6 (48)
Round 9 :
(7 sc, inc) x 6 (54)
Round 10 :
(8 sc, inc) x 6 (60)
Round 11-18 :
1 sc in each st (60)
Info :
At round 11 you can attach the head: pin the head to the body opening aligning neck tube with the body's center front. Alternatively leave head off to assemble later. Change to lavender for a belly panel by making a separate belly piece now (see Belly Panel below).
Round 19 :
(8 sc, dec) x 6 (54)
Round 20 :
(7 sc, dec) x 6 (48)
Round 21 :
(6 sc, dec) x 6 (42)
Round 22 :
(5 sc, dec) x 6 (36)
Info :
Stuff body from the top opening as you decrease, but leave enough space to stitch head on. Stuff firmly in lower belly and lightly in upper torso so the toy sits upright. If you want the dragon to sit more steadily, add a small disc of cardboard or felt in the base before final closure.
Round 23 :
(4 sc, dec) x 6 (30)
Round 24 :
(3 sc, dec) x 6 (24)
Round 25 :
(2 sc, dec) x 6 (18)
Round 26 :
(1 sc, dec) x 6 (12)
Info :
Fasten off leaving a long tail to sew the body closed if not attaching the head. For a neater finish, use the tail to ladder stitch the last opening closed after stuffing. If head is not yet attached, leave a 6-st opening for sewing the head neck tube in.
— Belly Panel (Make 1, Lavender) :
Round 3 :
(1 sc, inc) x 6 (18)
Round 4 :
(2 sc, inc) x 6 (24)
Round 5 :
1 sc in each st (24)
Round 6 :
(2 sc, dec) x 6 (18)
Round 7 :
1 sc in each st (18)
Round 8 :
Fasten off leaving long tail for sewing. Block flat if desired. Sew belly panel to front of body starting at round 12-14 centered between arms. Use ladder stitch for a neat edge and hide ends through body stuffing.
Info :
Make sure belly panel is centered and vertically aligned: place the top of the panel at approximately body round 12-14 (counting from top) so it sits under the neck and between the arms like the photo. Pin firmly before sewing.
— Arms (Make 2) :
Round 3 :
(1 sc, inc) x 6 (18)
Round 4-6 :
1 sc in each st (18)
Info :
Stuff hands fairly firmly to make a rounded paw. If you want poseable arms, insert a short insulated wire now before working upper arm rounds. Keep the palm slightly flattened to help the dragon sit with arms forward.
Round 7 :
(3 sc, dec) x 4 + 2 sc at end to shape (14)
Round 8-11 :
1 sc in each st (14)
Round 12 :
(2 sc, inc) x 4 (18)
Round 13-16 :
1 sc in each st (18)
Round 17 :
(2 sc, dec) x 4 (14)
Round 18 :
1 sc in each st (14)
Info :
Fasten off leaving long tail for sewing. Sew arms to sides of body between rounds 12-16 so they align with belly panel and head placement. Use a ladder stitch and secure with multiple passes to hide yarn tails inside stuffing.
— Legs (Make 2) :
Round 3 :
(1 sc, inc) x 6 (18)
Round 4 :
(2 sc, inc) x 6 (24)
Round 5 :
(3 sc, inc) x 6 (30)
Round 6-9 :
1 sc in each st (30)
Info :
Work foot shaping with a slightly wider toe area. Stuff foot base firmly to give stability when seated. For toes, you will add small purple claw pieces and sew them to the front of each foot at the end.
Round 10 :
(3 sc, dec) x 6 (24)
Round 11 :
(2 sc, dec) x 6 (18)
Round 12-16 :
1 sc in each st (18)
Round 17 :
(1 sc, dec) x 6 (12)
Round 18 :
1 sc in each st (12)
Round 19 :
Fasten off leaving long tail for sewing to body base; stuff leg firmly but leave top 4-6 rounds less stuffed for a smooth join to the hip. Repeat for second leg.
Info :
Attach legs to underside of body at the bottom opening at even spacing. Pin both legs in position so the dragon sits level; stitch through body rounds 1-4 for maximum stability. Add small safety stitches to anchor legs if the toy will be handled frequently.
— Tail :
Round 3 :
(1 sc, inc) x 6 (18)
Round 4 :
(2 sc, inc) x 6 (24)
Round 5-12 :
1 sc in each st (24)
Round 13 :
(2 sc, dec) x 6 (18)
Round 14 :
(1 sc, dec) x 6 (12)
Round 15-18 :
1 sc in each st (12)
Round 19 :
1 sc in each st (12) — leave tail end open for attaching tail spike cluster
Info :
Curve the tail slightly when stuffing. Stuff more firmly toward the tail base and slightly lighter toward the tip to help the dragon's tail rest in a natural curved position. Attach tail to the back lower body where the spine spikes begin; sew securely with ladder stitch.
— Spikes / Scales (Make 9 or more as seen) :
Info :
Create multiple scalloped spike pieces in lavender and sew them from head to tail. Sizes vary slightly along body: 3 small on head, 4 medium down the back, 2 larger near tail tip. Crochet in purple for a raised scallop effect.
Spike - Small (Make 3) Round 1 :
6 sc in mr (6)
Round 3 :
(1 sc, inc) x 6 (18)
Round 4 :
1 sc in each st (18)
Round 5 :
Fold and sc across top edge to create scallop: sc across 9 sts then sc across remaining 9 sts forming a raised edge; finish and fasten off leaving tail for sewing
Spike - Medium (Make 4) Round 1 :
6 sc in mr (6)
Round 3 :
(1 sc, inc) x 6 (18)
Round 4 :
(2 sc, inc) x 6 (24)
Round 5 :
1 sc in each st (24)
Round 6 :
Fold and sc across a strategic set of sts to make a pointed scallop edge, fasten off leaving tail for sewing (approx fold across 12 sts)
Spike - Large (Make 2) Round 1 :
6 sc in mr (6)
Round 3 :
(1 sc, inc) x 6 (18)
Round 4 :
(2 sc, inc) x 6 (24)
Round 5 :
(3 sc, inc) x 6 (30)
Round 6 :
1 sc in each st (30) — fold to create scalloped ridge and sc across to secure. Fasten off leaving tail for sewing.
Info :
Pin spikes along centerback line before sewing to control spacing (approx one spike every 6-10 body rounds depending on size). Use mattress stitch or whip stitch to attach spikes into the seam so they stand up neatly. Add smaller spikes to head/neck where indicated in photos.
— Ears (Make 2) :
Round 3 :
(1 sc, inc) x 6 (18)
Round 4 :
(2 sc, inc) x 6 (24)
Round 5-6 :
1 sc in each st (24)
Round 7 :
(2 sc, dec) x 6 (18)
Round 8 :
(1 sc, dec) x 6 (12)
Round 9 :
Fasten off leaving long tail for sewing. Create a purple scalloped edge by joining purple yarn to the ear outer edge and working 1 sc along edge then (ch2, sl st) across to form tiny loops for the ruffled look as seen in the photo.
Info :
Sew ears to top sides of head at approximately round 6-8 on the head; angle slightly forward. The purple ruffled rim is optional but gives the adorable two-tone finish visible in the images.
— Wing (Make 2, Outer Lavender Membrane + Inner Ridge) :
Wing - Base Round 1 :
ch 9, sc in 2nd ch from hook and across (8)
Round 2 :
ch 1, turn, 2 sc in first st, 1 sc in next 6 sts, 2 sc in last st (10)
Round 3 :
ch1, turn, (1 sc, inc) at ends to expand curve, (work increases at tip) resulting in approx 14 sts (14)
Round 4-7 :
Work 1 sc around, shaping the outer curve. After round 7 you should have a soft triangular wing membrane approx 14-18 sts wide depending on desired size.
Round 8 :
Switch to BLO on the next round to form the wing edge ridge: 1 sc in each st BLO (14-18)
Round 9 :
Fasten off leaving long tail for sewing. Create internal wing ridges with surface slip stitch: using purple yarn, start at wing base and surface sl st up toward the tip three times to suggest struts. Alternatively, crochet a narrow tube (ch 3-20, sl st back) and sew it inwards to create raised wing bones.
Wing - Inner Ridge :
ch 3, sc in 2nd ch and next ch to make a thin tube; fasten off and sew in three radial lines from base to tip to mimic photo ridges.
Info :
Pin wings to the back at about the same height as the top of the belly panel, aligning with the tops of the arms. Sew wings to the body with the wing base overlapping the scale row, then stitch the wing bones for a defined structure. For added stiffness you can insert a short length of wire in the wing base and wrap it in yarn before sewing inside the wing for poseability.
— Claws / Toes (Make 6 small lavender claws) :
Claw Round 1 :
6 sc in mr (6)
Round 2 :
1 sc in each st (6) — flatten and stitch onto toes
Info :
Sew three small claws to the front of each foot spaced evenly. For hands, sew two small claws to each paw. Use small stitches to secure claws to thick chenille yarn so they do not pull loose.
— Tail Tip Spike Cluster :
Round 3 :
(1 sc, inc) x 6 (18)
Round 4 :
Fold and sc across top sts to form a tufted tip, fasten off leaving tail for sewing to tail end
Info :
Sew the tail tuft to the tip of tail, matching shape and orientation from photo. Flatten slightly and secure densely so it keeps a rounded puffed look.
— Additional Decorative Raised Ridges (Head & Wing Bones) :
Round 1 :
To create raised ridges along head and wing bones, crochet thin tubes (ch 3-12) in purple, sl st back to form cords. Sew these to the head top and around wings as seen in photos to define segments.
Info :
Use surface slip stitch or crochet cords sewn on top for raised accents. Pin in place before stitching to ensure symmetrical placement. Use the same lavender yarn as other accent pieces.
— Assembly & Final Shaping :
Info :
Before final sewing, lay out all pieces and pin into place to check symmetry: head, ears, spikes, wings, arms, legs and tail. Use photos as a guide: the belly panel centers under the neck, wings align with the top of the belly panel, and spikes run down the center of the back from head to tail.
Step :
Attach head to body by aligning the neck tube or 6-st head opening to the body's opening and sewing with whip or ladder stitch, taking care to keep the snout oriented forward. Stuff head more firmly if needed before final closure.
Step :
Sew ears to head at rounds 5-8 on either side; angle slightly forward. Sew spikes along head first then down the center of back and along tail; use small stitches at the base to secure spikes upright.
Step :
Sew wings to the back: place wing base slightly behind where the top of the belly panel meets body side. Sew through both wing base and 2-3 rounds of body to anchor securely. Add ridge cords and secure with small stitches.
Step :
Sew arms to sides between rounds 12-16 so they align with the belly panel and head for a cuddly front posture. Legs mount at the bottom opening — sew through multiple rounds for stability so the dragon can sit comfortably.
Step :
Sew tail to lower back centerline between the last two body rounds and the final spike; reinforce with several passes of yarn. Add tail spikes from base to tip and sew tail puff to end.
Info :
Weave all ends securely inside the stuffed body. Trim yarn tails close to the fabric after weaving them at least 1.5-2 inches into the stuffing to prevent unraveling. Use pins to hold pieces in place while sewing for precise placement. If desired, add a small safety keychain ring inside a seam for hanging or attaching tags.
— Finishing Touches :
Info :
Use a small amount of pale blush or fabric paint to add subtle cheek shading if desired. Re-check all seams and reinforce any loose spots. For a final groom, gently brush the chenille nap with a soft brush to even the pile. Add a small embroidered smile or short stitched mouth under the snout if you prefer a visible mouth rather than a blank muzzle.
Info :
Optional: If making for small children, consider embroidering eyes instead of using safety eyes to avoid small parts. Use an embroidery circle of felt behind the eye to mimic the pink backing seen in the photo if you will not use safety eyes.
This plush dragon combines soft chenille yarn with whimsical two-tone details to become a treasured handmade friend. Each scalloped spike, embroidered eyelid and wing ridge adds character and charm. Enjoy the quiet focus of stitching it together and the delight when you finish — a perfect gift or nursery companion to treasure. 🧶💕🐉