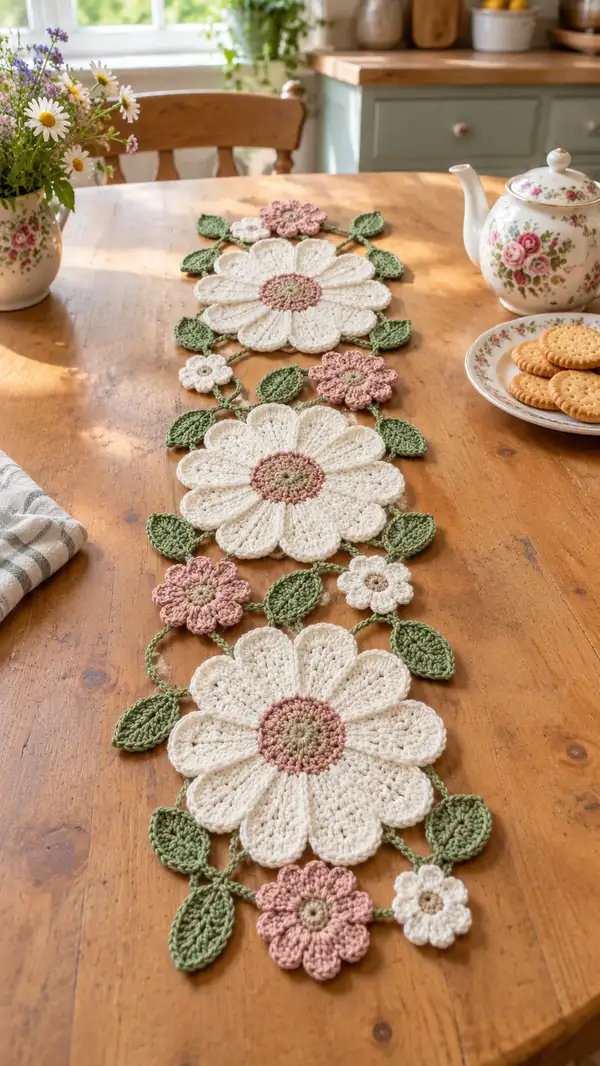
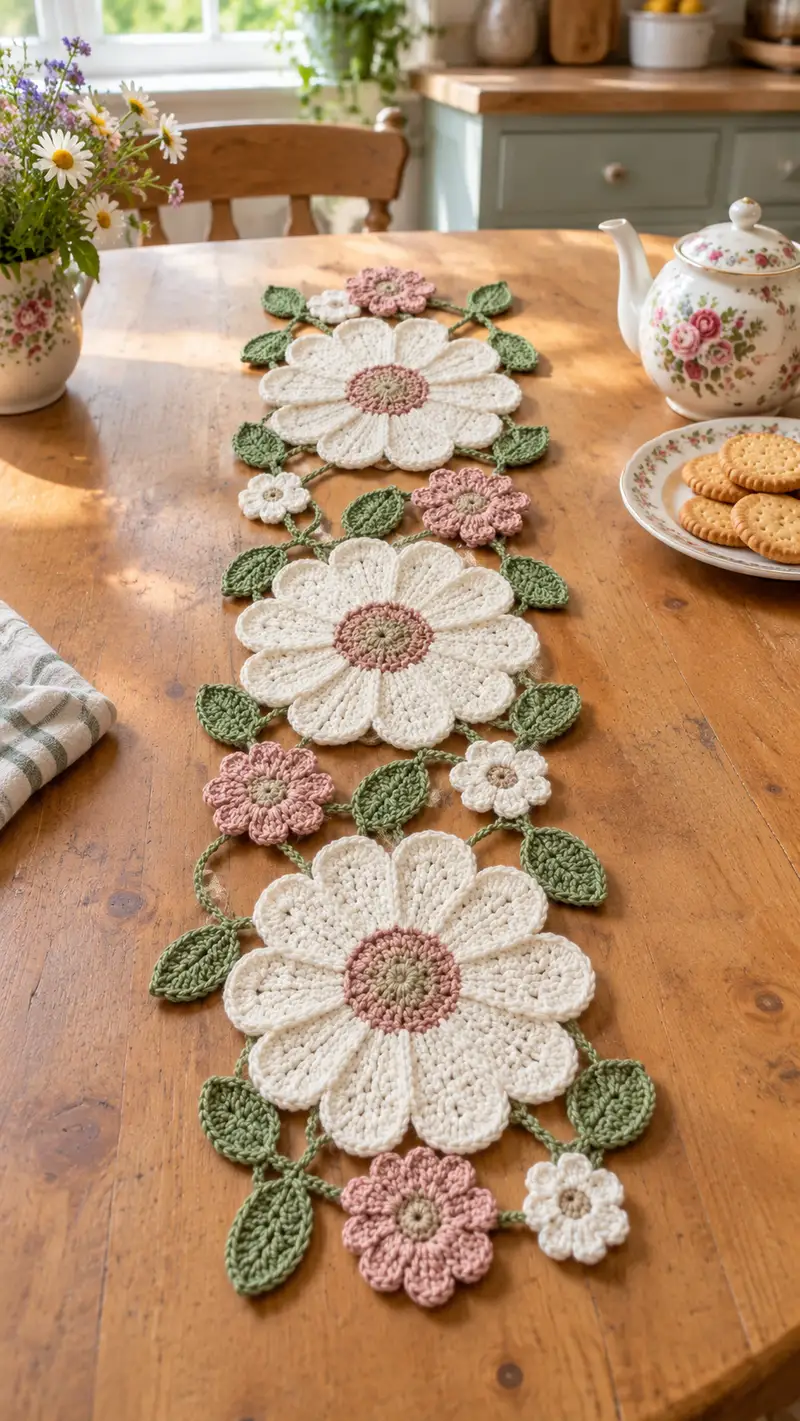
Create a charming daisy chain table runner featuring three large daisy motifs linked by delicate stems, small blossom accents and leafy sprigs. The design uses a soft palette of cream, dusty pink and sage green, worked in a durable cotton-blend yarn for a crisp finish. This pattern includes detailed step-by-step instructions for each large flower, small flowers, leaves and joining stems, with plenty of tips for blocking and finishing. A perfect seasonal accent for a farmhouse or cottage-style table.
Progress Tracker
0% Complete
— Materials & Gauge :
Info :
Recommended gauge: 16 sc x 20 rows = 4 in (10 cm) in single crochet using worsted cotton-blend yarn and 4.0mm hook. This gauge is for reference only; table runner size will change with yarn/hook choices. The pattern is written in US terms. Work tightly enough that petals hold shape but not so tight that stitches distort.
— Notes Before You Begin :
Info :
All motifs are worked flat in rounds or in joined-round petal sequences to create a slightly sculpted, 3D look. Use stitch markers to mark the start of rounds and quarter points to space petals evenly. When changing colors, leave a 6-8 inch tail to weave in later or carry yarn along the back for short color runs.
— Large Daisy (Make 3) :
Info :
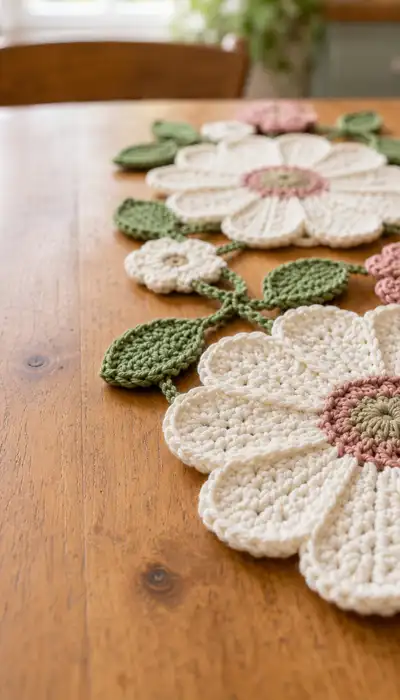
Each large daisy is constructed as a circular center worked in two contrasting colors, then twelve sculpted petals are worked around the perimeter. The petals are deep, worked over multiple rows to create a raised effect. Make 3 of these large daisies for the runner shown.
Round 1 :
Using Sage Green (inner center): mr, 6 sc in ring (6)
Round 2 :
Inc in each st around (12)
Round 3 :
(1 sc, inc) x 6 (18)
Round 4 :
(2 sc, inc) x 6 (24)
Info :
Change to Dusty Pink for the outer center ring at the end of Round 4 by finishing last stitch with new color. Carry the previous color inside if you will not weave ends immediately.
Round 5 :
With Dusty Pink: (3 sc, inc) x 6 (30)
Round 6 :
1 sc in each st around (30)
Round 7 :
(4 sc, inc) x 6 (36)
Round 8 :
1 sc in each st around (36)
Info :
This completes the round where petals will anchor. We will make 12 petals; place 12 markers around this round with equal spacing. With 36 sts, place a marker every 3 stitches to make 12 anchor points.
Round 9 :
Petal base set-up: *ch 6, skip next 2 sts, sl st in next st (anchor)* repeat from * to * 12 times around. You will have 12 ch-6 loops anchored evenly (36 sts worked as anchor points).
Info :
Petal loops are worked into the ch-6 spaces you just made. Keep a marker on first loop as reference for counts. If your loops are tight reduce ch to 5 next time; adjust to keep petals proportionate.
Round 10 :
Work petals row 1: In first ch-6 loop work (sc, hdc, 3 dc, hdc, sc) all into same loop, sl st into next loop to move to the next petal base — repeat for all 12 petals (each petal uses these stitches). Petal count 12.
Round 11 :
Petal row 2 (build height): Turn to work back into the petals: Working into each petal, in same front-facing row, starting at first petal, work (sc, hdc, 5 dc, hdc, sc) into the body of the petal, sl st into the next petal base to move. This increases petal height and gives sculpted effect.
Info :
Keep petals uniform by placing a removable marker at petal 1 and periodically comparing lengths. If a petal has fewer stitches, carefully work an extra dc in the center of that petal's next row.
Round 12 :
Petal row 3: Repeat row 11 but increase center dcs to 7 (sc, hdc, 7 dc, hdc, sc) for each petal, sl st to next petal base (12 petals total). This creates a full rounded petal profile.
Round 13 :
Petal shaping round: Working around petals' outer edges, sc evenly across the outermost edges of each petal to tidy the perimeter—approx 8 sc per petal depending on your tension. Total stitches ~96 (12 petals x 8 sc). Join with sl st to first sc.
Info :
If petals are tall and floppy, you can add a second pass of sc in BLO across each petal perimeter to stiffen slightly. Use 3.5mm hook for tidier edge if desired.
Round 14 :
Edge round: *(1 sc, 1 picot, 1 sc) across the top of each petal edge spacing evenly* — work neat picots at tip of each petal to enhance definition. Picot: ch 3, sl st into first ch. Repeat around. Total ~96 sc and 12 picots.
Round 15 :
Back trim: Turn to back of motif and work 1 sc in each st around the inner center and back of petal anchors to flatten and stabilize seam. Approx 60 sc. Join and fasten off, leaving long tail for weaving and assembly.
Info :
Weave in ends or leave for assembly. Wet-block each large daisy flat with petals fanned out using pins or blocking wires to set shape. Allow to dry completely before joining.
— Small Flower (Make 6) :
Info :
Small flowers are 6-petal blooms used as accents between big daisies. Work them in either Dusty Pink or Cream as shown. These are quick motifs and made flat.
Round 1 :
Using Soft Taupe or inner contrast: mr, 6 sc in ring (6)
Round 2 :
Inc in each st around (12)
Round 3 :
Change to Dusty Pink or Cream: *(ch 4, sl st in same st, skip next st)* repeat around to make 6 ch-4 loops spaced (6 loops).
Round 4 :
In each ch-4 loop work (sc, hdc, 3 dc, hdc, sc) to form petal; sl st into next base to move. Repeat for 6 petals. Finish and fasten off. Block flat gently if needed.
Info :
Make 6 small flowers. Alternate colors as you prefer for a balanced look. These small flowers sit between large daisies and leaves.
— Leaves (Make 14-16) :
Info :
Leaves are worked flat with a pointed tip and textured vein in the center using BLO to create a raised ridge. Make multiple sizes: small (approx 6 cm) and medium (approx 8 cm) to echo the photo.
Round 1 :
Using Sage Green: ch 10 (for a medium leaf; scale chain length for small leaves), 1 sc in 2nd ch from hook, 1 hdc in next, 1 dc in next 4 ch, 1 hdc, 1 sc in last ch. Rotate to work along opposite side of chain: 1 sc in second ch from base, 1 hdc, 4 dc, 1 hdc, 1 sc. Do not join. You have a long oval leaf base.
Round 2 :
Working around leaf edge evenly, sc around entire perimeter with increases at tip to shape point (approx 26 sc total for medium leaf). Continue without joining to prepare for vein.
Round 3 :
Vein and texture: Work 1 sc in first 6 sts along one side BLO to create a subtle ridge, then 1 sc in each st at tip and other side. Alternatively, work a central line of sl st or a crocheted raised chain along center if you prefer a distinct vein.
Round 4 :
Return to edges, work 1 sc in each st around to tidy (approx 26 sc). Finish off leaving long tail for sewing. Block leaf with a slight curve if you want natural drape.
Info :
Make 14–16 leaves in mixed sizes. For smaller leaves reduce starting chain to ch 8 and adjust rounds accordingly. Block leaves to shape with a little steam if necessary.
— Connecting Stems & Chains :
Info :
Stems are crocheted chains worked in Sage Green to link motifs. The photo shows delicate braided/chain stems approx 10–16 chains between motifs and connecting leaves. You will crochet stems and join them with sl sts to motif edges or sew into position.
Step 1 :
Decide layout: Place the three large daisies in a line spaced approximately 10–12 inches apart (center to center) or adjust as desired for table length. Position small flowers and leaves between and around daisies as in photo.
Round 1 :
Make stems: With Sage Green, ch 12 (or length desired), sl st into the edge of a leaf or into the back of a petal at a stable spot. Make multiple stems connecting daisies to leaves and small flowers. Where two stems cross, use small sl st to tack them together.
Info :
For a more organic look, make some stems 6-8 ch and others 14-18 ch. Tension should be relaxed; if chain curls too much, work a row of hdc along the chain to flatten it slightly.
— Joining Motifs (Detailed Joining Method) :
Info :
There are two joining methods: crochet-join using sl sts and sewn-join using yarn needle. Crochet-join is faster and neater when joining petals or leaves directly. Sewn-join gives you precise placement for delicate arrangements.
Join Option A :
Crochet join: Lay two motifs with right sides facing up. Working with Sage Green, insert hook through both motifs' edge stitches and work sl st every 4–6 stitches to join. Pin motifs first to check layout before joining.
Join Option B :
Sewn join: Thread a long tail from motif or a new piece of yarn into a blunt yarn needle. Pin pieces in place and whip stitch through both motifs' back loops only for an invisible seam. Use small, even stitches and knot securely at the end.
Info :
Where stems meet a petal tip, slip stitch the stem chain to the tip and then secure with a few small whip stitches on the underside to hide the join. Avoid pulling too tight while joining so motifs keep their flat profile.
— Assembly Layout Guidance :
Info :
Suggested layout for runner in photo: Starting from one end: small leaf cluster, small dusty-pink flower, small leaf, large daisy 1, two leaves and one small white flower cluster, large daisy 2, repeated leaves and small flowers, then large daisy 3, and a small cluster finishing the other end. Keep the arrangement asymmetrical and organic for a natural look.
Step 1 :
Pin all motifs in place on your working surface following the suggested layout. Make adjustments until spacing feels natural. Snap a photo for reference during final joining.
Step 2 :
Begin by joining the central large daisies first, then add small flowers and leaves. Work stems as you go, securing ends with small sl sts or sewn tacks to keep them laying flat.
Info :
Always join motifs on the wrong side (underside) when possible so joins are less visible. Allow the runner to drape and check both sides for balanced composition before final securing.
— Finishing Edges & Final Blocking :
Round 1 :
Edge round (optional): With 3.5mm hook and Sage Green, work 1 sc evenly around any exposed motif edges and stems to tidy the look. Where stems meet, work a small picot or single loop for decorative finish.
Info :
Wet-block final assembled runner carefully on a flat surface. Use rust-proof pins to shape each petal and leaf. For a very crisp edge consider light starch spray, but test on a scrap first. Dry completely before laying on table.
— Alternative Petal Construction (Advanced Texture) :
Info :
If you want more texture and dimension, work petal fronts with front post stitches: after petal row 2, work 2 rows of front post trebles (FPtr) around the petal base to make them stand up more. This is optional and will add bulk.
— Troubleshooting Common Issues :
Info :
If petals curl under, block them with pins stretched outward. If they lie too flat, add a second petal row to raise them. If joints are stiff, remove a few joining stitches and re-sew with a looser tension.
— Variation Ideas :
Info :
Scale the runner up by adding more daisy motifs and repeating leaf/stem sequences. For a table centerpiece, place a single large daisy with extra surrounding leaves. Use variegated yarn for center rings for a vintage look.
— Complete Stitch-by-Stitch Counts Summary :
Info :
Large daisy center rounds increase from 6 to 36 stitches prior to petal anchor points. Twelve petals built around 36 anchor points produce ~96 edge sc stitches after petal shaping. Small flowers increase to 12 then form 6 loops for petals. Leaves built from chains of 8–12 produce ~20–30 edge stitches depending on size. Keep a small notebook to track stitch counts if adjusting sizes.
Info :
When assembling, remember that each large daisy uses about 40–60g of cream, inner rings use 10–15g dusty pink and sage green each, each small flower uses 6–10g, and each leaf uses 4–8g. These are approximate; weight varies by yarn brand.
— Care Instructions :
Info :
Hand wash gently in cool water and reshape while damp. Lay flat to dry. Avoid heavy soiling; use coasters for hot plates. Spot-clean with mild soap for minor stains. If made from machine-washable cotton, a gentle cycle in a laundry bag is possible but reshape and dry flat afterward.
This Daisy Chain Table Runner brings a lovely, handmade floral touch to any table — perfect for brunches, tea settings and everyday charm. Each motif stacks up into a delicate vintage-inspired runner that looks wonderful displayed on wood. Enjoy the soothing process of crocheting petals and leaves, and delight in the final blocking that brings everything to life. 🧶🌼 Whether you keep it for yourself or give it as a thoughtful gift, this runner adds a cozy, handcrafted accent to your home. Happy crocheting! ✨