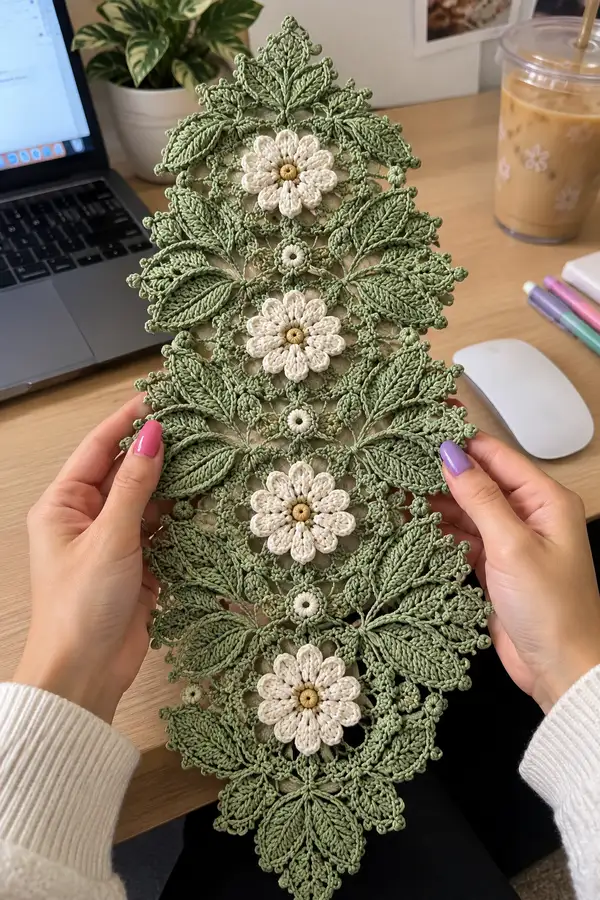
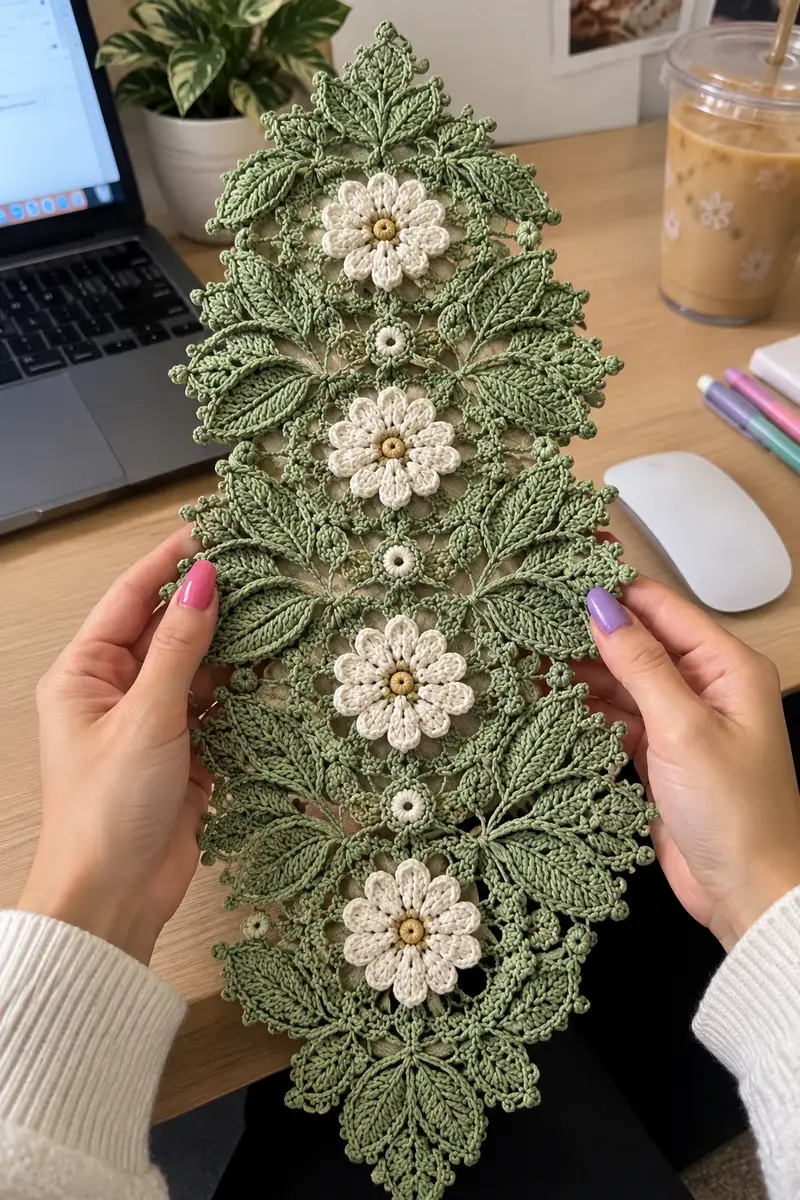
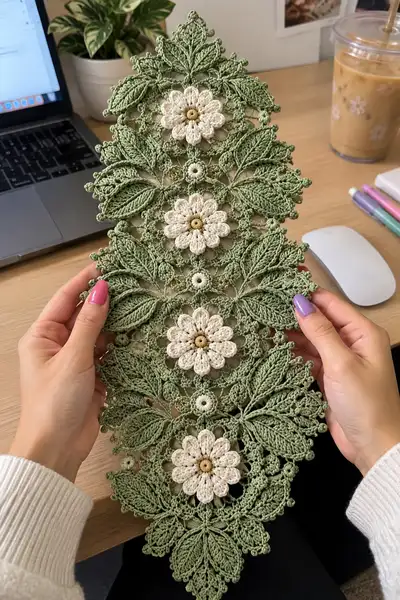
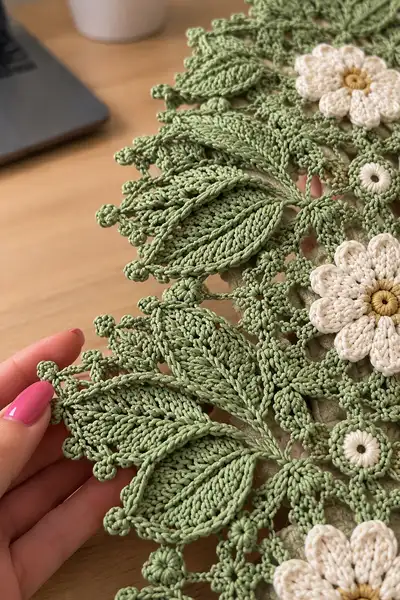
A hand-held lace table runner made from interlocking daisy motifs and layered leaves, worked in soft sage green with creamy daisies and a warm mustard center. This elegant runner features raised leaf veins, 3D petals, and picot-edged borders — perfect for adding a botanical, vintage-inspired touch to a desk, dresser, or small table. The pattern shows modular motifs joined with decorative chains so you can alter length easily.
Progress Tracker
0% Complete
— Pattern Overview :
Info :
This runner is made from repeating units: a central Daisy Motif (cream + mustard), a Small Connector Rosette (green), and paired Leaf Motifs (green). Work motifs separately and join them in the Join Rounds. The sample shows 4 large daisies with leaf clusters between them; repeat units to adjust length.
— Daisy Motif (Make 4 or more) :
Round 1 :
With cream yarn, mr, 6 sc into mr (6)
Round 2 :
Inc in each st around (12)
Round 3 :
(1 sc, inc) x 6 (18)
Round 4 :
(2 sc, inc) x 6 (24)
Round 5 :
1 sc in each st (24)
Info :
Keep tension slightly loose on this round to allow petals to lift later. Place a marker at the first sc to mark round start.
Round 6 :
(Ch4, skip 2 sts, sc in next) x 8 (8 ch4 loops created around the round)
Round 7 :
Work petals in each ch4 space: [sc, hdc, 3 dc, hdc, sc] into each ch4 loop, sl st to next base sc to secure (petals created, base remains 24)
Info :
Petal stitch sequence produces slightly raised petals. Use stitch marker to mark the last petal join so petals remain even when joining next round.
Round 8 :
With cream, sl st into next st to round off petals, fasten off leaving long tail for join to rosette if desired
Round 9 :
Switch to mustard (or join a small bead). MR in the center hole (through back of petal base if you like), 6 sc into mr (6). Pull tight and sl st to join; fasten off, leaving tail to sew a wooden bead into center or sew motif onto runner (6)
Info :
Sew a small wooden bead or button into center with the mustard tail, or leave as a small ring for an open center look. Secure bead but avoid pulling too tight or petals will curl inward.
— Small Connecting Rosette (Make multiples) :
Round 1 :
With green, mr, 8 sc into mr (8)
Round 2 :
Inc in each st around (16)
Round 3 :
(2 sc, inc) x 5, sc in remaining 6 sts to total 21 (21) - or adjust to make evenly spaced points for joining
Info :
This small rosette acts as a spacer between daisies and leaves. You can make 1 sc round only if you prefer a flatter connector.
Round 4 :
Ch3, sl st in next st around to create small loops if you will use them for joining chains (optional). Fasten off (no count adjustment)
— Basic Leaf Motif (Make 8 pairs per repeat) :
Info :
Each leaf is worked flat over a small chain foundation then joined at the base to create the layered pair seen in the runner. Work two mirror leaves and join at row end. Use BLO/FLO for vein ridges where specified.
Leaf Round 1 :
With green, ch11 (foundation chain for one leaf)
Leaf Round 2 :
Sc in 2nd ch from hook and in next 8 ch (9 sc), 3 sc in last ch (tip increase) (12)
Leaf Round 3 :
Turn and work along opposite side of foundation chain: sc in next 8 ch, sc in last (where you started) to close base (20)
Leaf Round 4 :
Ch1, sc in each st around the leaf to create a round edge (20)
Info :
At this point you have a petal-shaped leaf. Use a stitch marker at the base center for later joining. Keep the base slightly tighter to make pairing easier.
Leaf Round 5 :
Work a veining round: *fpdc around next 2 sts, bpdc around next 2 sts* repeat across. This builds a raised central vein effect (20)
Leaf Round 6 :
Ch2, (dc, tr, dc) into the tip sts to accentuate tip, sc down the other side into the base sc to complete the shaping (20)
Info :
Adjust the number of foundation chains (plus 2-4) to change leaf size. For paired layered leaves, make one leaf slightly smaller: ch9 instead of ch11 and follow same steps to produce a nested leaf.
Leaf Round 7 :
Edge round: sc in each st; add picots along the outer edge every 3 sts: (sc, ch3, sl st in first ch) to create decorative balls at the edge (20 + picots)
Leaf Round 8 :
Fasten off leaving long tail for sewing; make mirror leaf by reversing foundation chain direction to create symmetrical pair (no count change)
— Layered Leaf Cluster (Join a pair) :
Round 1 :
Place larger leaf and smaller leaf with base edges aligned. Using a tapestry needle and green tail, whipstitch through base 6-8 times to secure them centered (no stitch count)
Info :
Sew from the underside so stitches are hidden. Pull threads gently so leaves cup slightly upwards to mimic the sample's sculpted look.
Round 2 :
Optional: Work a small connecting loop by sl st along the sewn base to create an attachment point for joining to rosettes later (no count)
— Joining Round (How motifs connect into runner) :
Info :
Join motifs with green yarn using chain arches and sl st joins. Each repeat uses: Daisy motif, small rosette below, two leaf clusters flanking each side, and connecting chains forming a diamond lattice. Work join rounds as you place motifs side-by-side.
Round 1 :
Lay out motifs in desired order. With green yarn attached to a small rosette, ch8, sl st into the nearest petal base of the adjacent daisy (creates a long chain arch). Repeat to form four arches around the rosette (visual spacing - no single st count)
Round 2 :
Where two arches cross, join with sc into the arch midpoint and form a picot: sc, ch3, sl st into the first ch to form decorative dot between leaf and daisy (repeat across joins)
Info :
Make sure that each daisy sits centered between two leaf clusters by checking symmetry. Use pins to hold motifs in place on a blocking mat while joining.
Round 3 :
To connect leaf clusters to rosette: With green yarn, work sl st from base loop into rosette chain point, ch4, sc into leaf base loop; repeat to create four connection points securing leaf cluster to the center chain. Fasten off after completing connections for that cluster
Info :
Keep joins loose enough to preserve lace openness but snug so motifs don't gap. If you want a firmer runner, work joining chains tighter and add fewer picots.
— Decorative Edge and Pointed Tip (Top and Bottom) :
Edge Round 1 :
With green yarn picked up along the runner side, sc evenly along the side edges where motifs create an outer contour. Count approximate sc to maintain even tension (sample: ~120 sc per long side for a 4-daisy runner)
Edge Round 2 :
Ch5, skip 4 sc, sl st in next sc to form a shallow arch repeat; on corners work (sc, picot, sc) to create a pointed tip where motifs meet (no strict count)
Info :
Outer picot points follow the motif bumps to echo the small bobble points seen in the sample. For a neat finish, block the runner flat and stitch the edge through the outermost motif stitches only.
Edge Round 3 :
Work a decorative round of chain loops and picots: *ch4, picot, sl st into next arch anchor* repeat around to form small balls at outermost edges. Fasten off and weave ends.
— Blocking and Final Finishing :
Info :
Soak the runner in lukewarm water with a touch of wool wash (or mild soap), gently squeeze out excess water (do not wring). Pin flat on blocking mat to shape pointed ends and leaf curvature. Use rust-proof pins to define each petal and leaf edge. Allow to dry completely, and lightly spray with diluted fabric stiffener if you prefer a crisper runner.
Finishing Step :
Weave in all ends with tapestry needle. If you used wooden beads, secure each bead by sewing through polyester thread twice and knotting on the wrong side. Trim threads close to surface and hide knots under adjacent stitches.
— Alternative Variations & Size Adjustments :
Info :
To lengthen runner: repeat extra Daisy+Leaf+Rosette unit the same way and join as you go. To shorten: omit units symmetrically from both ends. For a wider runner, add an additional column of motifs and mirror-join across the center line.
Info :
Color variations: make daisies in pastel colors for a spring version; alternate leaf colors for an ombre effect. Using finer thread and smaller hook yields a smaller, more delicate runner; thicker yarn yields a robust table piece.
— Stitch & Technique Notes (frequent Info sections) :
Info :
Front post and back post stitches (fpdc, bpdc) used in leaf veining must be worked with consistent tension to produce raised ridges. If your posts are loose, use a slightly smaller hook for those rounds only. Practice on a scrap leaf first.
Info :
Puff stitches for petals (if you prefer puff over the dc cluster given) should be closed with a single yarn-over draw-through and then secured with a sl st into the base; keep loop size consistent across petals to maintain evenness.
Info :
When joining motifs, work on a flat surface and pin motifs in final position before permanent joins. A single mistaken join early in the row can cause cascading offsets; use stitch markers to label join holes.
Info :
All stitch counts given are for the example runner; motif counts are precise where noted. When working arch/connecting rounds the number of chain repeats is flexible: aim for symmetry rather than an exact stitch count when following free-form join rounds.
— Full Sample Repeat Summary (Order of pieces) :
Step :
For each repeat along the runner: Daisy Motif (cream), small green rosette below the daisy, a pair of layered leaves on either side of the rosette (mirror-paired), and connecting chain arches that link to adjacent daisies. End with pointed tip cluster made of leaf edges and picots.
Info :
Make a small swatch of 1 daisy + 2 leaves + 1 rosette and join to see how your tension affects final spacing before committing to multiple repeats.
Completing this runner is such a satisfying finish — the layered leaves and 3D daisies come together into a delicate botanical statement piece. Each modular motif is like a small victory, and assembling them into the full runner gives a real sense of accomplishment. I love the tactile contrast between the smooth petals and the ridged leaves — it makes the piece photo-worthy and gift-worthy. 🧶🌿 Finish with a gentle block and it will sit beautifully on a shelf or table. Enjoy every stitch and share the joy! ✨