🧢 Beautiful ✨ Detailed πŸ’ Adorable

Dew Drop Handbag M Size Pattern

Dew Drop Handbag M Size Pattern
4.0β˜… Rating
5-7 Hours Time Needed
1.5K Made This
βœ‚οΈ

Intermediate Level

Ideal for those with basic crochet experience, featuring slightly more advanced stitches and techniques to expand your skills.

⏱️

Weekend Treat

Takes 5-7 hours, making it an enjoyable project to finish over a couple of days.

✨

Stylish Touch

An elegant detail to elevate any look, combining traditional techniques with contemporary design sensibilities.

About This Dew Drop Handbag M Size Pattern

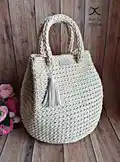
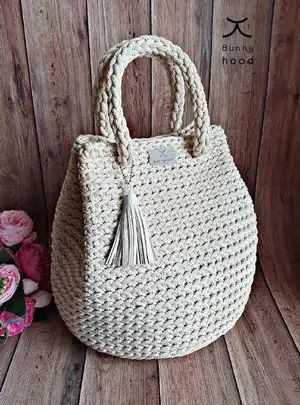
This pattern creates the Dew Drop handbag in M size, a drop-shaped rope bag with a round base and tall sides. The design uses polyester rope worked in single crochet back loops for a textured, modern look. You will also make braided I-cord handles and learn a neat method to join and hide ends for a polished finish.

Dew Drop Handbag M Size Pattern crochet pattern - detailed view of completed project

The pattern includes full round-by-round base instructions, side instructions, an I-cord tutorial for handles and photo-guided assembly. It is ideal for crafters who want a durable, washable bag that holds its shape well.

Why You'll Love This Dew Drop Handbag M Size Pattern

I absolutely love this pattern because it transforms simple polyester rope into a refined, structured bag that looks store-bought but handcrafted. I enjoy how quickly the round base grows with increases and how the back-loop rows create a subtle ribbed texture. The I-cord handles add a beautiful finished detail that feels luxurious and sturdy when worn. I also appreciate the practical finishing techniques included, like hiding ends with a lighter and neatly joining the I-cord, which make the final result long-lasting and tidy. This pattern lets me combine utility with style while using easy-to-find materials.

Dew Drop Handbag M Size Pattern step 1 - construction progress Dew Drop Handbag M Size Pattern step 2 - assembly progress Dew Drop Handbag M Size Pattern step 3 - details and accessories Dew Drop Handbag M Size Pattern step 4 - final assembly and finishing

Switch Things Up

I love customizing this Dew Drop bag by changing rope color and size; a brighter rope makes a bold statement while neutral tones stay classic.

I often use a thicker rope and a larger hook to make a chunky, oversized tote thats perfect for market shopping or beach days.

To make a mini version as a gift or keychain, I choose a thinner cord and smaller hook β€” the pattern scales well when you keep the same shaping steps.

I sometimes line the bag with fabric to add structure and hidden pockets; simply sew a circular fabric base and a tall fabric tube for the sides then hand-sew it inside the bag.

Try adding magnetic or sewn-in snaps to create a secure closure at the top, or make a drawstring insert for a different opening style.

Swap the braided I-Cord for a leather strap or store-bought handles for a mixed-material look and added durability when carrying heavy items.

I like to embellish with decorative stitching or embroidered initials on a small sewn label to personalize each bag I make.

For extra stability, you can insert a thin, flexible disc inside the base before attaching the lining to help the bag keep its round shape under load.

Experiment with decorative stitches on the side rows by alternating BLO rows with regular SC rows to create subtle patterning in the texture.

If you want crossbody wear, make the I-Cord longer (or add a detachable strap) and reinforce join points with extra weaving and stitching for comfort and strength.

Common Mistakes & How to Fix Them

βœ— Skipping a stitch marker or scrap yarn to mark the last base stitch will make counting rows confusing; mark the last stitch of the base with scrap yarn to easily find the start of the side rounds. βœ— Not working into back loops only for the side rows results in a different texture and may alter the bag height; be sure to work every side round in SC BLO as instructed to get the ribbed effect. βœ— Cutting ends too short before hiding them can make it hard to secure them; leave a small tail (~30 cm) when finishing your I-cord so you can weave and hide ends properly. βœ— Forgetting to weave the I-Cord down two rows when threading handles makes the placement less secure; weave the I-Cord in and out about two rows down for a stable attachment. βœ— Applying too much heat with the lighter when melting polyester ends can burn the rope; use a quick, gentle touch and immediately press the softened end under nearby yarn to hide it.

Dew Drop Handbag M Size Pattern

Make a stylish Dew Drop handbag using chunky polyester rope and simple single crochet stitches. This pattern guides you through a round base, tall sides worked in back loops, and braided I-cord handles with clear photo-based assembly tips. Youll end up with a durable, washable bag perfect for everyday use or as a unique handmade gift. Follow the step-by-step instructions to create a professional-looking rope bag.

Intermediate 5-7 Hours

Materials Needed for Dew Drop Handbag M Size Pattern

β€” Main Fabric

  • 01
    ~160 meters polyester rope 5-6 mm (color used - light beige)
  • 02
    Tubular knit polyester outer surrounding polyester yarn core (rope construction described for the yarn)

β€” Tools Required

  • 01
    7 mm crochet hook
  • 02
    Scissors
  • 03
    Lighter (for hiding ends)
  • 04
    Needle for sewing label
  • 05
    Favorite tassel or accessory
  • 06
    Scrap yarn for marking last base stitch
  • 07
    Yarn needle for sewing/joining I-cord and hiding ends
  • 08
    Stitch marker (optional)

Progress Tracker

0% Complete

β€” Make the Base :

Round 1 :

6 sc into the magic loop, 1 sl, 1 ch (6)

Round 2 :

*2 sc blo into next stitch*, repeat * * 6 times (12)

Round 3 :

*1 sc blo, 2 sc blo into next stitch *, repeat * * 7 times (21)

Round 4 :

*2 sc blo, 2 sc blo into next stitch *, repeat * * 7 times (28)

Round 5 :

*3 sc blo, 2 sc blo into next stitch *, repeat * * 7 times (35)

Round 6 :

*4 sc blo, 2 sc blo into next stitch *, repeat * * 7 times (42)

Round 7 :

*5 sc blo, 2 sc blo into next stitch *, repeat * * 7 times (49)

Round 8 :

*6 sc blo, 2 sc blo into next stitch *, repeat * * 7 times (56)

Round 9 :

*7 sc blo, 2 sc blo into next stitch *, repeat * * 4 times (60)

Info :

Base is done.

β€” Make the Sides :

Round 10-29 :

sc blo all stitches for 19 row (or till side is ~25 cm tall). Slip 2 last stitches and weave in end*

Info :

The sides are super easy to make, just crochet all the stitches until the bag is as tall as you like. You can stop earlier or make more rows for a taller or shorter bag.

β€” Perfect Ending :

Info :

First, insert hook, catch the yarn end and pull it under and through the stitch as shown in the pattern photos; this tucks the end down and secures the last stitch.

Info :

Second, put the hook in the same crochet stitch back loop, catch the yarn and pull it through the loop as shown; repeat this to secure and hide the end neatly.

Info :

This yarn is 100% polyester, so it is perfect for hiding ends with a lighter because it can melt. Hide the yarn end a little bit further on your crocheting and cut the rest of the yarn, leaving only a very short ending.

Info :

Heat the short ending for a few seconds with a lighter and quickly hide it by pushing it under the nearest yarn with a hook. Thats it! The sides are done.

β€” Crochet the Handles :

Info :

Handles are made by crocheting I-Cord. Knowing how to make I-Cord is helpful β€” it can be used as a lanyard, drawstring or any other rope or cord.

Row 1 :

Chain 3. Insert hook into 2nd chain, pull up a loop. Insert hook into 3rd chain, pull up a loop (3 loops on hook). Follow pictures 1 - 5 in the tutorial.

Row 2 :

Desired length: catch the yarn and pull up a loop, then remove it from hook, being careful not to lose it. Pinch the cord with thumb and finger to help hold loops. Yarn over and pull a loop through the second loop, carefully remove it from the hook. Yarn over and pull up a loop (picture 9-10). Yarn over and pull a loop catch the yarn and pull a loop (picture 11-12). To start next row - insert hook into two next (empty) loops (3 loops on a hook).

Info :

Continue crocheting rows in this manner until the cord is ~90 cm length. Then pull off the hook, cut the yarn (leaving ~30 cm ending) and leave it all. Later we will join the ends.

β€” Assembling the Bag :

Info :

The crochet fabric is very strong, so there is not chance the bag will tear away or break. You may get a little stretching in the stitch gap like in the tutorial photos; pull the I-Cord throughout it as needed.

Info :

Weave the I-Cord youve just crocheted in and out of stitches, about two rows down from the edge (follow the referenced photos 2 - 8). This secures the handle and creates a decorative finish.

β€” Join the Ends :

Info :

After you weaved the I-Cord, you need to join its endings. You can end the I-Cord by yarn over and pull through all three loops on hook and tie up both endings, but the tutorial shows a neater way to join the ends.

Info :

Take the I-Cord end and insert hook into the first loop. Catch the yarn and pull it all throughout (pictures 1-4 in the tutorial). Take the other I-Cord end and insert the hook as shown, then catch the yarn and pull it all throughout (pictures 5-8).

Info :

Insert hook in the loop as shown in the tutorial (picture 9). Catch the yarn and pull it all throughout (picture 10). Continue joining remaining loose loops in this manner following the step-by-step photos until all loops are joined.

Info :

When finished joining, make a double knot and hide the ends into the I-Cord and cut the leftovers, leaving very short ends. Melt the short ends with a lighter and press the melted end into the I-Cord to hide it securely.

Info :

Pull handle 1 and handle 2 into final position, add your favorite tassel, sew on a label if desired and the bag is ready to wear.

Assembly Instructions

  • Weave each I-Cord handle in and out of the bag edge stitches about two rows down to anchor the handle securely and evenly around the opening.
  • After weaving, join the two loose ends of each I-Cord by inserting a hook into the first loop, pulling the yarn through, then repeating with the other end until all loops are joined and secure.
  • Make a double knot at the joined I-Cord ends, hide the tails inside the I-Cord, trim leaving very short ends, then melt the polyester tails briefly with a lighter and press them into the I-Cord to hide.
  • Position the two handles opposite each other (handle 1 and handle 2). Pull the handles into place so they sit flat and evenly on the bag opening before trimming and finishing.
  • Sew on your label with a needle and thread and attach a tassel to one handle or the bag edge as a final decorative touch.

Important Notes

  • πŸ’‘Use scrap yarn or a stitch marker to mark the last single crochet stitch of the base to make counting the start of the sides much easier.
  • πŸ’‘Work all side rows into the back loops only (SC BLO) to get the correct ribbed texture and intended bag height.
  • πŸ’‘Hide polyester rope ends by melting them briefly with a lighter and pressing them into the I-Cord or nearby yarn; be quick and careful to avoid burning.
  • πŸ’‘Leave a generous tail (around 30 cm) when finishing I-Cord so you have enough yarn to join and hide the ends neatly.
  • πŸ’‘The rope can be machine washed on a 30-40Β°C gentle cycle but do not tumble dry, bleach, iron or dry clean; the rope retains form and color well after washing.

This Dew Drop Handbag pattern gives you a chic, structured rope bag thats both beautiful and practical. The design is durable, washable and perfect for everyday use or gifting. Try it in different rope colors for a fresh seasonal look! 🧢✨

You ask,

we answer.

FAQs

What size will the finished bag be?

Finished bag size: round bottom diameter approximately 25 cm, height approximately 25 cm, handles approximately 45 cm.

Can I use a different rope thickness or yarn?

You can use a different rope thickness, but the final size and firmness will change; adjust hook size accordingly and make a gauge test to achieve desired dimensions.

Do I need experience with I-Cord to make the handles?

Some basic experience helps, but the pattern includes a detailed I-Cord tutorial with step-by-step photos that guide you through making and joining the handles.

How long does it typically take to complete the bag?

Most crafters finish this project in about 5-7 hours, depending on experience and whether you make custom adjustments or extra finishing details.