About This Diamond Beanie Pattern
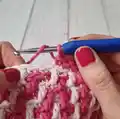
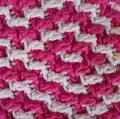
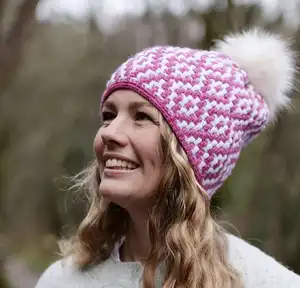
This pattern creates a textured mosaic diamond beanie worked in the round using two colors. You will make the hat top-down as a single cylinder and finish the edge and top for a neat look. It uses simple single crochet and mosaic double crochet techniques to build the diamond motif. Suitable for making multiple sizes from toddler to adult.
Includes full size table, gauge information and yarn amounts for each size. Clear instructions on reading the mosaic diagram and finishing the foundation edge are provided.
Why You'll Love This Diamond Beanie Pattern
I absolutely love this pattern because the mosaic technique produces an eye-catching diamond texture using only one color per round, making color changes neat and predictable. I enjoy how the hat is worked top-down so you can try it on as you go and easily adjust the height. The pattern is forgiving for beginners but still produces a professional-looking beanie that feels special. I also love how versatile it is — swap colors to create completely different looks with the same instructions.
Switch Things Up
I love experimenting with colors — try a soft pastel palette for a gentle, cozy look or bold contrasting colors for a striking mosaic diamond effect.
Change yarn weight and hook size to alter finished size; bulky yarn with a larger hook creates a chunky hat while fingering weight makes a delicate mini beanie.
I often add a folded cuff by working extra rounds in single crochet or ribbing at the end to create a snug, warm brim.
Try swapping the two colors every 2-4 rounds for a striped mosaic look that still keeps the diamond texture apparent.
For a different edge finish, you can work a round of slip stitches or crab stitch (reverse sc) in color A for a neat, slightly raised border.
Add earflaps and ties for children's hats — pick up stitches at the brim and work a triangular flap, then braid or crochet ties to secure under the chin.
I sometimes line the hat with soft fleece for extra warmth and a professional finish; simply cut a circle and sew it to the inside after finishing the beanie.
Mix in a metallic or boucle accent yarn for one of the colors to give the beanie a festive or textured look without changing the pattern.
Adjust the starting column in the mosaic diagram to shift the placement of the diamond on the hat; changing the start column changes where the pattern seam appears.
I also like to replace the pom pom with a faux-fur pom for an upscale look or make a small crocheted flower to sew on for a playful accent.
Experiment with embroidered details over the finished mosaic to personalize initials or small motifs without disrupting the textured surface.
Common Mistakes & How to Fix Them
✗ Not checking gauge before starting; check a 10x10cm (4"x4") swatch and adjust hook size to match 18 stitches and 18 rounds so your beanie fits correctly.
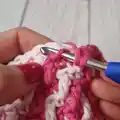
✗ Forgetting to change color on the last yarn over and pull through; always change color on the last time you 'yo and pull through' to keep the color transitions neat.
✗ Working with inconsistent tension during mosaic dc placements; practice inserting the hook from below and pulling through the front loop to maintain even stitches and consistent fabric texture.
✗ Skipping stitch marker placement when working in spiral; place a marker in the first stitch and move it each round to keep track of the start of round and avoid accidental stitch count errors.