🧢 Beautiful ✨ Detailed πŸ’ Adorable

Donut Amigurumi Pattern

Donut Amigurumi Pattern
4.6β˜… Rating
1-2 Hours Time Needed
2.4K Made This
βœ‚οΈ

Beginner Friendly Level

Perfect for those just starting their crochet journey, with clear instructions and simple techniques

⏱️

Quick Make

Complete in under 2 hoursβ€”lightning fast fun for instant gratification and quick gifts.

🧸

Cute Companion

An adorable friend to cherish, handcrafted with love to bring comfort and joy for years to come.

About This Donut Amigurumi Pattern

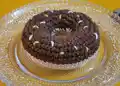
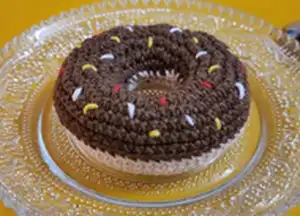
This pattern creates a small stuffed donut amigurumi with a beige base and brown frosting topped with colorful sprinkles. You will work in simple single crochet rounds and join the base and frosting to create a plush donut shape. The design uses basic techniques, making it an ideal quick make for crocheters of all skill levels.

Donut Amigurumi Pattern crochet pattern - detailed view of completed project

The pattern includes a materials list, abbreviations, full round-by-round instructions, and clear attachment steps. Finish with sewn-on yarn sprinkles to personalize your donut.

Why You'll Love This Donut Amigurumi Pattern

I absolutely love this pattern because it turns simple stitches into a fun, sweet little toy that brightens any shelf. I enjoy how quickly the donut comes togetherβ€”perfect for gifting or making multiples. I love adding my own colors for the sprinkles to make each donut unique and playful. I also appreciate that the pattern is beginner-friendly, so I can teach friends how to make their first amigurumi. Making these donuts always brings a bit of joy and a sense of accomplishment.

Donut Amigurumi Pattern step 1 - construction progress Donut Amigurumi Pattern step 2 - assembly progress Donut Amigurumi Pattern step 3 - details and accessories Donut Amigurumi Pattern step 4 - final assembly and finishing

Switch Things Up

I love customizing this donut by changing yarn colours for different frosting effects, such as pastel, bright, or ombre tones.

I sometimes make the donut larger by using a thicker yarn and larger hook to create a chunky plush version that is extra cuddly.

For keychains or charms, I use thinner yarn and a smaller hook to make tiny donuts perfect for accessories.

I like adding embroidered faces or tiny felt decorations to give each donut a personality and make them more toy-like.

Try different sprinkle techniques: single embroidered stitches, tiny French knots, or short yarn pieces sewn on for texture.

Use variegated yarn for an interesting multicolour effect on the frosting without changing colours mid-pattern.

Incorporate metallic or sparkly yarn for festive donuts that double as holiday ornaments or party decorations.

Mix fibres like cotton and acrylic for different drape and firmness; cotton gives a crisp look while acrylic is soft and forgiving.

I also experiment with stuffing levels to get a flatter or plumper donut shape depending on the look I want to achieve.

Finally, make a whole bakery set by crocheting multiple donuts with different topping combos and display them in a handmade box or tray for a charming gift.

Common Mistakes & How to Fix Them

βœ— Skipping the long tail when starting the base makes sewing the inner pieces difficult; leave the recommended long tail (about 15 cm) for easy stitching. βœ— Not counting stitches after increases can lead to mismatched rounds and uneven shaping; count your stitches at the end of each round to ensure correct totals. βœ— Forgetting to use BLO when joining the frosting to the base will change the finished look; follow the instruction to slip stitch in the BLO for a neat top edge. βœ— Overstuffing the donut can distort the shape and make assembly awkward; stuff gradually and stop when the donut is firm but still slightly springy. βœ— Cutting the yarn tail too short before sewing makes attachment tricky; always leave the suggested tail length for secure sewing and weaving in ends.

Donut Amigurumi Pattern

Make a delightful stuffed donut amigurumi with simple rounds and easy assembly. This beginner-friendly pattern guides you through the base, frosting, and sprinkle details so you can create a cute handmade treat. Perfect for gifting or decorating your craft space, the finished donut is quick to make and full of charm. Enjoy a cozy, satisfying crochet project with clear step-by-step instructions.

Beginner Friendly 1-2 Hours

Materials Needed for Donut Amigurumi Pattern

β€” Main Fabric

  • 01
    Sport/Fine Yarn / 4 Ply Weight Yarn (main weight used for the pattern)
  • 02
    Alize Cotton Gold - Beige Colour (used for base) (55% Acrylic, 45% Cotton)
  • 03
    YarnArt Jeans - Brown Colour (used for frosting) (55% Acrylic, 45% Cotton)
  • 04
    Assorted small amounts of contrasting yarn colours for sprinkles (various colours)

β€” Tools Required

  • 01
    Crochet Hook : 3 mm
  • 02
    Stitch marker
  • 03
    Yarn Needle/Tapestry Needle
  • 04
    Polyester Fiberfill

Progress Tracker

0% Complete

β€” Materials :

Infos :

Yarn : Sport/Fine Yarn/4 Ply Weight Yarn. I used Alize Cotton Gold-Beige Colour and YarnArt Jeans-Brown Colour (55 % Acrylic, 45 % Cotton). Some colours of yarn for sprinkles. Crochet Hook : 3 mm. Stitch marker. Yarn Needle/Tapestry Needle. Polyester Fiberfill.

β€” Abbreviations :

Infos :

Ch:Chain. Sl: slip stitch. Sc: single crochet. Inc: increase. BLO: Back Loop Only.

β€” Difficulty :

Info :

Easy/Beginner

β€” DONUT BASE :

Info :

Start with BEIGE YARN, make a long tail about 15 cm and start with 20 chain

Round 1 :

sc 20 in the chain (20)

Round 2 :

(sc, inc) x 10 (30)

Round 3 :

(2 sc, inc) x 10 (40)

Round 4 :

(3 sc, inc) x 10 (50)

Round 5 :

(4 sc, inc) x 10 (60)

Round 6-8 :

Sc around

Info :

Sl, leave a long tail for sewing

β€” DONUT FROSTING / TOPPING :

Info :

Make same with BROWN (ANY COLOUR) YARN but no need give a long tail (sl and cut the yarn)

Round 1 :

sc 20 in the chain (20)

Round 2 :

(sc, inc) x 10 (30)

Round 3 :

(2 sc, inc) x 10 (40)

Round 4 :

(3 sc, inc) x 10 (50)

Round 5 :

(4 sc, inc) x 10 (60)

Round 6-8 :

Sc around

Info :

Sl, cut the yarn

Info :

With yarn Needle attach colours yarn as the sprinkles.

β€” ATTACHMENT :

Info :

First attach the inner of donuts (base and frosting/topping) using the long tail of yarn with slip stich (20).

Info :

Then attach the outside (base and top side): slip stitch donut base with frosting (BLO frosting/top base) until 50 stitch, then fill the polyfill.

Info :

Then slip stitch all until done (60).

Assembly Instructions

  • Attach the inner circles (base and frosting/topping) first using the long tail from the base and slip stitch through 20 stitches to join securely.
  • Join the outside edges by slip stitching the donut base to the frosting using BLO on the frosting/top base until you have worked 50 stitches, leaving an opening for stuffing.
  • Fill the donut with polyester fiberfill firmly but not overstuffed to maintain a rounded, donut shape.
  • Continue slip stitching the remaining stitches until you reach 60 total and the donut is fully closed and neat.
  • Using a yarn needle, attach small lengths of contrasting yarn as sprinkles across the frosting, spacing them evenly and securing the ends on the inside.

Important Notes

  • πŸ’‘Leave a long tail (about 15 cm) when starting the base to use for sewing and attachment to the frosting.
  • πŸ’‘Use BLO (back loop only) on the frosting/top base when slip stitching to the base to create a defined edge and neat finish.
  • πŸ’‘Stuff gradually and check the shape frequently; overstuffing can distort the donut and make finishing difficult.
  • πŸ’‘Secure all yarn ends and weave them into the donut interior to prevent unraveling and create a clean finish.

This cute donut amigurumi pattern is a quick and satisfying make that brings a smile every time. Create a set in different colours and sprinkle combos for playful decor or sweet handmade gifts. Perfect for beginners and a lovely way to practice shaping and joining techniques. 🧢🍩

You ask,

we answer.

FAQs

What size will the finished piece be?

The finished donut measures approximately 8-12 cm across depending on yarn tension and yarn thickness used.

Can I use different yarn weights for this pattern?

Yes, you can use different yarn weights, but this will change the finished size; choose an appropriate hook to maintain stitch definition and adjust stuffing accordingly.

Do I need prior crochet experience for this pattern?

This pattern is beginner friendly and uses basic single crochet, increases, and slip stitches, so basic crochet knowledge is recommended.

How long does this project typically take to complete?

Most crocheters can finish this donut in under 2 hours, depending on experience and speed.