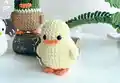
About This Duck No Sew Amigurumi Pattern
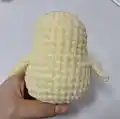
This pattern teaches you how to crochet a charming no-sew duck amigurumi worked from the body up to the head. It includes a simple base that you can make in plain yellow, a mallard color variation, or adapt to a rooster design. The pattern uses super bulky (Category 6) yarn and a 3.5mm hook for a plush textured finish. Photos and step-by-step rounds make it easy to follow along.
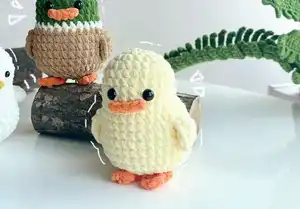
Perfect for making quick handmade gifts or building your amigurumi skills with minimal finishing. Includes instructions for legs, wings, beak (speculum), and small details.
Why You'll Love This Duck No Sew Amigurumi Pattern
I absolutely love this pattern because it combines fast, satisfying crochet with charming results that feel handmade and heartwarming. I enjoy how the no-sew construction makes assembly easier and keeps the finished toy neat and durable. The design is versatile — you can make a simple yellow chick, a colorful mallard, or a little rooster using the same shaping. I also appreciate that the pattern highlights small techniques like creating feet and the speculum which really bring personality to the piece. It always makes me smile to see someone finish one in just a few hours and fall in love with their little creation.
Switch Things Up
I love how easy it is to customize this pattern by changing colors — try pastel shades for a softer chick or bright seasonal colors for festive versions.
If you want a larger or smaller duck, change your yarn weight and hook size; bulky yarn with a larger hook gives a chunky toy while lighter yarn and smaller hook create a mini version.
I often swap safety eyes for embroidered eyes to make the toy baby-safe or change the eye size to give different expressions.
You can make the mallard variation by following the color-change notes, or invent your own color blocking to make a family of ducks with unique personalities.
Try adding tiny crocheted accessories like a scarf, hat, or bow by working a few extra chains and single crochet rows to personalize each duck.
For a poseable option, consider inserting lightweight wire into the limbs before stuffing so you can bend feet and wings into different positions.
I sometimes add felt details like small embroidered beaks or cheeks glued with hot glue for extra texture and safety for young children.
To make a set, vary the eye placement and beak size slightly — moving eyes up or down a row or changing the speculum width changes the expression dramatically.
If youre making many at once, try using a small assembly line approach: crochet all bodies first, then all legs, then all beaks to speed up production and keep consistent results.
Dont be afraid to experiment with stitch tension and stuffing density — a firmer stuffing gives structure while softer stuffing yields a cuddlier feel, and both are lovely depending on the intended use.
Common Mistakes & How to Fix Them
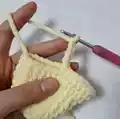
✗ Skipping the stitch marker at the start of rounds causes you to lose track of the beginning; place a marker at the first stitch and move it each round to remain accurate.
✗ Forgetting to stuff gradually leads to lumps and uneven shaping; add stuffing little by little while shaping to maintain a smooth, rounded body.
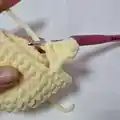
✗ Cutting the yarn too early when making legs or feet prevents seamless joining; keep the yarn when instructed and use slip stitches to join pieces to the body as directed.
✗ Misplacing the eyes will change the character of the face and proportions; count stitches carefully and place the safety eyes between the recommended rounds and stitch separation.
✗ Working with inconsistent tension causes uneven round sizes and mismatched stitch counts; maintain a steady, comfortable tension throughout the project.
✗ Ignoring color-change notes can produce messy joins or incorrect stripes; follow the color change instructions exactly and weave in ends as recommended to keep edges tidy.