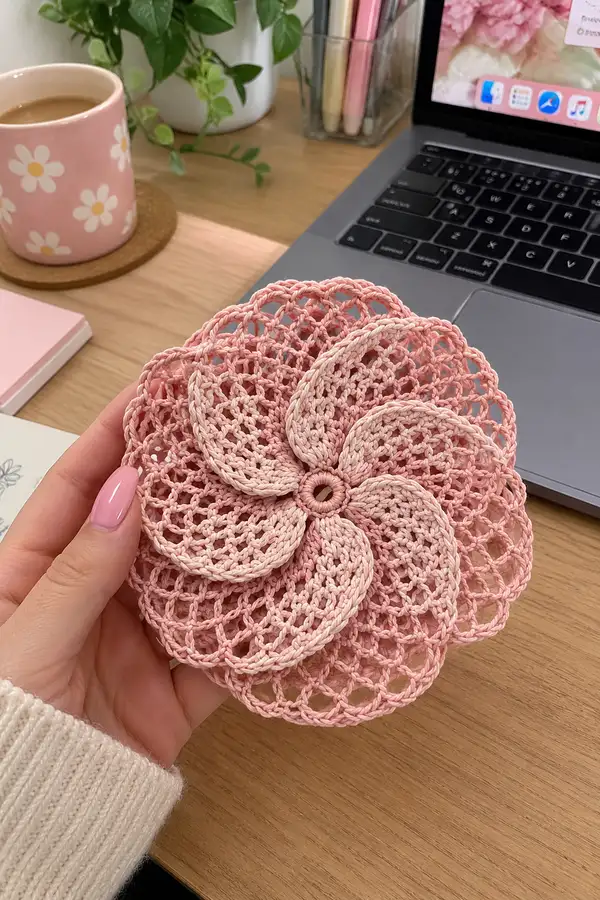
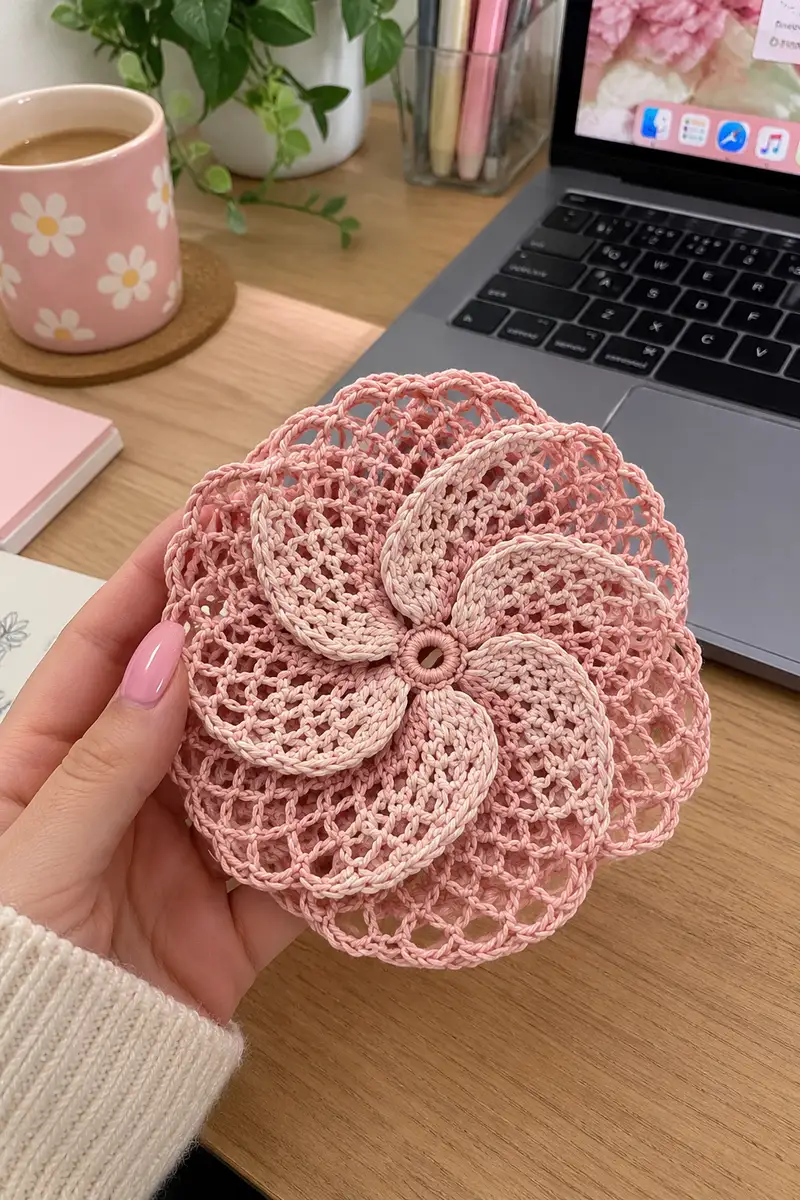
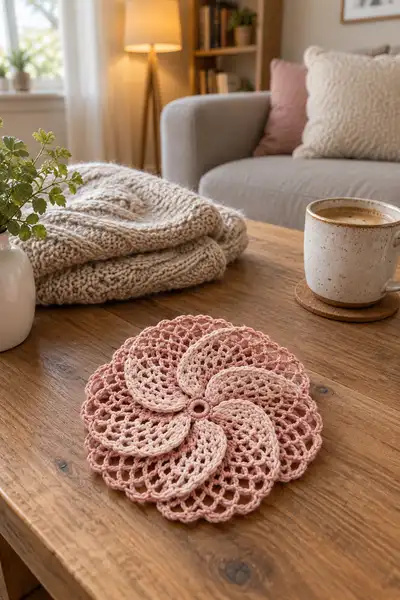
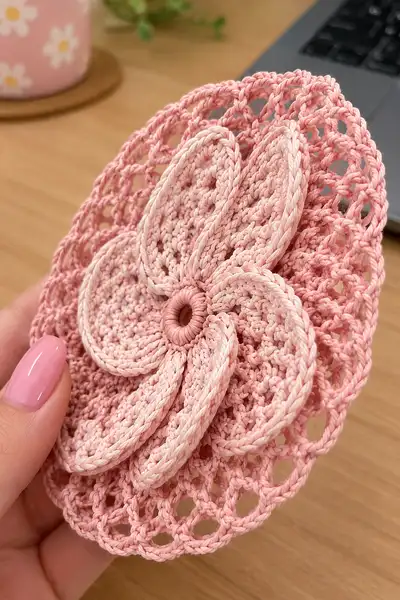
Create an elegant dusty rose bedspread made from large floral medallions — delicate raised petals set over an open lacy background. Each motif is worked in a soft dusty-rose cotton blend with layered petals and a scalloped mesh edge, joined as-you-go for a seamless, heirloom finish. Includes matching pillow cover instructions and a full edging to frame the spread beautifully. Perfect for a romantic bedroom update or a thoughtful handmade gift.
Progress Tracker
0% Complete
— Overview :
Info :
This pattern describes one large floral medallion (approx. 18-22 cm / 7-8.5 in across when blocked, in sport/DK cotton with 3.25 mm hook). Make as many medallions as you need to cover the bed size you want. The motif is built in three main stages: Center disc (Rounds 1-9), Six raised petals (each petal R1-R12), and Outer lacy mesh and scallop edge (Rounds 1-14). Join-as-you-go (JAYG) instructions appear during the outer mesh rounds so motifs connect seamlessly as you work. Match tension and block each motif before final joining.
Info :
All rounds begin in the top of the first stitch unless otherwise stated; use a stitch marker to mark round starts. Use the smaller hook for petal rounds if you prefer a more defined petal. If using two shades, change color at the Info callouts below.
— Gauge :
Info :
1 motif (unblocked) = approx 18-22 cm / 7-8.5 in across. Adjust hook to meet desired motif size. Lacy fabric will expand with blocking; measure after blocking when planning final layout.
— Motif — Center Disc :
Round 1 :
Make a magic ring, 6 sc into ring. Tighten ring. (6)
Round 2 :
Inc in each stitch around. (12)
Round 3 :
(1 sc, inc) × 6. (18)
Round 4 :
(2 sc, inc) × 6. (24)
Round 5 :
(3 sc, inc) × 6. (30)
Info :
Place 6 small stitch markers evenly around this round to mark the base points where each petal will later attach; space them every 5 stitches (30 ÷ 6 = 5 sts). This gives consistent petal placement.
Round 6 :
(4 sc, inc) × 6. (36)
Round 7 :
(5 sc, inc) × 6. (42)
Round 8 :
(6 sc, inc) × 6. (48)
Round 9 :
1 sc in each st around. (48)
Info :
Fasten off this color if you change for petals, leaving a 20 cm tail if you will sew petals down; otherwise join new yarn at the petal base when instructed. Blocking the center slightly helps the petals sit neatly.
— Petal (Make 6) :
Info :
Each petal is worked in joined rounds onto the center disc. Begin at the stitch marker you placed on Round 5 of the center disc. Use a smaller hook (2.75–3.0 mm) if you want stronger raised petals. The petals are three-dimensional: the first rounds create the petal base, the middle rounds add height using FLO/BLO and post stitches, and the final rounds shape the outer rim. Work petals in the same color or change to a slightly lighter dusty rose for subtle contrast.
Petal Round 1 :
Join yarn to the marked stitch on center disc, ch 1, sc in same st, ch 2, sk next 3 sts on center and sl st to next marker base to create a small tab of chains for petal base — this tab anchors the petal. (1 sc + chain tab)
Petal Round 2 :
Work around the chain-tab: 6 sc into the chain loop (or 3 sc + 3 hdc depending on chain length) to form a tight semicircular petal foundation. Turn work so the loop is now the outer edge. (6)
Petal Round 3 :
Increase round to form teardrop: (1 sc, inc) × 3 along the semicircle edge. (9)
Petal Round 4 :
(2 sc, inc) × 3. (12)
Info :
At this stage the petal is a shallow cup; we will add vertical height and a subtle ridge using front loop-only rows in the next rounds.
Petal Round 5 :
1 sc in each st working in FLO only around the petal (12). This tightens outer edge and creates a ridge at the petal base.
Petal Round 6 :
(3 sc, inc) × 3. (15)
Petal Round 7 :
1 sc BLO in each st around (15). Working BLO here pushes looped ridge forwards creating petal depth.
Petal Round 8 :
(4 sc, inc) × 3. (18)
Info :
To make the petal cup slightly lifted, add a row of half double crochet posts: the next round will use hdc2tog or front-post hdc across the center of the petal to create an arc. Keep tension even.
Petal Round 9 :
Ch 2 (counts as hdc), hdc in next st, front-post hdc around the next 4 sts forming a raised channel, hdc in remaining sts and join. (18)
Petal Round 10 :
1 sc in each st (18). If you want a thicker petal edge, work these sc in BLO to create a defined lip.
Petal Round 11 :
Work outer shaping: (1 sc, 1 hdc, 1 dc) × 6 evenly across the outer curve to create a gentle crescent texture. (18 clusters counted as 54 stitches if counting each dc/hdc/sc individually; keep counts conceptually even across petals)
Petal Round 12 :
Finish petal edge: sl st into next st, ch 1, sc evenly around outer curve, sl st to base to finish neatly. Fasten off leaving a 20 cm tail for sewing if needed. Repeat petals 2–6 at each marked base on the center disc.
Info :
After completing each petal, pin it gently on blocking mat to desired orientation (slightly overlapping clockwise to form the swirl). Light steam blocking will help petals hold their shape.
— Petal Assembly & Shaping Notes :
Info :
When you have completed all 6 petals, arrange them so each overlaps the next by about 25–30% of the petal width, forming the spiral swirl visible in the photos. Use your long tail to sew the petal bases securely to the center disc through the base rounds (Center R5–R7 area) using small mattress or whip stitches. Weave tail into the back to hide. For a very crisp raised petal, sew only at the base and leave outer petal edges free to lift slightly.
— Outer Lacy Mesh (worked in rounds around the petal set) :
Info :
Begin mesh rounds by rejoining yarn to a visible join point on the center disc between two petals or at the top of a petal base. The outer mesh creates the openwork background and eventual scalloped edge; later rounds include join-as-you-go steps to connect neighboring motifs.
Round 1 :
Join yarn to center between two petals, ch 3 (counts as dc), 1 dc in same join, ch 3, sk to next gap between petals, 2 dc, *ch 3, sk to next gap, 2 dc; rep from * around. Join with sl st to top of initial ch-3. (12 ch-3 spaces if 6 petals produce two gaps per petal set; adjust to match your actual gap count)
Round 2 :
Ch 1, sc in same st, *ch 5, sk to next 2-dc cluster and sc in the base between cluster and petal; rep from * around creating a ring of ch-5 arches. Join with sl st. (12–18 ch-5 arches depending on cluster count)
Round 3 :
Ch 4 (counts as tr), 2 tr in next ch-5 arch, ch 3, 3 tr in next arch, *ch 3, 3 tr in next arch; rep from * around to form tall loops. Join. (Number of 3-tr clusters = number of arches)
Info :
Use this round to begin alignment for as-you-go joining. If this is a motif that will be joined later, mark the arches that will match neighbor motifs with a stitch marker for easier matching.
Round 4 :
Ch 1, sc in same st, *ch 7, sc in apex of next tr cluster; rep around. (A ring of ch-7 mesh loops forming airy openwork)
Round 5 :
Ch 3 (counts as dc), 4 dc in same ch-7 loop, *5 dc in next ch-7 loop; rep around. Join. (Clusters of 5 dc create a fuller mesh)
Round 6 :
Ch 1, sc in same st, *ch 9, sc in next cluster top; rep around. The ch-9 creates larger mosaic-like spaces for the final scalloped shaping. Join. (Number of ch-9 loops matches number of clusters)
Info :
If joining to an existing motif: At this round, perform JAYG (join-as-you-go) by replacing specified ch-9 loops with joins to adjacent motifs. See Join-as-you-go section below for exact join points and sequence order.
Round 7 :
Ch 1, sc in same st, *ch 4, (sk 2 ch, 1 sc) into the next ch-9 to create a small mesh row inside each large loop. Rep around and join. This builds a denser net for the scallop shell to sit on. (Number of small mesh repeats = number of large loops)
Round 8 :
Ch 3, (dc, tr, dc) all into next small ch-4 loop to start scallop; *skip to next small mesh and make (dc, tr, dc) in each; rep around to form initial scallop arches. Join. (Scallop count = number of mesh loops)
Round 9 :
Ch 1, sc across each stitch and in the top of each (dc, tr, dc) to tidy and stabilize scallops. Join. (Stitch count equals number of previous cluster tops plus mesh sts)
Round 10 :
Ch 3 (counts as dc), (2 dc, ch 2, 3 dc) into center top of each scallop to create a full shell picot-style scallop. In the spaces between shells work (1 dc) to even out. Join. (Scallop repeats = number of scallop arches)
Info :
At this point the motif should lie flat. If it bowls, block flat; if it wrinkles, work a final row of sc in BLO to draw edge slightly inwards.
Round 11 :
Ch 1, sc in each st around to create a neat turned edge for joining. Join and fasten off. Leave long tail for sewing if you plan to hand-join motifs rather than JAYG.
Info :
For the pictured bedspread, motifs were joined using a mix of JAYG on Round 6 and hand-sewn over Round 11 to create nearly invisible seams. Decide your preferred join method before proceeding to replicate the look exactly.
— Join-As-You-Go (JAYG) Method :
Info :
Arrange motifs in the layout you want: for a bedspread you will generally use a rectangular grid (e.g. 8 × 10 motifs for a full sample layout — adjust for bed size). Work motifs in rows from left-to-right so when you reach the outer mesh Rounds you can join to the previously completed adjacent motifs seamlessly.
JAYG Step 1 :
When working Round 6 (the ch-9 loops) of a motif that has neighbor(s) already completed, replace certain ch-9 loops with the following sequence at join points: ch 4, sl st into corresponding ch-9 apex on neighbor motif, ch 5 continuing to complete your loop. This creates a secure but open bridge. Use this sequence on the loops where motifs meet horizontally and vertically. Maintain a consistent sequence for all joins.
JAYG Step 2 :
For corner joins where four motifs meet, make two sl sts into the neighboring motif (one to each neighbor) separated by ch stitches so the crossing is firm; avoid making the crossing too tight to preserve lace elasticity.
Info :
Mark the positions on your working motif where joins will occur before creating ch loops to ensure perfect alignment. If joining later by sewing, match Round 11 stitche points and mattress stitch through the ch-loops and sc edge for an invisible seam.
— Edge & Scalloped Border for Finished Bedspread :
Info :
After joining all motifs into the desired rectangle, you'll have an irregular outer edge where partial diamond or half scallops appear. The edging rounds described here are worked continuously around the whole spread to neaten and add a decorative scallop frame.
Edge Round 1 :
With motif grid lying flat, join yarn at any outermost motif seam; work 1 sc evenly around the entire outer edge of the assembled spread, placing 3 sc in each outer scallop valley to maintain consistent shape. Work slowly and place pins to keep corners square. Fasten off. (Count varies by number of motifs; adjust)
Edge Round 2 :
Join yarn, ch 3, dc across the first edge scallop, *ch 2, 3 dc in next scallop; rep around. This creates a uniform shell rhythm around the entire spread. Join and fasten off.
Edge Round 3 :
Join yarn, ch 1, sc in same st, *ch 4, sc into middle dc of each shell to create small lacy picots between shells; rep around. Join. Fasten off and weave in ends.
Edge Round 4 :
Optional final row: Work a fine row of crab stitch (reverse sc) around entire edge for a hand-stitched finished look and slight tensioning. This helps the border lie flat and reinforces seams where multiple motifs meet.
Info :
Block the whole bedspread with rust-proof pins and steam or wet-block to final dimensions. The open mesh will smooth and relax, so block to the measurement you desire before Edge Round 3 to avoid reworking the border.
— Pillow Cover Variant (2 matching pillow covers) :
Info :
The photos show two matching square pillows made from the same medallion motif joined into a 2×2 motif square then layered with a plain backing. Instructions below form a 2 motif × 2 motif pillow front sized for standard 45×45 cm cushion when using sport/DK cotton and the same hook.
Pillow Front Step 1 :
Make 4 motifs as instructed above and join them in a 2×2 grid using the JAYG method or hand-sew through Round 11 points. Arrange petals to align swirl directions consistently across the cushion for a unified look.
Pillow Front Step 2 :
Work one round of sc around the entire 2×2 unit, then follow Edge Rounds 2–3 for a neat scalloped finish. Sew a backing square of matching fabric or crochet a solid square (pattern provided below) and whip-stitch or mattress stitch together, leaving an opening for an insert. Insert pillow and close.
Info :
For a padded look, you can insert a thin layer of batting between the front motifs and the backing before closing. This adds loft and highlights the raised petal texture.
— Solid Crochet Backing for Pillow (optional) :
Round 1 :
Ch 60 (or chain to desired width matching the 2×2 motif unit), turn and sc in 2nd ch from hook and across. (59 sc)
Round 2-20 :
Ch 1, turn, sc across each stitch making a square rectangle. Adjust number of rows to match motif height. Fasten off and block to exact size. Use whip stitch to join backing to motif front.
Info :
Alternatively, use a purchased 45×45 cm pillow insert and sew backing fabric instead of crocheting a backing for a cleaner interior finish.
— Finishing & Blocking :
Info :
Carefully block each motif individually before joining if you want the most uniform finish. To block: pin motif on blocking mat to desired diameter, steam or spray with water, shape petals so they overlap consistently, allow to dry fully. Repeat for all motifs. After assembly, pin the entire spread flat and lightly steam to harmonize joins.
Info :
Weave in all tails: use a yarn needle to follow stitch paths under several rounds (at least 4–6 cm of weaving) to secure ends. Trim close to surface. Consider a drop of fabric glue on very stubborn tails to keep them from poking out after washing.
— Sizing & Layout Examples :
Info :
Approximate motif counts for common bed sizes (estimate): Twin: 6 × 9 motifs (54), Double/Full: 8 × 9 motifs (72), Queen: 9 × 10 motifs (90), King: 10 × 11 motifs (110). These are estimates — measure your motifs after blocking and calculate accordingly, allowing 1–2 cm seam allowance for joins if you prefer a tightly packed look.
Info :
Make a swatch of 4 motifs and join them to see how the spacing looks; this helps determine whether to slightly reduce or expand the ch loop sizes in the mesh rounds for a denser or airier field.
— Troubleshooting & Tips :
Info :
If petals curl too much inward, steam lightly and use pins to flatten them while they dry. If the outer mesh puckers, add a supplementary sc round between mesh rounds to even out loops. Keep counts consistent and place markers to find repeated points quickly when joining.
Info :
For a gradient effect consider using cake yarns that transition through dusty rose shades; join petals in the slightly lighter center shade to mimic the photo's gentle tone variation.
Finishing this dusty rose bedspread is so rewarding — each medallion adds a touch of artisan charm and the final scalloped edge frames it like a lace heirloom. The layered petals cast soft shadows across the bed, and the airy mesh keeps the piece light and beautiful. Whether you make it as a statement piece for your bedroom or a gift for someone special, you will love the calm, romantic mood it creates. 🧶🌸✨