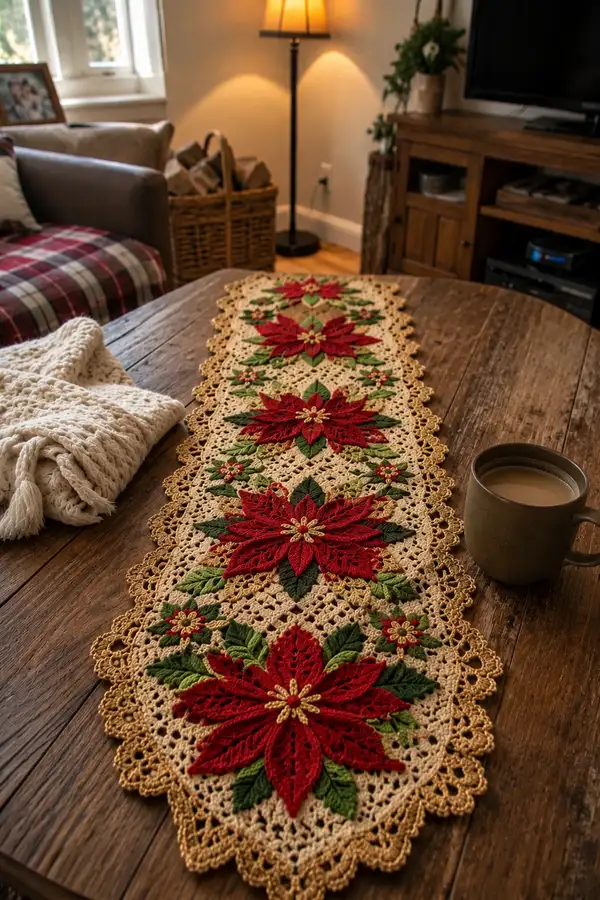
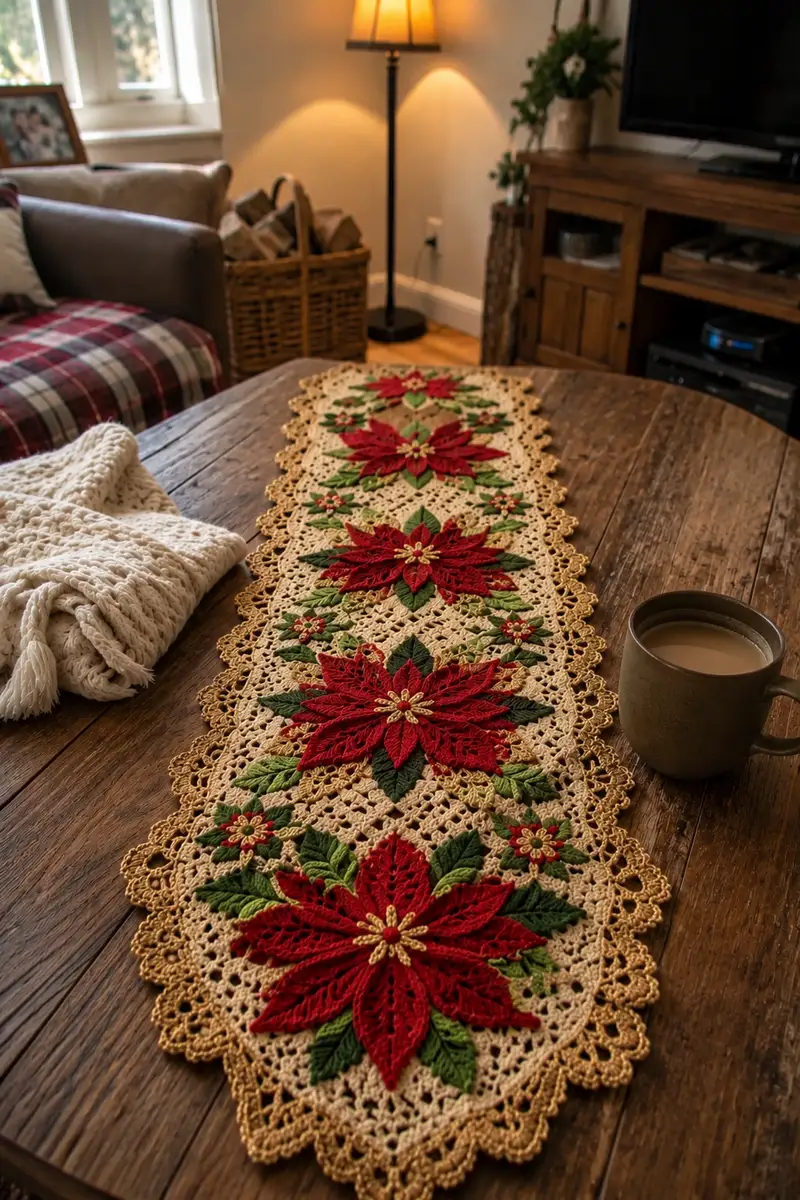
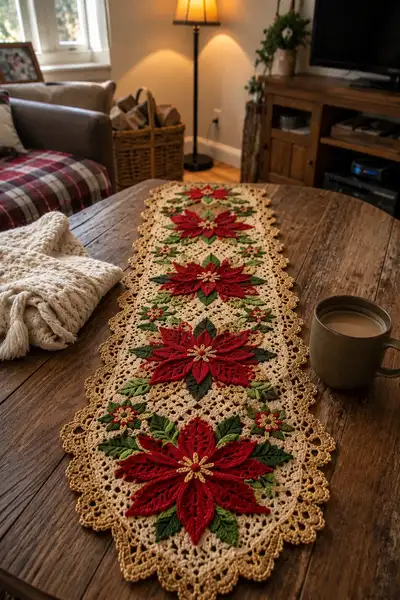
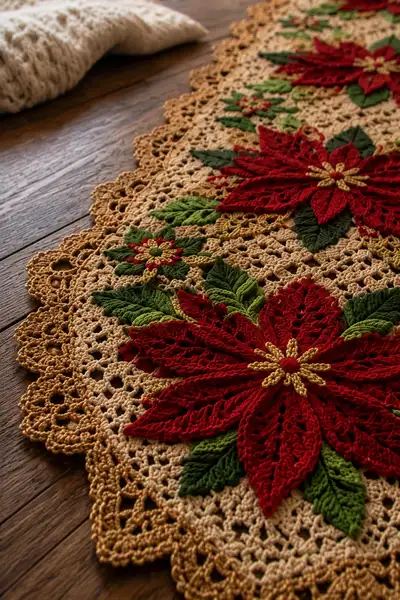
Create a luxurious holiday table runner featuring layered red poinsettias, textured green leaves and a warm gold lace border. This detailed pattern reproduces the look of the pictured runner with modular floral motifs joined by a vintage-style lacy filet background. Designed to sit long and narrow across a dining table, the finished piece highlights raised petals and leaf texture for a rich, dimensional centerpiece.
Progress Tracker
0% Complete
— Overview and Construction :
Info :
This runner is built from repeating large poinsettia motif units set into a rectangular lacy filet background and finished with a gold scalloped border. Work each poinsettia motif flat as a separate motif: center, inner petals, outer petals, leaf clusters then join motifs to the background using a join-as-you-go (JAYG) method or sew motifs to preworked background panels. The pattern below gives step-by-step instructions for one large motif, the leaf modules, the connecting filet background panels and the finishing scalloped border. All rounds/rows include stitch counts and Info sections for shaping, blocking, and assembly. Gauge is approximately 18 sts and 12 rows = 10 cm in filet mesh using 3.5mm hook and worsted cotton.
— Poinsettia Center Disk (gold tiny star) :
Round 1 :
With Gold, ch 2. Work 8 sc in 2nd ch from hook (8)
Round 2 :
(1 sc, inc) x 4 around (12)
Round 3 :
(2 sc, inc) x 4 around (16)
Info :
These tiny gold stitches form a small raised center that will be tacked down later. Use a smaller hook (3.0mm) if you prefer a tighter, compact center.
Round 4 :
(3 sc, inc) x 4 (20)
Round 5 :
Sl st into next st to create small bump, fasten off leaving 20cm tail for sewing (20)
— Inner Petal Set (Small Petals) - Make 8 :
Round 1 :
With Deep Red, ch 6, sc in 2nd ch from hook, hdc in next, dc in next, tr in next, sl st in same base ch to form pointed petal. Turn to work along foundation ch to match shaping: Alternatively work short row petal on a small base of ch6 ending with sl st to create a long petal shape. (1 petal)
Round 2 :
Join at base with sl st and sc around base 5 stitches to make firm base; sc5 across base (5)
Round 3 :
Work 5 sc in BLO across base to create a ridge, fasten off leaving long tail for sewing
Info :
Small inner petals are stacked later beneath larger petals. Make 8 consistent petals, block lightly to shape points if necessary.
— Outer Petal Construction (Large Red Petals) - Make 8 :
Round 1 :
With Deep Red and 3.25mm hook, ch 10, sc in 2nd ch from hook, hdc, dc, dc, tr, dtr, tr, dc, dc, sl st in last ch to shape long pointed petal (1)
Round 2 :
Turn to work along foundation chain: sc12 evenly across the back of the chain to create firm base (12)
Round 3 :
Working into base only, (sc, inc) x 6 (18)
Round 4 :
1 sc in each st BLO for texture (18)
Round 5 :
Work a decorative central vein: ch1, sc in next st, *(ch2, sk 2, sc in next) repeat across to create openwork vein then return and secure with a sl st down center; this forms a stylized needle-like vein for each petal
Round 6 :
Fasten off leaving long tail for sewing. Block each petal slightly pulling point to a crisp sharp edge. Make 8 petals total
Info :
Use a tapestry needle and the long tails to baste-pinned petals onto the motif center so all petals overlap evenly. Outer petals should overlap the inner petals by approximately 25% at the base.
— Petal Embellishment: Raised Veins and Picots :
Round 1 :
With same Deep Red, use surface slip stitch or chain embroidery: from petal base to tip, work 6-8 surface sl st veins depending on petal width; secure ends on WS
Round 2 :
Add picot edge: Join at petal tip, *(sc, ch3, sl st in first ch) over petal tip to form tiny picot points, works as delicate points on outermost petals (approx 8-10 picots per petal depending on shaping)
Info :
Raised veins are optional but create a botanical look. If you prefer a flatter motif, skip surface stitches and rely on block shaping alone.
— Leaf Module Large (Dark Green) - Make 8 :
Round 1 :
With Dark Green, ch 12. In 2nd ch from hook: sc, hdc, dc, dc, tr, dc, dc, hdc, sc across to shape a long leaf (9 sts across)
Round 2 :
Turn and work back along opposite side of foundation chain: sc, hdc, dc, dc, tr, dc, dc, hdc, sc (18)
Round 3 :
Work central vein with fpdc: ch1, *fpdc around the central stitch on each side to create a raised ridge down the middle of the leaf; repeat to length (18)
Round 4 :
BLO round: 1 sc in each st BLO to create a defined edge (18)
Round 5 :
Fasten off leaving long tail for sewing. Make 8 large leaves to arrange beneath outer petals
Info :
Block leaves to shape and curve slightly; pin steam-shaped curve during blocking so leaves life away from the background when sewn.
— Leaf Module Small (Light Green) - Make 8 :
Round 1 :
With Light Green, ch 8, sc in 2nd ch, hdc, dc, dc, hdc, sc (6)
Round 2 :
Work back along chain: sc, hdc, dc, dc, hdc, sc (12)
Round 3 :
sc across in BLO to create slight ridge, fasten off leaving long tail for sewing (12)
Info :
Small leaves are for secondary layering between petals; make matching pairs for each motif so distribution is symmetrical.
— Assembling the Poinsettia Motif :
Round 1 :
Place Gold center on work surface RS up. Pin 8 inner small red petals evenly around center, spacing at 45 degrees. Sew each petal base to the center disk using long tails and mattress stitch; secure tightly (center remains flat)
Round 2 :
Arrange 8 large red petals between the small inner petals so large petals sit between inner points. Baste each petal with a long tail but do not secure fully yet; check for symmetry
Round 3 :
Sew large petals only at their bases allowing petal tips to arch. Use close whip stitch across base of each petal to fasten down. After sewing, hide tails on WS and weave in securely
Info :
Position two or three small and large leaves underneath the petal layers at opposing sides to create a balanced star effect; tack leaves at one or two points to secure while preserving their raised profile.
Round 4 :
Sew small light-green leaves tucked between some red petal bases for contrast. Add dark green large leaves slightly offset under the outer petals to form the foliage layer
Round 5 :
Attach remaining gold embroidery bits as anthers: using gold yarn, create 8-12 small chain loops of ch6 anchored at center to form small raised stamen shapes. Secure and trim ends
Info :
Press and block the finished motif on a blocking mat using pins and light steam/spray, shaping petal points and leaves to desired curvature. This is essential before joining motifs to background.
— Small Filler Flower (optional) - Make 4 per motif :
Round 1 :
With Dark Green, ch 6, sl st to form loop, sc6 in loop (6)
Round 2 :
With Red, join and make 6 petals: *(ch4, sl st in next st) repeat 6 times to form tiny petals. Fasten off leaving tail to sew into background around large motif.
Info :
These tiny flowers fill gaps between motifs on the background and add visual continuity; tuck small leaves beneath them for cohesion.
— Filet Background Panel (Working Rows/rounds) :
Row 1 :
Using Cream, foundation ch to required length for one motif repeat: ch 62 (this size creates an approximate square grid that accommodates a single motif block centered). Turn
Row 2 :
RS: sc in 2nd ch from hook, *ch3, sk3, sc in next ch; rep across until last ch, sc in last ch (approx creates 15 open mesh spaces and edge scs)
Row 3 :
Ch1, turn. Sc in first st, *ch3, sk3, sc in next sc; repeat across. (Matrix continues) Rows 2-24 form a mesh rectangle for supporting one large poinsettia motif
Info :
Work the filet panels until they are square and can accept the motif centrally. Block panels flat to ensure even joining later. You may create two long narrow panels (left and right) and join motifs to them, or work one continuous long panel and JAYG join motifs as you go.
Row 4-24 :
Repeat Row 3 (maintain mesh grid). After row 24, measure and ensure panel height equals motif diameter plus at least 4 mesh spaces for border.
Info :
If you prefer to JAYG, stop mesh panels where petals should overlap and join motif edges into open spaces using sl sts or sc to attach; otherwise sew motifs on after both motif and panels are blocked.
— Motif Placement and Join-as-You-Go (JAYG) :
Round 1 :
Make three or desired number of large poinsettia motifs. For a runner with 3 large flowers as pictured, arrange motifs in a single column on the cream filet panel evenly spaced with approx 6-8 filet rows between each motif center (adjust as needed for desired spacing)
Round 2 :
To JAYG: With motif RS up and filet panel RS up, align motif base so petals rest on top of mesh spaces. Using long tail from motif, work sl st through mesh space and through motif base at regular intervals to attach; use 8-12 evenly spaced tacking stitches around the motif base
Round 3 :
If sewing on after blocking: Pin motif to cream panel and sew through motif base and cream mesh using a yarn needle and long tail with small, even whip stitches, burying ends on WS
Info :
When joining motifs, be careful to maintain alignment so petals do not catch when the runner is folded. Use pins heavily — motifs must match across the runner center line to keep symmetry.
— Creating the Continuous Runner Panel (Joining Multiple Panels) :
Round 1 :
Make two identical filet strips with motifs attached if runner is wide; for a narrow single-column runner, work a continuous long filet strip by chaining to final length: ch (62 x number of motifs) + 4 for turning. Build mesh rows as above until entire length is covered with motifs placed and attached.
Round 2 :
Seam panel ends with invisible join: align RS together and sc through both edges (for a continuous runner you won't need this). Fasten off and weave ends
Info :
Check that motif centers are equidistant; adjust by moving motifs slightly or by adding/removing mesh rows between motifs prior to final sewing.
— Border Preparation (Edge Rounds before scallop) :
Round 1 :
With Gold, join at one edge point. Round the entire runner perimeter with 1 sc in each st and 3 sc in each mesh ch3 space to create a uniform edge. Work 2 sc in corners to round the corner and keep fabric from curling
Round 2 :
Work 1 sc in each sc across and (ch3, sc in same sp) 3 times in each ch3 mesh space to create tiny picot cluster anchors for scallops (st counts vary by runner length)
Info :
This foundation for the scalloped border evens the edge and creates landing points for scallops. Keep tension even; if edge waves, block again prior to scallops.
— Gold Scalloped Lace Border (Decorative Edge) :
Round 1 :
With Gold (3.0-3.25mm hook), *(5 dc in same st, sk 2 sc, sl st into next sc) repeat around to form scallop shells at regular intervals; in mesh ch3 spaces work 7 dc shell to make larger scallops where pictured. Work shells so scallops fall around pointed edges of runner to form decorative arcs
Round 2 :
On top of each shell work a picot row: sl st into center of shell, *(ch3, sl st in 1st ch) x 3 across center dc to form tiny peaks; sl st into base and continue to next shell
Round 3 :
Edge finishing: sc in each sl st between shells and in shell bases to stabilize edge. Fasten off and weave ends thoroughly. Repeat scallop rounds along entire perimeter including scallop points at motif ends
Info :
Blocking after the scalloped edge is essential. Wet-block the entire runner, pinning each scallop to a uniform gauge to achieve smooth, evenly spaced arcs.
— Alternate Border Option: Picot Lace (If you prefer delicate edge) :
Round 1 :
With Gold, sl st into edge anchor, *ch5, sl st into next anchor, sc into following st to space picots uniformly. Repeat around for a dainty border.
Info :
Choose this if you want a subtler border or less bulk on table corners. It is faster and gives a more vintage lace appearance.
— Final Blocking and Finishing :
Round 1 :
Gently wet-block the entire runner: pin edges and all petal points to a blocking board, shape scallops using pins to consistent spacing, allow to dry fully. Use steam carefully on cotton if necessary
Round 2 :
Weave all tails on WS with tapestry needle, knot securely and bury ends through several stitches. Trim any stray fibers
Info :
For an extra crisp finish, starch lightly on the wrong side and press with cool iron through a pressing cloth once fully dry.
— Measurements and Adjusting Length :
Info :
The pictured runner uses 3 large poinsettia motifs spaced evenly with 6-8 mesh rows between motifs; finished width is approx 28-30 cm and length approx 120-140 cm depending on spacing. To lengthen, add additional motif repeats and mesh rows; to shorten, reduce motif count or tighten spacing between motif centers.
— Tips for Consistency and Quality :
Info :
Keep a small sample motif and background panel to check gauge before committing to full runner. Store long tails labeled with section names to simplify assembly. Work petals and leaves in batches for consistency. Use blocking and pins during assembly so pieces sew together neatly.
— Troubleshooting and Variations :
Info :
If a petal or leaf looks too flat, add an additional row of BLO or fpdc for more texture; if the mesh shows through petals, mount a small felt circle under the motif before tacking to background (optional). For a monochrome look, use deep red for both petals and background for a vintage tone-on-tone effect.
This elegant poinsettia table runner brings vintage charm and holiday warmth to any table. Each layered petal and leaf is crafted to give a sculptural, botanical look that feels both luxurious and handmade. Blocking and a careful scalloped edge transform the assembled motifs into a cohesive heirloom-quality runner you'll be proud to display. Whether you gift it or keep it for seasonal decorating, this runner is a satisfying and beautiful project. 🌟🧶