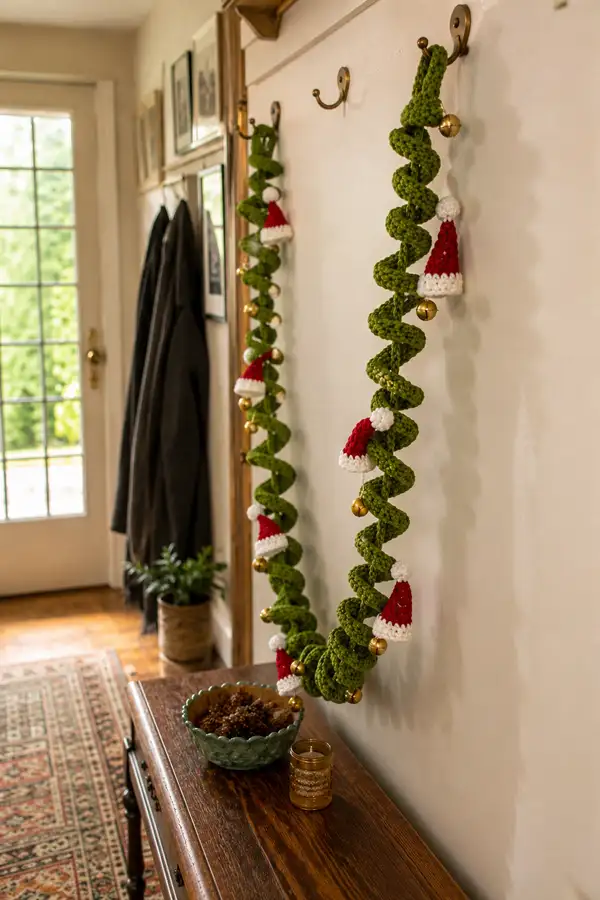
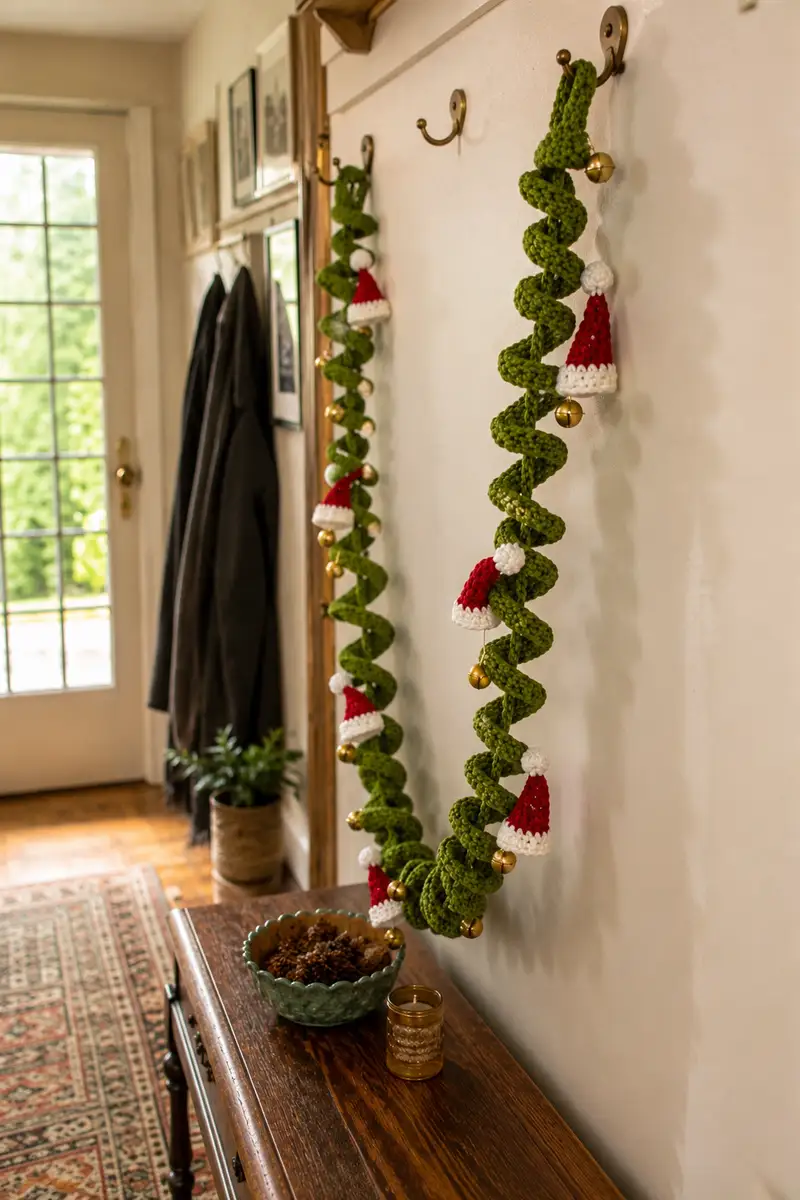
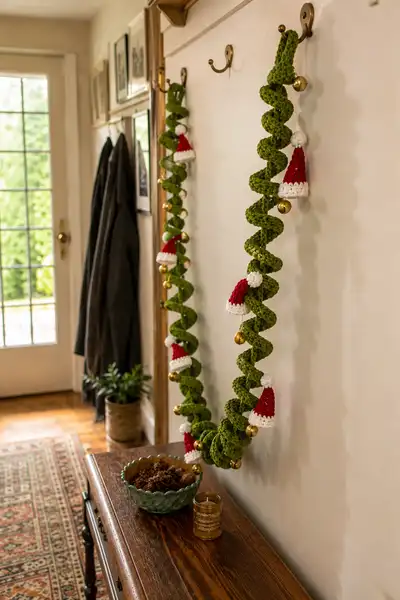
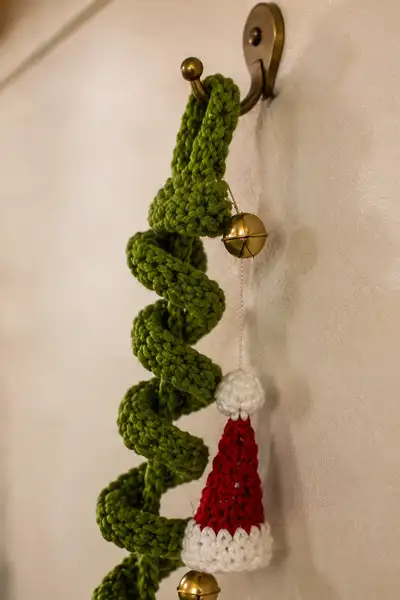
A festive, chunky spiral garland crocheted in vibrant green with tiny red-and-white Santa hats and shiny golden bells. Designed to drape beautifully on hooks or mantels, this garland uses a tubular crochet technique to create a soft corkscrew spiral that holds its shape. The pattern includes step-by-step instructions for the spiral cord, small Santa hats, crocheted pom-poms, hanging loop and bell attachments. Perfect for holiday entryways, stair rails, or mantel displays.
Progress Tracker
0% Complete
— Materials & Gauge :
Info :
Gauge is not critical for this decorative garland but for a similar look use worsted weight yarn with a 5.0mm hook to produce a dense tubular fabric. The finished spiral tube shown is approximately 1.25" (3 cm) in diameter and the full garland length pictured is roughly 6.5-7 feet (2.0-2.1 m) long. Adjust length by working fewer or more even rounds in the main tube section.
— Spiral Garland Tube (Work 1 long tube) :
Round 1 :
6 sc in magic ring (6)
Round 3 :
(1 sc, 1 inc) x 6 (18)
Round 4 :
(2 sc, 1 inc) x 6 (24)
Round 5 :
(3 sc, 1 inc) x 6 (30)
Round 6 :
(4 sc, 1 inc) x 6 (36)
Round 7 :
(5 sc, 1 inc) x 6 (42)
Round 8 :
(6 sc, 1 inc) x 6 (48)
Info :
You now have a tube circumference of 48 stitches which gives a comfortable, chunky diameter for the spiral. If you desire a thicker tube, continue one more increase round: (7 sc, inc) x 6 = 54 stitches total; if you want a slimmer tube, stop at 42 stitches. The instructions here proceed with 48 stitches which match the photos.
Round 9-18 :
1 sc in each st (48)
Info :
Work the next section in tight single crochet rounds to create a firm fabric. Place a stitch marker at the first stitch of every round. These initial even rounds are used to build a short neck so the spiral hangs cleanly from the top loop. Stuff very lightly only if you want the tube to hold its curve; otherwise leave unstuffed until the tube is longer.
Round 19-28 :
1 sc in each st (48)
Info :
If you plan to insert a braided cord or floral wire for shape memory, cut the cord to finished length now (allow for overlap at ends) and thread or slide it inside the tube later when there is enough length to push it in. Leaving an opening at one end of the tube for cord insertion will make finishing easier. If not using cord, you can stuff the tube lightly as you go to encourage the spiral shape.
Round 29-38 :
1 sc in each st (48)
Info :
Every 8-12 rounds, stop to gently shape the tube into a spiral coil. The corkscrew effect is achieved after finishing the tube by coiling and pinning around a dowel or by fastening wire inside; however slight coiling while working will help. Keep tension consistent and avoid skipped stitches.
Round 39-48 :
1 sc in each st (48)
Info :
At this point the tube length will be approximately 16-22 inches depending on yarn and tension. For a full garland like the picture, we will continue to work many more even rounds to reach an overall tube length that, when coiled, gives the desired spiral. Continue in the same manner until you reach round 160 or your preferred length.
Round 49-58 :
1 sc in each st (48)
Round 59-68 :
1 sc in each st (48)
Info :
Keep a running tally of rounds; for reference the sample garland used rounds 9-160 (152 rounds of even stitch) giving a long tube that coils into 7 feet. If you would like a shorter garland, stop earlier; for a longer one, add more rounds in multiples of 10 to keep satisfying shaping rhythm.
Round 69-78 :
1 sc in each st (48)
Round 79-88 :
1 sc in each st (48)
Round 89-98 :
1 sc in each st (48)
Info :
Tip :
Work standing stitches between color changes: leave a 6-8" tail if you will be threading in the cord through this end later. This helps to close the seam neatly and secure the cord.
Round 99-108 :
1 sc in each st (48)
Round 109-118 :
1 sc in each st (48)
Round 119-128 :
1 sc in each st (48)
Info :
Now is a good time to begin planning placement of hats and bells. In the photographed garland there are roughly 6-8 hats spaced evenly with bells in-between. Take measurements: For a tube that coils into 7' length, spacing every 10-12" when coiled gives a balanced look. Mark planned attachment points with small safety pins through the tube so you can later stitch hats and bells to those locations without stretching.
Round 129-138 :
1 sc in each st (48)
Round 139-148 :
1 sc in each st (48)
Round 149-156 :
1 sc in each st (48)
Info :
When your tube reaches the desired length, leave a tail of about 8-10" and stop crocheting. You will use this tail to sew closed the end after inserting cord/wire and stuffing. If you plan to hang from both ends, leave both ends open and prepare top loop as a separate piece to attach after finishing tube.
Round 157-160 :
1 sc in each st (48)
Info :
Finish off leaving a long tail for closing (approximately 10-12" if you will sew through thick fabric). Insert your braided cord or floral wire through one opening. If you are using cord, push it through with a knitting needle or chopstick, guiding it down the center. If using wire, thread it in sections making sure to fold or loop both ends so raw wire doesn’t poke out.
Round 161 :
Close tube end by sewing the last round stitches together using tapestry needle and long tail; weave through a circular path to cinch opening closed. Secure with a knot and weave ends 2-3 inches back through the work before trimming.
Info :
Stuff the tube as you close it if you prefer a firm spiral. For a looser spiral like the photo, add only a light amount of stuffing in the final sections and let the cord/wire provide the coiling memory. The tube should be flexible but not floppy.
— Hanging Loop / Top Finish :
Round 1 :
Ch 6, join with sl st to form ring; 6 sc into ring (6)
Round 3 :
1 sc in each st (12)
Round 4 :
Work 6 sc across making a folded loop: ch 20 (or desired hanging length), join to base with sl st and sc around (12)
Round 5 :
Sl st into next st and fasten off, leaving long tail to sew loop to top of tube
Info :
Sew the loop to the topmost rounds of your tube (approx rounds 9-12 area) using the long tail, backstitching for strength. If your garland will hang heavy bells, reinforce by sewing through tube several times. Optionally slip the loop over the cord/wire inside the tube before final closing for extra stability.
— Santa Hat (Make 6-8 as desired) :
Info :
Each small Santa hat is worked in red for the cone and white for the brim and pom. The sample hats are about 1.75-2" tall (4.5-5 cm) and about 1.5-1.75" wide at the brim. Use a 4.0mm hook for a slightly denser finish and to match proportion to the tube.
Round 3 :
(1 sc, inc) x 6 (18)
Round 4 :
(2 sc, inc) x 6 (24)
Round 5 :
(3 sc, inc) x 6 (30)
Round 6 :
(4 sc, inc) x 6 (36)
Info :
At 36 sts you have a base circumference that sits well for a tiny brim. If you want a taller hat, continue straight in round 7 as one sc in each st for 2-4 rounds before beginning decreases; the pictured hats are tapered quickly after the base so we start shaping downward now.
Round 7 :
(4 sc, 1 dec) x 6 (30)
Round 8 :
(3 sc, 1 dec) x 6 (24)
Round 9 :
(2 sc, 1 dec) x 6 (18)
Round 10 :
(1 sc, 1 dec) x 6 (12)
Info :
Fasten off red yarn leaving a 6-8" tail for sewing the tip closed and attaching to the brim later. Stuff very lightly if you prefer a slightly rounded cone. The small point will be covered with a pom-pom.
— Hat Brim (White) :
Round 1 :
Join white yarn to base of hat where you increased to 36 sts; 1 sc in each of 36 base sts (36)
Round 2 :
Working in BLO, 1 sc in each st BLO (36)
Round 3 :
Switch to front loops and work 1 sc in each FLO for ruffled look or simply sl st around for a neat edge (36)
Info :
Make the brim slightly thicker by working 2 rounds in white using BLO on the first white round to create a ridge that mimics a fluffy brim. Sew the white brim to the red cone securely using the red and white tails. Repeat hat pattern to make 6-8 hats to suit your garland spacing.
— Small Pom-Pom (Make one per hat) :
Round 3 :
(1 sc, inc) x 6 (18)
Round 4 :
1 sc in each st (18)
Round 5 :
(1 sc, dec) x 6 (12)
Info :
Stuff lightly to create a small ball, fasten off leaving a long tail for sewing to the hat tip. Alternatively, make classic yarn pom-poms instead of crocheted balls for a fluffier finish if you prefer.
— Small Bell Cap (Optional Crocheted Cap to Hide Knot) :
Round 3 :
1 sc in each st (12)
Info :
This tiny cap can be used to hide the knot above a attached bell and to provide a stitch loop to sew the bell to the tube. Work in gold or green as desired and fasten off with a tail to sew.
— Assembly & Spacing :
Info :
Before attaching anything, decide how many hats and bells you want and mark the tube. The photographed arrangement uses 6 hats with bells in the gaps. For a tube that has been coiled into 7' length, mark positions along the outermost coil every 10-12" for decorations. Make sure to alternate sides so hats face outward in the spiral.
Step 1 :
Press the finished tube into a corkscrew spiral by coiling it around a broom handle or dowel and use clothespins or blocking pins to hold the shape while you attach decorations. If you used internal wire, gently bend the tube into the spiral shape and secure the wire ends by tucking or folding them back into the tube openings and stitching closed.
Step 2 :
Sew the top hanging loop to the top opening of the tube with the long tail. Pass the needle through the tube and loop several times to ensure it carries weight. Tie a secure knot and weave the tail back into the tube.
Step 3 :
Sew hats to the tube at the marked points. Use the long tail on each hat to stitch through the outer rounds of the tube, catching 6-8 stitches evenly to create a stable attachment. If you want hats to hang slightly away from the tube, sew a short length of thread or metallic cord to the hat base to create a short drop then attach that cord to the tube.
Step 4 :
Attach bells by tying a thin metallic cord through the bell loop, then pass the cord up through the outermost stitch of the tube and secure with a small knot inside the tube. Alternatively, attach bells to the same thread that suspends hats so the bell dangles just below each hat as in the photos.
Step 5 :
Sew the pom-pom to the tip of each hat using the tail left from pom construction. Knot securely and hide tails in the hat by weaving them inwards. If using yarn pom-poms, sew through the center several times to secure.
Step 6 :
Once all decorations are in place, remove pins and allow the spiral to relax slightly. Make small adjustments so hats face outward and bells hang freely between coils. If the spiral is too loose, use a few hidden stitches between coil crossings to hold the spiral tighter.
Info :
For a professional finish, sew inside-head stitches from left to right using ladder stitch technique so there are no visible knots. Test hang the garland from the loop to ensure it balances and that the bells do not pull it off-center.
— Finishing Touches & Variations :
Info :
You can customize length, density of decorations, and tightness of spiral. To make a longer garland work additional even rounds in the main tube in groups of 10-20 rounds. To add more texture, occasionally work a round in BLO or do a round of hdc to create a ridge. For a more rustic look, use wool yarn; for a glossy, modern look use acrylic cotton-blend yarn.
Info :
Use clear fishing line to let bells appear to float below hats, or use metallic thread for festive shimmer. If you want the garland to be child-safe, omit small bells and secure all attachments with extra stitching.
Info :
Store flat or gently coiled to preserve shape; if you used wire inside, avoid sharp folding points that could deform the wire memory. Spot clean with a damp cloth and avoid machine washing to retain firmness.
Assembly Instructions
- Attach the top hanging loop to the topmost rounds (approx rounds 9-12 area) of the tube using the long tail; backstitch through the tube fabric several times and weave in the tail for security.
- Thread a flexible braided cord or floral wire through one open end of the tube before closing; once the cord is in place and the tube is lightly stuffed, close the end by sewing the last round stitches together and weaving the end tail back inside.
- Pin hat placement points along the coiled spiral first to check spacing; then sew each hat base to the tube by stitching the hat tail through 6-8 outer stitches on the tube so hats are evenly secured.
- Attach bells using thin metallic cord: thread cord through bell loop, knot or secure the cord, then sew the cord into the tube at marked points. Optionally use a tiny crocheted cap to hide the knot and secure the join.
- Sew pom-poms to the tip of each hat with long tail, knot securely and weave ends into the hat interior so no raw tails remain visible.
- Reinforce any heavy decoration by sewing through both sides of the tube and knotting inside, then test-hang the garland to ensure balance and adjust positions before final finishing.
Important Notes
- 💡Use stitch markers consistently at the beginning of each round to avoid counting errors and maintain proper shaping.
- 💡Stuff tube sections gradually as you work rather than waiting until the end; stuffing small amounts at once prevents lumps and helps the tube lie smoothly.
- 💡For safety bells, position and secure decorative cords before stuffing the area completely - they are tricky to reposition once closed.
- 💡Maintain consistent tension through the project; too tight makes the spiral stiff and too loose makes the tube floppy and holes may show stuffing.
- 💡When sewing hats and bells, use a yarn needle and take small stitches to avoid visible bulk on the outside of the tube.
- 💡If using internal wire for poseable spirals, fold or blunt the ends and tuck them into the tube ends before closing to prevent pokes.
This cheerful spiral garland brings instant holiday spirit with its chunky green corkscrew tube, bright little Santa hats and tinkling golden bells. The assembly is satisfying and the finished piece is showstopping — perfect for an entryway, staircase or mantel. I hope you enjoy making it as much as I did — every stitch adds festive charm! 🎄🔔🧶