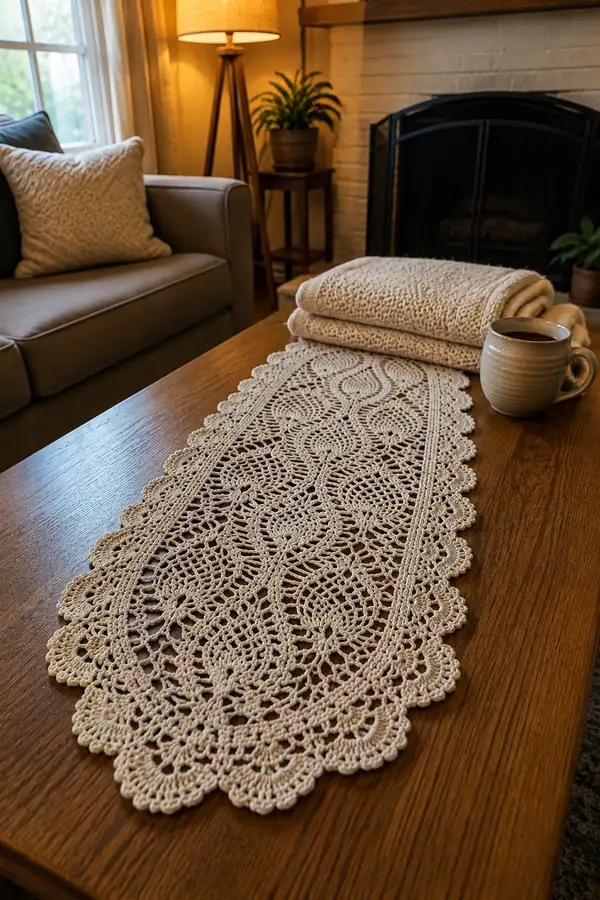
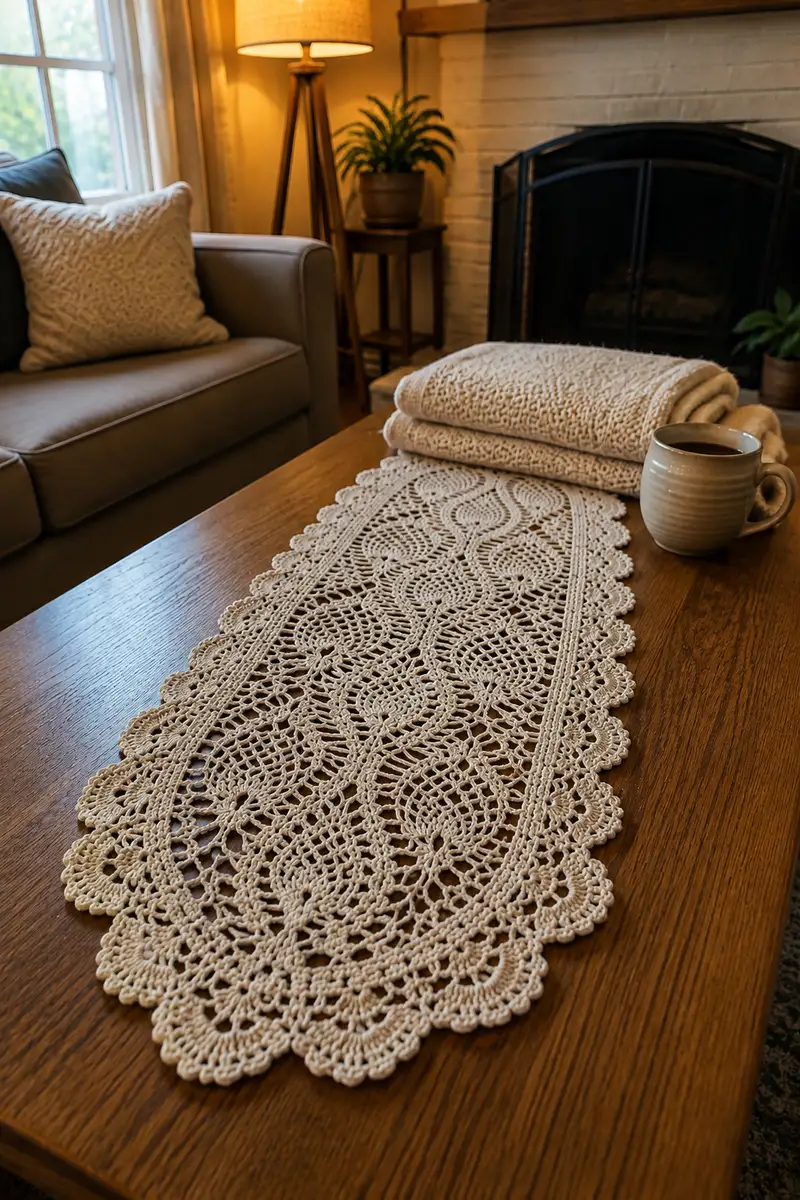
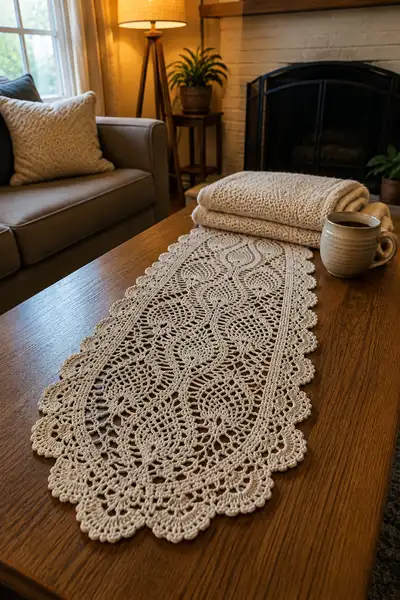
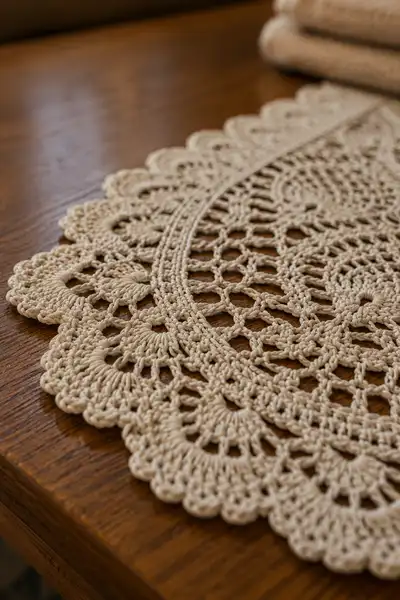
A delicate, vintage-inspired pineapple doily table runner in warm cream. This pattern recreates the photographed runner with repeating pineapple motifs, open latticework, and a scalloped scallop edge. Designed to drape beautifully down a coffee table or sideboard, it showcases detailed lace stitches and a softly textured border for an heirloom finish.
Progress Tracker
0% Complete
— Notes & Gauge :
Info :
Gauge is not strict for lace projects, but to match the photographed proportions, 10 cm/4 in of simple double crochet rows should equal approximately 18 dc rows using 2.75mm hook and the specified cotton yarn. The finished runner shown measures approximately 13" (33 cm) wide by 48" (122 cm) long unblocked; final length will vary with blocking and yarn choice.
Info :
Work flat in rows. All shells and clusters are worked into designated chain spaces unless directed to work into stitches. Use stitch markers to mark the center line and repeat boundaries. The pattern is written left to right for odd numbered rows; return rows are even-numbered unless otherwise stated.
— Center Medallion & Foundation Oval :
Round 1 :
Make magic ring. Ch3 (counts as dc). Work 11 dc into ring. Join with sl st to top of ch3. (12 dc)
Round 2 :
Ch4 (counts as dc+ch1), *dc in next st, ch1* across. Join with sl st to 3rd ch of starting ch4. (12 dc, 12 ch1 loops)
Round 3 :
Sl st into first ch1 space. *(Ch3, 2 dc, ch3) shell into same ch1 sp; sl st into next ch1 sp* around to form 12 small shell arches. Join. (12 shells)
Info :
These small shells form the first ring of arches that will guide the elongated pineapple motifs. Keep shells evenly tensioned. Mark the center of the shell at the top-most stitch for reference.
Round 4 :
Ch5 (counts as tr+ch1), *tr into center of next shell, ch1* around. Join. (12 tr, 12 ch1 loops)
Round 5 :
Work into ch1 loops: *(3 dc, ch2, 3 dc) shell into ch1 loop; ch1* around to expand each arch. Join. (12 shells)
Round 6 :
Ch1, sc into same st, *ch5, sc into center top of next shell* repeat making 12 long chain arcs. Join. (12 sc, 12 ch5 loops)
Info :
At this point the medallion is still quite round. Keep work flat by adjusting tension of chain arcs. If the center cups up, loosen tension; if it ruffles, tighten slightly. Place two markers at opposite shell centers to mark the long axis of the eventual oval runner.
Round 7 :
Into each ch5 loop: *(5 dc, ch3, 5 dc) large shell; sl st to next sc on base row* around forming 12 large shell fans. Join. (12 large shells)
Round 8 :
Ch1, sc into next 2 dc, *ch7, sc into center of next large shell at its top* repeat forming longer chain arches to begin elongating the medallion on both sides. Join. (12 sc, 12 ch7 loops)
Round 9 :
Into each ch7 loop: *dc, 2 dc in next st, (dc, ch2, dc) shell, 2 dc in next st, dc* to produce a filled fan that elongates the oval. Join. (12 expanded fans)
Info :
Begin forming the long axis by adding two extra fans opposite each other on the next expansions. Mark those two fan centers as the ends of your oval; these will be used to orient the first pineapple repeats down the length.
Round 10-12 :
Work 3 rounds of alternating chain-loop rows and shell-fill rounds to expand the medallion smoothly into an oval. Typical sequence per two rounds: row A - ch1 sc base with ch9 loops along sides, row B - work 7-11 dc clusters into ch9 loops to fill. After three repeats the oval should measure approximately 5" (12.5 cm) across at its widest point. (maintain shell/fan count of 12)
Info :
These rounds are grouped to maintain clarity. Count your fans and chain loops every round; the pattern relies on multiples of 12 for symmetry. This grouping counts as rounds 10, 11 and 12 in the construction sequence.
— Transition Rows to Pineapple Field :
Round 13 :
Ch3. Working evenly along both long sides of the oval, sc into each dc and into the top centers of fans, placing ch3 loops at the long edges every 4 dc to begin lattice spacing. Join. (count will vary with your expansion; keep same number of repeat positions - track 12 primary positions)
Round 14 :
Into each ch3 side loop: *(3 dc, ch3, 3 dc) shell; sl st to next sc* around the perimeter on the long sides only. At the two rounded ends continue to work 5-dc fans to maintain curvature. Join. (evenly placed shells along long sides)
Round 15 :
Ch2 (counts as hdc), hdc into next st across body row; when you reach the long edge shells, work a sequence of (hdc, ch2, hdc) in center of shell to create a ladder-peg for pineapple starting points. Continue across, join. (even number of hdc across)
Info :
These transition rows establish the ladder rungs where the pineapple motifs will attach. Keep markers at the start and end of each pineapple panel; each pineapple panel will use a repeat unit based on 12 chain loops along the length.
Round 16-20 :
Work five rounds establishing the first open lattice. Typical round pattern: Row 16 - ch5 loops across side chains, Row 17 - fill loops with dc clusters into each ch5, Row 18 - sc across body with ch6 side loops, Row 19 - chunky shell clusters into ch6 loops, Row 20 - sc base with ch7 temporary loops for pineapple foundation. These five rounds increase the vertical space so pineapples will have room to build upward. (maintain main repeat count of 12 per side)
Info :
Check that the runner remains fairly flat. If it waves, adjust chain loop tensions or add an extra filler round before starting the pineapple arches.
— Pineapple Motif Block (single repeat block, work multiple across length) :
Round 21 :
Change to pineapple foundation: Work across the long side for one pineapple block: ch1, sc in first base st, *ch9, skip 4 sts, sc into next st* repeat across the panel to create a set of ch9 foundation loops. Join. (this row creates ch9 loops count equal to pineapple repeats; typical photographed runner has 6 pineapple repeats down length per side)
Round 22 :
Into each ch9 loop: *sc, ch3, (2 dc, ch2, 2 dc) cluster, ch3, sc* forming the first double-row fan to begin the pineapple tip. Join. (per pineapple loop: 1 central cluster)
Round 23 :
Ch4, tr into top of the central cluster, ch4, sl st into same space to form a tall picot-like arch. Continue to next chain loop and repeat. Join. (tall arches across)
Round 24 :
Build the pineapple body: In each tall arch work *(3 dc, ch2, 3 dc) shell; into spaces between shells work a row of 5 dc to connect shells* across the pineapple field. Join. (each pineapple begins to take teardrop shape)
Info :
Each pineapple is built over a series of rows, increasing cluster counts at the widest rounds and decreasing towards the tip. Place stitch markers on the outermost dc of each pineapple body so you can align the next rows precisely and keep symmetry between left and right sides of the central spine.
Round 25 :
Ch1, sc across the row connecting shell bases. In the spaces between pineapples on the central axis, create small ch5 loops to maintain openness. Join. (sc base count equals previous repeat count)
Round 26-33 :
Work the pineapple expansion sequence over eight rounds. Each expansion round increases the number of dc in the shell fan by 2 at the widest point. Example sequence for one pineapple: Round 26 - (3 dc, ch2, 3 dc) shell; Round 27 - (5 dc, ch2, 5 dc); Round 28 - (7 dc, ch2, 7 dc) - peak width; Round 29 - (6 dc, ch2, 6 dc); Round 30 - (5 dc, ch2, 5 dc); Round 31 - (4 dc, ch2, 4 dc); Round 32 - (3 dc, ch2, 3 dc); Round 33 - (1 dc clusters closing toward tip). Work these counts into each pineapple loop consistently. (per pineapple fan math is symmetrical; count increases by 2 dc per side when moving towards the peak)
Info :
Ensure mathematical consistency: if your starting cluster has 3 dc on each side, Round 27 should have 5 dc on each side, making the total dc in the shell equal to 10 + center stitches. Keep written notes for each pineapple row so left and right remain mirror images.
Round 34 :
After completing the pineapple body, work a row of connecting dc between pineapple bases across the runner center to lock the motifs in place. Work (dc, ch3, dc) in the center spine spaces. Join. (connects repeat columns)
Round 35-40 :
Repeat the pineapple build for the next tier up where the motif recedes toward the center of the runner. These rows are smaller repeats mirroring rounds 26-33 but with two fewer dc on each widest row (e.g., 5/3/1 progression rather than 7/5/3). Continue for six full pineapple repeats down the length per side, working the same number of rounds for each to maintain even height for the motifs. (each pineapple block is 14-20 rounds depending on chosen height)
Info :
In the photographed runner the pineapple repeats are elongated and overlap slightly with the adjacent pineapples creating a linked, interlocking look. Keep the central spine row between the two mirrored pineapple columns consistent to achieve this look.
— Center Spine & Raised Band :
Round 41 :
Ch3, work a raised spine down the center: sc into each center space with a front-post hdc column worked on the next round for height. Place markers at the boundaries of the spine so the lace on either side mirrors correctly. (count equals number of center spaces across)
Round 42 :
Work along the spine: *FLO row - hdc in each st, but work in front loops only to create a raised effect*. Continue across. Join. (hdc count matches center spaces)
Info :
The raised band is visible as a thin double-rail on each long side of the patterned pineapples in the photo. To replicate, work two parallel spine rows: first marking stitches, then working a front-loop-only hdc row on both the left and right spine positions. This creates the subtle ridge seen in the runner.
Round 43-50 :
Work alternating rows of open chain lattice and connecting dc rows to stabilize the runner: odd rows - ch loops (ch7 to ch9) along the long sides, even rows - fill with 3-7 dc clusters and sc connecting stitches. Repeat for eight rounds until the pineapple field is firmly integrated to the spine. (maintain symmetry left and right)
Info :
At the halfway point of the runner, check alignment of pineapple repeats by folding lengthwise; motifs should mirror. Adjust tension or add a filler row if you notice drift.
— Repeating the Pineapple Panels (full-length) :
Round 51-70 :
Work full-length repeat sequence: For each pineapple column pair work 20 rounds per pineapple repeat block as established earlier (foundation loop, tip formation, serial expansions and closures). Repeat this 3-6 times depending on desired runner length. Photo sample uses 6 full repeats down the length. Each repeat comprises approximately Rounds 21-40 sequence. (full-length repeats x6)
Info :
Count total pineapple repeats to reach your desired runner length. If your runner is too short after 6 repeats, add one more repeat and maintain symmetry by mirroring counts from the starting medallion end to the finishing end so both ends match.
Round 71 :
After the final pineapple repeat, work a unifying filler round of dc and ch loops across the center to stabilize the openwork and prepare for edging. Work ch5 loops above each pineapple tip and sc across the spine binding them. Join. (stitch count equalizes both sides)
Info :
This unifying round reduces the risk of scallop skews at the border and gives a firm base for the border scallops that define the edge shape visible in the photo.
— Edge Preparation Rows :
Round 72 :
Ch3, work sc across the runner edge, creating evenly spaced ch6 loops along both long sides and ch8 loops at the rounded ends to prepare for deep scallops. Maintain even spacing; use a measuring gauge if desired to keep scallops uniformly sized. (sc base count matches prior stitches)
Round 73 :
Into each ch6 side loop: *(2 sc, ch3, 2 sc) small shell; sk next 2 sc along edge, sl st in next sc* repeat for consistent spacing. At each end ch8 loop work a larger (3 sc, ch4, 3 sc) shell to shape the rounded tip. Join. (shell count equals number of loops)
Round 74-78 :
Work five rounds building the scallop depth: alternate small picot rows and puff-like cluster rows to create a raised outer edge. Typical sequence for two rounds: Row A - small cluster filler across shells (sc, dc pairs), Row B - picot row around the edge (ch3 picots on top of small shells), then Row C - cluster round (7 dc fan into edge), Row D - finish picot edging. Repeat until scallops measure desired depth. (each round refines the edge)
Info :
The scalloped border in the photograph is deep with layered ridges. To reproduce, alternate rounds with front-loop-only stitches to create a ridge immediately before the final scallop fan round. This gives the edge the strong, dimensional profile seen in the runner.
— Final Scalloped Border (detailed rows) :
Round 79 :
Ch1, sc into base around the edge, preparing 2-sc foundations in each scallop apex. Join. (count equals number of scallops)
Round 80 :
Into each apex: *(sc, ch3, 7 dc, ch3, sc) deep fan; sl st into base between scallops* forming the main scallop curve. Join. (number of deep fans equals scallop count)
Round 81 :
Ch1, sc into first dc of each deep fan, *make 3 picots evenly spaced across the fan by (ch3, sl st in 3rd ch), then sc into next fan* repeat to add lacy peaks across each scallop. Join. (sc across fans)
Round 82 :
Work a layering round: into the center of each deep fan work *(3 dc, ch2, 3 dc) shell, sl st into base between scallops* to thicken the scallop center and give the layered look. Join. (same # fans retained)
Info :
Layering shells creates the thick scalloped outline seen in the photos. Keep stitches tight and even so the scallops flare uniformly during blocking.
Round 83 :
Edge finishing: ch4 spaces between scallops with a reverse picot on the outermost point. *Ch4, sl st into base, (ch3 sl st) x2* to form small decorative touch. Join. (decorations around edge)
Round 84-88 :
Work four rounds of stabilizing sc and subtle front-loop ridges to lock the edge. Suggested sequence: Row 84 - sc across (edge tidy), Row 85 - FLO hdc across (ridge 1), Row 86 - sc across, Row 87 - FLO hdc across (ridge 2), Row 88 - sc tidy finishing round. These rows produce the slightly raised inner rim seen near the scallop interior in the photo. (counts consistent with scallop positions)
Info :
Many lace runners have an interior rail or double-rail next to the scallops. Use these FLO rounds to mimic that raised inner band that frames the filigree center.
— Finishing Rounds & Blocking Preparation :
Round 89 :
Weave an optional decorative chain through the base of the scallops by working (ch5, sl st into next sc) along the base to give a final filigree look. Join. (decorative chain count equals scallop count)
Round 90 :
Final tidy row: sc evenly along all inner edges and across the runner center to even out the surface. Fasten off, leaving 18-24 inch tail for finishing and blocking. Weave ends loosely and leave for final trimming after blocking. (sc count per runner width)
Info :
Do not weave all ends in before blocking; leave them long so you can adjust slight pulls and retension a scallop if needed after blocking. Blocking will open the lace and set the scallops into their final curved form.
Round 91-100 :
Optional additional decorative passes: If you prefer extra depth like the photographic sample, add 10 more rounds of alternating picot, shell and FLO ridges across the scallops creating additional layered effect. Work carefully and maintain symmetry across both ends. (these rounds further refine edge thickness)
Info :
If you choose to add extra passes, keep track of edge counts and ensure both ends of the runner mirror each other. It is better to add the same sequence twice if needed than to improvise different stitches on one side.
— Blocking and Final Finish :
Info :
Soak the runner gently in lukewarm water with a few drops of mild detergent. Remove excess water by rolling in a towel, then pin to a blocking board or towel to the desired measurements. Pin each scallop outermost point and inner valley to maintain shape. Allow to dry fully (overnight or longer). For a crisper look, mist with a spray starch while pinned, then allow to dry completely.
Info :
After drying, weave in loose ends with a yarn needle. Trim close to fabric. If desired, press lightly on the back with a steam iron (use a pressing cloth to protect fibers). Photo sample shows runner with soft but defined scallops and a subtle raised spine achieved through careful blocking and FLO rounds.
This elegant pineapple doily runner is a labor of love that rewards patience with heirloom-worthy results. Every scallop and pineapple repeat contributes to a timeless table accent you will treasure. I hope you enjoy each lace-filled row and the satisfying transformation when the runner blooms under pins. Happy crocheting — and share your finished piece to inspire others! 🧶✨