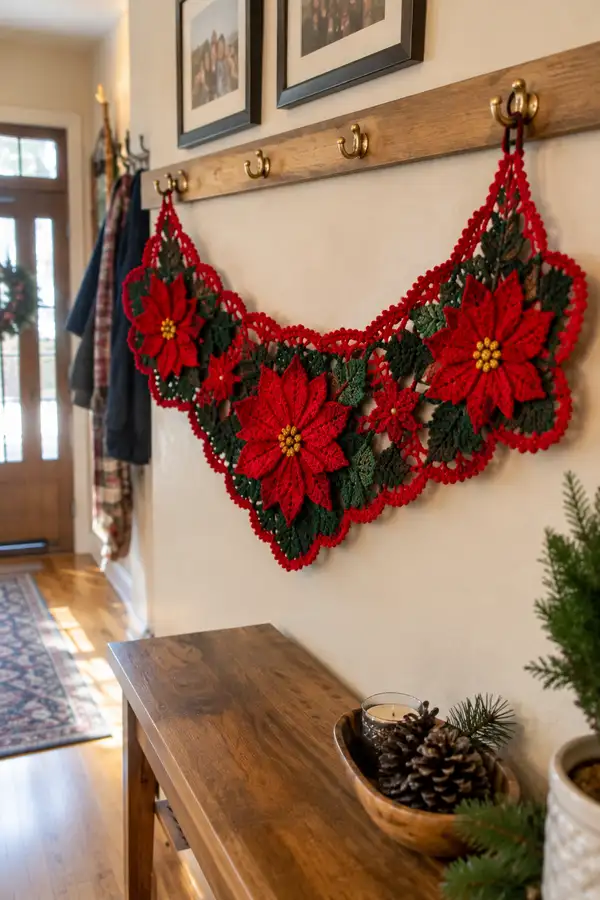
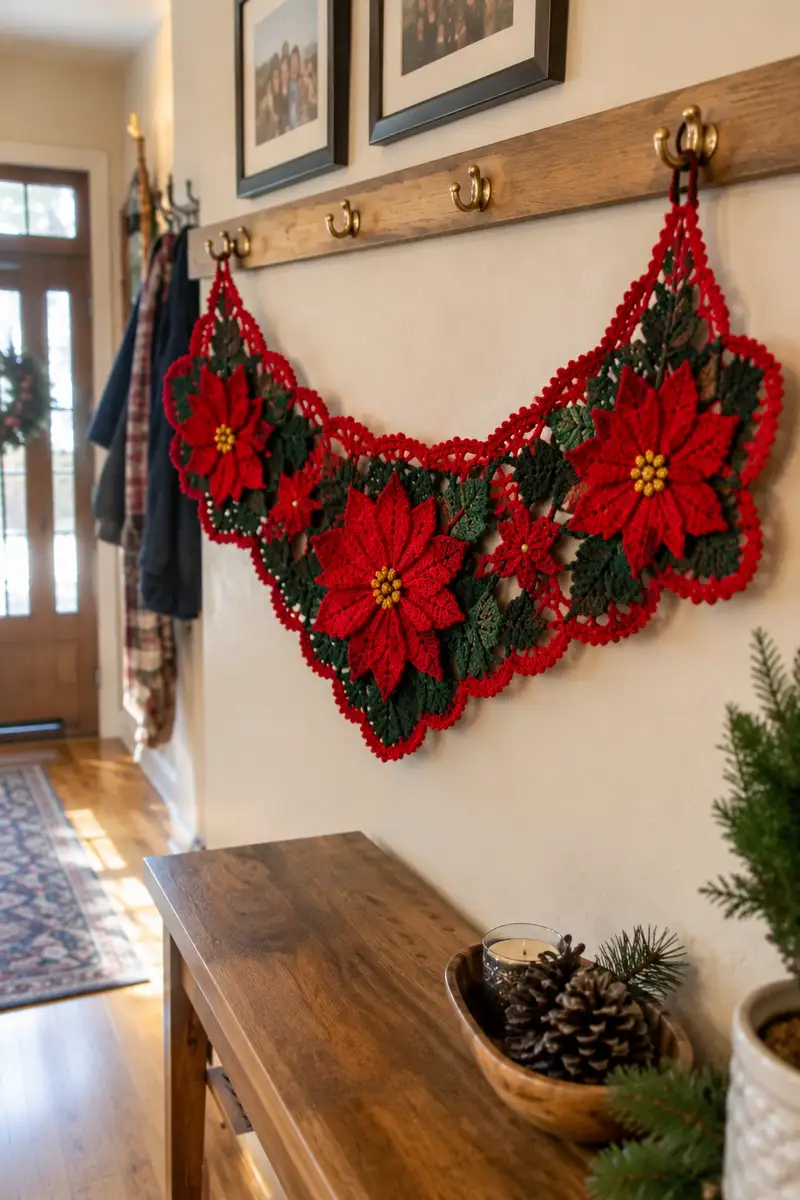
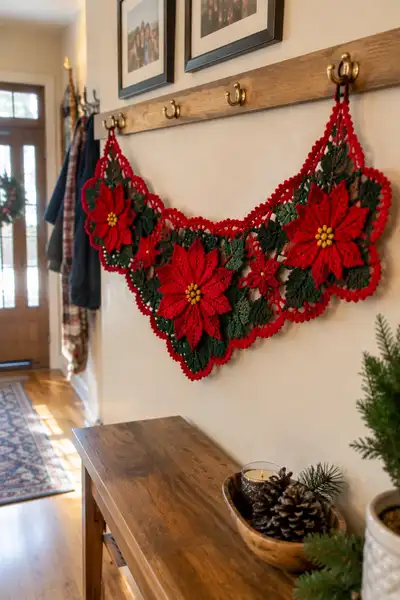
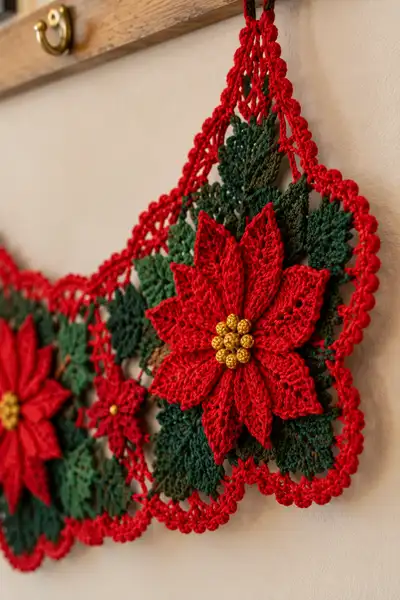
A richly textured, festive poinsettia doily runner featuring large layered red poinsettias, deep green leaves, and golden bead centers. This wall-hanging or table runner uses join-as-you-go motifs and a scalloped lace border for a vintage holiday look. Detailed stitchwork, layered petals, and beaded centers create dimensional poinsettias that beautifully catch the light. Designed for intermediate to advanced crocheters who love lace and modular assembly.
Progress Tracker
0% Complete
— Materials & Gauge :
Info :
Gauge is not critical for lace runner but for reference 28 dc x 10 rows = 10 cm in sample lace using 2.5mm hook and fingering cotton. Adjust hook to obtain crisp lace with no loose holes. Work tightly for defined petals and joins.
— Large Poinsettia Motif (Make 3) :
Round 1 :
Make a magic ring, ch1, 8 sc into ring (8)
Round 2 :
2 sc in each st around (16)
Round 3 :
(1 sc, inc) x8 (24)
Round 4 :
(2 sc, inc) x8 (32)
Round 5 :
(3 sc, inc) x8 (40)
Info :
This small disk will form the base that anchors the petal layers; keep it flat by blocking lightly after Round 6.
Round 6 :
1 sc in each st (40)
Round 7 :
(4 sc, inc) x8 (48)
Round 8 :
1 sc in each st (48)
Info :
Begin working first petal foundation: we will create 8 large outer petals around this disk. Mark the center top of each petal with a removable marker before beginning petals to ensure even spacing.
Round 9 (Petal foundation) :
*ch6, sl st into next 6th st around (to make 8 loops); rep from * around to make 8 loops. Join with sl st to first sl st. (8 loops)
Round 10 (Petal row 1) :
Working into first ch6 loop: sc in base, ch2, (dc, tr, dc) in loop, ch2, sc in base. Repeat in each loop to form 8 small petal arches.
Round 11 (Petal row 2) :
In each petal arch: sc in base, ch3, (2 dc, tr, 2 dc) all into arch, ch3, sc in base. This increases height of petals. Repeat for each petal (8 petals).
Round 12 (Petal shaping) :
Working up center of each petal: attach yarn at base, ch2, (2 hdc, 3 dc, 2 hdc) all in same central chain space to create a raised spine. Slip stitch back to base. Repeat for each petal creating a raised central ridge (8 ridges).
Info :
For pronounced texture, use working yarn carried and pull slightly when forming the central ridge; steam-block after completion to set petal shape.
Round 13 (Petal outer edge) :
Along outer edges of each petal work: sc, hdc, dc, tr, dc, hdc, sc to create a smooth finished edge. Work evenly across each petal so all petals measure roughly the same length.
Round 14 :
1 sl st evenly around to tidy joins between petals and to secure edges (no stitch count change)
Round 15 (Inner layer foundation) :
Work a picot round around the petal bases: *sc in base, ch3, sl st in 1st ch (picot), ch2, next sc* repeat between each petal base to create a decorative inner crown.
Round 16 :
1 sc in each st to stabilize inner crown. (approx 64-72 depending on spacing)
Info :
Count your stitches at this stage. Each motif should have an even number of base points to accept the second, smaller petal layer. If there are wide gaps adjust by adding an extra sc in those spots.
Round 17 (Inner smaller petals - make 8)
Attach yarn at base between two large petals, ch5, sl st to next base to make 8 small loops around inner circle. Join.
Round 18 :
Into each ch5 loop: sc at base, ch2, (hdc, dc, hdc) into loop, ch2, sc at base. Repeat 8 times.
Round 19 :
Form central raised points on these small petals with (1 hdc, 2 dc, 1 hdc) worked into the center of each small petal. Fasten off small petal layer and weave ends. (8 small petals)
Round 20 :
Re-join red yarn at inner disk and make a tidy round of sc around inner disk to hide joins and prepare for bead center placement (approx 40 sc)
Round 21 (Bead/center join) :
Make center cluster: ch1, 8 sc into magic ring if you prefer a crocheted center base; or sew a small golden bead cluster on top as described below.
Info :
Bead center option: using small golden beads or wrapped beads, place 9 beads in a 3x3 cluster on the inner disk. Use a length of strong thread or yarn tail to sew through the disk several times, anchoring beads securely. Tie off and weave ends behind the disk so they are not visible from the front.
Round 22 (Textured backstitch round) :
Turn motif to back; work a round of sc around base of petals on WS to prevent petals from flipping forward too far. (approx 48 sc)
Round 23 :
Fasten off leaving long tail for joining. Weave in ends from center to petal bases to secure shape. Block petals flat and slightly cupped if you prefer petal lift.
Info :
Each large poinsettia motif counts as approximately 23 rounds of work including shaping and finishing. Make three identical motifs for the runner. Block each motif flat with pins to set petal shapes before joining.
— Small Poinsettia Motif (Make 2) :
Round 1 :
Magic ring, ch1, 6 sc in ring (6)
Round 2 :
2 sc in each st around (12)
Round 3 :
(1 sc, inc) x6 (18)
Round 4 :
1 sc in each st (18)
Round 5 (Petal loops) :
*ch5, sl st to next st* rep around to make 6 loops. Join. (6 loops)
Round 6 :
In each ch5 loop: sc, ch2, (dc, hdc) ch2, sc. Repeat for 6 petals.
Round 7 :
Form petal edge with small picots: sc around petals adding ch3, sl st to 1st ch at tip of each small petal. Fasten off and weave ends. (This motif uses 7 rounds)
Info :
Small poinsettias act as filler motifs between larger flowers. Make two for the central section or edge decoration as shown in photo.
— Leaf Motif (Make 8) :
Round 1 :
Make a magic ring, ch1, 6 sc into ring (6)
Round 2 :
2 sc in each st around (12)
Round 3 :
(1 sc, inc) x6 (18)
Round 4 :
1 sc in each st (18)
Round 5 (Leaf foundation) :
ch1, [sc, hdc, dc, tr, dc, hdc, sc] all worked into next 7 sts to form the left half of the leaf; then rotate and mirror those stitches working back along the opposite side into remaining stitches to form a pointed leaf. (Approx 14-18 sts per leaf depending on shaping)
Round 6 :
Work 1 sl st around to tidy and then an additional round of BLO sc to create a delicate ridge: 1 sc BLO in each st around (18)
Round 7 :
On RS, embroider center vein: with contrasting yarn and yarn needle bring yarn up at base, insert yarn down at tip, then bring up at side and down to create symmetrical vein stitches; secure and weave ends.
Info :
Leaves are worked in variegated green to give lively tonal changes; make eight leaves to fill gaps between motifs. Block leaves slightly cupped to mimic real leaf shape.
— Filler Trellis Motif (Make 6) :
Round 1 :
Ch6, sl st to 1st ch to form a ring. Round 1: ch3 (counts as dc), 11 dc into ring, join (12 dc)
Round 2 :
Ch3, dc in same st, ch2, *skip 1, (2 dc in next), ch2* rep around to form 6 arches. Join and fasten off if desired.
Round 3 :
Into each ch2 arch work *(sc, ch4, sc)* to create diamond connectors. Fasten off. (This motif uses 3 rounds but replicates many times across runner.)
Info :
These small trellis diamonds fill the negative space and are joined to large motifs using slip stitches when assembling. Make six to eight depending on spacing plan.
— Center Bead Cluster (Make 3) :
Round 1 :
Option A - Crocheted bead base: magic ring, ch1, 8 sc into ring (8). Fasten off leaving long tail. Using tail sew through beads and secure.
Round 2 :
Option B - Sewn bead cluster: thread a length of strong thread, string 9 beads, shape into a 3x3 cluster and sew through motif center disk several times, knot and hide tails behind motif. (Use of seed beads recommended for shiny effect.)
Info :
Whichever method you choose, ensure beads are sewn tightly through the motif base so they don't shift. For a metal/golden look, use metallic wrapped beads or gold-tone seed beads to create that bright center seen in the photos.
— Join-as-you-go Assembly (Join motifs according to layout) :
Info :
Layout plan: three large poinsettias in a gently curved row, small poinsettias nested between and slightly below, leaves and trellis diamonds filling gaps. Pin motifs on blocking board according to final layout before joining.
Round 1 (Initial join) :
With RS facing and working from one large motif, join yarn at an edge point where two motifs meet, ch1, sc through motif edge, then sc into corresponding edge stitch of adjacent motif, working around the meeting edge to make a flat visible join. Continue joining edge by edge until motifs are connected at the planned points.
Round 2 :
For small connectors use sl st joins: bring motifs together at single chain loops and sl st through both loops; this creates open mesh joins that mimic lacework and keep drape.
Round 3 :
When joining leaves to poinsettia bases, sew through base disk and leaf base with ladder stitch every 6-8 sts to anchor leaf securely without flattening flower posture. Knot and weave tails through WS.
Info :
Do not over-tighten joins: the runner should remain flat and flexible. Keep joins looser near the scalloped edge to allow the border rounds to settle evenly.
Round 4 :
Use a 'bridging chain' method for trellis diamonds: ch5 between motifs then sl st to anchor points on adjacent motifs, creating decorative V-shaped bridges. Repeat across all filler motifs to unify composition.
Round 5 :
Once main motif row is joined, check for gaps and add extra trellis diamonds or leaves as needed to maintain a balanced silhouette. Fasten off and weave ends securely.
— Top Hanging Strap / Loop :
Round 1 :
Choose two outermost points where you want to hang runner. At that point, attach yarn and ch40 (or measure desired hanging length), sl st back into base to create a strong hanging loop. Work 2 more rows of sc along loop to stabilize: sc in each ch across, sl st to base; repeat once. Fasten off.
Info :
If you prefer two short loops as in the photo, make two loops spaced about 8-12 inches apart and reinforced with additional sc rows. Consider wrapping narrow ribbon around top for decorative reinforcement.
— Outer Scalloped Border :
Round 1 (Border foundation) :
With RS facing, attach red yarn at chosen outermost stitch, ch1, 1 sc in same st, sc evenly along outer edge of joined motifs, placing (sc, ch3, sc) in each point where motifs meet to prepare for scallops. Work around entire outer edge. This foundation may be approx 180-240 sc depending on runner size.
Round 2 :
*In each ch3 space work (sc, hdc, dc, tr, dc, hdc, sc) to form a scallop; between scallops sc in each st across.* Repeat around. Count scallops and adjust spacing so scallops are evenly distributed. (Number of scallops will equal number of outer points.)
Round 3 :
Work a picot round to create beaded edge: In each scallop work *sc, ch3, sl st in first ch (picot), sc* across the tip row of scallops. This yields the delicate beaded rim visible in the photos.
Round 4 :
Optional decorative chain overlay: Ch4, skip 2, sl st at third st to create lattice along inner curves of scallops. This adds an airy lace that echoes the runner's interior mesh.
Info :
Block scalloped border carefully with pins following scallop edges for a uniform finished look. A little starch or fabric stiffener will help maintain scallop shape on display surfaces.
— Final Finishing Touches :
Round 1 :
Weave in all tails securely on WS using yarn needle, burying ends through several threads of motif to prevent pulling free. Trim excess close to work.
Round 2 :
Steam-block entire runner: mist lightly and pin to shape on blocking board with scallops evenly spaced. Allow to dry completely. If you prefer a stiffer runner, apply light fabric stiffener per manufacturer's instructions.
Info :
Attach bead centers finally if you did not mount them earlier. For each large flower press bead cluster into center and secure with several stitches through the motif base; knot thread on WS and hide tails.
Round 3 :
Inspect joins and reinforce any visible loose connections with small, neat slip-stitch passes from WS. Adjust tension where necessary so runner hangs flat without bulging points.
Info :
Final runner length will vary by blocking and yarn; expected finished length approx 36-46 inches across the curved row and drop of 12-18 inches depending on scallop and hanging loop choices.
This elegant poinsettia runner blends classic crochet motifs with festive color and sparkly centers for a holiday showpiece. Each layered petal and leaf joins together to create a lush, vintage-inspired lace that will brighten any entryway or mantel. Enjoy the meditative rhythm of working modular motifs, and take pride in the final blocked, scalloped finish. 🎄🧶 Display it with pride and let this handmade accent become a seasonal favorite in your home. ✨