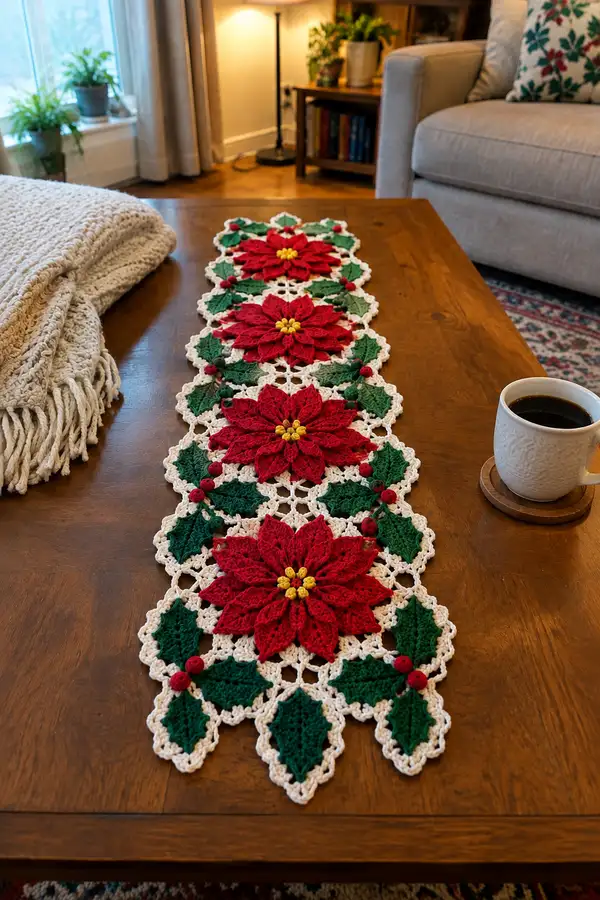
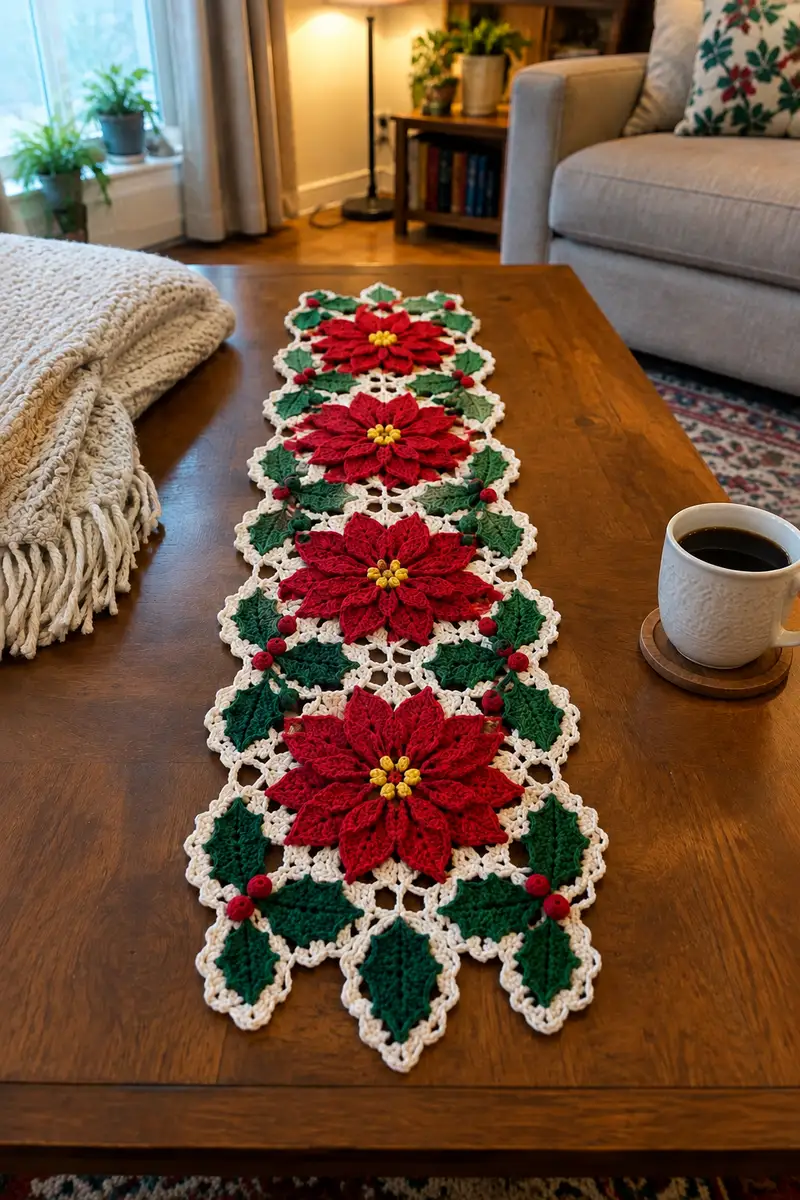
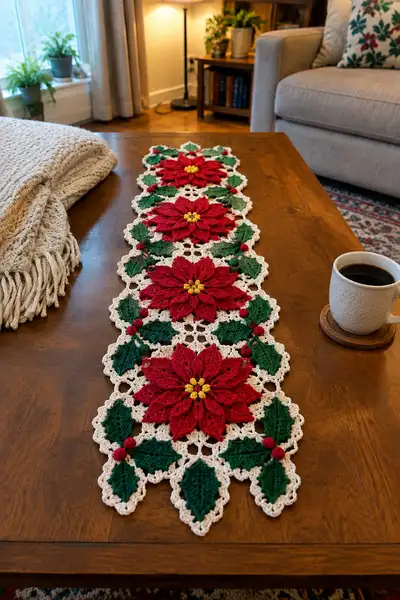
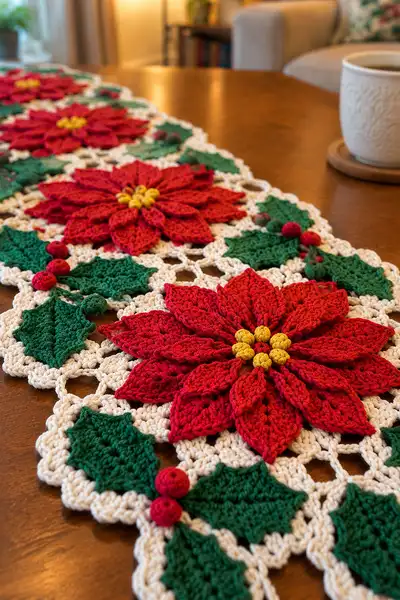
Create a festive table runner made from detached poinsettia and holly motifs joined by a delicate cream lace background. This pattern uses overlay and layered petal techniques to produce 3 bold red poinsettias with yellow centers, paired with deep green holly leaves and bright red berries. Finished runner lies flat with a scalloped cream edge for a traditional holiday look. Suitable for gift making or a seasonal centerpiece.
Progress Tracker
0% Complete
— Notes and Gauge :
Info :
Gauge is not critical for motif assembly, but 16 sc and 20 rows = 10 cm in single crochet roughly with worsted cotton and 4.0mm hook. Block motifs lightly for consistent final measurements. Work tightly enough that stuffing for berries will not show through.
— Poinsettia Flower Center (make 3 centers) :
Round 1 :
6 sc in magic ring (6)
Round 3 :
(1 sc, inc) x 6 (18)
Round 4 :
(2 sc, inc) x 6 (24)
Info :
These yellow centers are small raised beads - make three little clusters of 6-8 golden beads each to glue/sew into the poinsettia center later. Use bright yellow worsted cotton.
Round 5 :
1 sc in each st (24)
Round 6 :
(3 sc, inc) x 6 (30)
Round 7 :
Work 2 rounds even: 1 sc in each st (30)
Round 9 :
Fold center in half and work sc through both layers around to create a firm raised bead; (sc 1, sl st 1) around if needed to close (30)
Info :
Fasten off leaving 6 in (15 cm) tail to sew center to the finished poinsettia. Make small clusters of 5-7 beads together by sewing tails through each bead cluster; arrange as six small yellow beads clustered in a ring.
— Poinsettia Petals – Inner Petal Layer (make 8 petals per flower) :
Info :
Each petal is worked flat and uses short rows and post stitches to create a raised central ridge. Make 8 identical petals for inner tier. Work petals in red with 3.5-4.0mm hook for crisp shaping.
Petal Round 1 :
Ch 11, sc in 2nd ch from hook and each across (10)
Petal Round 2 :
Ch 1, turn, sc in each st across (10)
Petal Round 3 :
Ch 1, turn, (sc2tog over first 2 sts), sc in next 6, sc2tog over last 2 sts (8)
Petal Round 4 :
Ch 1, turn, sc in each st (8)
Petal Round 5 :
Ch 2 (counts as first hdc), hdc across next 6, hdc in last st (7 hdc + turning ch = top)
Petal Round 6 :
Working into both loops, ch 1, 1 sc in first st, 1 hdc in next 2 sts, 1 dc in next 3 sts, 1 hdc in next 2 sts, 1 sc in last st — shape the tip (9)
Petal Round 7 :
Working along opposite long edge: join with sl st to bottom edge, ch 1, sc in each turned row edge across to base (approx 8-10 sc to match base)
Info :
After Round 7, place a marker at the base center. Block each petal gently to flatten and shape. Repeat to make 8 petals. Keep stitches consistent across petals so that when layered they meet evenly.
Petal Round 8 :
Optional: add 1 round of picot edging: *sc, ch3, sl st into 3rd ch* across to give slight scallop to petal edge
— Poinsettia Petals – Outer Petal Layer (make 8 larger petals per flower) :
Info :
Outer petals are slightly longer and sculpted to overlap inner petals. Use same technique enlarged to ch 15 for starting chain.
Petal Round 1 :
Ch 15, sc in 2nd ch from hook and each across (14)
Petal Round 2 :
Ch 1, turn, sc in each st across (14)
Petal Round 3 :
Ch 1, turn, (sc2tog over first 2 sts), sc in next 10, sc2tog over last 2 sts (12)
Petal Round 4 :
Ch 1, turn, sc in each st (12)
Petal Round 5 :
Ch 2, hdc across next 10 sts, hdc in last st (11 hdc across)
Petal Round 6 :
Ch 1, turn, 1 sc in first st, 1 hdc in next 3 sts, 1 dc in next 5 sts, 1 hdc in next 3 sts, 1 sc in last st (13)
Petal Round 7 :
Join at base opposite edge, ch 1, sc along edge to base to create closed shape (approx 12-14 sc)
Info :
Work a central post on each outer petal to create upright ridge: from top center, work 3 dc front post down next to each other to create the raised center. Fasten off leaving long tail for sewing.
— Poinsettia Petal Assembly (per flower) :
Info :
Arrange 8 inner petals in a circle with bases meeting. Sew bases together using long yarn tails, then arrange outer 8 petals offset between inner petals and sew at base. Use pins to hold layers in place during assembly. Secure through several passes to make a firm layered flower.
Assembly Step 1 :
Place inner petals in a ring, sewing each adjacent base to the next using overcast stitches; after attaching all 8, go through the row again sewing into the very base to close any gaps.
Assembly Step 2 :
Place outer petals on top, offset so outer petal sits between two inner petals. Sew outer petal bases to the same center point as inner petal bases, catching inner bases as you go so they sit slightly raised.
Assembly Step 3 :
Sew the yellow bead cluster center onto the center, pulling tail through several times to anchor firmly. Tidy ends and weave inside the back of the flower.
— Holly Leaf Motif (make 12 leaf halves for clusters) :
Info :
Each holly leaf is worked flat and uses increases and decreases to make points. Make two mirrored halves or work a single leaf by joining halves later. Use deep forest green worsted cotton.
Round 1 :
Ch 8, sc in 2nd ch from hook and each across (7)
Round 2 :
Ch 1, turn, (sc, inc) across to center then mirror to shape a leaf point: sc in next 2, (inc, sc) (11)
Round 3 :
Ch 1, turn, sc across working FLO on this row to create a raised ridge (11)
Round 4 :
Ch 1, turn, (sc2tog, sc) across to taper toward tip (8)
Round 5 :
Ch 1, turn, sc in each st (8)
Round 6 :
Work picot points to create holly serrations: *(sc, ch3, sl st into 3rd ch)* across outer edge to form three points
Info :
For a full leaf, repeat to make mirrored half and seam halves together with whip stitch; alternatively, work leaf as a single slightly larger chain start (ch 14) and mirror shaping in one piece. Block leaves flat and add vein by running a surface slip stitch down center from tip to base.
— Holly Leaf Variant – Raised Vein Version :
Round 1 :
Ch 12, sc in 2nd ch from hook across (11)
Round 2 :
Ch 1, turn, sc inc pattern to form center bulge: (sc, inc) x 5, sc last (16)
Round 3 :
Ch 1, turn, work FLO row of sc (16)
Round 4 :
Ch 1, turn, (sc2tog, sc) across to taper (11)
Round 5 :
Ch 1, turn, sc across (11)
Round 6 :
Surface crochet a centered vein: with cream or darker green, using tapestry needle, make surface sl sts in a line from tip to base. Fasten off, leaving long tail for sewing to lace motif.
Info :
Make 6 full leaves per runner side (12 per runner total) to match photo spacing. Block to keep points crisp.
— Berry Bobble (make 18 small berries) :
Round 1 :
6 sc in magic ring (6)
Round 3 :
1 sc in each st (12)
Round 4 :
Work 1 round of tight sc in BLO to reduce diameter slightly (12)
Round 5 :
Fasten off leaving long tail; add small pinch of fiberfill and close by sewing through center tightly to create firm berry (pull yarn to make bead shape)
Info :
Sew berries in clusters of two or three near leaf junctions. Use tiny stitches to anchor to lace background so berries sit slightly raised.
— Lace Connector Motif (make 10-12 motifs) :
Round 1 :
Ch 8, join to form ring with sl st, ch 3 (counts as dc), 23 dc into ring (24)
Round 2 :
Ch 4 (counts as tr), *tr in next st, ch 1* around to form open picot loops; join with sl st (24 tr + 24 ch-1 sp)
Round 3 :
Into each ch-1 sp: (sc, ch5, sc) — this creates a looped edging and spaces for joining (24 loops)
Round 4 :
Join cream yarn in any loop, ch 1, sc, ch 4, sc across each loop creating an 8-pointed flower-like open motif (24 chains)
Info :
Make enough lace connectors to space between flowers and connect leaves. These are the scaffold for the runner - join motifs via their chain loops later using sl sts or sewing for a slightly raised look.
Round 5 :
Optional: work 1 round of scalloped edging: *sl st, ch 3, 3 dc, ch 3, sl st* in selected loop spaces to add a soft scalloped joining border
— Joining Motifs and Layout Preparation :
Info :
Layout the runner flat before joining: center poinsettia motifs spaced evenly with lace connectors between them, holly leaves clustered around each flower with berries sitting at leaf base. Use blocking board and pins to pin motifs in final placement to avoid shifting during joining.
Join Round 1 :
With cream yarn and working into loop edges of lace motifs, join adjacent motifs by sl st into corresponding ch loops: *sl st into loop of motif A, ch 2, sl st into matching loop of motif B* repeat across every connecting loop to form lattice (this keeps an open airy look)
Info :
When joining petals of flower to lace background, position flower so that base of petals align with 8 inner lace loops; use yarn tails from petals to sew through both petal base and lace connector to secure. Sew rather than sl st for stronger hold on floral centers.
— Edge Scallop and Final Border :
Border Round 1 :
With cream yarn, pick up around outermost lace perimeter: *sc in every st, (ch 3, skip 2 sts, sc) to form picot arches* around the entire runner. Adjust spacing to keep scallops even.
Border Round 2 :
In each picot arch, work (sc, hdc, 3 dc, hdc, sc) to produce full scallops. Fasten off and weave ends.
Info :
For a crisp finish, steam-block the whole runner after joining. Place a pressing cloth over motifs and use hover steam to avoid flattening petals. Pin scallops into an even rhythm while drying for a polished edge.
— Variation: Denser Mesh Joining Technique :
Info :
If you prefer a denser lace background, replace sl st joins between lace motifs with single crochet joins: sc through both motif loops, pulling tightly for a flatter, more solid join. This gives a sturdier runner for heavier table items.
— Assembly Steps (Detailed) :
Round/Step 1 :
Lay out a central line: Lace - Flower - Lace - Flower - Lace - Flower - Lace; place holly leaves symmetrically around each flower using pins and measure 4.5-5 cm from center to keep consistent spacing.
Round/Step 2 :
Sew each poinsettia to the underlying lace connector through the petal bases using long tails. Use mattress stitch style passes through base loops and lace chain loops to secure each petal with even tension so flower sits slightly raised.
Round/Step 3 :
Sew holly leaves to lace edges in clusters of two or three; attach berries by sewing through the berry tail into the lace and leaf base, anchoring through the lace connector beneath for stability.
Round/Step 4 :
Join lace connector motifs together in the runner layout with slip-stitch chain loop joins, then reinforce by sewing with cream yarn through the same loops from the back to even out tension.
Round/Step 5 :
Work the final cream scalloped border around the entire runner, carefully spacing scallops to follow motif points. Pin scallops before working and check symmetry.
Info :
Weave all ends toward the back and trim neatly. Steam-block the entire runner, pinning into final shape and allowing to dry fully for stable form. A light starch spray can be used if you want a crisper look.
— Finishing Touches and Tips :
Info :
Optionally, add a few hand-stitched seed beads in the yellow center for extra sparkle. Do not add heavy embellishments that will sag the lace — keep the runner decorative and light. Label each motif with a small sticker during creation to track counts and avoid accidental mismatches during assembly.
Info :
If you want a longer runner, add an extra lace connector and flower pair following the same repeat pattern. The modular design scales horizontally easily.
Info :
Care: Hand wash cold with mild detergent and reshape while damp; do not wring. Dry flat to preserve scallops and petals.
This festive table runner combines classic holiday motifs—poinsettia, holly, and delicate lace—into an heirloom-worthy centerpiece. Each layered petal and carefully placed berry adds texture and season-ready color. The modular motif approach makes it manageable and rewarding to create, and watching the runner come together is a delightful process. 🎄🧶 Display it beneath candles or a simple centerpiece and enjoy a handmade seasonal accent. Happy crocheting!