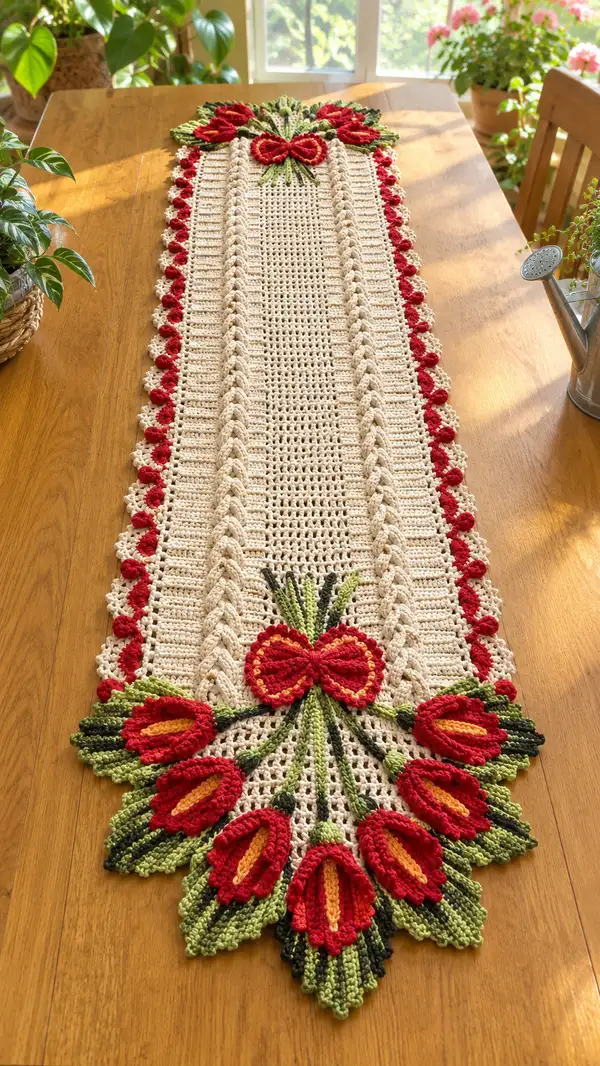
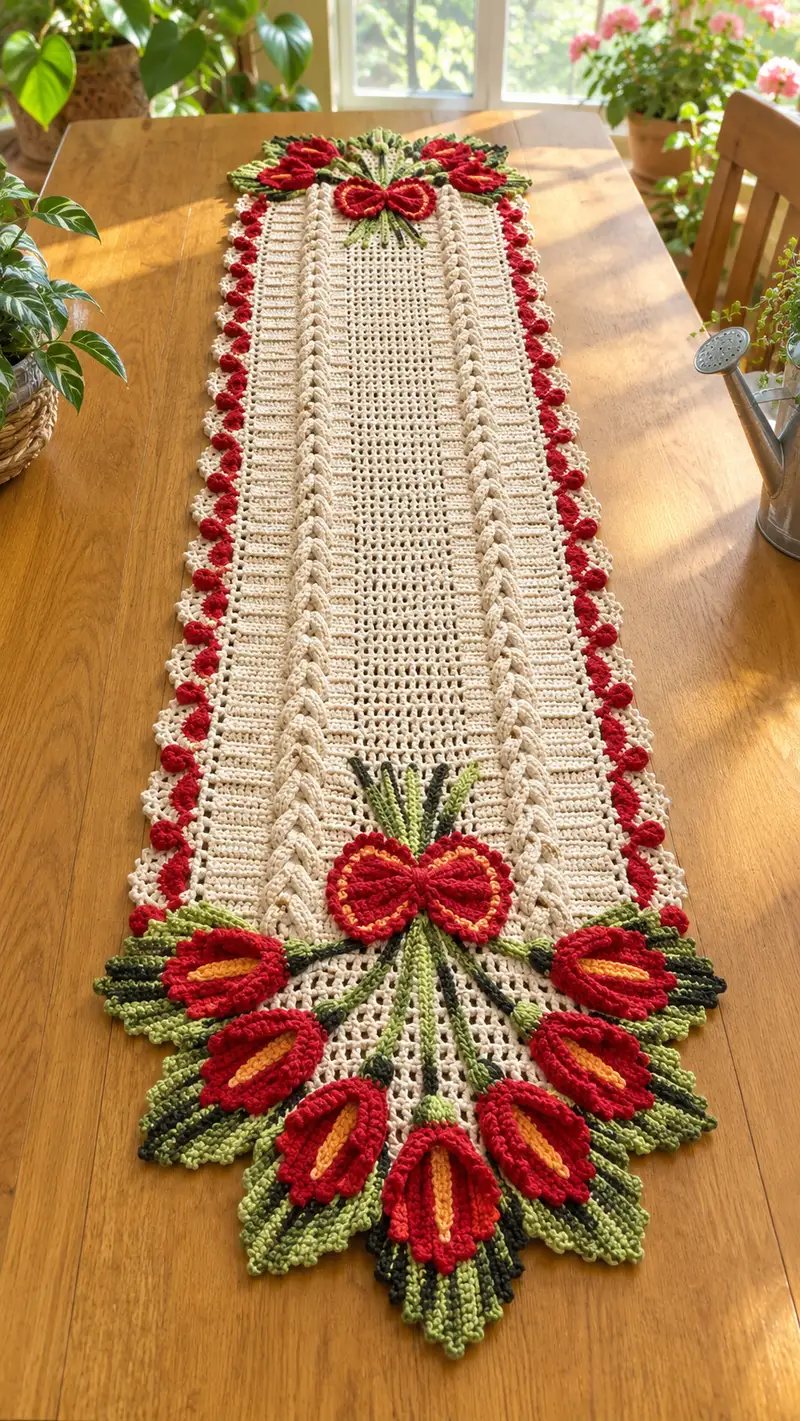
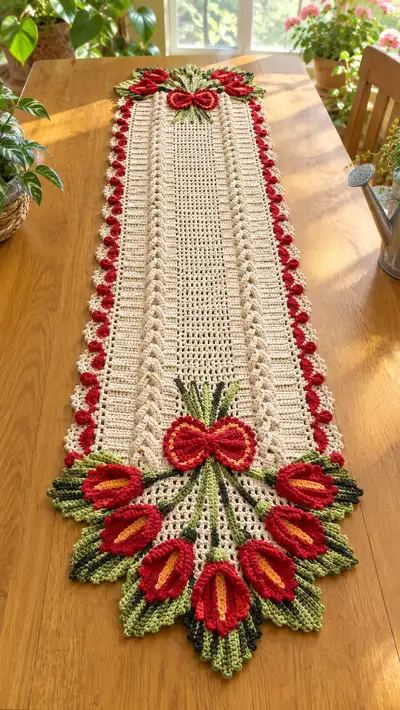
A long, elegant crochet table runner featuring a cream textured center, rope-like braided columns, scalloped red edging and vibrant red tulip clusters with green leaves at each end. This vintage-inspired runner uses cotton yarn and layered applique motifs to create a heirloom centerpiece for dining tables and sideboards. The pattern includes detailed flat-panel instructions, separate motif construction for flowers and leaves, and full assembly directions.
Progress Tracker
0% Complete
— Materials & Gauge :
Info :
Use worsted weight 100% cotton for a flat, durable table runner. Gauge is approximately 14 hdc x 12 rows = 10 cm using a 3.5 mm hook. Adjust hook to obtain this gauge. Runner as written (central panel + tulip clusters) measures approximately 14 inches (35 cm) wide and 56-60 inches (142-152 cm) long after assembly and blocking.
— Central Panel (Make 1) :
Foundation :
Ch 52. This width creates a 50-st working width after turning chain and establishes the main rectangular panel width.
Round 1 :
Row 1 (RS): Hdc in 3rd ch from hook and in each ch across. (50 hdc)
Round 2 :
Row 2 (WS): Ch 2 (does not count), turn. Hdc in each st across. (50 hdc)
Round 3 :
Repeat Row 2. (50 hdc)
Round 4-8 :
Work even in hdc across each row. (50 hdc)
Info :
Place stitch markers at the first and last stitch of each row on the RS to help find edge locations later when sewing cable trims and the scalloped border. Keep tension consistent to avoid scalloping edge unintentionally.
Round 9 :
On RS: Ch 2, turn. FPdc around next st (creates raised line), *hdc in next 6 sts, FPdc around next st; rep from * to last st, hdc in last st. (50 sts total: 8 FPdc positions along full width depending on spacing)
Rounds 10-13 :
Repeat Round 9 to build texture lines in the center panel. Keep first and last 2 sts of every row in hdc for a neat edge. (50 sts)
Info :
If you prefer a simpler look, substitute Rows 9-13 with even hdc rows - the cable strips will add the braided detail.
Round 14 :
Row 14 (WS): Ch 2, turn. Hdc in each st across. (50 hdc)
Round 15-24 :
Work even in hdc for 10 rows. (50 hdc)
Info :
Work to desired runner length before adding end motifs. The sample central panel contains 80 rows total before applying end shaping and motif joins. Adjust number of even rows to lengthen or shorten your runner proportionally.
Round 25-32 :
Repeat texture sequence (FPdc every 7th st) used in Rounds 9-13 to echo cable placement. (50 sts)
Round 33-48 :
Continue straight hdc rows to reach the long portion between end motifs. (50 hdc per row)
Info :
Stop here when your panel reaches approximately 28-30 inches / 71-76 cm in length for a balanced look; you will add the tulip clusters and bows which extend length further.
Round 49-56 :
Repeat the FPdc texture rows again (as Rounds 9-13) to mirror the first half. (50 sts)
Round 57-64 :
Work even in hdc for final straight section before finish. (50 hdc)
Info :
Fasten off leaving a long tail for seaming the cable strips and scalloped border. Block the central panel flat to measurements before assembly for neat joins.
— Cable Trim Strips (Make 2, one per long side) :
Foundation :
Ch 12. This narrow strip will be worked the full length of the runner and sewn to the long edges. Final width approximately 9 rows high x 10 sts wide when blocked.
Round 1 :
Row 1 (RS): Sc in 2nd ch from hook and each ch across. (11 sc)
Round 2 :
Ch 1, turn. Sc in blo across for 11 sc. (11 sc)
Round 3 :
Ch 2, turn. FPdc around 3rd st from left to create first raised post, *sc in next 2 sts, FPdc around next st; rep from * across last st sc. (11 sts, 3 FPdc positions)
Round 4-9 :
Repeat Round 3 to build raised braided texture. (11 sts)
Info :
To create the rope-braid effect seen on the runner, on every 8th row work a cross-over: FPdc around post 4 rows below then FPdc around current post to tilt the columns. Practice the crossover on a small swatch to get comfortable with front-post crossing.
Round 10 :
Ch 1, turn. Sc across. (11 sc)
Round 11-80 :
Continue the 10-row textured repeat (Rounds 2-10 pattern) until trim length matches central panel length. End on Row 10 (sc row) for a neat edge. (11 sts per row)
Info :
Make sure both strips are identical in length. Block them flat to the central panel dimensions before attaching. Sew them to the long edges matching sc edge stitches of the panel with a whip stitch for a seamless look.
— Scalloped Bobble Edge (Make 2 long edges, work along cable trims) :
Info :
The scalloped red edging is worked directly along the cable trim once it is sewn to the panel, forming a decorative scallop with bobbles spaced between shells. Use Accent Red yarn and 3.25-3.5 mm hook.
Round 1 :
With RS facing and Accent Red, join with a sl st into the first sc at the long edge seam. Ch 1, sc in same st. (1 sc)
Round 2 :
*Skip 2 sc, (5 dc in next sc) shell made; sk 2 sc, sc in next sc; rep from * along edge to end. Finish with sc in last seam. (Repeat shells evenly spaced)
Round 3 :
Join Accent Red at base of each shell, ch 1, (bobble) in center dc of shell: (yo and pull up 5 times, yo and draw through 6 loops) bobble made and secured with sl st in same st. Sl st into adjacent sc to anchor; rep for each shell center. (Number of bobbles equals number of shells)
Round 4 :
Ch 1, sc around all bobbles and shells to secure and make a neat finish. (Even stitches around edge as needed)
Info :
Work the scallop repeat to both long sides. If you prefer a subtler edge, omit the bobbles and use a single-row shell border instead.
— Tulip Bud Motif (Make 14 total; 7 per end) :
Info :
Each tulip is layered and worked in the round, then shaped into a cupped petal. Work buds flat-to-3D and sew to the short ends in a radiating fan. Use Accent Red for outer petals and Yellow for inner petals and centers. Optional very light stuffing creates a cupped effect.
Round 1 :
With Yellow yarn, ch 6, join with sl st to form a ring. Ch 2 (counts as first hdc), work 11 hdc into ring. Join with sl st to top of ch-2. (12 hdc)
Round 2 :
Ch 2, hdc in same st, 2 hdc in each st around. Join. (24 hdc)
Round 3 :
Switch to Red yarn (Info: change color now; carry Yellow inside if desired), ch 2, *hdc in next st, 2 hdc in next st; rep from * around. Join. (36 hdc)
Round 4 :
Ch 1, sc in each st around. Join. (36 sc)
Info :
This circle is the inner cup foundation. For a cupped tulip look, work the next rounds with half-double and front-post to create raised petal ribs.
Round 5 :
Ch 2, *hdc in next 3 sts, FPdc around next st; rep from * around. Join. (36 sts with 6 FPdc ribs)
Round 6 :
Ch 3, (counts as tr) *tr in next 3 sts, (tr dec across the top of next pair) to shape petal peaks; rep from * around to create 9 peaked ribs. Join. (36 equivalent tr sections)
Round 7 :
Working in back loops of previous tr peaks: Ch 1, sc in each tbl across each tr peak to create a defined petal scallop. (36 sc)
Round 8 :
Switch to Red (outer petals): Join at base of a petal, ch 3, 4 dc in same petal base, sl st to next petal base; *ch 3, 4 dc in next petal base, sl st to next petal base; rep until you have 9 outer petals. (9 outer petals)
Info :
If you want the tulip to sit open, add light polyester stuffing now into the cup and close the back with a few sc to maintain shape.
Round 9 :
Ch 1, sc around back edge of the tulip cup to form a small neck for sewing. (approx 36 sc)
Round 10 :
Fasten off leaving 10-12 inch tail for sewing. Repeat to make required number of tulips (14 total).
Info :
For deeper tulips, add an additional petal round in red before finishing by repeating Round 8 steps with longer clusters (6 dc clusters) to enlarge outer petals.
— Tulip Stem (Make 14) :
Round 1 :
With Light Green yarn, ch 26 for a 12 cm long stem (adjust length as desired). Sl st in 2nd ch from hook and each ch across, or sc across for a firmer stem. (25 sc)
Round 2 :
Ch 1, turn. Sc in each st across. Fasten off leaving long tail for sewing. (25 sc)
Info :
For a rounded stem, make two narrow tubes (ch 10 each) and sew them together around a little stuffing, then stitch to the tulip base. The simple flat stem is easiest for attaching to the runner surface.
— Leaf Motif (Make 28 total; 14 per end) :
Round 1 :
With Light Green yarn, ch 24. Sc in 2nd ch from hook and next 10 ch. (11 sc across worked side). This becomes the midrib base.
Round 2 :
Turn, ch 2, hdc in next 3 sts, dc in next 4 sts, hdc in next 3 sts, sl st in last. (11 sts shaped)
Round 3 :
Working down the opposite side of foundation chain: sl st in next 3 ch base, hdc in next 3 ch, dc in next 4 ch, hdc in last 1 ch. Join to tip with sl st and fasten off. (Leaf shape complete)
Round 4 :
Use Dark Green to embroider veins: with yarn needle, run two parallel straight stitches from leaf base to tip. Secure ends. Make 28 leaves total. (One leaf equals one side of the cluster)
Info :
Leaves are worked flat and lightly blocked for firm shape. For layered effect, work some leaves in a slightly larger size by increasing starting chain to 28 and adding extra dc rounds to the center.
— Decorative Bow (Make 1 per end, 2 total halves then join) :
Round 1 :
With Accent Red, ch 20. Row 1: Sc in 2nd ch from hook and across (19 sc). Turn. (19 sc)
Round 2 :
Ch 1, sc in each st across. (19 sc)
Round 3 :
Ch 2, hdc across and finish with a final row of sl st around to make a small rectangle. Fasten off. Make 2 identical rectangles and join in center by wrapping a small length of Dark Green yarn around the middle to cinch into a bow shape. Secure ends with hidden stitches. (2 halves built then cinched)
Info :
The bow functions as a central anchor for the tulip cluster. You can alter bow size by using a wider foundation chain for a larger statement bow.
— Assembly :
Info :
Layout all pieces on a flat surface and pin them in place before sewing. Block central panel and trims first so edges are straight. Place central panel RS up and position cable strips to match the FPdc rows on the panel.
Step 1 :
Sew each cable trim strip along long edges of the central panel using a mattress or whip stitch through the blocked edge and cable base, matching the sc rows. Use the long tail left from the panel and secure with several back-and-forth stitches. Make sure the cable seam is smooth without puckering.
Step 2 :
With Accent Red, join the scalloped bobble border to the cable trim outer edge by sl stitching at the base of shells, then securing each bobble with small hidden stitches on the underside to prevent movement. Work one long side fully then the other.
Step 3 :
Arrange tulips into a fan at each short end: position 7 tulips into a semi-circle, stems meeting at center. Pin leaves between and behind tulip cups so they radiate outward. The innermost tulips sit slightly above the outer for depth. The sample places 7 tulips with leaves layered in three tiers: back large leaves, middle medium leaves, front small leaves.
Step 4 :
Sew tulip stems to the base of the central panel short edge using the long tail. Secure each stem with 3-4 passes of needle and stitch across the small back sc neck of the tulip. Attach leaves beneath tulip bases, catching the runner fabric and the stem base so they sit as a single layered motif.
Step 5 :
Center the bow directly at the stem junction and fasten in place with hidden sewing. Use a few stitches through the bow wrap and the runner to anchor it firmly. Tie a final finishing knot on the underside and weave in tails to the back.
Step 6 :
Weave in all remaining ends at least 2 inches into the wrong side of the runner, secure with knots if desired, and trim flush. Block the finished runner lightly to even edges and set the shape.
Info :
When sewing layered appliques, sew deepest layers first (largest leaves), then medium, then tulips, and finally the bow. Pin firmly to reduce shifting while sewing. Use small stitches and try to hide knots inside the applique layers.
— Finishing Touches & Variations :
Info :
Optionally add a thin row of metallic thread along the inside edge of the scallop for a little sparkle. You can also omit the bobble stitch for a flatter border or change flower colors seasonally (pink/salmon for spring, burgundy for autumn). For a longer runner, extend central panel even rows and make cable trims the same length; adjust number of tulips per end to maintain balance.
Final Care :
Hand wash in cool water and reshape while damp. Lay flat to dry to preserve shape and prevent distortion of applique. Iron on low through a cloth if needed to flatten.
Completing this tulip table runner is a delightful mix of calm row work and joyful applique sewing — a perfect weekend project that leaves your table looking fresh and handcrafted. The bold red tulips and braided columns give classic vintage charm while the neutral body fits many decor styles. I hope it becomes a centerpiece you reach for at special gatherings or Sunday brunches. Enjoy the process and the beautiful result! 🧶🌷