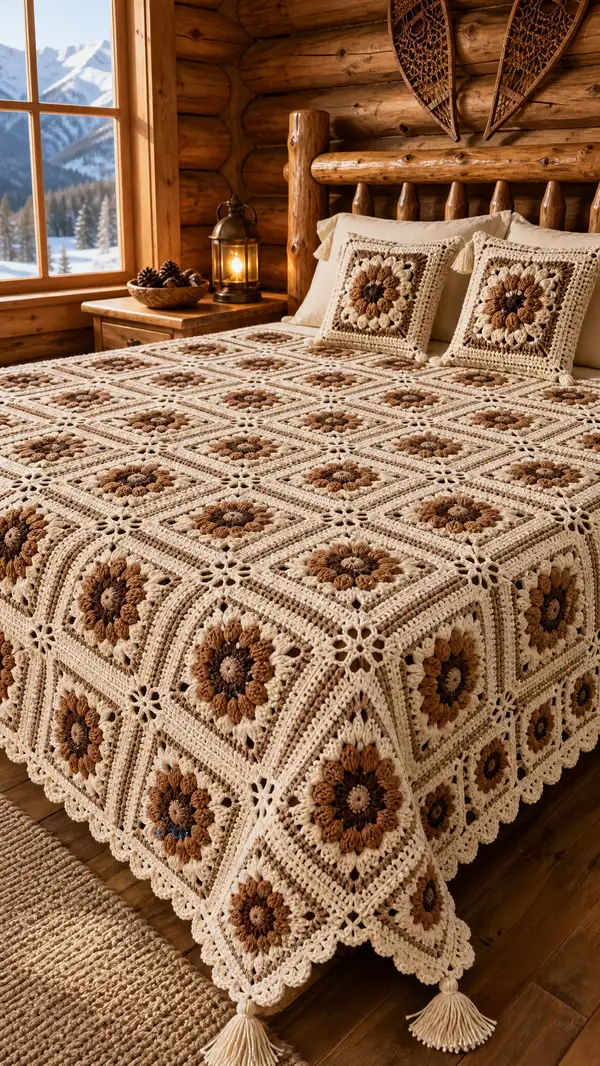
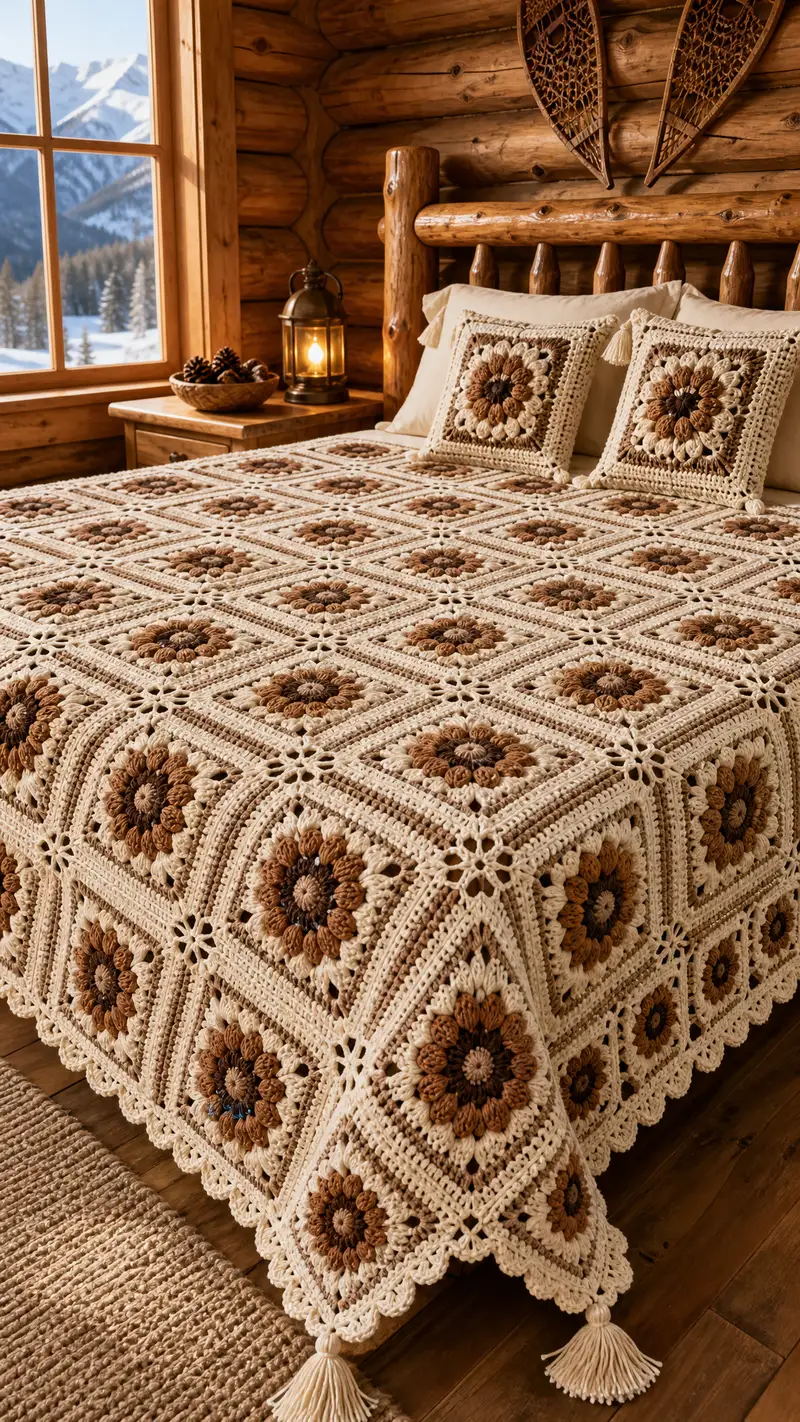
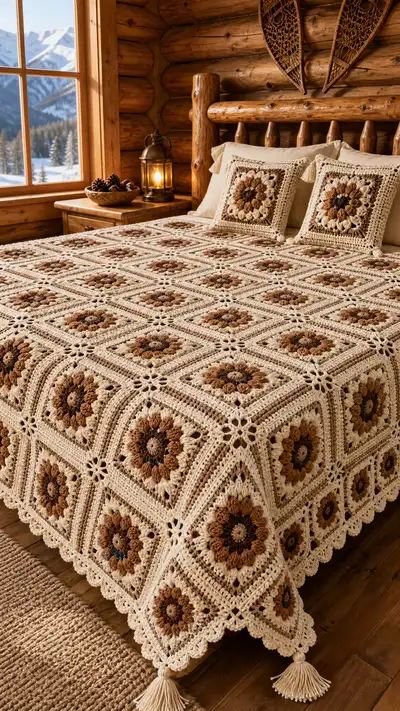
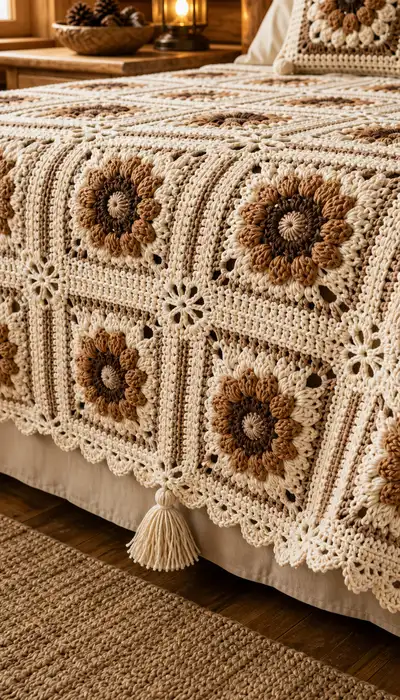
Create a warm, rustic bedspread made of textured floral granny squares in espresso, mocha, camel and cream tones. This pattern features puff-petal motifs, raised cluster rounds, and a scalloped edging with tasseled corners for an elegant cabin-chic finish. Ideal for a cozy bedroom or as a thoughtful handmade gift, the design assembles many repeatable squares into a large bedspread with matching pillow covers.
Progress Tracker
0% Complete
— Notes & Special Techniques :
Info :
This pattern uses puff stitches, clusters and standard granny-square corner increases to create a floral rosette that is squared off with additional rounds. The puff stitch used here is a 5-loop puff closed with a ch1 and counts as 1 stitch. For consistent texture, keep the number of yarn-overs and loops the same every time you make a puff. When a color change is indicated, finish the last pull-through of the round with the new color to make a clean join. Block squares to exact measurements and join with your preferred join technique; instructions here use a flat slip-stitch join and a final decorative join round.
— Motif (Make 84 squares for queen/84-100 for larger spread; pattern shows sample of 84 squares) :
Round 1 :
With Espresso, make mr, ch2 (counts as hdc), 11 hdc into ring, pull ring tight (12 hdc)
Round 2 :
2 hdc in each st around (24 hdc)
Info :
Change to Mocha for next round. Place a stitch marker in the first stitch to mark round start. Puff petals will be worked in the next round into groups of stitches to form 12 petals; each puff counts as one stitch.
Round 3 :
*(Work puff: yo, insert hook in next st, yo pull up loop; repeat yo, insert hook in same st, yo pull up loop) total 5 times to make a 5-loop puff, yo and pull through all loops, ch1 to close puff; ch1, skip next st* repeat from * to * 12 times around, join with sl st to first puff (12 puffs, 12 ch-1 sps)
Info :
Keep puffs even by pulling loops to the same height before the final pull-through. Ch1 between puffs creates a small space and helps the petal pop. Count: you will have 12 puff petals with 12 chain-1 spaces; the working stitch count for the round is 24 elements but we will continue to treat each puff as 1 stitch for subsequent rounds.
Round 4 :
Slip to first ch-1 sp, ch3 (counts as dc), (2 dc, ch1, 3 dc) in same ch-1 sp (forms petal base), *skip next puff, in next ch-1 sp work (3 dc, ch1, 3 dc)* repeat from * around to make 12 petal clusters, join with sl st to top of beginning ch3 (12 clusters)
Info :
The 3-3 cluster arrangement gives the rosette a fuller, layered look and raises the petals off the background. Keep consistent stitch height when working into chain-1 spaces.
Round 5 :
Change to Camel. Ch1, sc in same st and in each st and ch-space around working 2 sc in the center ch-1 of each cluster (you will work around edges of clusters and into the ch-1 corner spaces) -- aim for 48 sc total (48)
Round 6 :
Ch2, hdc in same st, *hdc in next 3 sts, 2 hdc in next st* repeat from * around (increase evenly) —(60 hdc)
Info :
This round starts shaping the motif toward a regular circle that we will square off. When counting hdc increases, ensure your increases are evenly spaced to maintain a flat rosette shape.
Round 7 :
Change to Mocha. *hdc in next 4 sts, 2 hdc in next st* repeat around (72 hdc)
Round 8 :
Ch1, sc in each st around in Camel (72 sc)
Info :
We now begin the square-forming rounds. Mark the center points for future corner placement by noting every 18th stitch (72/4 = 18). Place a removable marker at each of those four points to maintain corner symmetry in the next round.
Round 9 :
With Cream, ch3 (counts as dc), dc in next 8 sts, (2 dc, ch2, 2 dc) in next st (corner made), *dc in next 17 sts, (2 dc, ch2, 2 dc) in next st* repeat 2 more times, dc in remaining sts to complete round, join to top of ch3 (this divides the round into 4 sides with 2-dc, ch2, 2-dc corners)
Info :
Each side now approximates 18 stitches between corners; this is the foundation of the square framing. If your count differs by ±1, adjust by adding or removing a dc evenly across sides so corners land neatly at quarter points.
Round 10 :
Ch1, sc in same st, sc in next 8 sts, *(2 sc, ch2, 2 sc) in ch2 corner sp, sc in next 17 sts* repeat 2 more times, join with sl st (sc edge gives a tidy transition for joining rounds)
Round 11 :
Change to Camel. Ch2, hdc in same st, hdc in next 4 sts, *(skip next st, dc3tog shell over next 3 sts? — see Info) ch1, hdc in next 9 sts* repeat to next corner, in corner work (2 hdc, ch2, 2 hdc), continue around; aim for a textured frame (count approx 84 hdc-equivalents)
Info :
Round 11 uses a textured shell that creates vertical ridges between floral centers. If you prefer a simpler round, work 1 hdc in each st instead. Maintain four corners with (2 hdc, ch2, 2 hdc) for square geometry.
Round 12 :
With Cream, ch1, sc around placing 3 sc in each corner ch2 sp to reinforce shape. Join (approximately 96 sc)
Round 13 :
Ch3 (counts as dc), dc in next 28 sts, (2 dc, ch2, 2 dc) in corner, *dc in next 31 sts, (2 dc, ch2, 2 dc) in corner* repeat 2 more times, join—This expands square to a larger even grid (approx 120 dc)
Info :
At this stage each motif measures approximately 10 x 10 cm (4 x 4 in) with worsted yarn and a 4.0mm hook; adjust rounds to make motifs larger or smaller as desired. Keep motif counts consistent across all squares so they join evenly later.
Round 14 :
Ch1, 1 sc in each st around working 3 sc in each corner ch2 sp; finish off and weave in ends or carry Cream into joining round (approx 120 sc)
Info :
Block each completed square flat and to the same dimensions before assembly. Use pins to square edges and steam or wet-block according to yarn manufacturer's instructions; allow to dry fully.
— Joining & Assembly (Flat Slip-Stitch Join and Decorative Join) :
Info :
Layout your blocked squares in the desired arrangement. For this bedspread sample we arrange 7 squares across and 12 squares down (84 squares) for a queen size; adjust quantity for other sizes. The joining method here uses a flat slip-stitch join (join-as-you-go is also described in an alternate option).
Round J1 :
With Cream, place two squares with right sides facing up. Join at corner: insert hook through both square loops at the corner st, pull up loop, ch1, sl st through next st on both squares, continue sl st through next 12 sts across side (or until corner) matching stitches 1:1. Fasten off at end of side. Repeat each side so entire row is joined by flat sl st seam.
Info :
When joining, keep tension relaxed so seam lies flat rather than drawing the squares together. Use pins to keep square edges matched as you join across long runs.
Round J2 :
Once rows are joined, join rows to form the panel: align two joined rows, working the same flat sl st through matching stitches across the long seam. Work across the entire bedspread until all rows are connected in a grid. After joining, weave in all seam tails and block the joined panel flat.
Info :
Alternate Join Option: For a decorative visible join, use the join-as-you-go (JAYG) method on the final round of each square by slip-stitching into the adjacent square's final round while making the last round. Or use the invisible mattress stitch with a yarn needle for a nearly seamless join.
— Large Border (Worked all around after joining) :
Round B1 :
With Cream, join at any corner, ch1, sc evenly around entire spread working 3 sc in corner ch-2 spaces. Keep stitch count even by placing 1 sc per visible stitch on edges; join with sl st (this creates a neat base for the decorative rounds)
Round B2 :
Ch3, dc in each st around; in corners work (2 dc, ch2, 2 dc). Join with sl st (this smooths the edge and establishes corner space for scallop placement)
Info :
If the edge is slightly tight, switch to 4.5mm hook for border rounds to allow for a flexible drape. Maintain even dc spacing along the long sides to keep border straight.
Round B3 :
Ch1, sc in each st around working (sc, ch3, sc) in each corner ch2 sp to make pointed corner loops. Join with sl st.
Round B4 :
Change to Camel. *Work shell scallop: in next st work (5 dc) in same st, skip next 2 sts* repeat around to form scallops. At corners work (5 dc) in corner sp; join with sl st. (approx scallops = total edge length / 3)
Info :
Scallop count depends on final dimensions. Work evenly so scallops are symmetrical and corners receive a full scallop for continuity. If necessary, alter spacing to ensure last scallop lands neatly at the corner.
Round B5 :
With Cream, ch1, sc in each st around, place 3 sc in the top of each scallop for a refined finished edge. Join and finish off. Weave in ends discreetly.
Round B6 :
Optional decorative picot edge: join Espresso, *sc in next 2 sts, ch3, sl st in first ch to form small picot, sl st in next st* repeat around for vintage detail. Fasten off and weave in ends.
Info :
This final decorative round gives a tiny popcorn of contrast at the edges. If you prefer a softer edge, omit this round and simply finish with one tidy sc round in Cream.
— Pillow Cover (Make 2 to match bedspread) :
Info :
The pillow covers are made from 4 large granny squares joined 2x2. Follow the Motif rounds through Round 14 but stop when units measure the desired pillow size. For a 18 x 18 in pillow, make larger motifs by adding 2 extra rounds of dc before finishing.
Round P1 :
Follow Motif Rounds 1-8, then ch3 and work 3 more expansion dc rounds in Cream to reach a side length of approximately 9-10 inches per motif if using worsted yarn. Join the four motifs with sl st join-as-you-go or flat sl st join.
Round P2 :
With Cream, work 3 rounds of sc around the joined 2x2 panel to create a continuous border. Round 3: ch1, sc around placing 3 sc in each corner to stabilize. Insert a pillow form or stuff with polyfill and close with a final slip-stitch row or invisible seam.
Info :
Add tassels at the four corners of the pillow to echo the bedspread corners. Make tassels slightly smaller than bedspread tassels for proportion.
— Tassels & Corner Finishes :
Round T1 :
To make corner tassels, wind Cream yarn around a 10 cm cardboard form for desired fullness (approx 60-80 wraps for medium fullness). Cut one end, tie at top with a strong overhand knot using extra yarn. Remove from form and bind 1 cm below the top with a tight extra length of yarn. Trim ends evenly for a clean tassel and add a decorative wrap with a contrasting Camel color at the top if desired.
Info :
Attach tassels with a long tail and sew through the top loop into the corner, knotting securely on the back with several stitches. Add two small whip-stitches through the corner of the border for extra security.
— Alternate Join-As-You-Go (JAYG) Method (Optional) :
Round JAYG1 :
When making the final round of a motif, instead of finishing and cutting yarn, place the new square next to an already-blocked square and work the final sc round such that every time you reach the joining side you sl st into the corresponding stitch of the adjacent square rather than working into your current square only. This creates an integrated seam and eliminates a separate join step.
Info :
Practice JAYG on a single seam before committing to all joins; it takes coordination but provides a very neat, flat seam ideal for bedspreads that will be washed frequently.
— Finishing Touches & Care :
Info :
Weave in all tails by threading through several stitches and trimming close. Gently steam-block the entire assembled bedspread, pinning to desired measurements. If using acrylic yarn, avoid high heat when blocking—use steam at a distance or wet-block with cool water. For laundry, hand wash on gentle or machine wash in a delicate bag on cool water; reshape while damp and dry flat to protect tassels and scalloped edges.
Round F1 :
Optional: Add small embroidered accents at the center of each motif using single strands of yarn or embroidery thread to highlight petal centers. Use a simple French knot or tiny seed stitch for sparkle.
Info :
Finally, step back and admire the texture and layered florals. Small irregularities give handmade charm; consistent blocking and joining will make the final piece hang evenly across the bed.
This espresso floral granny square bedspread is a true labor of love—each textured square builds into a warm, inviting surface with vintage charm. The layered puff petals and neutral palette create a look that's both sophisticated and snug. Enjoy the meditative rhythm of repeating motifs and the gratifying moment when the full spread comes together. 🧶 Cozy up, add tassels, and share your handmade treasure with pride! ✨