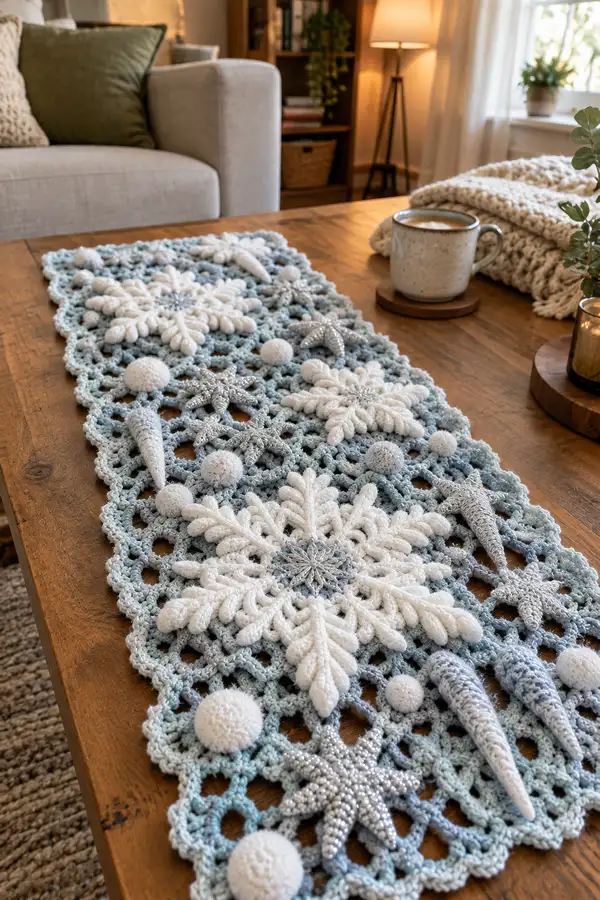
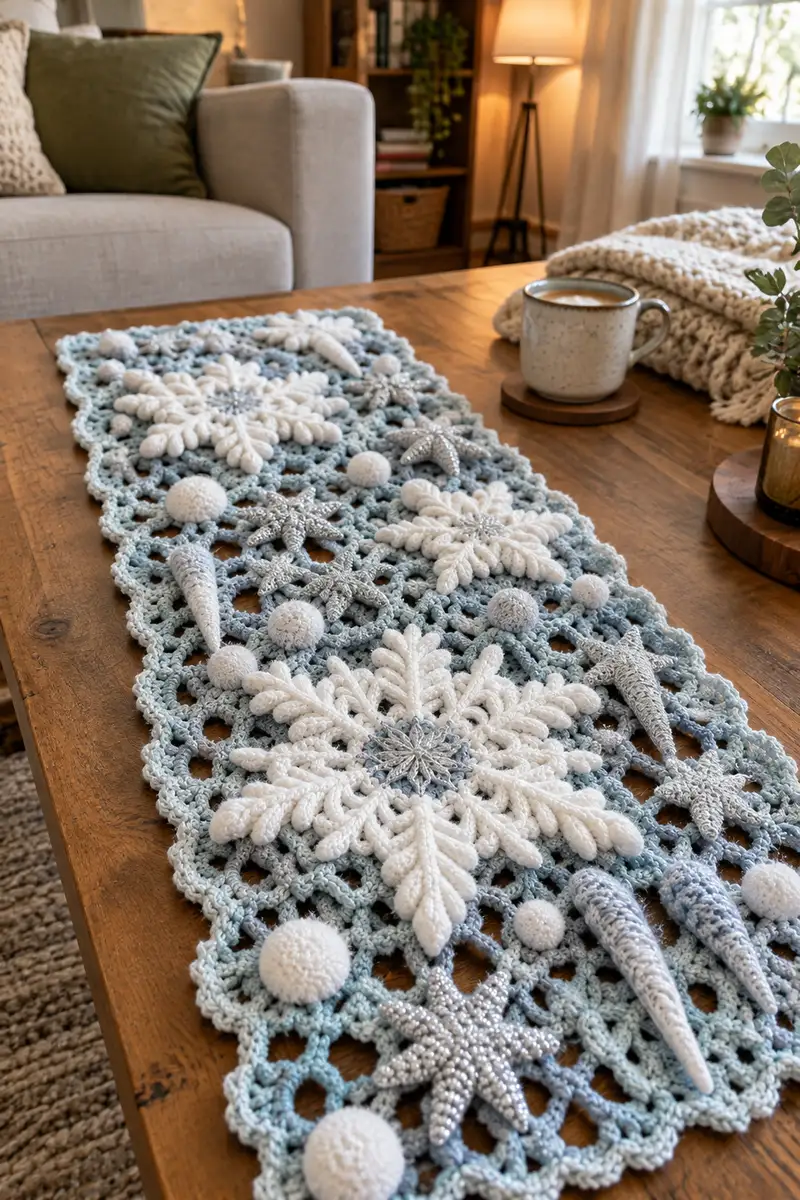
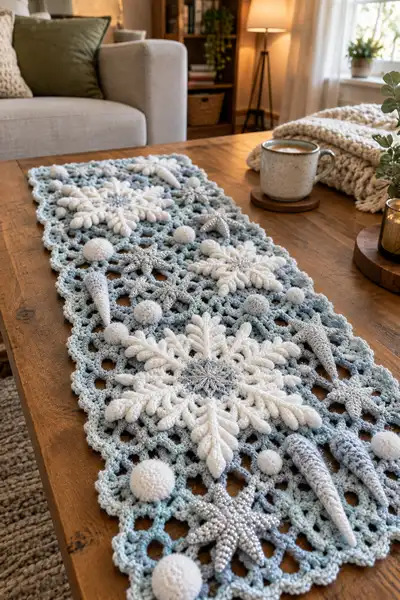
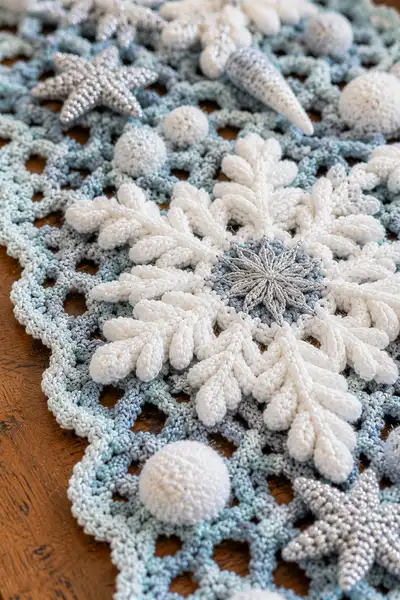
Create a stunning winter table runner featuring raised 3D snowflakes, icicle cones, bobble ornaments and a delicate lacy mesh base. This pattern combines a soft icy-blue variegated base with plush white puff snowflakes and silver accents for a luxurious, festive centerpiece. The finished runner is richly textured with layered motifs that are crocheted separately and appliqued to the mesh foundation. Detailed step-by-step instructions make assembling the motifs into a cohesive runner approachable for experienced crocheters.
Progress Tracker
0% Complete
— Base Mesh Foundation :
Round 1 :
Using variegated icy-blue yarn and 5.0mm hook, ch 100 (foundation chains create runner length; adjust ch in multiples of 10 for longer/shorter runner)
Round 2 :
Row: 1 sc in 2nd ch from hook, 1 sc in next 8 ch, *ch 4, sk next 4 ch, 1 sc in next 10 ch; rep from * across to last 9 ch, 1 sc in last 9 ch (creates alternating sc blocks and 4-ch loops)
Round 3 :
Turn and work along opposite side of foundation chain: 1 sc in each sc and 4-ch loop: in each 4-ch loop work (1 sc, ch 4, 1 sc) to form loop, continue evenly to end; join with sl st to first sc
Round 4 :
Ch1, *sc in sc, ch5, sk next sp, sc in next sc; rep across making ch-5 mesh for larger openings; join
Round 5 :
Ch2 (counts as hdc), hdc in each sc and ch-5 sp around, placing 2 hdc in each ch-5 at corners where you want an expanded grid; join (this evens the base and gives slight height)
Info :
Work first 4-6 rows firmly but not tight to create an open mesh that will support motifs; use stitch markers at start/end to maintain even width
Round 6 :
Switch to a pattern of dc clusters to form lattice: ch3 (counts as dc), *sk 2 hdc, (dc, ch2, dc) into next st (forming small 2-dc shell), sk 2 hdc, dc in next st; rep across; join
Round 7 :
Ch1, sc in each dc and ch2 sp; in each ch2 sp work (ch4, sc) to create openwork ring for motif placement; join
Round 8 :
Ch3, dc in each sc and ch4 loops around, ensuring you have a consistent set of holes (approx. 8-10 holes across width depending on starting ch); join
Round 9 :
Ch1, *sc in next 2 dc, ch4, sk 2 dc, sc in next 2 dc; rep across. This creates regular 4-ch lattice holes that will hold snowflake centers
Info :
Measure your mesh: target width about 12-14 inches for a table runner; adjust initial chain to reach desired width. Keep grid openings uniform so motifs sit flat.
Round 10 :
Ch3, dc in each sc and into ch4 loops around, placing extra dc at ends to square edges (estimated stitch count per round depends on foundation chain; remain consistent)
Round 11 :
Work 2 rounds even in dc to stabilize base (dc in each st around)
Round 12 :
Switch to ch5 lattice: *sc in next 3 dc, ch5, sk 3 dc; rep across; join
Round 13 :
Round of sc: 1 sc in each st and in each ch5 loop work (1 sc, ch5, 1 sc) to build larger loops for decorative edging and motif anchors
Round 14 :
Ch3, dc in each sc and into each ch5 loop: (2 dc, ch3, 2 dc) in every ch5 loop to make a small framed hole; join
Info :
At this stage you should have a stable lattice with regular framed holes approximately 2 cm across. These framed holes are the anchor points for attaching large snowflakes and icicles; count holes to plan motif spacing.
Round 15 :
Even round: 1 dc in each st around to flatten mesh (this will be the structural surface for motifs)
Round 16 :
Decorative picot spacing: *sc in next 4 dc, (ch3, sl st into base of ch3) picot, sk 2 dc; rep across to create gentle scallop texture in mesh
Round 17 :
1 sc in each st, join and fasten off leaving long tails at predetermined motif anchor points for sewing. Block the base lightly to square and flatten mesh before attaching motifs
Info :
Block the base mesh with pins to desired finished measurements. This is a good checkpoint to evaluate spacing and motif placement; mark where large snowflakes will sit with safety pins or removable stitch markers.
— Large 3D Puff Snowflake (Make 3) :
Round 1 :
With bulky white yarn and 6.5mm hook, make mr, ch1, 8 sc in magic ring (8)
Round 2 :
2 sc in each st around (16)
Round 3 :
(1 sc, inc) x 8 (24)
Round 4 :
(2 sc, inc) x 8 (32)
Info :
This small disc will become the center base for the puff arms. Keep tension firm so center is stable and does not warp under puff stitch pressure.
Round 5 :
Ch1, sc in each st around (32)
Round 6 :
*Ch6, sl st into next st to create loop for arm base; rep 8 times around to make 8 even loops (8 loops)
Round 7 :
Work puff arms: Into each ch6 loop work (puff stitch x 7, sl st into base) forming a chubby leaf-shaped arm. Each puff = YO, insert hook, pull loop, repeat YO insert 5 times total per puff then draw through all loops, ch1 to close puff. Repeat across 8 loops
Round 8 :
After puff row, ch1, 1 sc between each puff and 2 sc at base where arms join to keep motif flat (approx 32 sc)
Info :
Puff technique: keep loops even in height. Use a yarn needle to ease puffs into shape while still attached, aligning points for a symmetrical snowflake.
Round 9 :
Second layer of arms: In each puff stitch base work (ch8, 6 puff stitches along chain returning to base, sl st) to create elongated feathered arm; secure with sc between arms (repeat 8 times)
Round 10 :
Work 1 sc around entire motif to tidy base and reinforce the arms (approx 48 sc)
Round 11 :
Create decorative outer tips: *ch5, 1 sc into tip of outer puff, picot, sl st to base; rep around to form scalloped outer edge
Round 12 :
With silver yarn and smaller 4.0mm hook, embroider center star by working through center disc: ch1, 16 sc around center, then (ch6, sl st into center) x 8 to create a metallic star overlay; secure with bead if desired
Info :
Press puffs gently with fingers to shape. Avoid steaming as bulky yarn may flatten. Sew a small bead at center to anchor metallic overlay if using.
Round 13 :
Weave tail through back and secure; leave long tail for sewing motif onto base mesh (approx 6-8 inches)
Info :
Make three large snowflakes spaced evenly along the runner; place central one slightly off-center for visual interest. Use blocking pins to flatten each snowflake to the desired diameter before attaching.
— Medium Layered Snowflake (Make 2) :
Round 1 :
With worsted white yarn and 5.5mm hook, make mr, ch1, 10 sc in mr (10)
Round 3 :
(1 sc, inc) x 10 (30)
Round 4 :
Ch3, *sk 2 sc, (dc, ch2, dc) into next sc (forming 5 shell points); rep to make 5 shell points; join
Round 5 :
In each shell point work layered puff: ch6, along chain work 5 puff stitches anchored back at shell base, sl st to base to form a single arm; repeat in each shell (5 arms)
Round 6 :
Decorative ridge: sc around, placing 3 sc between arms and 2 sc at each arm base (approx 40 sc)
Round 7 :
With silver yarn, work star overlay: ch1, 10 sc around center, then ch5 loops securing with sl st into center to create a metallic star
Info :
These medium snowflakes sit between large snowflakes and fill visual space. They should be slightly flatter than large puffy motifs to layer smoothly.
Round 8 :
Fasten off leaving long tail for sewing. Block to flatten slightly; do not over-stretch puff arms.
— Small Star Accent (Make 4) :
Round 1 :
With silver sparkle yarn and 4.0mm hook, ch5, sl st to first ch to form ring; ch3 (counts as dc), 11 dc in ring (12)
Round 2 :
*Ch4, sl st into next dc to form a point; rep 6 times to create 6-star points; fasten off
Info :
Sew silver stars onto base mesh in between snowflakes for shimmer. Use small stitches and a dab of fabric glue under each star for extra security if runner is decorative only.
— Icicle Cone (Make 8) :
Round 1 :
With pale grey or variegated yarn and 4.0mm hook, ch6 join to form ring, ch1, 6 sc in ring (6)
Round 3 :
(1 sc, inc) x 6 (18)
Round 4 :
(2 sc, inc) x 6 (24)
Round 5 :
Even round: sc in each st (24)
Round 6 :
Decrease shaping: (3 sc, dec) x 6 (18)
Round 7 :
(2 sc, dec) x 6 (12)
Round 8 :
Stuff lightly with fiberfill to create a tapered icicle; continue: (1 sc, dec) x 6 (6)
Round 9 :
Sl st in each st to close top tightly; fasten off leaving long tail for attaching; insert more stuffing if needed before final closure
Info :
For glittery icicles, wrap silver thread around the cone body using slip stitches while working rounds 5-7. Stuff progressively as you decrease to avoid lumps.
— Rounded Ornament Spheres (Small, Medium, Large) :
Small Sphere - Round 1 :
With worsted white and 4.0mm hook: mr, ch1, 6 sc in mr (6)
Small Sphere - Round 2 :
6 inc (12)
Small Sphere - Round 3 :
(1 sc, inc) x 6 (18)
Small Sphere - Round 4 :
Even round 1 sc around (18)
Small Sphere - Round 5 :
(1 sc, dec) x 6 (12)
Small Sphere - Round 6 :
6 dec (6) — stuff lightly and close; leave tail for sewing
Medium Sphere - Round 1 :
mr, ch1, 8 sc in mr (8)
Medium Sphere - Round 2 :
8 inc (16)
Medium Sphere - Round 3 :
(1 sc, inc) x 8 (24)
Medium Sphere - Round 4 :
1 sc around (24)
Medium Sphere - Round 5 :
(1 sc, dec) x 8 (16)
Medium Sphere - Round 6 :
8 dec (8) — stuff and close
Large Sphere - Round 1 :
mr, ch1, 10 sc in mr (10)
Large Sphere - Round 2 :
10 inc (20)
Large Sphere - Round 3 :
(1 sc, inc) x 10 (30)
Large Sphere - Round 4 :
1 sc around (30)
Large Sphere - Round 5 :
(1 sc, dec) x 10 (20)
Large Sphere - Round 6 :
10 dec (10) — stuff firmly then close; leave long tail
Info :
Sew spheres to base mesh using threaded yarn needle and long tail. Vary sizes and place near larger snowflakes and star accents for dimension. Tuck tails under motifs for invisible joins.
— Silver Textured Star (Make 2-4) :
Round 1 :
Using silver sparkle yarn and 4.0mm hook, ch4, sl st to form ring, ch3, 10 dc in ring (11)
Round 2 :
*Ch6, sl st into next dc to create long point; rep 5 times to form 5 long points; after points, work 1 sc around to tidy and add small metallic beads by sewing them into the center
Info :
These stars are decorative and slightly stiff; secure them with extra stitches through mesh for longevity. Use them sparingly to avoid overwhelming design.
— Joining Motifs & Layout :
Info :
Lay blocked base mesh flat. Arrange three large snowflakes spaced roughly one third along runner length (approx every 12-15 inches), with medium snowflakes placed between them. Add icicles and spheres in clusters radiating from snowflake centers. Pin everything before sewing.
Round 1 :
Using long tail from each motif, whip stitch the motif center to the underlying ch-5 hole or framed hole previously marked on mesh; sew through base mesh and motif base several times to secure (6-8 passes)
Round 2 :
Sew each arm tip of large snowflake to mesh in 2-3 places around the arm base so arms lie flat yet retain height; do not stitch the outermost puff tips so they keep 3D volume
Round 3 :
Sew medium snowflakes and small stars using hidden ladder stitch or whip stitch; use silver yarn for decorative top stitching if desired
Info :
When attaching icicles, only sew the top 4-6 rounds into the mesh to allow the cone to hang naturally. Allow spheres to sit on mesh and tack with a few stitches on the underside for removable display if you wish.
Round 4 :
Secure any metallic overlays with small stitches into motif centers, catching center of base mesh to anchor; ensure beads are sewn on through motif and mesh for durability
Round 5 :
After all motifs are sewn, check for gaps and add small clusters of tiny spheres or star accents into empty mesh holes to balance visual weight
— Decorative Border :
Round 1 :
With variegated yarn and 5.0mm hook, join at one long edge of runner with sl st, ch1, sc evenly around runner edge working 3 sc in each corner to round corners (count depends on runner perimeter)
Round 2 :
*Ch6, sl st into 3rd sc to form scallop loop, sk 2 sc, sc in next sc; rep around to create scalloped border
Round 3 :
With white yarn, work small picot ridges: *sc in each scallop, (ch3, sl st into first ch) picot at center of scallop; rep around
Round 4 :
With silver sparkle, sl st through outer loops of scallops to add shimmer on outer edge; fasten off and weave in ends
Info :
Border tightness controls final runner drape. Keep border slightly looser if you want more scallop swing or tighter for a neat, framed edge.
— Finishing Touches :
Info :
Once all motifs are attached, inspect underside for loose tails and secure them. Lightly steam-block with a low setting and allow to dry flat on blocking board to set shape without crushing puffs.
Round 1 :
Optional: Add small beads or pearls to snowflake centers by sewing with fine thread and a beading needle. Knot securely on underside and hide knot under motif.
Round 2 :
Trim any stray fibers and do a final brushing of puffy arms with soft brush to gently open fibers if using fusible or novelty yarns
Info :
For cleaning, spot clean only. Metallic yarns may tarnish with aggressive washing — store the runner flat and avoid folding heavy motifs to prevent crushing.
This Fancy 3D Snowflake Table Runner brings winter magic to your table with its luscious puffy snowflakes, silver stars, and delicate lacy base. Each motif is a tiny sculpture that, when combined, creates a cozy and elegant display that guests will admire. The pattern rewards patience with a stunning centerpiece that feels celebratory and handmade. 🧶❄️ Whether used for the holidays or as winter decor, it makes a thoughtful heirloom-style gift. Enjoy every stitch and the sparkle it brings to your home! ✨