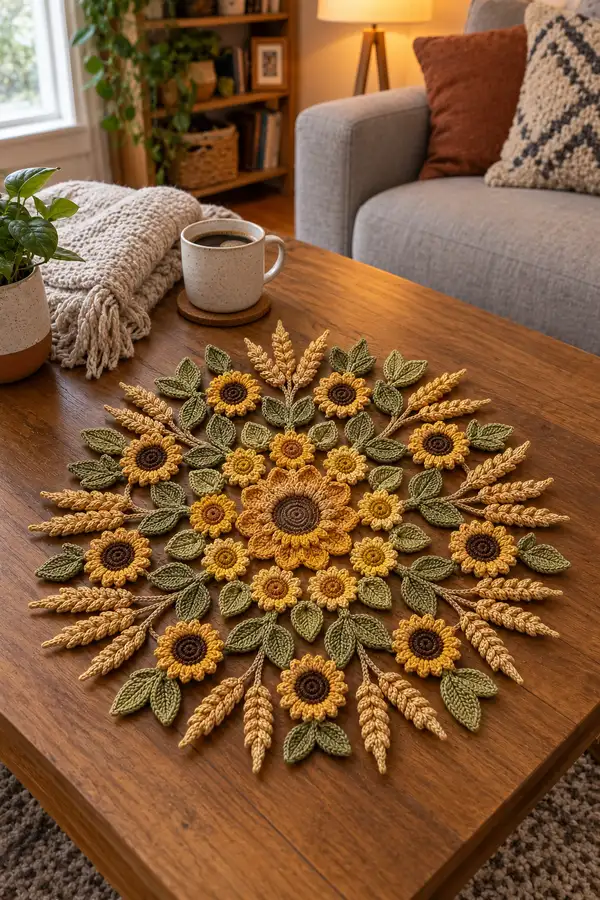
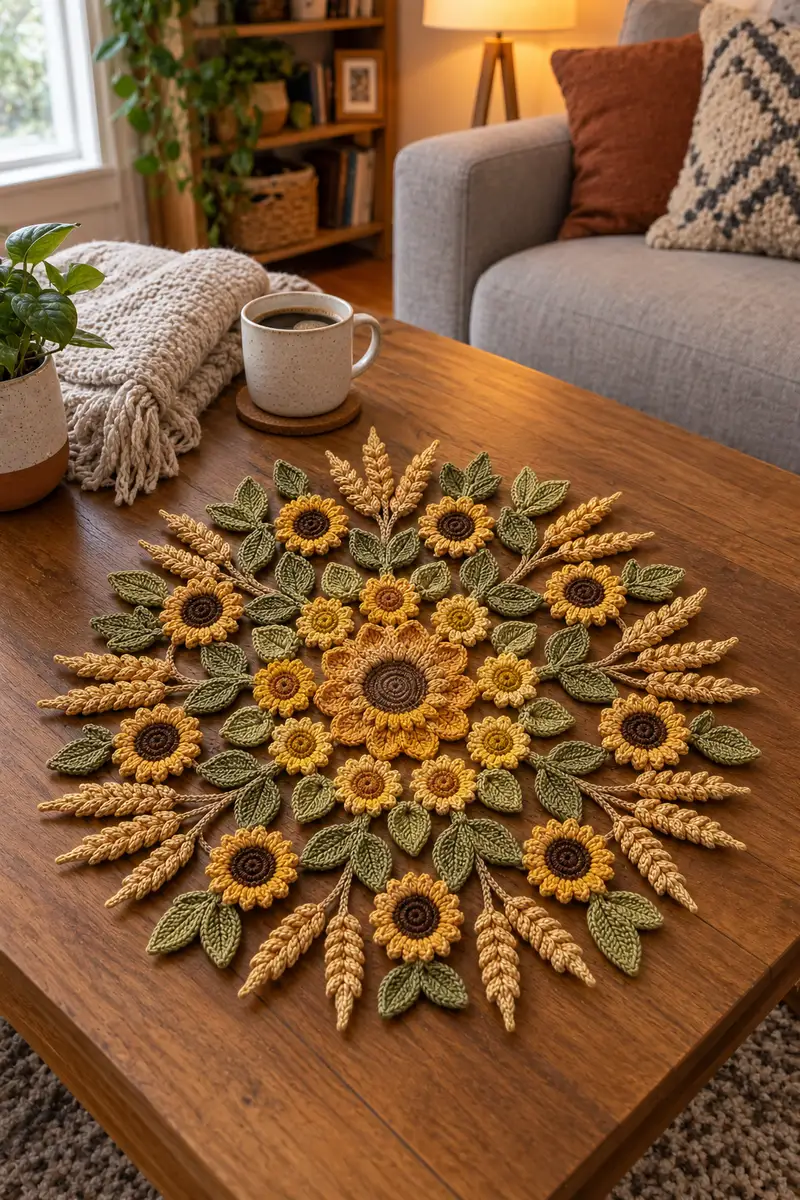
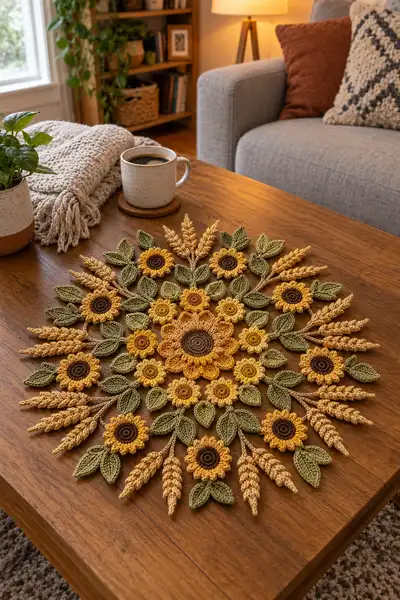
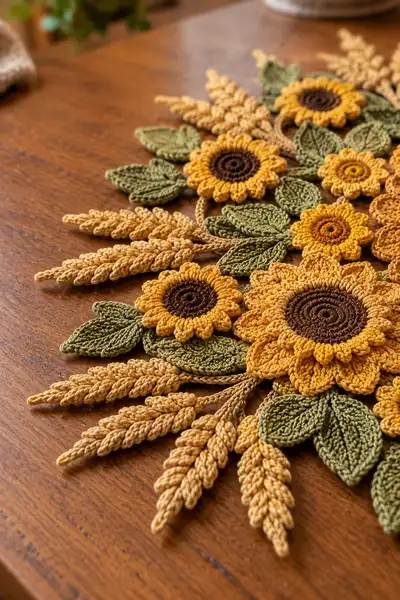
Create a warm sunflower-inspired round mandala table centerpiece featuring layered sunflowers, leafy sprigs and wheat ears. This richly textured centerpiece uses simple motifs joined into an elegant circular arrangement. Designed to sit beautifully on a coffee or dining table, it brings autumnal charm with mustard, ochre, sage and brown tones.
Progress Tracker
0% Complete
— Center Medallion (worked in dark brown) :
Round 1 :
6 sc in magic ring (6)
Round 3 :
(1 sc, inc) x 6 (18)
Round 4 :
(2 sc, inc) x 6 (24)
Round 5 :
(3 sc, inc) x 6 (30)
Info :
Keep tension firm so the center is tight and lies flat. Use a smaller hook (3.25mm) if necessary for a compact center.
Round 6 :
(4 sc, inc) x 6 (36)
Round 7 :
(5 sc, inc) x 6 (42)
Round 8 :
(6 sc, inc) x 6 (48)
Round 9 :
1 sc in each st (48)
Round 10 :
1 sc in each st BLO (48)
Info :
Working the round in BLO creates a small ridge which helps anchor the first petal layer. Place 12 evenly spaced markers to mark petal anchor points every 4 stitches.
Round 11 :
1 sc in each st (48)
Round 12 :
1 sc in each st (48)
Round 13 :
(6 sc, dec) x 6 (42)
Round 14 :
(5 sc, dec) x 6 (36)
Info :
These decreases tighten the edge so the first ring of petals sits snug and slightly cupped; do not over-tighten or the next round will pucker.
Round 15 :
(4 sc, dec) x 6 (30)
Round 16 :
1 sc in each st (30)
Round 17 :
1 sc in each st (30)
Round 18 :
1 sl st evenly around to create tidy edge; fasten off and weave in end
Info :
Weave the tail tightly through the back loops to secure the circular spiral and prevent gap at the center after attaching petals.
Round 19 :
Optional: add a second narrow round of brown surface slip-stitch detail: sl st in each st around (30)
Round 20 :
Fasten off and set medallion aside for petal attachment
Round 21 :
Optional embroidery: use contrast yarn to couch a circular ridged row around round 10 if you want extra depth
Round 22 :
Info: Light blocking of the medallion will help petals attach smoothly; steam pin to flat surface briefly
Round 23 :
Info: Prepare 12 marker points around the outer edge spaced evenly for the large petal positions; mark every 2 stitches where petals will join (12 petals)
Round 24 :
Info: This center medallion will anchor the first petal layer. Have mustard/golden yarn ready
— Large Sunflower Petal Layer (make 1 ring of 12 petals in golden yellow) :
Round 1 :
Join golden yarn at an anchor marker: ch 1, sc in same st to secure
Round 2 :
Petal (work into same base st): ch 6, skip 1 st, sl st into next anchor st to form a looped petal base. Repeat at each anchor for 12 loops (12 loops)
Round 3 :
Working into first loop: sl st, sc, hdc, 3 dc, hdc, sc, sl st (petal completed). Repeat into each loop around to make 12 petals; finish with sl st to join (12 petals)
Info :
For a puffed petal look, instead of 3 dc, work 3 puff stitches (yarn over, insert, pull up loop x 3 times, yarn over and pull through all). Puff stitches create fuller petals.
Round 4 :
Slip-stitch around the base of each petal to tidy: sl st in each st across base (approx. 48 sl st)
Round 5 :
Working at the base between petals: (ch2, sc) in the gap between petals to anchor and tighten shape. Repeat 12 times (12 ch2 spaces)
Round 6 :
Optional: Add a second petal row for depth: join yarn behind a petal and sc across back loops of petal bases for a firmer row (approx 48 sc)
Round 7 :
Info: If you chose puff petals, steam-block petals slightly with a light hand to shape the curve outward before continuing
Round 8 :
Fasten off ends and weave in securely on the back of the medallion
Round 9 :
Info: Count petal spacing to ensure 12 evenly spaced petals; resew any that sit crookedly before proceeding
Round 10 :
Optional add-on: Make a small decorative picot/loop at petal tips by joining yarn and working (sc, ch3, sl st in top of petal) on every other petal for a scalloped edge
Round 11 :
Work a tidy reverse-round behind petals to hide joins: join yarn at back, sc around base, sl st to join (approx 48 sc)
Round 12 :
Info: Fasten off and weave ends. The large sunflower center assembly is now complete. Set aside.
Round 13 :
Info: Make 1 large sunflower center; additional small sunflowers will surround this central motif.
Round 14 :
Note: Keep the medallion and large petals flat; steam lightly if petals curl inward.
Round 15 :
Optional embroidery: Using a darker mustard yarn, couch a few radial lines from center between petals for extra texture
Round 16 :
Info: For a firmer piece, add a thin fusible interfacing circle behind the medallion glued with fabric glue (optional)
Round 17 :
Finish: weave all ends to the back and trim close
Round 18 :
Info: Block large sunflower flat, pinning petal tips to achieve even circular shape
— Small Sunflower Motifs (make 10-14 small sunflower motifs in ochre and brown) :
Round 1 :
6 sc in magic ring with brown (6)
Round 3 :
(1 sc, inc) x 6 (18)
Round 4 :
Switch to ochre yarn. 1 sc in each st BLO (18)
Info :
Changing to ochre here gives a neat transition for petals; carry tail to the back and weave in later.
Round 5 :
Ch 5 at base of first petal loop, sl st into same st to make loop. Repeat around for 9-10 loops depending on desired petal tightness (10 loops)
Round 6 :
Work petal into each loop: sl st, sc, hdc, 3 dc (or 3 puff sts for more volume), hdc, sc, sl st. Repeat for each loop (10 petals)
Round 7 :
Sl st around bases to tidy and fasten off, weave in ends
Round 8 :
Info: Make 10-14 of these small flowers to arrange around the central sunflower; vary sizes by changing ch loop length (ch4 for smaller, ch6 for larger)
Round 9 :
Optional: Add a tiny cluster of seed-like surface stitches at flower center using a contrasting darker yarn for interest
Round 10 :
Info: Block small flowers flat; arrange later for even spacing in the final layout
Round 11 :
Optional: Create a slightly larger mid-sized sunflower by increasing initial rounds to 30 sts before petals (use same petal method)
Round 12 :
Fasten off all small flower motifs and weave ends
— Leaf Motif (make 28-36 leaves in sage green) :
Round 1 :
Ch 7, sc in 2nd ch from hook, hdc in next, dc in next 2, hdc in next, sc in last, turn to work along opposite side of chain and mirror: sc, hdc, dc, dc, hdc, sc. Slip stitch to first sc to form leaf (approx 12 sts)
Round 2 :
Fold leaf in half and using the front loop only along the center fold, work 6 sc along center to create a raised vein (6)
Round 3 :
Working around the leaf edge: sc in each st, 2 sc in tip st to round tip, sc back down the other side (approx 24 sc)
Round 4 :
Info: To create realistic veins, use surface slip stitch lines: with contrasting lighter green yarn, surface sl st from base to tip at 3 spaced positions
Round 5 :
BLO row: 1 sc in each st BLO to create an edge ridge (24)
Round 6 :
Fasten off leaving 10-12cm tail for sewing; lightly block each leaf with pins to flatten and shape
Round 7 :
Info: Make leaves in two sizes by varying starting ch length: ch 6 for smaller leaves, ch 8-9 for large leaves
Round 8 :
Optional: Add a small picot at leaf tip for accent: sl st, ch3, sl st in same st on every other leaf
Round 9 :
Make 28-36 leaves total, approximately 18 medium and 10-18 small, to create the layered look seen in the photo
Round 10 :
Info: Keep some leaves paired (make two identical leaves and join at base with a few slip stitches) for symmetry when sewing around motifs
— Wheat Ear Motif (make 24-30 wheat ears in tan/ochre) :
Round 1 :
Ch 30 for stem base (or adapt length to desired wheat size)
Round 2 :
Starting from 2nd ch from hook: working along chain base: (sc, ch2, sl st) to create a series of grain loops on one side: repeat across chain to tip (approx 15 loops)
Round 3 :
Turn and repeat on opposite side of chain to create mirrored loops, forming a full wheat spike (approx 30 loops)
Round 4 :
Secure tip with a sl st and fasten off, leaving long tail for sewing. Gently shape loops with fingers to stagger the 'grains' along the stem
Info :
For a plumper wheat ear, make loops slightly longer (ch3) and secure each loop with a small sc to stabilize shape.
Round 5 :
Optional: Wrap base of wheat ear with a small length of darker yarn to create a visible joint and stronger sewing point
Round 6 :
Make 24-30 ears; vary length slightly for a natural, cascading look when assembled
Round 7 :
Info: Keep stems thin and flexible; if desired, insert a short piece of floral wire inside the chain stem before finishing for poseable ears (wrap wire end to avoid poking)
Round 8 :
Optional: Add a few knotted slips along the stem base to create a thicker root attachment for sewing
Round 9 :
Fasten off and weave in ends; lightly block wheat ears to open loops evenly
Round 10 :
Info: Group wheat ears into small clusters of 3-4 during assembly for visual weight and balance
Round 11 :
Tip: Using a slightly thinner yarn for the wheat gives a delicate realistic effect; keep color range close to ochre/tan
Round 12 :
Final: trim excess tails but keep at least 7-10cm for secure sewing during assembly
— Connecting Stem & Cord (make multiple cords for joining motifs) :
Round 1 :
Ch 40-60 for stems between flowers depending on spacing desired. Single crochet along chain back on opposite side to make a tubular cord: sc in 2nd ch from hook and across (approx 39-59 sc)
Round 2 :
Optional: For a twisted rope effect, work in hdc and then twist cord while steam-setting
Round 3 :
Info: Make cords in two lengths to connect inner ring of small flowers to outer wheat/leaf ring. Prepare 12 longer and 12 shorter cords for the layout shown
Round 4 :
Finish cords by slip-stitching the last stitch and leaving long tails for sewing; do not fasten off until sewn in place
Round 5 :
Optional: Braid several thin cords together to form thicker stems for heavier clusters
Round 6 :
Info: Keep cords flat and untwisted for easy sewing; pin in position when arranging motifs.
— Inner Decorative Leaves (make 12-16 folded double leaves) :
Round 1 :
Ch 9, sc in 2nd ch from hook, hdc in next, dc in next 4, hdc, sc to tip. Mirror on the other side to form leaf (approx 22 sts)
Round 2 :
Fold leaf in half and sc through both layers along the center to form a folded leaf with a raised ridge (8 sc)
Round 3 :
Edge row: sc around edge through both layers (approx 32 sc)
Round 4 :
Info: These form fuller paired leaves that sit beneath small flowers; make 12-16 pairs
Round 5 :
Fasten off and leave long tail for sewing; block and shape as desired
Round 6 :
Optional: Add surface sl st veins for detail on the folded leaves
Round 7 :
Info: Keep some folded leaves slightly smaller to create depth
Round 8 :
Finish leaves and store for assembly
Round 9 :
Note: A balanced ratio of leaves-to-flowers determines the mandala fullness; adjust counts to taste
Round 10 :
Info: Use pins to lay out leaves with flowers before sewing to confirm arrangement.
— Layout & Assembly (step-by-step join; these are sequential assembly 'rounds') :
Round 1 :
Layout: On a flat surface or blocking board, place the large central sunflower medallion in the center. Arrange the small sunflowers in a ring around it, leaving 2-3 cm gaps for connecting cords.
Round 2 :
Info: Visual symmetry is key. Use a ruler or circular template to space small flowers evenly. Mark positions with pins.
Round 3 :
Attach small flowers: Thread yarn tail through needle, align a small flower so its back touches the medallion edge, sew through 6-8 stitches around the base to secure (repeat for each small flower)
Round 4 :
Info: Sew using mattress or whip stitch from back to front for a nearly invisible join; avoid pulling too tight which could cup the assembly.
Round 5 :
Attach folded inner leaves between small flowers: place paired leaves so they tuck under each small flower base and sew through the base rounds and central medallion edge with long tails (12-16 leaves)
Round 6 :
Attach cords: Lay longer cords connecting small flowers to the outer arc positions. Sew both ends of each cord: one end to small flower base and the other to a planned outer leaf/wheat cluster point.
Round 7 :
Info: Use temporary pins to keep stems aligned; sew the cord end with a few tight stitches around the base of the motif and knot securely on the wrong side.
Round 8 :
Place and sew wheat clusters: Group 3-4 wheat ears into a small bouquet, tie with a short yarn wrap, and sew bouquet base to outer cord end or directly to the edge of a small flower grouping.
Round 9 :
Attach outer leaves: Sew medium and small leaves into gaps between wheat clusters and small flowers to build the outer ring. Each leaf should be anchored with 3-5 secure stitches through leaf base into underlying cord or motif.
Round 10 :
Info: Alternate leaves and wheat clusters for an airy, botanical edge that mirrors the reference layout.
Round 11 :
Create additional small filler flowers: apply 6-8 tiny single-round flowers between petals and leaves to fill negative spaces and create a dense mandala look. Sew securely.
Round 12 :
Info: Use small stitches and weave tails into the underside of adjacent motifs for a clean finish; avoid leaving long knots visible on top.
Round 13 :
Edge reinforcement: Once all motifs are sewn, place a thin round of slip-stitch or single crochet around exposed base edges to tidy connections. Work sc into gaps between motifs, sl st across joins, approximately 48-72 stitches depending on combined perimeter.
Round 14 :
Info: Work this tidy edge in a neutral ochre or brown so it blends with varied motif colors and stabilizes the whole mandala.
Round 15 :
Secure loose motifs: go back to each seam and add extra tiny whip-stitches if any motif feels loose or lifts from the base.
Round 16 :
Info: Keep the mandala flat during sewing; assemble on a large foam board and pin motifs to prevent distortion.
Round 17 :
Optional: Add small decorative chain loops or picots between outer tips for a lacy finishing touch: ch4, sl st into next gap, repeat around edge
Round 18 :
Finish by weaving in all long tails securely into the wrong side of the work; trim close after weaving through several stitches
Round 19 :
Info: Use a fabric glue dot beneath critical seam areas if piece will be handled frequently to prevent loosening
Round 20 :
Set completed mandala aside for final blocking and shaping
— Outer Decorative Edge & Final Rounds :
Round 1 :
Join ochre yarn at any outer join point. Work 1 sc in each visible join stitch around to neaten edge. Aim for approximately 60-84 sc depending on final perimeter.
Round 2 :
(Ch3, skip 1 st, sc) repeat around to create small scallops. Count and adjust spacing so scallops sit evenly (approx 20-28 scallops)
Round 3 :
Optional picot: in each ch3 space work (sc, ch3, sl st in sc) to create pointed decorative edge across scallops
Round 4 :
Info: Work this decorative edge loosely; too tight an edge will cause the mandala to cup up from the surface.
Round 5 :
Finish: fasten off and weave ends to back side; ensure no raw tails show on the top decorative surface.
Round 6 :
Final blocking: Pin the mandala to a flat surface at the finished diameter (approx 40-45 cm in the sample) and lightly steam or spray with water, allow to dry fully
Round 7 :
Info: Pin each petal tip and leaf tip to achieve symmetrical shape; use even tension on each pinned point for uniformity
Round 8 :
Edge finishing: If you prefer a firmer edge, use a narrow iron-on hem or slip-stitch a second round in a darker color to create a framed look
Round 9 :
Optional: Add light non-slip felt pads to underside for table protection and to prevent sliding
Round 10 :
Info: Once blocked and finished, the mandala will lie flat on tables; store flat to preserve shape when not in use
— Final Tips & Variations :
Round 1 :
Info: To make a larger centerpiece, increase counts of small flowers and extend outer cord lengths; to make a smaller doily, reduce number of small flowers and use thinner yarn.
Round 2 :
Color swap idea: Replace ochre with soft pinks for a spring version or deep reds for a holiday look
Round 3 :
Maintenance: spot clean with damp cloth; avoid machine washing unless all ends are glued and seams reinforced
Round 4 :
Info: Keep a small repair kit (matching yarn and tapestry needle) for quick fixes to outer motifs if they loosen over time
Round 5 :
Congratulations: your mandala is complete — give it a final press and enjoy styling on your table!
Completing this round floral mandala is deeply satisfying — every petal and wheat ear adds to a layered, textured centerpiece that instantly warms your room. Pinning and blocking are part of the joy; the final reveal is worth the patience! 🧶🌻 Place it proudly on your table or gift it to someone who loves handmade home decor. Happy stitching and enjoy the cozy vibes! ✨