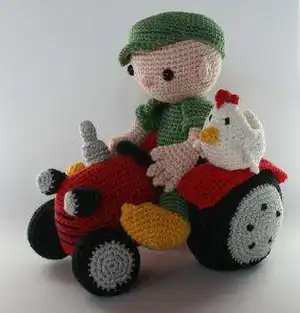
Create an adorable Farmer Teun riding his little tractor with this detailed amigurumi pattern. You'll get clear, step-by-step rounds for the tractor, farmer, chicken and all accessories. Perfect for makers who love character toys and thoughtful assembly. Enjoy a satisfying project that results in a charming handmade gift or keepsake.
Progress Tracker
0% Complete
— Tractor :
Round 2 :
Ch 1, turn around, 2 sc into the 1st sc, 12 sc, 2 sc into the next sc (= 16 sc)
Round 3 and 4 :
Ch 1, turn around, 16 sc
Round 5 :
Ch 1, turn around, sc 2 st together, 12 sc, sc 2 st together (= 14 sc)
Round 6 :
Ch 1, turn around, 14 sc
Round 7 :
Continue crocheting a round of sc along the whole work as follows: 4 sc along the side, 3 sc at the corner, 13 sc along the bottom, 3 sc at the corner, 4 sc along the side, 3 sc at the corner, 13 sc along the top, 3 sc into the last sc (= 46 sc)
Info :
Continue crocheting in rounds.
Round 9 :
6 sc, 2 sc into the next sc, 15 sc, 2 sc into the next sc, 6 sc, 2 sc into the next sc, 15 sc, 2 sc into the next sc (= 50 sc)
Round 11 :
7 sc, 2 sc into the next sc, 15 sc, 2 sc into the next sc, 8 sc, 2 sc into the next sc, 15 sc, 2 sc into the next sc, 1 sc (= 54 sc)
Round 18 :
ch 54, skip 10 sc, 1 sc into the 11th sc, 43 sc
Round 19 :
54 sc into the ch, 44 sc (= 98 sc)
— Top :
Info :
Attach the red yarn into the 1st remaining sc of round 17.
Round 1 :
10 sc along the sc.
Round 2 - 22 :
Ch 1, turn around, 10 sc
Info :
Attach the yarn onto the side of the 1st sc of the 1st round and make a round sc along the work as follows: 21 sc along the side, 2 sc at the corner, 8 sc along the top, 2 sc at the corner, 21 sc along the side (=54 sc)
Info :
Ch 1, turn around and sc the st together with the remaining loops of round 18, work from inside the tractor.
— Bottom :
Info :
The bottom is made in back and forth going rounds. Make 1 ch after each round and turn around.
Round 40 :
Continue crocheting a round of sc along the whole work as follows: 37 sc along the side, 2 sc at the corner, 8 sc along the bottom, 2 sc at the corner, 37 sc along the side, 2 sc at the corner, 8 sc along the top, 2 sc into the last sc. (=98 sc)
Info :
Don't fasten off, sc the st together with the sc of the upper part with a round of sc. Stuff the tractor while crocheting.
Info :
Embroider with black 4 stripes at the front of the tractor. Use the picture as a guide.
— Back wheels :
Round 1 :
6 sc into the 1st ch, 1 sl into the 1st sc
Round 2 :
2 sc in every sc (= 12 sc)
Round 3 :
2 sc in every 2nd sc (= 18 sc)
Round 4 :
6 times (1 sc, 2 sc into the next sc, 1 sc) (= 24 sc)
Round 5 :
2 sc in every 4th sc (= 30 sc)
Round 6 :
6 times (2 sc, 2 sc into the next sc, 2 sc) (= 36 sc)
Round 7 :
2 sc in every 6th sc (= 42 sc)
Round 8 :
6 times (3 sc, 2 sc into the next sc, 3 sc) (= 48 sc)
Info :
Continue with black.
Round 9 :
2 sc in every 4th sc (= 60 sc)
Round 10 :
2 sc in every 10th sc (=66 sc)
Round 11 :
6 times (5 sc, 2 sc into the next sc, 5 sc) (= 72 sc)
Round 12 :
2 sc in every 12th sc (= 78 sc)
Round 17 :
Sc every 12th and 13th sc together (= 72 sc)
Round 18 :
6 times (5 sc, sc 2 st together, 5 sc) (= 66 sc)
Round 19 :
Sc every 10th and 11th sc together (= 60 sc)
Round 20 :
Sc every 4th and 5th sc together (= 48 sc)
Info :
Continue with grey.
Round 21 :
6 times (3 sc, sc 2 st together, 3 sc) (= 42 sc)
Round 22 :
Sc every 6th and 7th sc together (= 36 sc)
Round 23 :
6 times (2 sc, sc 2 st together, 2 sc ) (= 30 sc)
Round 24 :
Sc every 4th and 5th sc together (= 24 sc)
Round 25 :
6 times (1 sc, sc 2 st together, 1 sc) (= 18 sc)
Round 26 :
Sc every 2nd and 3rd sc together (= 12 sc)
Round 27 :
Sc every 1st and 2nd st together (= 6 sc)
Info :
Fasten off. Close the hole and weave in the end. Embroider with black 5 spots divided at round 5. Make another wheel. Sew the wheels onto the side of the tractor.
— Mudguard :
Info :
The Mudguard is made in back and forth going rounds. Make 1 ch after each round and turn around.
Round 6 :
Continue crocheting a round of sc along the whole mudguard as follows: 4 sc along the side, 2 sc at the corner, 24 sc along the bottom, 2 sc at the corner, 4 sc along the side, 2 sc at the corner, 24 sc along the top, 2 sc into the last sc.
Info :
Make another part like this, but don't fasten off. Put the both parts on top of each other and crochet the st together with a round of sc. Fasten off.
Info :
Make another mudguard and sew the mudguards onto the wheels.
— Front wheels :
Round 1 :
6 sc into the 1st ch, 1 sl into the 1st sc
Round 2 :
2 sc in every sc (= 12 sc)
Round 3 :
2 sc in every 2nd sc (= 18 sc)
Round 4 :
6 times (1 sc, 2 sc into the next sc, 1 sc) (= 24 sc)
Info :
Continue with black.
Round 5 :
2 sc in every 4th sc (= 30 sc)
Round 6 :
6 times (2 sc, 2 sc into the next sc, 2 sc) (= 36 sc)
Round 10 :
6 times (2 sc, sc 2 st together, 2 sc) (= 30 sc)
Round 11 :
Sc every 4th and 5th sc together (= 24 sc)
Round 12 :
6 times (1 sc, sc 2 st together, 1 sc) (= 18 sc)
Round 13 :
Sc every 2nd and 3rd sc together (= 12 sc)
Round 14 :
Sc every 1st and 2nd st together (= 6 sc)
Info :
Fasten off. Close the hole and weave in the end. Make another front wheel and sew the wheel onto the side of the tractor.
— Lamp :
Round 1 :
6 sc into the 1st ch, 1 sl into the 1st sc
Round 2 :
2 sc in every sc (= 12 sc)
Info :
Continue with black.
Round 3 :
12 sc, into the back loops only.
Round 5 :
Sc every 3rd and 4th sc together (= 9 sc)
Round 7 :
Sc every 2nd and 3rd sc together (= 6 sc)
Info :
Fasten off. Close the hole and weave in the end. Make another lamp and sew the lamps at the side of the tractor.
— Pipe :
Round 1 :
6 sc into the 1st ch, 1 sl into the 1st sc
Round 2 :
6 sc, into the back loops only.
Round 5 :
2 sc in every sc, into the front loops only (= 12 sc)
Round 6 :
12 sc, into the back loops only.
Info :
End with 1 sl into the 1st sc and fasten off. Stuff the pipe and sew it on top of the tractor.
— Steering wheel :
Info :
Ch 18 with black, 1 sl into the 1st ch to make a circle.
Round 2 :
2 sc in every 3rd sc (= 24 sc)
Round 4 :
Sc every 3rd and 4th sc together (= 18 sc)
Round 5 :
Fold the work in half and sc the st together with the remaining loops of round 1 (= 18 sc)
Info :
Fasten off. Sew the steering wheel onto the tractor.
— Chair :
Round 1 :
6 sc into the 1st ch, 1 sl into the 1st sc
Round 2 :
4 sc into the 1st sc, 2 sc, 4 sc into the next sc, 2 sc (= 12 sc)
Round 3 :
1 sc, 3 times (2 sc into the next sc), 3 sc, 3 times (2 sc into the next sc), 2 sc (= 18 sc)
Round 4 :
2 sc, 3 times (2 sc into the next sc), 6 sc, 3 times(2 sc into the next sc), 4 sc (= 24 sc)
Round 5 :
3 sc, 3 times (2 sc into the next sc, 1 sc), 6 sc, 3 times (2 sc into the next sc, 1 sc), 3 sc (= 30 sc)
Round 6 :
4 sc, 3 times (2 sc into the next sc, 1 sc), 9 sc, 3 times (2 sc into the next sc, 1 sc), 5 sc (= 36 sc)
Round 7 :
6 sc, 3 times (2 sc into the next sc, 2 sc), 9 sc, 3 times (2 sc into the next sc, 2 sc), 3 sc (= 42 sc)
Info :
Make another part like this, but don't fasten off. Put the both parts on top of each other and crochet the st together with a round of sc. Continue crocheting 9 sc, ch 1, turn around, sc 2 st together, 14 sc, sc 2 st together, ch 1, turn around, sc 2 st together, 12 sc, sc 2 st together.
Info :
Fasten off. Sew the chair at the back of the tractor.
— Farmer :
Info :
Start at the bottom of the body.
Round 1 :
6 sc into the 1st ch, 1 sl into the 1st sc
Round 2 :
2 sc in every sc (= 12 sc)
Round 3 :
2 sc in every 2nd sc (= 18 sc)
Round 4 :
6 times (1 sc, 2 sc into the next sc, 1 sc) (= 24 sc)
Round 5 :
2 sc in every 4th sc (= 30 sc)
Round 6 :
6 times (2 sc, 2 sc into the next sc, 2 sc) (= 36 sc)
Round 15 :
6 times (sc 2 st together, 2 sc), 12 sc (= 30 sc)
Round 19 :
28 sc, sc 2 st together (= 29 sc)
Round 20 :
2 times (sc 2 st together), 9 sc, 3 times (sc 2 st together), 8 sc, sc 2 st together (= 23 sc)
Round 21 :
2 times (sc 2 st together), 6 sc, 3 times (sc 2 st together), 7 sc (= 18 sc)
Round 22 :
Sc every 2nd and 3rd sc together (= 12 sc)
Info :
Continue with pink.
Round 23 :
2 sc in every sc (= 24 sc)
Round 24 :
2 sc in every 4th sc (= 30 sc)
Round 25 :
6 times (2 sc, 2 sc into the next sc, 2 sc) (= 36 sc)
Round 26 :
2 sc in every 6th sc (= 42 sc)
Round 28 :
6 times (3 sc, 2 sc into the next sc, 3 sc) (= 48 sc)
Round 32 :
16 sc, 1 popcorn of 4 dc (4 dc into the 1st st, but don't finish the st completely, skip the last yarn over and pull through. There are 5 loops onto the hook. Pull the yarn over the hook and pull through all 5 loops), 31 sc (= 48 sc)
Info :
Attach the safety eyes between round 33 and round 34 with 9 st between them.
Round 38 :
6 times (3 sc, sc 2 st together, 3 sc) (= 42 sc)
Round 40 :
Sc every 6th and 7th sc together (= 36 sc)
Round 41 :
6 times (2 sc , sc 2 st together, 2 sc ) (= 30 sc)
Round 42 :
Sc every 4th and 5th sc together (= 24 sc)
Round 43 :
6 times (1 sc, sc 2 st together, 1 sc) (= 18 sc)
Round 44 :
Sc every 2nd and 3rd sc together (= 12 sc)
Round 45 :
Sc every 1st and 2nd st together (= 6 sc)
Info :
Fasten off. Close the hole and weave in the end.
— Ear :
Round 1 :
6 sc into the 1st ch, 1 sl into the 1st sc
Round 2 :
4 times (2 sc into the next sc), leave the rest of the st unworked.
Info :
Fasten off. Make another ear and sew the ears onto the side of the head between round 31 and round 35.
— Legs :
Info :
Start with the wooden shoes.
Round 1 :
6 sc into the 1st ch, 1 sl into the 1st sc
Round 2 :
4 sc into the 1st sc, 2 sc, 4 sc into the next sc, 2 sc (= 12 sc)
Round 3 :
1 sc, 3 times (2 sc into the next sc), 3 sc 3 times (2 sc into the next sc), 2 sc (= 18 sc)
Round 4 :
2 sc, 3 times (2 sc into the next sc), 6 sc, 3 times (2 sc into the next sc), 4 sc (= 24 sc)
Round 5 :
4 sc, 3 times (2 sc into the next sc), 9 sc, 3 times (2 sc into the next sc), 5 sc (= 30 sc)
Round 8 :
12 sc, ch 4, leave the rest of the st unworked.
Round 9 :
Skip 21 sc, 1 sc into the 22th sc, 8 sc, 4 sc into the ch (= 12 sc)
Round 10 :
6 times (sc 2 st together) (= 6 sc)
Info :
Fasten off. Close the hole and weave in the end.
Info :
Attach the yellow yarn into the 1st sc left from the 1st crocheted part.
Round 1 :
4 sc, ch 4, skip 13 sc, 1 sc into the 14th sc, 3 sc, 4 sc along the ch (= 16 sc)
Round 3 :
Sc every 3rd and 4th sc together (= 12 sc)
Round 4 :
Sc every 1st and 2nd st together (= 6 sc)
Info :
Fasten off. Close the hole and weave in the end. Stuff the front of the wooden shoe.
Info :
Attach the green yarn into the 1st sc left from the 2nd crocheted part.
Round 1 :
13 sc, 4 sc along the ch
Round 2 :
5 sc, 2 times (sc 2 st together), 8 sc (= 15 sc)
Round 17 :
13 sc, leave the rest of the st unworked. Stuff the legs lightly.
Round 18 :
Fold the leg in half and sc the st together with 7 sc. Fasten off.
Info :
Make another leg and sew the legs at the bottom of the body.
— Arm :
Info :
Start making the thumb and fingers.
Thumb - Info :
Ch 2 with pink.
Thumb Round 1 :
5 sc into the 1st ch, 1 sl into the 1st sc
Info :
Fasten off. Lay the thumb aside.
Finger - Info :
Ch 2 with pink.
Finger Round 1 :
4 sc into the 1st ch, 1 sl into the 1st sc
Finger Round 2 and 3 :
4 sc
Info :
Fasten off. Make 2 more fingers, don't fasten off off the last finger.
Round 4 :
Crochet the fingers together as follows (make sure the yarn ends end up inside): Continue crocheting 2 s of the 2nd finger, 4 sc of the 3rd finger, 2 sc of the 2nd finger, 4 sc of the 1st finger (= 12 sc)
Round 5 :
4 sc, 5 sc along the thumb, 8 sc (= 17 sc)
Round 6 :
4 sc, 2 times (sc 2 st together), 9 sc (=15 sc)
Round 8 :
Sc every 4th and 5th sc together (= 12 sc)
Round 9 :
Sc every 5th and 6th sc together (=10 sc)
Info :
Continue with green.
Round 15 :
2 sc in every 2nd sc (= 15 sc)
Round 16 :
2 sc in every 3rd sc, into the front loops only (= 20 sc)
Round 18 :
Sc every 3rd and 4th sc together (= 15 sc)
Round 19 :
Sc the st together with the remaining loops of round 17 (= 15 sc)
Round 20 :
2 sc in every 5th sc (= 18 sc)
Round 24 :
Sc every 2nd and 3rd sc together (= 12 sc)
Round 25 :
4 sc, leave the rest of the st unworked
Round 26 :
Fold the work in half and sc the st together with 5 sc (don't stuff the arm). Fasten off.
Info :
Make another arm and sew the arms onto the side of the body.
— Cap :
Round 1 :
6 sc into the 1st ch, 1 sl into the 1st sc
Round 2 :
2 sc in every sc (= 12 sc)
Round 3 :
2 sc in every 2nd sc (= 18 sc)
Round 4 :
6 times (1 sc, 2 sc into the next sc, 1 sc) (= 24 sc)
Round 5 :
2 sc in every 4th sc (= 30 sc)
Round 6 :
6 times (2 sc, 2 sc into the next sc, 2 sc) (= 36 sc)
Round 7 :
2 sc in every 6th sc (= 42 sc)
Round 8 :
6 times (3 sc, 2 sc into the next sc, 3 sc) (= 48 sc)
Round 10 :
2 sc in every 8th sc (= 54 sc)
Round 16 :
Ch 1, turn around, 20 sc into the back loops of the sl
Round 17 and 18 :
Ch 1, turn around, 20 sc
Round 19 :
Ch 1, turn around, sc 2 st together, 16 sc, sc 2 st together (= 18 sc)
Round 20 :
Ch 1, turn around, sc 2 st together, 14 sc, sc 2 st together (= 16 sc)
Round 21 :
Ch 1, turn around, sc 2 st together, 12 sc, sc 2 st together (= 14 sc)
Info :
Sew the cap onto the head of the farmer.
— Chicken :
Info :
Ch 2 with off white.
Round 1 :
6 sc into the 1st ch, 1 sl into the 1st sc
Round 2 :
4 sc into the 1st sc, 2 sc, 4 sc into the next sc, 2 sc (= 12 sc)
Round 3 :
1 sc, 3 times (2 sc into the next sc), 3 sc 3 times (2 sc into the next sc), 2 sc (= 18 sc)
Round 4 :
2 sc, 3 times (2 sc into the next sc), 6 sc, 3 times (2 sc into the next sc), 4 sc (= 24 sc)
Round 5 :
3 sc, 3 times (2 sc into the next sc, 1 sc), 6 sc, 3 times (2 sc into the next sc, 1 sc), 3 sc (= 30 sc)
Round 9 :
ch 6, skip 12 sc, 1 sc into the 13th sc, 17 sc
Round 10 :
6 sc into the ch, 18 sc (= 24 sc)
Round 12 :
Sc every 3rd and 4th sc together (= 18 sc)
Round 15 :
Sc every 2nd and 3rd sc together (= 12 sc)
Round 18 :
Sc every 1st and 2nd st together (= 6 sc)
Info :
Fasten off. Close the hole and weave in the end. Stuff the head.
Info :
Attach the off white yarn into the 1st remaining sc of round 9, left from the head.
Round 1 :
12 sc, 6 sc along the ch (= 18 sc)
Round 3 :
Sc every 2nd and 3rd sc together (= 12 sc)
Info :
Stuff the body and tail.
Round 5 :
Sc every 1st and 2nd st together (= 6 sc)
Info :
Fasten off. Close the hole and weave in the end.
— Beak :
Round 1 :
6 sc into the 1ststh, 1 sl into the 1st sc
Info :
End with 1 sl into the 1st sc and fasten off. Sew the beak onto the head. Embroider with black the eyes above the beak.
— Crest :
Round 1 :
1 dc into the 3rd ch, 1 dc, 1 sl, 1 dc, 1 sl
Info :
Fasten off. Sew the crest onto the top of the head.
— Left wing :
Info :
Ch 2 with off white.
Round 1 :
6 sc into the 1st ch, 1 sl into the 1st sc
Round 2 :
2 sc in every sc (= 12 sc)
Round 3 :
ch 4, 3 sc into the ch, 1 sc at the circle, ch 3, 2 sc into the ch, 1 sc at the circle, ch 2, 1 sc into the ch, 3 sc at the circle, 2 times (2 dc into the next sc), 3 sc, 1 sl.
— Right wing :
Info :
Make the right wing at the same way as the left wing till round 2.
Round 3 :
ch 2, 1 sc into the ch, 1 sc at the circle, ch 3, 2 sc into the ch, 1 sc at the circle, ch 4, 3 sc into the ch, 3 sc at the circle, 2 times (2 dc into the next sc), 3 sc, 1 sl.
Info :
Fasten off. Sew the wings onto the side of the body with the longest feather on top.
Info :
Sew the chicken onto the left mudguard. Put the farmer onto the tractor.
This charming Farmer Teun set brings together a cute farmer, a detailed tractor and a tiny chicken for a delightful handmade gift. It is perfect for display or gentle play and makes a great project to practice shaping and assembly. 🧶🧵✨