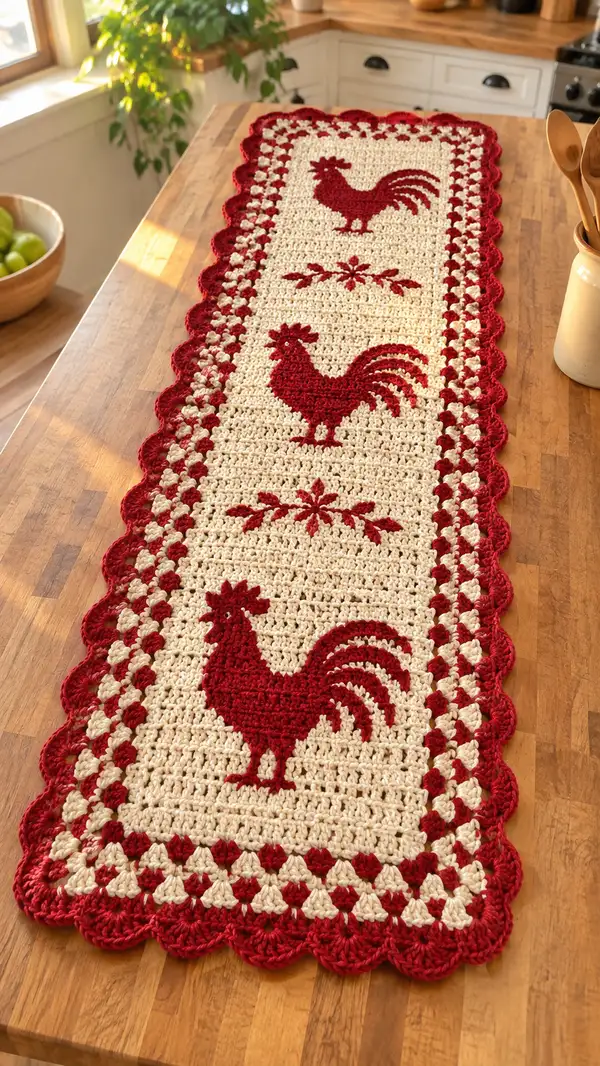
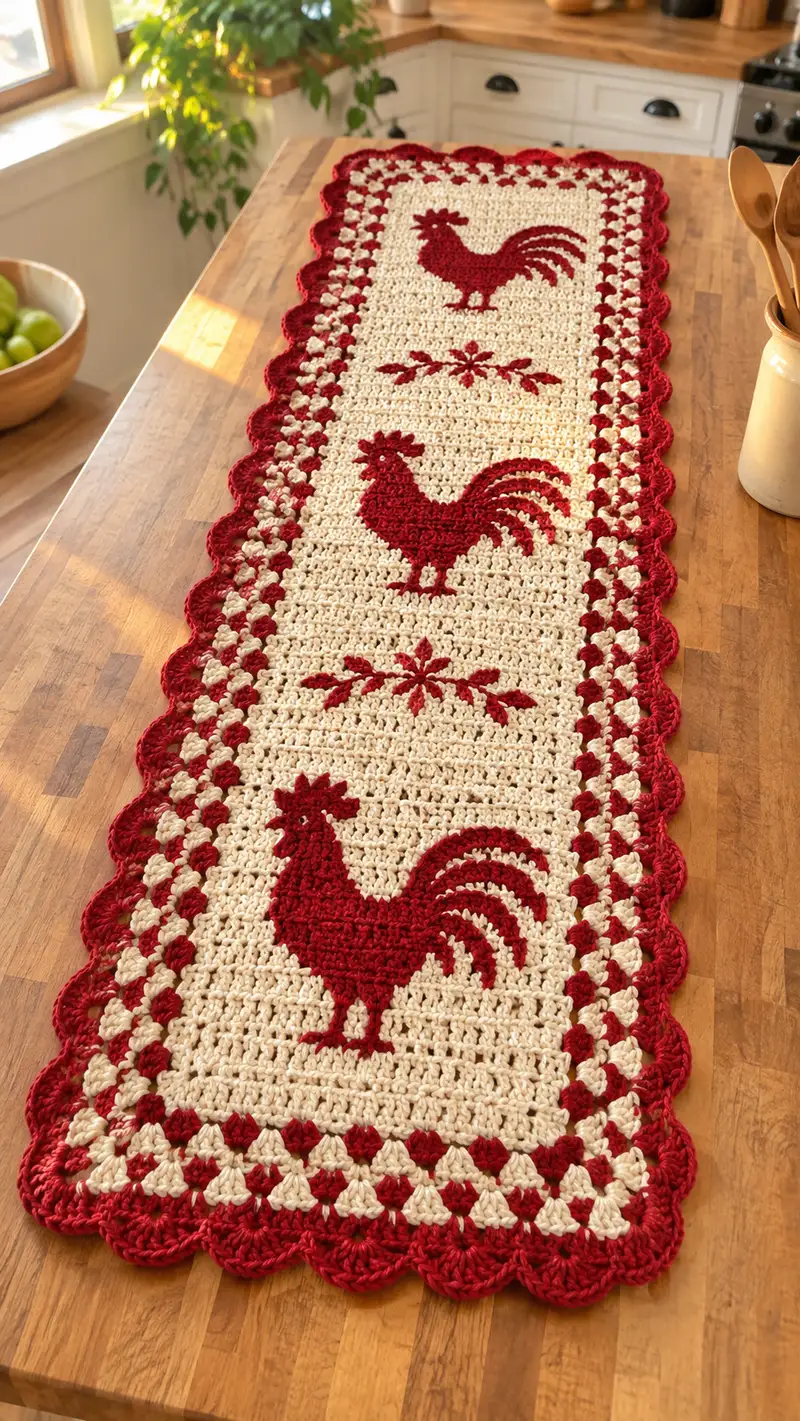
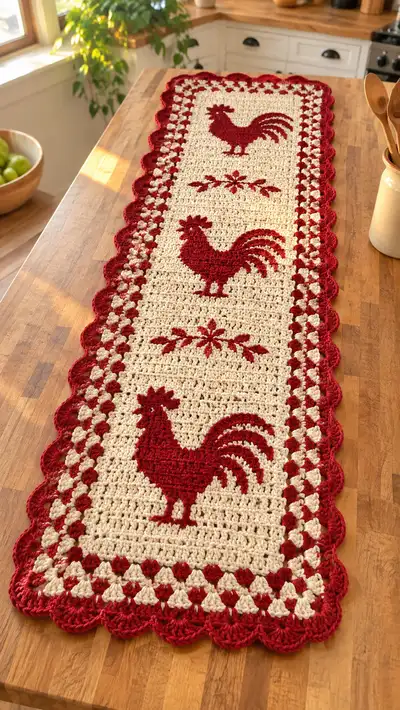
A warm farmhouse-style table runner featuring three bold rooster silhouettes worked in deep red against a cream background, framed by contrasting granny-check borders and a scalloped red edge. This long, narrow runner adds rustic charm to kitchen tables, sideboards, or entry consoles. The pattern uses worsted weight yarn, simple stitches, and surface crochet embroidery for the roosters so you can create this vintage-inspired accent with a modern finish.
Progress Tracker
0% Complete
— Foundation & Panel :
Round 1 :
Chain 129 (this creates a long runner approximately 10-12 inches wide depending on gauge; chain is worked loosely). Turn. Note: chain count is 129 to allow for a stable center field and even borders; adjust by adding multiples of 6 if you prefer a slightly wider runner.
Round 2 :
DC in 4th ch from hook (first dc counts as turning ch), dc in each stitch across. Total: 127 dc. Turn. (127)
Round 3 :
Ch 3 (counts as first dc), dc in each st across to end. Turn. Total: 127 dc. (127)
Round 4-11 :
Repeat Round 3 for eight more rows. These rows form the top buffer above your first rooster motif; maintain consistent tension. (127)
Info :
Place stitch markers at the center stitch and at quarter points to help align motifs later. To find center: fold your foundation in half to locate center and mark. For this chain the center column sits between sts 63 and 64 approximately; mark both if needed.
Round 12-31 :
Continue working even DC rows across the entire width to establish the background field. Work rows 12 through 31 (20 rows) in cream. These rows will host the first rooster motif placed by surface crochet later. Maintain 127 dc each row. (127)
Info :
If you prefer to work the roosters as tapestry intarsia while crocheting the panel, place color change markers now and follow a chart. This pattern assumes you will work the entire panel in cream and add motifs later by surface crochet for cleaner edges.
Round 32-37 :
Work 6 even DC rows in cream as a spacer between motifs. These rows give breathing space for the motif and will help center the design. (127)
Round 38-57 :
Work 20 DC rows in cream to create the panel that will receive the second (middle) rooster motif. Keep stitch count consistent and use stitch markers to mark motif center. (127)
Info :
After completing 57 rows total from the top (including foundation), you will have space for three identical rooster motifs staggered down the center. Use removable stitch markers to mark the top and center row for each motif area before proceeding.
Round 58-63 :
Work 6 DC rows in cream as the spacer between the second and third rooster motif. (127)
Round 64-83 :
Work 20 DC rows in cream to build the panel that will receive the bottom rooster motif. (127)
Round 84-91 :
Work 8 DC rows in cream as the bottom buffer of the runner. You should now have approximately 91 rows total worked in the main field. (127)
Info :
At this point block the panel flat to square up edges. Blocking will make the later border rounds and scalloped edging sit neatly. Pin the panel to desired final measurements, steam or wet block lightly according to yarn manufacturer instructions, then allow to dry.
— Rooster Motifs (Surface Crochet Embroidery) :
Info :
We recommend working the roosters using surface slip stitch (also called surface crochet) with contrast red yarn onto the completed cream panel. Surface crochet gives crisp lines and allows you to adjust placement precisely. You will work across existing rows rather than adding new rows. Prepare a clear chart (stitch grid) or print the silhouette template; this step-by-step provides placement guidance and explicit stitch-by-stitch surface directions for all three roosters.
Round 1 :
Transfer your cream panel to a flat work surface. Using removable pins or markers note the top-left corner of the center motif area you prepared earlier. Start with the top rooster area: find the top row of the motif area (this is Row 12 of the completed panel). Mark the starting stitch at 35 sts in from the left edge (this is the left margin so each motif sits centered within the 127-st width).
Round 2 :
Attach red yarn with a slip knot to the right of the starting stitch on the surface (or on wrong side and bring up through the first target st). Work 1 surface sl st across each top-of-stitch along the outline for the first row of the silhouette. For a smoother line, keep tension even. This row defines the top-most head/comb region of the rooster. Count: you should work approximately 6–10 surface sl st across the comb/top depending on your placement.
Round 3 :
Continue working surface sl st lines for the second silhouette row directly beneath the first, following the silhouette chart. Typically the head and neck begin to widen; work approximately 12 surface sl st across the neck/body area. Keep counts consistent with your chart. Fasten yarn securely but do not cut until motif is complete. (Approx 12 sts)
Round 4 :
Work surface sl st row for chest/body. The silhouette grows wider — expect to work a run of roughly 18–24 surface sl sts depending on the width of your chosen silhouette. Maintain even spacing and keep the stitches snug against the fabric. This creates a dense red area when repeated across adjacent stitches. (Approx 20 sts)
Info :
When changing direction of the silhouette edge, make a tiny anchor sl st in the base row to pivot cleanly (this prevents large floats). Keep the wrong side neat by catching floats every 6–8 stitches if you carry yarn across the field.
Round 5 :
Work the lower-belly surface rows; continue to expand the red area to create the body shape. Use shorter runs near the leg area and a slightly wider run where the body peaks. (Approx 22 sts)
Round 6 :
At the leg placement, work two small vertical runs of surface sl st to create the first leg, then move back to fill the body — this creates a small gap for the leg shape to remain cream until you outline and fill the leg precisely. (Leg runs approx 3 sts each)
Round 7 :
Work tail base: begin a curved sequence of surface stitches fanning out to the right (for a right-facing rooster); work progressively longer runs (4, 6, 8 stitches) across successive surface rows to create the tail feathers. Use a slight stagger to emulate feather layering. Pin shape lightly to hold while filling. (Tail fan series)
Round 8 :
Fill in the body with closely spaced surface sl st rows until you have dense coverage and a solid silhouette. Work rows across the widest part of the body with consistent stitch density. Aim for coverage that fully hides the cream background within the rooster outlines. (Filling step)
Info :
Leave small holes at the bottom of each leg to work defined leg shaping later; this gives clean separation between body and legs. Use a tapestry needle and shorter surface stitches to shape the toes if you prefer more detail.
Round 9 :
Work defined leg sl st runs on the surface where you left the gaps — add small horizontal stitches for toes (3 short stitches per foot). Secure ends on the wrong side and weave in firmly. (Leg detail)
Round 10 :
Work the comb and wattle details: tiny vertical surface clusters or a short chain of sl sts to create the comb's scalloped edge. Add a small single slip stitch for an eye and attach a tiny contrasting highlight (e.g., a simple French knot with embroidery floss) if desired. (Facial details)
Round 11-20 :
Repeat Rounds 2–10 logic to fill and refine the silhouette, smoothing edges and filling any gaps. Each repetition increases density and sharpness of silhouette lines. Fasten off and weave ends. These steps finish the top rooster motif. (Finishing top motif)
Info :
Use the same method for the middle and bottom roosters — align each motif to the markers you placed earlier. For consistent sizing, measure from the top of each motif area to the bottom and ensure each rooster uses approximately the same number of surface rows and width (about 20 surface-row equivalents each).
Round 21-60 :
Work the middle rooster using the same 20-step surface crochet procedure over the center motif area you prepared (approx 20 surface-row equivalents). Then repeat for the bottom rooster over the final motif area. Allow yourself to adjust detail and tail shape slightly between roosters for visual interest while keeping overall silhouette proportions consistent. (Complete three roosters)
Info :
As you work the three roosters, step back often to ensure the silhouettes align vertically and are centered. Use a clear ruler or quilting ruler to confirm that the center of each rooster aligns with the center stitch markers. Small differences add charm, but large shifts are noticeable on a long runner.
— Granny-Check Border (worked around the center panel) :
Round 1 :
With cream yarn and RS facing, attach with sl st to one short side corner (bottom right corner of the panel when facing RS). Ch 3 (counts as first dc), work 1 dc into corner, ch 2, work 2 dc into same corner (this creates the 'corner group'). Turn to work along the long edge: *skip 2 sts, work 3 dc cluster in next st (this creates a small granny cluster), ch 1, skip 2 sts, 3 dc cluster in next st; rep across until you reach the next corner. At corner, work 2 dc, ch 2, 2 dc in corner. Continue around the remaining sides repeating the granny-check pattern, joining with sl st to top of starting ch-3. Note: When you reach the short ends, make sure corner groups are symmetrical. This first border round sets the granny-check framework. Maintain approx stitch groups to align with 127-st row width.
Round 2 :
Change to deep red yarn. Slip stitch to the ch-2 corner sp, ch 3, 2 dc in same corner sp, ch 1, *work 3 dc cluster in each ch-1 space across the long side (3-dc cluster, ch 1, next cluster), transitioning at short sides with corner 3 dc, ch 2, 3 dc. Join with sl st to top of ch-3. This creates alternating checker clusters in red and cream when the next round is worked. (Granny-check round in red)
Info :
Ensure that your clusters sit evenly by counting clusters rather than individual stitches across each side. Aim for an equal number of cluster spaces on both long sides to maintain symmetry.
Round 3 :
Change to cream and repeat the cluster round similar to Round 1 but now working 3-dc clusters into the ch-1 spaces of the previous round to create a checkerboard effect. This alternation of cream and red clusters builds the classic granny-check border seen in the photo.
Round 4-6 :
Work two more rounds repeating Round 2 (red) then Round 3 (cream) as needed until you reach desired border thickness — in the sample runner there are three full checker rounds in alternating colors which creates a bold frame for the center field. Each round should maintain the corner 2dc-ch2-2dc structure and clusters in the side spaces. (3 alternating rounds total)
Info :
If you prefer a subtler frame, stop after two rounds; for a chunkier look add a fourth alternation. Keep the counts even by adjusting final cluster placement at short sides so corners remain square.
— Scalloped Edge (Final finishing rounds) :
Round 1 :
With deep red yarn and RS facing, attach with sl st to any ch-2 corner sp. Ch 1, sc in same corner sp. Work sc evenly around the entire runner along the outer edge of the granny-check border to create a foundation for the scallops. Maintain even spacing — approximately 1 sc for every cluster or stitch group around the perimeter. Join with sl st. (sc foundation round)
Round 2 :
Ch 1, sc in same st, *skip 3 foundation sc, in next sc work (5 dc, sl st to base of this 5-dc group) to make a shell, skip 3 sc, sc in next sc; rep from * around. On the short ends you may need to work 3-dc shells instead of 5 to maintain even spacing; adjust to keep scallops even. Join with sl st and fasten off. This creates the deep red scalloped edge shown in the photo. (scallop round)
Round 3 :
Optional: For an extra pronounced scallop, work a finishing round of slip stitches around the perimeter into the base of each shell to tidy the edge. Work sl st into the top of each shell and around corners to smooth transitions. Weave in any remaining ends and block carefully again to shape the scallops. (finishing slip stitch round)
Info :
If any scallops feel uneven after blocking, you can adjust by adding or removing a slip stitch at shell bases to even spacing. The scallop will look deepest in red if shells are 5 dc; reduce to 3 dc only where needed to make the shells fit around corners evenly.
— Finishing & Final Touches :
Round 1 :
Weave in all ends securely with a yarn needle on the wrong side. Trim close without cutting base stitches. For the surface crochet roosters, ensure all floats and tails are secured on the wrong side and stitched in several directions to avoid pull-throughs.
Round 2 :
Final block the entire runner to measurements. Pin scallops smoothly and allow panel to dry totally. Press very lightly on low heat through a damp cloth if yarn manufacturer allows; otherwise reshape while wet and allow to dry.
Round 3 :
Optional: Add a thin non-slip pad beneath the runner if placing on a smooth surface. If used as a table centerpiece under dishes, avoid placing hot items directly on the yarn.
Info :
Label or photograph your placement of rooster motifs if you plan to replicate this runner — this helps reproduce consistent spacing in future projects or gifted pieces.
Creating this farmhouse rooster runner is such a satisfying project — the warm cream background and deep red silhouettes feel both vintage and fresh. The mix of simple double crochet rows, granny-check framing, and surface crochet motifs lets you focus on flow and placement without complicated shaping. Blocking and careful finishing turn a long strip of crochet into a country-chic centerpiece that brightens any kitchen or table. 🧶🌾✨ Display it proudly or gift it to someone who loves rustic charm — it’s handmade warmth in every stitch!