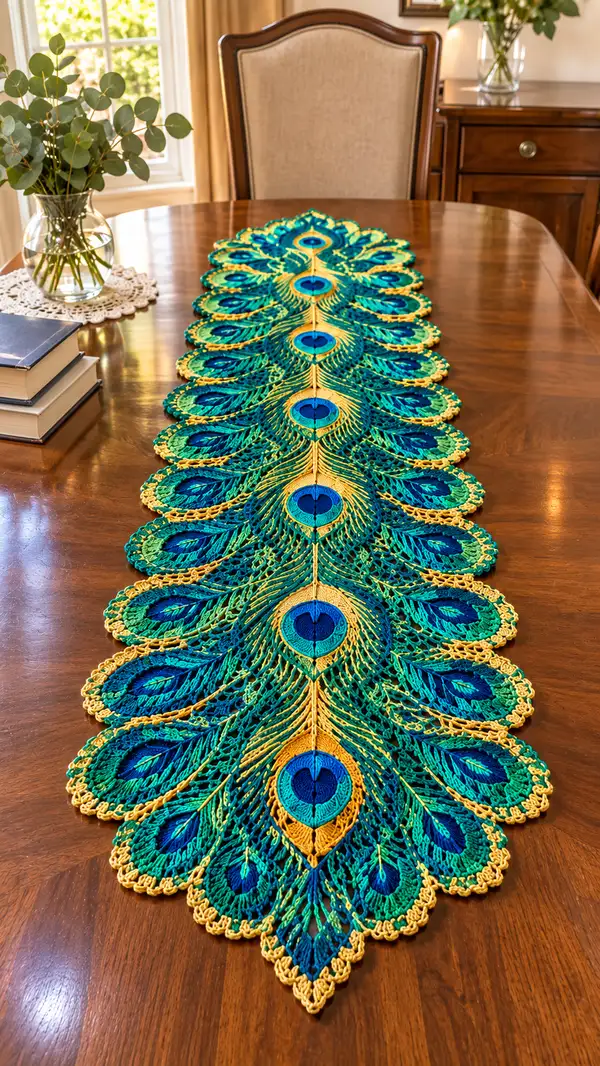
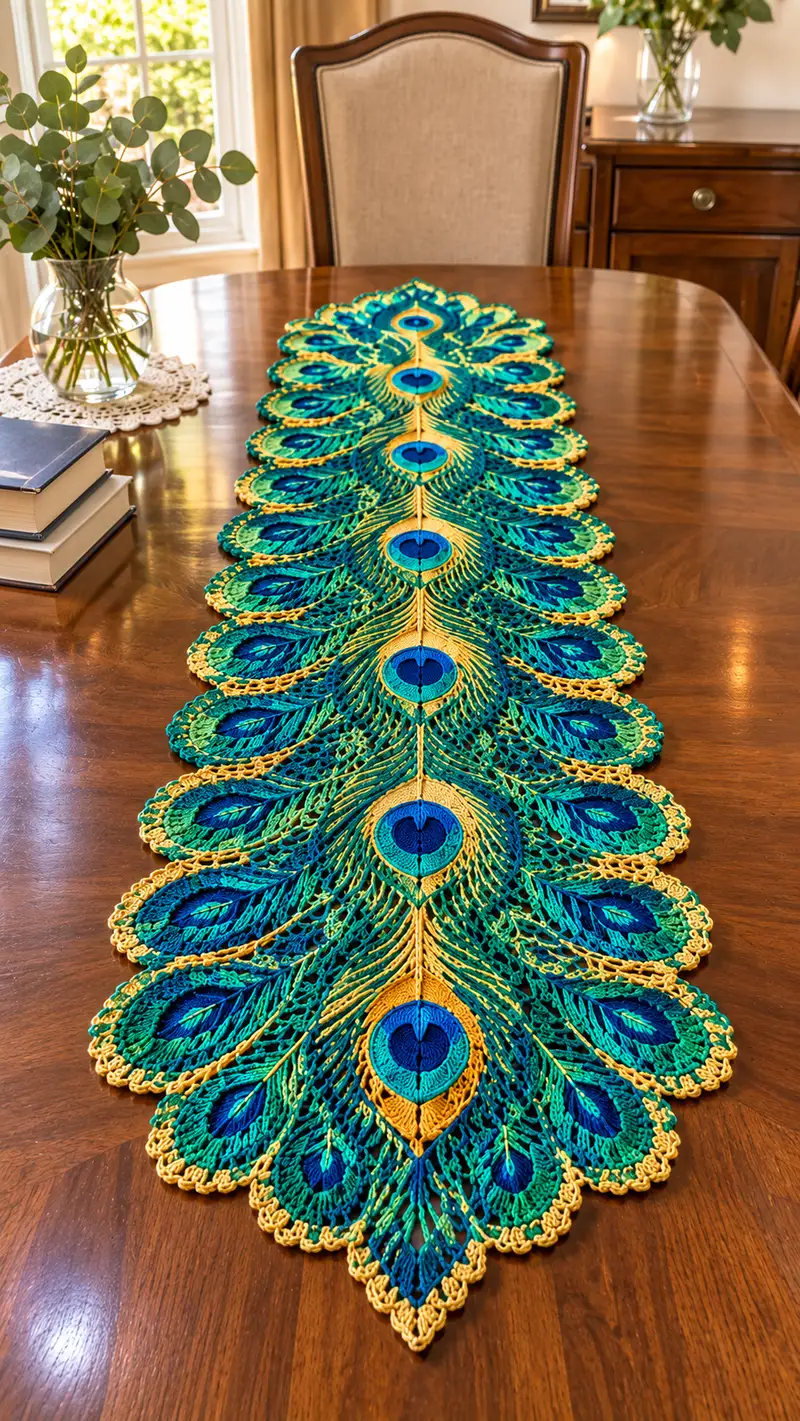
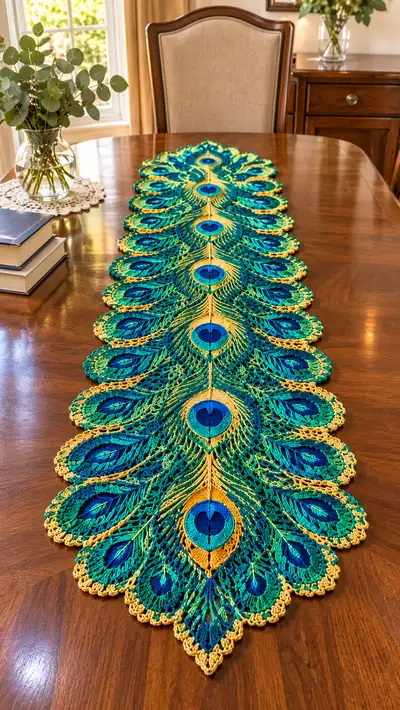
A stunning peacock-feather inspired table runner worked in vibrant teal, emerald, royal blue and gold. This long lace runner features repeating peacock-eye motifs joined by an elegant central spine and scalloped gold edging. The pattern uses delicate lace stitches, openwork chains and layered fans to mimic real peacock feathers. Perfect for a dramatic dining table centerpiece or seasonal showpiece.
Progress Tracker
0% Complete
— Overview & Gauge :
Info :
This pattern creates repeating peacock-feather motifs mirrored across a central spine. Make a gauge swatch of one full motif to determine your hook choice and tension. A single completed feather-eye motif blocked should measure approximately 9.5-10.5cm wide (3.7-4.2in) and 22-24cm long (8.6-9.4in) depending on yarn. The sample runner pictured is 9 motif pairs long (18 feather units) plus tapered ends, approximately 160-180cm long.
Info :
Use a 2.75-3.0mm hook with fingering weight cotton for crisp lace. If your motifs are too loose or saggy, drop a half-size hook. If too tight, go up a half size. Block motifs firmly to exact shape as you will assemble them after blocking.
— Materials & Color Strategy :
Info :
Main gradient variegated teal yarn will work for the outer feather layers. Use royal blue for the inner eye, gold for the spine and scalloped edging. You will be changing colors between rounds frequently to achieve the layered peacock effect; carry yarn inside motifs where possible but do not carry gold across large open sections—fasten off and weave ends instead.
— Eye Motif (Make one for each feather eye center) :
Round 1 :
With royal blue, mr, ch1, 6 sc in ring (6)
Round 2 :
Inc in each st around (12)
Round 3 :
(1 sc, inc) x6 (18)
Round 4 :
(2 sc, inc) x6 (24)
Round 5 :
(3 sc, inc) x6 (30)
Info :
Keep stitches loose enough to allow the eye to lie flat. Check that circle is not cupping or ruffling. If it cups, increase one round of even sc.
Round 6 :
1 sc in each st (30)
Round 7 :
Switch to deep teal (fasten off royal blue). Ch2 (counts as hdc), hdc in same st and next 4 sts, (hdc, 1 ch) around to create subtle texture: work pattern to create 6 hdc groups, ending with sl st to top of initial ch2 (30)
Round 8 :
With emerald, ch3 (counts as dc), dc in each st around (30)
Info :
This inner eye component uses short rounds and color changes to achieve the concentric peacock-eye. Fasten off each color cleanly and weave tails inward for a neat center.
Round 9 :
With turquoise, ch1, sc in each st (30)
Round 10 :
Change to variegated teal, ch3, (dc, ch2, dc) in same st to start small petal cluster. *Skip 2 sts, (dc, ch2, dc) in next st; rep from * around creating eight petal anchors (8 clusters)
Round 11 :
Work shell fans around each cluster: in each ch2 sp work (2 dc, ch2, 2 dc) to expand the eye into a teardrop form (8 shells). Sl st to join to first dc.
Round 12 :
Ch1, 1 sc in each st and 3 sc in each ch2 sp to smooth the shells (approx 64 sts)
Info :
Round counts will vary slightly depending on exact shell smoothing; aim for a neat teardrop active 'eye' measuring roughly 4.5-6cm across after blocking.
Round 13 :
With deep green, ch4 (counts as tr), tr in next st, (ch3, sk 2, 3 tr in next 3 sts) around to create the first rake of feather ridges, ending sl st to top of initial ch4 (approx 20 cluster groups)
Round 14 :
Ch2, dc into all tr clusters to lock them, creating a slightly raised ring around the eye (approx 64-70 dc)
Round 15 :
Change to variegated teal. Work chains and long treble loops outwards to start feather 'veins': *(ch6, skip 3 sts, sc in next st, ch6) repeat across oval, placing sc anchors evenly (approx 18-22 anchors)
Info :
These long chain loops form the inner veins and will be crocheted over later to form the layered feather look. Keep chains even and tension consistent—use stitch markers if needed to mark anchor points.
Round 16 :
Working into chain loops from previous round: in each long ch6 loop work (sc, hdc, 3 dc, hdc, sc) to produce a fan within each loop. This expands the eye shape naturally (approx 18-22 fans)
Round 17 :
Ch1, sc around entire motif including fan edges to tidy and prepare for petal extension (approx 140 sts depending on fan counts)
Round 18 :
Change to gold, ch3, (dc, ch2, dc) into select outer spaces to begin gold decorative ring. Place 12-14 gold V-sts evenly around motif, sl st to join.
Round 19 :
Ch1, sc in each st and sc in each ch2 sp around. Fasten off gold and weave ends to back neatly (final eye motif finished)
Info :
Block eye motifs flat and pointy end down to shape teardrop precisely. Make as many eye motifs as needed for number of feather units in your runner.
— Outer Feather Petal (Make one and attach to each side of eye) :
Round 1 :
Join variegated teal at base of eye where outer petal will begin, ch6, sl st into anchor point to create first loop (counts as base chain)
Round 2 :
Ch3 (counts dc), 11 dc in chain loop, sl st to anchor (12 dc fan)
Round 3 :
Ch4 (counts as tr), tr in each dc across fan, ch2, sl st to next anchor point to form a long petal arc (12 tr)
Round 4 :
Ch1, sc in each tr to create a solid base for next openwork row (12 sc)
Round 5 :
Openwork: *(ch8, sk 2, sc in next st) repeat across arc to create chain-lace openings (approx 12 ch8 loops)
Info :
These ch8 loops will later be worked into elongated chain spaces to mimic the feather's airy structure. Keep loops consistent; use a stitch marker at the midpoint of each petal arc for symmetry.
Round 6 :
Work into the back of the ch8 loops from previous round: in each ch8 work (sc, hdc, 5 dc, hdc, sc) to form elongated fans. This increases width and creates layered texture (approx 12 fans)
Round 7 :
Ch1, 1 sc in each st across petal foundation, working 3 sc in each ch2 sp from previous rounds as needed to keep even (approx 100-110 sts across petal)
Round 8 :
Change to deep green for subtle shading at petal tips. *(ch6, sl st into alternate spaces along petal edge) repeat to create a braiding effect around edges (approx 24 loops)
Round 9 :
Into each ch6 loop work (sc, hdc, 3 dc, hdc, sc) to create scalloped feather edges and texture (approx 24 scallops)
Round 10 :
Ch1, sc around entire petal and join to motif with sl st, fasten off if desired. Repeat mirror petal on other side of eye motif to make a full feather unit.
Info :
Make symmetrical left and right petals by counting stitches precisely and using markers to ensure both sides match. Block petals stretched slightly outward to emphasize the feather silhouette.
— Feather Vein Rows (Create layered lace veins for each feather) :
Round 1 :
Attach gold at the back center top of eye motif; ch40 (spine chain), sl st to base of next eye to create the runner center spine later. This ch40 is a sample length for single feather; for long runner leave long central chain and work veins from it when assembling.
Round 2 :
Working back into chain, *ch18, sl st into chain at interval to form long loop representing a group of long feather strands. Repeat along the chain to create 6-8 long loop groups per feather (adjust as needed for motif width)
Round 3 :
In each ch18 loop, work (sc, ch6, 3 dc, ch6, sc) to produce long airy strands with a fan at center. These become the feather veins that spread across the petal structure (6-8 fans)
Round 4 :
Ch1, sl st back to motif and tack the bases with sc stitches to anchor vein groups to the petal foundation. Fasten off excess gold tails and weave in.
Info :
These delicate vein loops create the linear feather appearance. Keep loops consistent length and anchor points even on both sides of the central spine for a balanced look.
— Large Outer Feather Expansion (Add rounds to widen feather shape) :
Round 1 :
Join variegated teal at outermost edge of petal, ch3, 2 dc in same st, *ch3, sk 2, (3 dc, ch3, 3 dc) in next anchor to form elongated shells around outer edges. Repeat around to shape large scalloped feather edge (approx 16-20 shells)
Round 2 :
Ch1, sc in each st and 3 sc in each shell ch3 sp to even out (approx 180-200 sts depending on shells)
Round 3 :
Switch to gold. Work decorative looped picot edging: *(ch5, sl st in 3rd ch from hook to create a small loop, sl st to next st) around each scallop to create a gold lacy border; sl st to join.
Info :
Gold edging emphasizes the feather silhouette and gives a finished look. You may increase or decrease shells to change the scale of each feather unit.
— Mirror Feather Unit Assembly (Make a full feather by combining eye + two outer petals) :
Round 1 :
Pin eye motif centered. Pin one outer petal on right and mirror petal on left aligning their bases with the eye outer join points. Use 1.5x the base ch to ensure proper overlap.
Round 2 :
Sew petals to eye using gold or matching thread with a whip stitch through the back loops only so the join remains invisible on the front. Use approx 10-14 evenly spaced mattress stitches for each petal base depending on motif size.
Info :
Before sewing, pin the entire feather unit on a blocking mat and wet-block to the final shape. Let dry thoroughly to maintain shape during joining to spine.
— Center Spine Unit (Create long central chain and decorative ridge) :
Round 1 :
Using gold, ch a long centre chain the full length of your runner, leaving about 5cm extra at each end for tapered tips. For a 170cm runner chain approx 420-480 chain stitches depending on yarn stretch—measure as you go.
Round 2 :
Working back along chain: sc in each ch across to create a firm decorative cord (do not turn). This forms a flattened spine about 1-1.5cm wide. Fasten off and weave ends.
Info :
The central gold spine gives a strong visual axis and anchor for sewing feather units. Make the spine slightly narrower than motif bases so motifs overlap and lay flat.
Round 3 :
Optional decorative ridge: rejoin gold along centre of sc spine and work a row of raised tr clusters: *ch2, (tr3tog cluster over next 3 sts), ch2, sl st into next st; repeat along to create vertical rib. This will help visually separate mirrored feathers.
— Joining Feather Units to Spine (Repeat for each motif pair across runner) :
Round 1 :
Block each full feather unit flat. Pin the spine into place on table. Starting at one end, position the first feather unit so its center base sits directly over the spine center—make sure the eye points outward/up the runner as in image.
Round 2 :
Sew feather base to spine with neat slip-stitch ladder method or whip stitch through both spine sc and the motif base. Use gold yarn to make the seam discreet; stitch every 6-8 stitches across base for stability.
Round 3 :
Pin the mirrored feather for the other side of the spine and repeat sewing so the two petals mirror each other forming a full feather on either side of the spine (a left and right pair around one eye). Keep spacing consistent: allow 2-3 chains of gold spine between each motif pair for visual breathing space.
Info :
Accurate spacing determines final length—measure as you go. For the photographed runner, motifs are placed very close with minimal spacing to create a dense flowing repeat. Use pins to ensure symmetry along entire runner before final stitching.
— Tapered End Feathers & Repeat Instructions :
Round 1 :
To create tapered ends, make smaller scaled eye motifs by skipping outer expansion rounds on last two feathers at each end (reduce outer fan rounds by 2-3 and use smaller shells). This creates a smooth tapered finish similar to the photo.
Round 2 :
Space feather units evenly along spine: For the sample runner with 9 pairs, place the first tapered feather 1.5cm from the start of the spine, then space each subsequent pair approximately 16-18cm apart measured from eye centers. Adjust spacing to taste for a longer/shorter runner.
Info :
You can make the runner shorter or longer by adding/removing motif pairs. Keep symmetry by always adding motifs in mirror pairs—left and right—around the spine.
— Edge Scallop & Final Border (Work after all units are joined) :
Round 1 :
With gold, join at outermost petal tip on one end. Ch1, sc evenly around entire exposed outer edge of runner including petal outer shells and bottom points. Work 1 sc per stitch or 3 sc in shell ch spaces to even counts (this round evens the edge and prepares for scalloped picot border).
Round 2 :
Ch5, sl st into 3rd ch from hook to make small loop, *skip 2 sts, sc in next st, ch5, sl st in 3rd ch to form picot loop, sk 2 sts, sc in next st; repeat along entire edge to create small gold looped scallops. Aim for roughly 60-80 loops depending on runner width.
Round 3 :
Into each ch5 loop work (sc, hdc, 3 dc, hdc, sc) to create rounded gold scallops around entire piece. At the runner points work (5 dc, ch3, 5 dc) to make pointed tips. Fasten off and weave tails thoroughly.
Info :
This gold scalloped border frames the entire runner and highlights the peacock feather edges. Block entire runner again after border—stretch scallops slightly for even shape and allow to dry flat.
— Decorative Detail Rows & Surface Sewing :
Round 1 :
To emphasize feather veins, use deep teal and surface slip-stitch along key chain loops following natural veins from eye outwards. Surface slip-stitch: insert hook from front to back, pull loop on front, sl st into next front loop to create a raised line. Work symmetrical lines on both sides of spine for visual balance.
Round 2 :
Optional: Add small gold picot dots inside each outer petal center using a contrasting fine thread for added sparkle—use 2mm needle and fine yarn to hand-embroider small star dots and lock with tiny stitches on the back.
Info :
Surface embellishment is optional but elevates depth. Work lightly and check both sides as you go to avoid pulling the motif out of shape.
— Blocking & Finishing :
Round 1 :
Wet-block each separate motif to precise measurements using pins on blocking mat. Pin the runner assembled on the blocking surface and adjust scallops and points evenly. Spray evenly with water or use steam, then leave to dry fully—this sets shape permanently.
Round 2 :
After blocking and drying, check seams and reinforce any loose joints with additional whip stitches through both spine and motif base. Weave in all ends tidily on wrong side, trimming close but not cutting too near to knots.
Info :
For a crisper look, use a fabric stiffener spray lightly and allow to dry; test on a scrap motif first to ensure stiffness level is what you want.
— Optional Variation: Single-Color Runner :
Round 1 :
Follow same construction but use one color for entire piece (e.g., deep teal). Omit color changes and gold border. Increase blocking pressure to accentuate feather texture without color contrast.
Info :
Single-color version relies on texture and shape alone. Consider using a slightly lighter or heavier yarn to make ribs and fans more visible.
— Troubleshooting & Tips (Multiple Info sections integrated):
Info :
If an eye motif cups instead of lying flat, add one more round of even sc to increase circumference and then re-block. If it ruffles, skip a shell or reduce stitch increases in outer rounds.
Info :
When joining motifs, always work from center outward on both sides to maintain symmetry. Sew through the back loops of motif and spine stitches to make the seam less visible on the front surface.
Info :
Keep a notepad marking each motif's round numbers and colors used so repeats are consistent across the runner; this is essential for multi-color pieces.
Info :
Make a sample feather pair and join it to a short spine test to verify spacing before committing to the full runner. Adjust spacing and picture it visually on table to ensure desired look.
Info :
For a heavier table runner, use sport-weight cotton or two strands of fingering held together and adjust hook size up 0.25-0.5mm accordingly.
Working through this peacock-feather table runner is a rewarding journey from single eye motifs to a dramatic, flowing centerpiece. Each feather is a small work of art that joins into a long, elegant spine of color and texture. The wet-blocking and gold scalloped border give the runner a museum-quality finish that will delight guests and family alike. 🧶✨ Display it proudly—this pattern turns a dining table into a statement. Happy stitching and enjoy the colorful process! 🦚