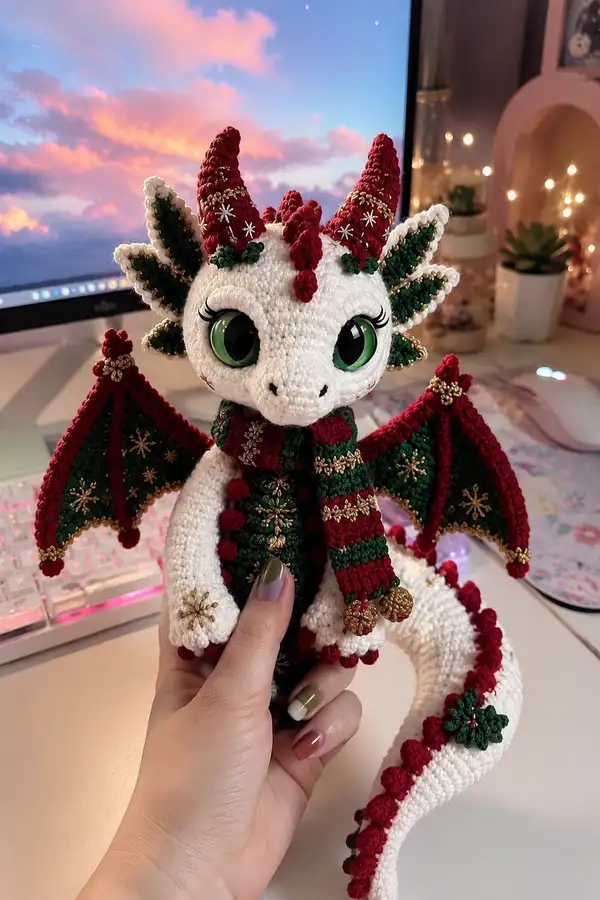
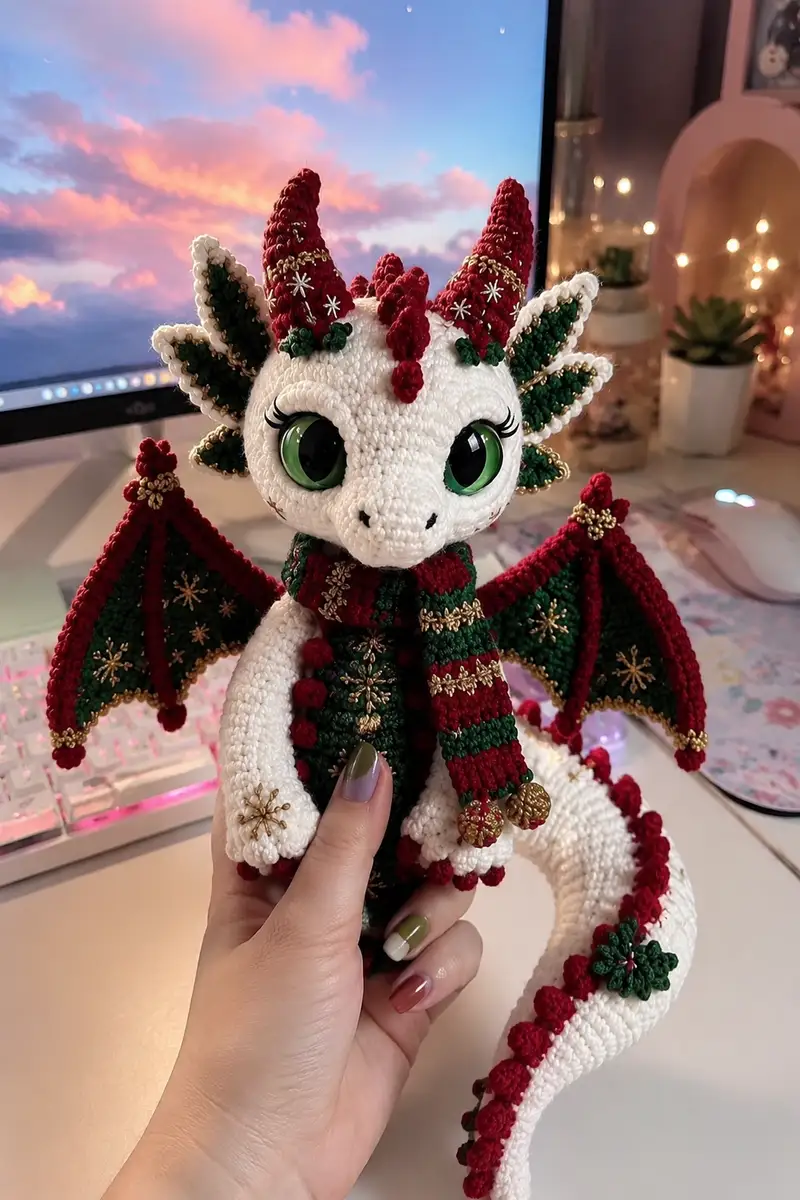
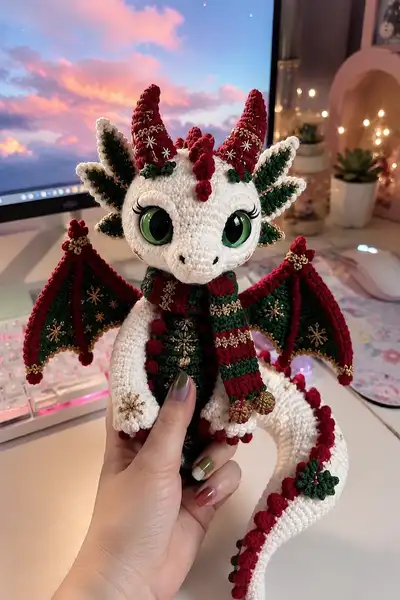
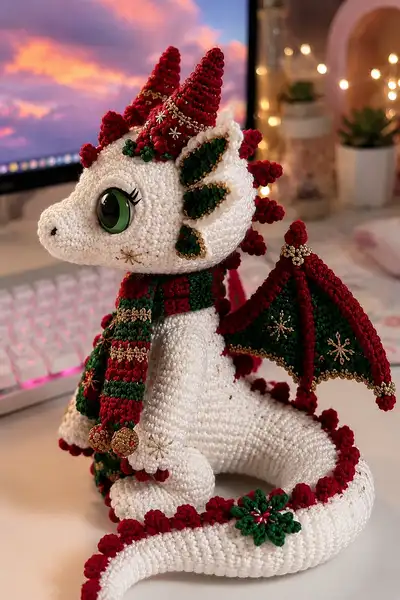
Bring cozy holiday charm to your craft table with this Festive Dragon Amigurumi Pattern. This detailed pattern recreates the white dragon with jewel-green eyes, ruby-red spikes, and gold-trimmed wings and scarf as seen in the photo. Designed with textured ridges, layered ear fins, and decorative snowflake embroidery, it makes a beautiful seasonal gift or keepsake. The instructions include step-by-step rounds, assembly tips, and optional techniques to create the exact festive details.
Progress Tracker
0% Complete
— Head :
Round 1 :
6 sc in magic ring (6)
Round 3 :
(1 sc, inc) x 6 (18)
Round 4 :
(2 sc, inc) x 6 (24)
Round 5 :
(3 sc, inc) x 6 (30)
Round 6 :
(4 sc, inc) x 6 (36)
Info :
Work in continuous rounds (do not join). Use stitch marker to mark the first stitch of each round. These increases begin the spherical portion of the head. Use main color (white).
Round 7 :
(5 sc, inc) x 6 (42)
Round 8 :
(6 sc, inc) x 6 (48)
Round 9 :
1 sc in each st (48)
Round 10 :
1 sc in each st (48)
Round 11 :
1 sc in each st (48)
Info :
Eye placement: place safety eyes between rounds 13-14. For the look in the photo, place eyes approximately 10-12 stitches apart (measure between center points). Insert safety eye backs now but do not fully tighten the washer until head is partially stuffed.
Round 12 :
1 sc in each st (48)
Round 13 :
(Bump row) 1 sc in next 48 sts (48)
Round 14 :
1 sc in each st (48)
Info :
For the pronounced muzzle in photos, we will work additional shaping forward for the snout. Mark the 12 stitches that form the front center of the head where the snout will extend (typically across rounds 10-14 center front stitches). Keep these marked for muzzle attachment rounds.
Round 15 :
(6 sc, inc) x 6 (54)
Round 16 :
1 sc in each st (54)
Round 17 :
1 sc in each st (54)
Info :
Begin creating the muzzle by crocheting 2 short rounds worked directly across a blocked zone of 12 front stitches. This forms the protruding snout. Keep a separate marker for the muzzle rounds; these are worked as an integrated flap stitched into the head.
Round 18 :
Work muzzle: join yarn at first marked front stitch. Round A1 (muzzle) : 6 sc in MR (6) - work short cone and then join to head (this small cone will be sewn into the 12-marked st opening). Fasten off leaving long tail.
Info :
Create two small nostril dimples by embroidering with black thread later; you can also add short decreases at the tip of the muzzle if you prefer a closer integration. Sew the muzzle cone into the opening and adjust stuffing level of head so muzzle sits naturally.
Round 19 :
1 sc in each st (54)
Round 20 :
(7 sc, inc) x 6 (60)
Round 21 :
1 sc in each st (60)
Info :
Start adding light stuffing to the head now, especially around the eye sockets. Stuff firmly enough that eyes won’t sink in but leave room for final shaping. Place eye washers securely after stuffing to desired tension.
Round 22 :
(7 sc, dec) x 6 (54)
Round 23 :
(6 sc, dec) x 6 (48)
Round 24 :
(5 sc, dec) x 6 (42)
Info :
Continue stuffing as you decrease to maintain a rounded head. For the sculpted cheek look, add extra stuffing at sides of eyes and fewer stuffing at base of head to elongate the snout effect.
Round 25 :
(4 sc, dec) x 6 (36)
Round 26 :
(3 sc, dec) x 6 (30)
Round 27 :
(2 sc, dec) x 6 (24)
Round 28 :
(1 sc, dec) x 6 (18)
Info :
Fasten off leaving long tail for sewing neck to body. Weave tail through remaining stitches and pull closed. Make sure head is nicely rounded and eyes secured. Add eyelash embroidery with black thread if desired (the photo shows dramatic lashes added by embroidery).
— Ears / Ear-Fins (Make 2) :
Round 1 :
6 sc in magic ring (6)
Round 3 :
(1 sc, inc) x 6 (18)
Round 4 :
1 sc in each st (18)
Round 5 :
1 sc in each st (18)
Info :
Switch to green for inner fin layer: change to forest green yarn at the start of Round 6 to create the inner colored leaf. Carry the white yarn along the edge if you want the white border to be continuous.
Round 6 :
Work inner leaf: BLO 1 sc in next 18 sts (18)
Round 7 :
(3 sc, inc) x 4 + (2 sc) repeat shaping to create scallop - adjust to keep 18 sts (18)
Round 8 :
Edge round: switch back to white and sc evenly around edge, working (1 sc, ch1, sl st) decorative picot points spaced evenly (18)
Info :
Sew ear-fins to head at rounds 7-9 on the side of head, spacing them to match the layered look in the photo (stack three fin shapes slightly overlapped). Add gold embroidery along the white edge using metallic thread for the lacy trim.
— Horns and Spine Clusters :
Info :
Horns are worked as small cones in red yarn. There are three larger horns across the top and several small spike clusters down the neck and tail. Use smaller hook (2.25mm) for tighter cones.
Horn A - Cone (Make 3) Round 1 :
6 sc in magic ring (6)
Round 3 :
(1 sc, inc) x 6 (18)
Round 4 :
(2 sc, inc) x 6 (24)
Round 5 :
1 sc in each st (24)
Round 6 :
(3 sc, dec) x 6 (18)
Round 7 :
(2 sc, dec) x 6 (12)
Round 8 :
6 dec (6) - Fasten off leaving long tail for sewing
Info :
Decorate horns with gold thread by wrapping and stitching fine rows of metallic thread or crocheting a sparse chain-stitched wrap around the cone. Sew three horns into place on top of head following the photo spacing. Add two small red spike cones (Rounds 1-5 scaled smaller) between the main horns.
— Body :
Round 1 :
6 sc in magic ring (6)
Round 3 :
(1 sc, inc) x 6 (18)
Round 4 :
(2 sc, inc) x 6 (24)
Round 5 :
(3 sc, inc) x 6 (30)
Round 6 :
(4 sc, inc) x 6 (36)
Info :
The body begins with a rounded belly then elongates into a seated torso. Keep rounds continuous; this creates a slightly elongated shape with a stable base for the legs. If you need a firmer base, crochet an internal oval base disk with denser stuffing and later sew it inside the lower rounds.
Round 7 :
(5 sc, inc) x 6 (42)
Round 8 :
(6 sc, inc) x 6 (48)
Round 9 :
1 sc in each st (48)
Round 10 :
1 sc in each st (48)
Round 11 :
1 sc in each st (48)
Info :
If adding collar or scarf later, you may change to green/red stripe rounds around round 12-14; the body in the photo has a scarf sitting over the upper chest area, so keep chest rounds plain to attach scarf neatly.
Round 12 :
(6 sc, dec) x 6 (42)
Round 13 :
(5 sc, dec) x 6 (36)
Round 14 :
1 sc in each st (36)
Round 15 :
1 sc in each st (36)
Info :
Begin moderate stuffing here for torso; still leave room at the top to insert and sew the neck joint. Stuff firmly at the base for stability and more lightly at the upper chest so head sits naturally.
Round 16 :
(4 sc, dec) x 6 (30)
Round 17 :
(3 sc, dec) x 6 (24)
Round 18 :
(2 sc, dec) x 6 (18)
Round 19 :
1 sc in each st (18)
Round 20 :
1 sc in each st (18)
Info :
Leave long tail and fasten off after Round 20. This opening will be used to sew the head to the body. You may also add an internal neck reinforcement (a scrap tube of felt or tightly crocheted ring) to help the head sit firmly.
— Front Legs / Arms (Make 2) :
Round 1 :
6 sc in magic ring (6)
Round 3 :
(1 sc, inc) x 6 (18)
Round 4 :
1 sc in each st (18)
Info :
These arms are slightly flattened pads that become paws. Stuff the paw area quite firmly to maintain shape; the arms in the photo have a subtle snowflake embroidery on the outer paw face.
Round 5 :
(2 sc, inc) x 6 (24)
Round 6 :
1 sc in each st (24)
Round 7 :
1 sc in each st (24)
Round 8 :
(3 sc, dec) x 6 (18)
Round 9 :
1 sc in each st (18)
Round 10 :
1 sc in each st (18)
Info :
Create little pom pom fringe by working bobbles along cuff edge: switch to red and work a round of red bobbles around the wrist area (attach multiple bobbles by working a 3-5 dc bobble into alternating stitches). Fasten off and weave in ends.
Round 11 :
(1 sc, dec) x 6 (12)
Round 12 :
6 sc (12) - Stuff paw firmly
Round 13 :
(1 sc, inc) x 6 (18)
Round 14 :
1 sc in each st (18)
Round 15 :
1 sc in each st (18)
Round 16 :
(2 sc, dec) x 4 + 2 sc at end (14) - shape shoulder
Round 17 :
1 sc in each st (14)
Round 18 :
Fasten off leaving long tail for sewing to body at chest rounds 10-12
Info :
Sew arms to body so they rest naturally on the chest. In the photo the arms are slightly forward-facing; when pinning, place arms so the inner edge overlaps a couple of stitches toward center front for a cuddled look.
— Back Legs / Hips (Make 2) :
Round 1 :
6 sc in magic ring (6)
Round 3 :
(1 sc, inc) x 6 (18)
Round 4 :
(2 sc, inc) x 6 (24)
Round 5 :
(3 sc, inc) x 6 (30)
Round 6 :
1 sc in each st (30)
Info :
Legs are sturdy and slightly flattened for a seated posture. Stuff feet firmly and legs moderately. The feet in the photo have small red pom-pom toes and a gold snowflake motif on the outer face; add embroidery after assembly.
Round 7 :
1 sc in each st (30)
Round 8 :
(4 sc, dec) x 6 (24)
Round 9 :
1 sc in each st (24)
Round 10 :
(3 sc, dec) x 6 (18)
Round 11 :
1 sc in each st (18)
Round 12 :
1 sc in each st (18)
Round 13 :
(2 sc, dec) x 4 + (2 sc) adjust to 14 sts (14)
Round 14 :
1 sc in each st (14)
Round 15 :
(1 sc, dec) x 4 + (2 sc) adjust to 10 sts (10)
Round 16 :
1 sc in each st (10) - Stuff foot firmly
Round 17 :
1 sc in each st (10)
Round 18 :
Fasten off leaving long tail for sewing to body lower rounds (rounds 1-4 of body base). Make sure legs are mirrored with toes pointing slightly outward.
Info :
Sew legs to bottom of body at base rounds 1-4. Pin first to confirm seating posture and widen placement if necessary for stability. Add pom-pom toes with 3-4 small red bobbles sewn to the front edge of each foot.
— Wings (Make 2) :
Info :
Each wing consists of a frame ridge (red), a membrane (green), and decorative ribs embroidered with gold. The wing is worked flat in rows forming triangular membrane then edged and ribbed. For sturdy wings, insert a thin piece of cardboard or plastic inside and slip-stitch closed, or work a double thickness then sew together around a thin stiffener.
Round 1 (wing center) :
Ch 8, sc in 2nd ch and across (7)
Round 2 :
Ch1, turn, sc across, ch1 at end to shape tip (7)
Round 3 :
Ch1, turn, sc across increasing at both ends to form triangular shape: sc increase at first and last st (9)
Round 4 :
Ch1, turn, sc across increasing similarly to widen (11)
Round 5-7 :
Continue increasing at both edges until membrane measures desired wing height (typical 17-21 sts across tip). For our scale, stop at 19 sts wide.
Round 8 :
Fasten off green. Switch to red yarn and sc around the triangular membrane to create the red ridge edge. Work 1 sc in each st along the flat side and 2 sc in each outer edge stitch to create a raised ridge (approx. 40 sc total depending on size).
Round 9 :
Work 3 decorative ribs by crocheting small raised ridges: attach red yarn at outer edge and sc along lines from edge to tip forming three ribs; secure ends and fasten off (3 ribs)
Round 10 :
Edge: work a round of picots in red along the perimeter: *(sc, ch2, sl st in 2nd ch)* repeat evenly (approx. 12 picots)
Info :
Embroider snowflake motifs onto the green membrane using metallic gold thread. Use star stitch: bring needle from center outwards in 6 directions and add a small chain of bullion or french knot at ends to mimic the look in the photo. Attach any beads as desired prior to final sewing.
Round 11 :
Attach wing to body: sew along the inner flat edge to body rounds 6-10 and secure tightly. Wings should sit slightly behind the arms and be angled upward.
— Tail :
Round 1 :
6 sc in magic ring (6)
Round 3 :
(1 sc, inc) x 6 (18)
Round 4 :
(2 sc, inc) x 6 (24)
Round 5 :
(3 sc, inc) x 6 (30)
Round 6-10 :
1 sc in each st (30) - work even rounds to establish the tail width
Info :
Tail in the photo is long, tapering, and decorated with alternating red bobble ridges along the top edge and a green flower motif near the tip. Work tail as a long tube and add bobbles later by crocheting them in place or sewing separately.
Round 11 :
(3 sc, dec) x 6 (24)
Round 12 :
1 sc in each st (24)
Round 13 :
(2 sc, dec) x 6 (18)
Round 14 :
1 sc in each st (18)
Round 15-34 :
Continue decreasing gradually over many rounds to taper the tail to a point: decrease by 6 sts every 3-4 rounds so tail ends around 6 sc for tip. Example pattern: Round15 (1 sc, dec)x6 (12); Round16-20 1 sc each (12); Round21 (1 sc, dec)x4 (8); Round22-24 1 sc each (8); Round25 dec x4 to 4sc and then fasten off with long tail for sewing (approx. final 30-40 rounds total depending desired length)
Info :
Work the red bobble ridge: make small bobble motifs (3-5 dc bobble) in red and sew them along the top seam of the tail spaced evenly. For a clean finish, stitch the bobbles to the top loop of each round so they sit raised.
Round 35 :
Attach green flower motif near tail tip: make a 6 petal flower with small picot edges and sew onto tail. Fasten off and weave ends.
— Decorative Flower Motifs (Make 3-5) :
Round 1 :
6 sc in magic ring (6)
Round 2 :
*ch3, sc in next st* rep around to form 6 loops (6 loops)
Round 3 :
In each ch3 loop work (sc, hdc, 3 dc, hdc, sc) to form a petal (6 petals)
Round 4 :
Fasten off and block petals slightly. Sew a small bead or contrasting french knot at center with metallic gold thread to match the ornamentation in the photo.
Info :
Sew flower motifs on tail, shoulder and outer wings as shown in the image. Use a thin gold thread to outline petals for a festive shimmer.
— Scarf / Collar Accessory :
Round 1 :
Ch 60 (or long enough to wrap around neck). Join without twisting and work in rounds.
Round 2 :
Work 1 sc in each ch around (60) - this forms the first round of the scarf.
Round 3-6 :
Alternate red and green stripes every round: Round3 red (1 sc each 60), Round4 green (1 sc each 60), Round5 red, Round6 green to create 4-6 stripe pairs.
Round 7 :
Add gold embroidery: using metallic thread, work small horizontal bars every 8-10 sts along the red stripes to form decorative floret bands.
Round 8 :
Make tassels or bobbles at each scarf end by crocheting small pom-pom clusters: attach 3-4 red bobbles and finish with a gold bead. Sew securely to scarf ends.
Info :
Wrap scarf around neck after head and body are joined. The photo shows the scarf tucked slightly in front; pin in place and then sew a few stabilization stitches at the chest so the scarf keeps its shape.
— Small Decorative Bobbles and Trim :
Round 1 :
To create a bobble: yo, insert, pull up loop, yo pull through two times to form 5-dc bobble or substitute with 3-dc bobble for smaller size. Work bobble cluster by repeating in same st then finish with sl st to secure.
Round 2 :
Sew bobbles along wings edge, tail top, scarf, and cuffs according to photo spacing. Use red for bobbles and gold thread to secure and highlight bases with metallic chain stitches for sparkle.
Info :
When sewing embellishments use small stitches and matching yarn so they blend invisibly. Attach beads last and use a dab of fabric glue to add extra security for display-only items.
— Finishing & Assembly :
Info :
Weave in all ends as you go, blocking and lightly shaping wings and ear fins. Below are precise assembly steps to join all components coherently.
Round :
Neck attachment: align head opening (rounds 25-29) to body opening (rounds 18-20). Pin head evenly centered; sew by using mattress stitch or whip stitch through matching rounds ensuring head sits facing forward.
Round :
Sew legs: position legs at body base rounds 1-6; attach securing with 8-12 stitches across seam for stability. Stuff body more if required before final closes.
Info :
Add final embroidered nostrils (2 small french knots or short horizontal satin stitches) and gold snowflake motifs on paws and wings as seen in the picture. Use subtle blush on cheeks if desired with pastel pencil or fabric-safe chalk.
This festive dragon brings whimsical holiday magic to your crochet creations — full of personality, texture, and jewel-like details! Each round contributes to a plush companion with handmade charm and seasonal sparkle. Embellishing with metallic thread and small motifs makes it an heirloom-worthy gift. Enjoy stitching every decorative detail and don't forget to share your finished dragon with pride! 🧶✨🎁