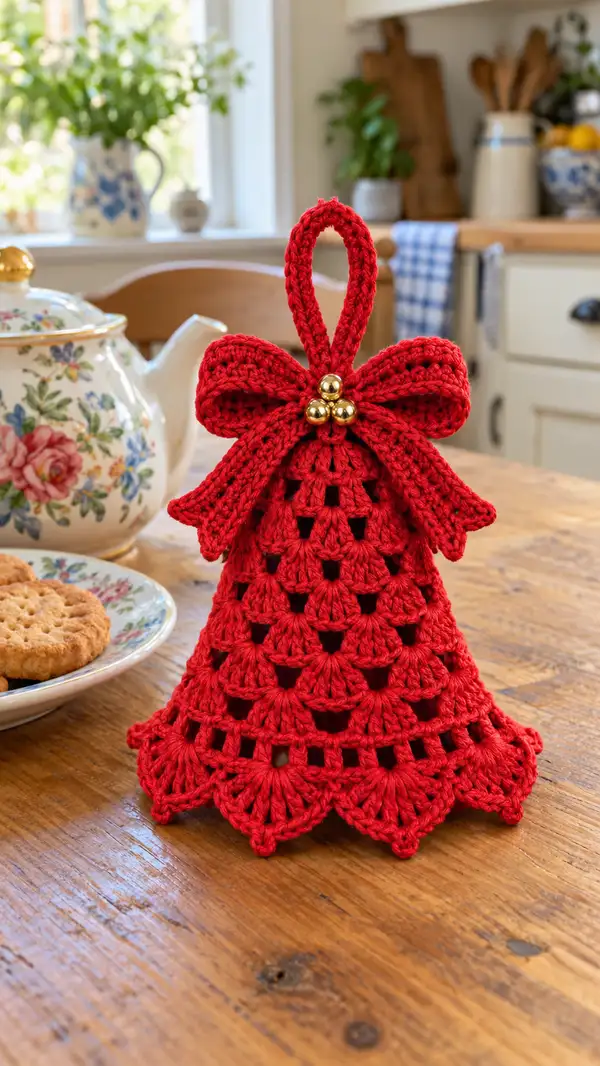
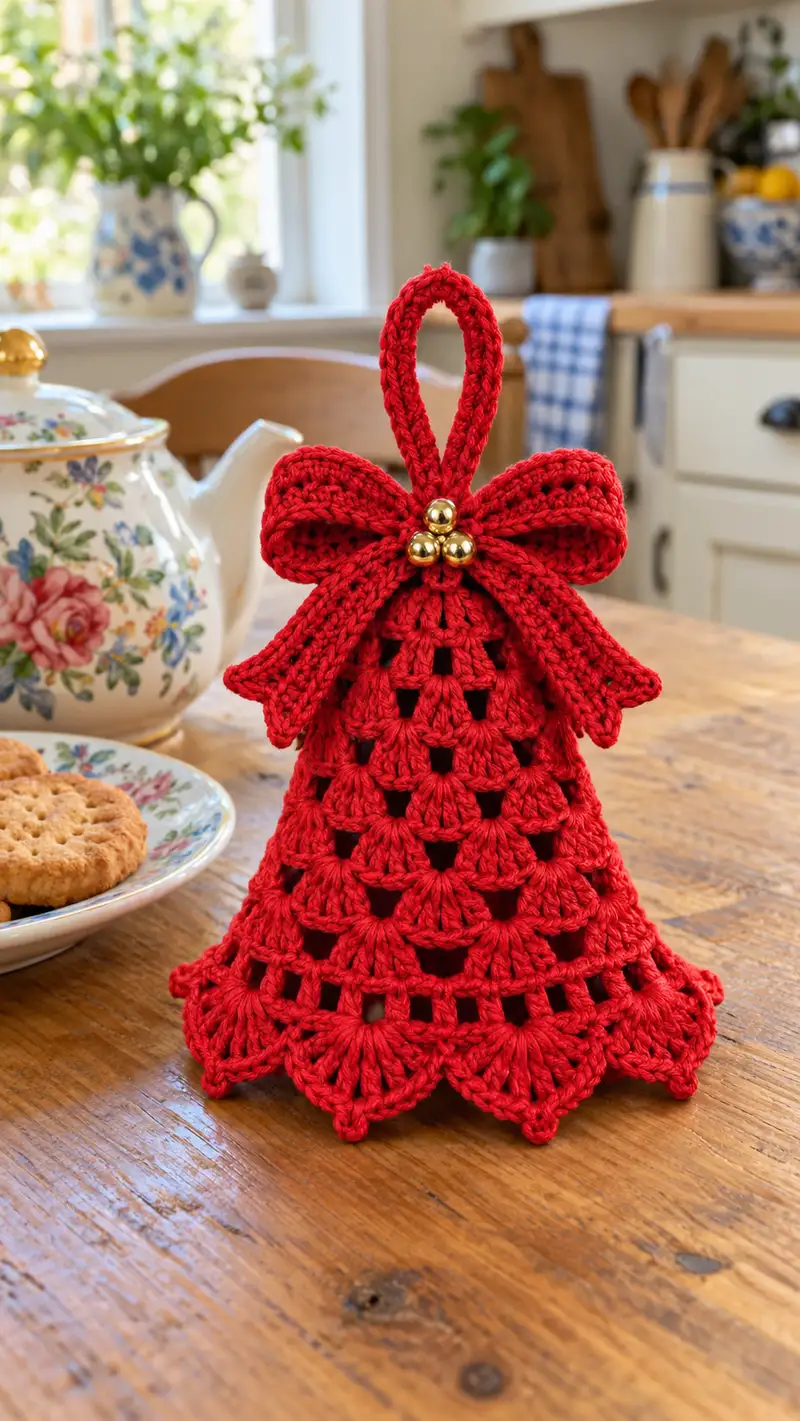
Create a charming, lacy red bell ornament perfect for holiday decorating or gift-giving. This bell features delicate shell tiers, a scalloped base, a structured crocheted bow with loop, and three gold bead bells at the center. Worked top-down with clear round-by-round instructions, this pattern balances decorative lace with sturdy shaping so it stands or hangs beautifully.
Progress Tracker
0% Complete
— Bell Body :
Round 1 :
6 sc in magic ring (6)
Round 3 :
(1 sc, inc) x 6 (18)
Round 4 :
(2 sc, inc) x 6 (24)
Round 5 :
(3 sc, inc) x 6 (30)
Round 6 :
(4 sc, inc) x 6 (36)
Round 7 :
(5 sc, inc) x 6 (42)
Round 8 :
(6 sc, inc) x 6 (48)
Info :
These first 8 rounds form the bell crown. Use a stitch marker at the first stitch of each round to keep your place. The stitch count at the end of round 8 is 48 'anchor' stitches; each of the following shell clusters will be worked into these anchor stitches so counts refer to anchor positions (48).
Round 9 :
Ch3 (counts as dc), *skip next st, into next st work (3 dc) cluster, ch1, skip next st, dc in next st; rep from * around joining with sl st to top of ch3 (48 cluster anchors)
Round 10 :
Ch3, *in ch1 space from previous round work (3 dc, ch1, 3 dc) shell, ch1, skip to next ch1; rep from * around, join (48 shells)
Round 11 :
Ch3, *in central ch1 of each shell work (3 dc) cluster, ch2, sc into next dc of shell below to anchor, ch2; rep around, join (48 cluster anchors)
Info :
Round 9-11 begin the lacy tier effect. Maintain consistent tension — the top is narrow and will begin to flare. If your shells look too loose, switch to a slightly smaller hook.
Round 12 :
Ch3, *into next anchor stitch work (dc, ch1, dc) in same place to form small fan, ch1, sc into top of previous round sc to anchor; rep around, join (48 anchors)
Round 13 :
Ch4 (counts as tr), *into next ch1 space work (2 tr) cluster, ch1, tr in next ch1 space; rep around, join (48 clusters)
Round 14 :
Ch3, *make a shell (3 dc) into each tr cluster top, ch2 between shells for contrast; rep around, join (48 shells)
Round 15 :
Ch3, *in ch2 space work sc, ch2, sc to create small vertical anchor, ch1, (3 dc) in top of next shell; rep around, join (48 anchors)
Info :
At this point the bell begins to take shape and flare. If you prefer a taller bell, add an extra even round (1 sc in each anchor) before the next shell round. The sample pictured is approximately 18 cm (7 inches) tall when finished using worsted cotton and the hook sizes suggested.
Round 16 :
Ch3, *into top of each small fan work (dc, ch1, dc) shell, ch1 between shells for open spaces; rep around, join (48 shells)
Round 17 :
Ch3, *in ch1 space work (3 dc, ch2, 3 dc) larger shell to begin forming distinct tier, ch1, sc in next anchor; rep around, join (48 tier shells)
Round 18 :
Ch3, *sc into ch2 space from previous round, ch3, into next anchor work (3 dc, ch1, 3 dc), ch1; rep around, join (48 anchors)
Round 19 :
Ch3, *in the ch1 space from previous round work (tr, ch1, tr) to add height, ch2, sc into top of nearby shell; rep around, join (48 height anchors)
Info :
These alternating clusters and chain spaces are what create the alternating openwork diamond shapes visible in the photo. Keep shell centers aligned; to adjust spacing, change ch1 to ch2 between shells on one or two rounds.
Round 20 :
Ch3, *work (3 dc) shell into each anchor, ch2, sc into next anchor; rep around, join (48 shells)
Round 21 :
Ch3, *into ch2 space of previous round work (3 dc, ch1, 3 dc) large shell, ch1, sc into next anchor; rep around, join (48 large shells)
Round 22 :
Ch3, *into central ch1 of each large shell work (3 dc) cluster, ch1, sc into next shell top; rep around, join (48 clusters)
Round 23 :
Ch3, 1 sc in next st, *ch3, skip next anchor, (3 dc) into next anchor, ch1, sc into following anchor; rep around, join (48 anchors)
Info :
Begin checking the bell width against your intended finished size. If it seems too narrow, add an additional increasing round (see suggested increase method below) before proceeding. Suggested increase: (7 sc, inc) x 6 to raise to 54 anchors if you need a larger circumference.
Round 24 :
Ch3, *into ch3 space work (3 dc, ch1, 3 dc) shell, ch1, sc into next sc anchor; rep around, join (48 shells)
Round 25 :
Ch3, *sc into ch1 of each shell, ch2, (3 dc) into the next sc anchor; rep around, join (48 anchors)
Round 26 :
Ch4, *into next anchor work (2 tr, ch1, 2 tr) cluster to add vertical height, ch2, sc into next anchor; rep around, join (48 clusters)
Round 27 :
Ch3, *into ch2 space work 5 dc fan (5 dc), ch1, sc into top of following cluster; rep around, join (48 fans)
Info :
Rounds 26-27 add additional height to the bell tiers. If you prefer more openwork, replace some dc fans with 7-dc fans or add extra ch2 spaces. Remember to keep the number of anchor locations constant (48) so tiers align for a neat scallop base.
Round 28 :
Ch3, *sc into center of each 5-dc fan, ch3, (3 dc) into next anchor; rep around, join (48 anchors)
Round 29 :
Ch3, *into ch3 space work (3 dc, ch1, 3 dc) shell, ch1; rep around, join (48 shells)
Round 30 :
Ch2 (does not count), 1 hdc in same st, *ch2, skip next anchor, (hdc, ch2, hdc) into next anchor for small arches; rep around, join (48 arches)
Round 31 :
Ch1, sc in each st and ch-space around working into top loops only to firm the structure: sc in each hdc and sc in each ch2 space (96 sc equivalent points), join
Info :
Round 31 tightens the fabric and prepares the bell for the scalloped edging. If you used larger loops before, this rounds acts as a reinforcement. Check that work sits flat and the bottom flare is symmetrical before starting scallops.
Round 32 :
Change to edging preparation: ch1, *sc in next 2 sts, ch3, skip 2, sc in next 2; rep around to form small ladder spaces for scallop anchors, join
Round 33 :
Ch4 (counts as tr), *into each ch3 space work (7 dc) scallop fan, sl st into next sc; rep around giving 16 scallops (48 anchors create 16 scallops if group every 3 anchors)
Round 34 :
Ch1, sc into top of each scallop fan and into each sl st space to tidy edge, join (approx 112 sc equivalent)
Info :
Blocking the scallops at this stage will give a crisp, even base. Pin each scallop to shape on a blocking mat and steam light from a distance or pin overnight with a damp cloth overlay to set the shape.
Round 35 :
Ch1, *sc 3, picot: (ch3, sl st to first ch) into center of scallop to create pointed edge, sc 3 into next scallop; rep around, join
Round 36 :
Ch1, sc in each st around to tidy and finish brim, join, fasten off leaving a 20cm tail for assembly
Info :
If you want a stiffer brim, block it over a small bowl or cup the size you want and lightly spray with a fabric stiffener, or thread a thin wire into the last round before closing to keep the scallop flared.
— Bow (make 1) :
Info :
The bow is made as four long strips: two loop strips and two tail strips. Each strip is worked flat and then folded/stitched to create the dimensional bow. Use the 3.0mm hook for slightly tighter fabric; you can use the same yarn.
Strip A (loop) Round 1 :
Ch31, sc in 2nd ch from hook and across (30 sc)
Strip A Round 2 :
Ch1, turn, sc in each st across (30)
Strip A Round 3 :
Ch1, turn, BLO sc in each st across to create a defined ridge (30)
Strip A Round 4-10 :
Repeat Round 3 (30 each round). Fasten off leaving a 40cm tail. Fold strip in half lengthwise and stitch through both layers along long side to form a tube (gently stuff with a tiny bit of fiberfill if you want a plush loop). Make a second identical Strip A for the second loop.
Info :
Working the strip folded and stitched gives the bow loops structure. For more rounded loops, leave a small channel and insert a thin piece of craft wire before closing securely.
Strip B (tail) Round 1 :
Ch41, sc in 2nd ch from hook and across (40 sc)
Strip B Round 2 :
Ch1, turn, sc in each st across (40)
Strip B Round 3 :
Ch1, turn, BLO sc in each st across (40)
Strip B Round 4-12 :
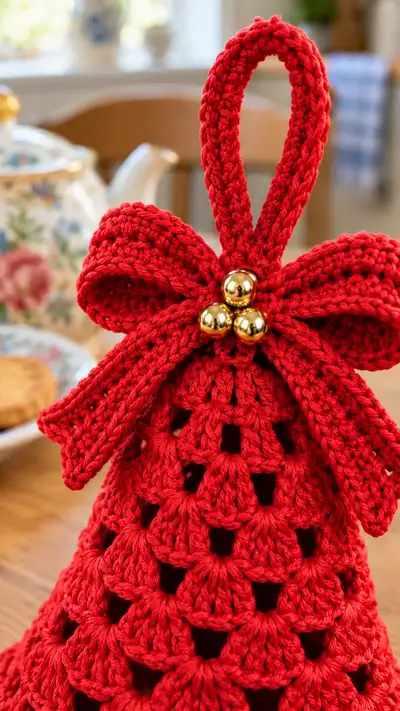
Repeat Round 3 (40 each round). Fasten off leaving a 40cm tail. Fold lengthwise and stitch to form two tail strips. Taper ends by folding about 4 rows of one end inward and sewing to create the pointed tail like in the photo.
Info :
Make one bow set (two loops + two tails). You can reduce or extend length depending on how large you want the bow relative to the bell. For a more rigid bow, add lightweight interfacing inside the tube before closing.
— Bow Center Wrap and Bead Attachment :
Center Wrap Round 1 :
Ch8, join with sl st to first ch to form ring, ch1, sc in each ch around for 3 rounds (8 sc per round). Fasten off leaving long tail for wrapping.
Info :
Use the long tail from the center wrap to cinch the bow loops and tails together tightly. Place the loops on top of the bell crown and the tails draped down in front as shown, then wrap the center piece firmly around the meeting point.
Attach beads :
Thread three gold beads or jingle bells together on a short length of matching yarn or thin craft wire. Position on top center of bow. Use yarn needle to stitch through the center wrap and each strip several times to secure the beads. If using wire, fold ends under and hide in the bow before sewing center wrap closed.
Info :
Stitch beads so that they sit snugly and do not catch on fabric. If gifting to children, use thread and sew through beads multiple times, then apply a small dab of fabric glue on the knot for extra security (let it dry fully).
— Hanging Loop :
Round 1 :
Ch31, sl st into 1st ch to make ring (loop length approx 10-12 cm). Leave tail and fold into a narrow tube by working sc around both sides of the chain: from the inside of the ring, work 30 sc around the outside of the chain; join and repeat for 4 rounds to create a sturdy rope (30 sc per round).
Round 2-5 :
Repeat sc around the chain to create a thick cord; fasten off leaving long tail to sew into bell crown.
Info :
Sew the loop securely to the top inside of the bell crown before attaching the bow. You can also insert a small metal split ring at this point and sew the loop around it for extra durability when hanging heavier decorations.
— Scalloped Edge Alternative (Detailed) :
Alt Round 1 :
Ch1, sc around next row to prepare base (work in each stitch and ch-space) join
Alt Round 2 :
Ch3, *5 dc in next ch-space, sl st into next sc, rep around to form full scallops (approx 16 scallops), join
Alt Round 3 :
Ch1, sc into top of each scallop then ch2 between scallops, join. Fasten off. Block edges to shape.
Info :
Either edging method yields the lacy scallops in the photo. The main pattern uses a picot tip for a slightly pointed scallop; the alternative gives a rounder scallop. Blocking ensures uniform scallops.
— Finishing and Assembly :
Info :
Before joining bow and loop, weave in all tails from bell body and scallop rounds except those left intentionally for assembly. Use a yarn needle and weave into the inside of the bell to keep the exterior clean.
Assembly Step 1 :
Sew the hanging loop to the inside top of the bell: bring the loop tail through the top opening and anchor by stitching around 6 anchor points from Round 1-4, ensuring the loop stands upright and is centered.
Assembly Step 2 :
Position bow loops on either side of the loop with the fold of each loop toward the center. Lay tails over the front of the bell as pictured. Use the center wrap tail to cinch and stitch through the back of the loop and front of the tails; secure tightly.
Assembly Step 3 :
Place the bead cluster onto the center wrap and sew the beads through the center wrap multiple times, then stitch through the bow base into several anchors on the bell crown to stabilize the whole embellishment.
Info :
Make sure the bow covers the top of the bell crown seam where the loop is sewn — it hides join stitches and gives a polished look. Use small, even stitches and tie off on the inside of the bell, then weave the tail into the fabric.
Final Touch :
Block or steam the finished bell gently and shape the scallops and bow loops as desired. Add a small amount of fabric stiffener to bow loops if you prefer them rigid. Trim remaining tails and tuck them inside.
Info :
Your finished bell should be balanced and able to stand if placed upright, or hang beautifully on a tree or hook. If you want the bell to ring, you can insert a small jingle bell inside the body before closing the crown or simply rely on the bead decoration for the look.
This festive bell ornament brings a charming handmade accent to your holiday décor — delicate lacy tiers pair with a structured bow and shiny bead cluster for a classic look. Every step is designed to help you finish neatly and with pride. I hope you enjoy the process as much as the result; the bright red finish will bring warmth and cheer wherever you hang it. Happy crocheting and enjoy gifting these little treasures! 🎀🧶