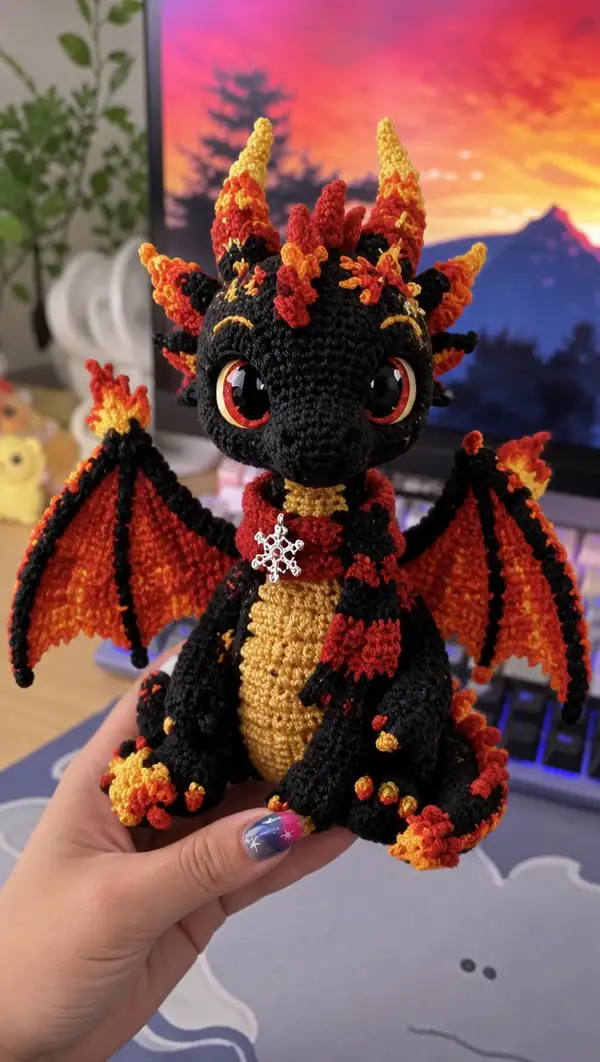
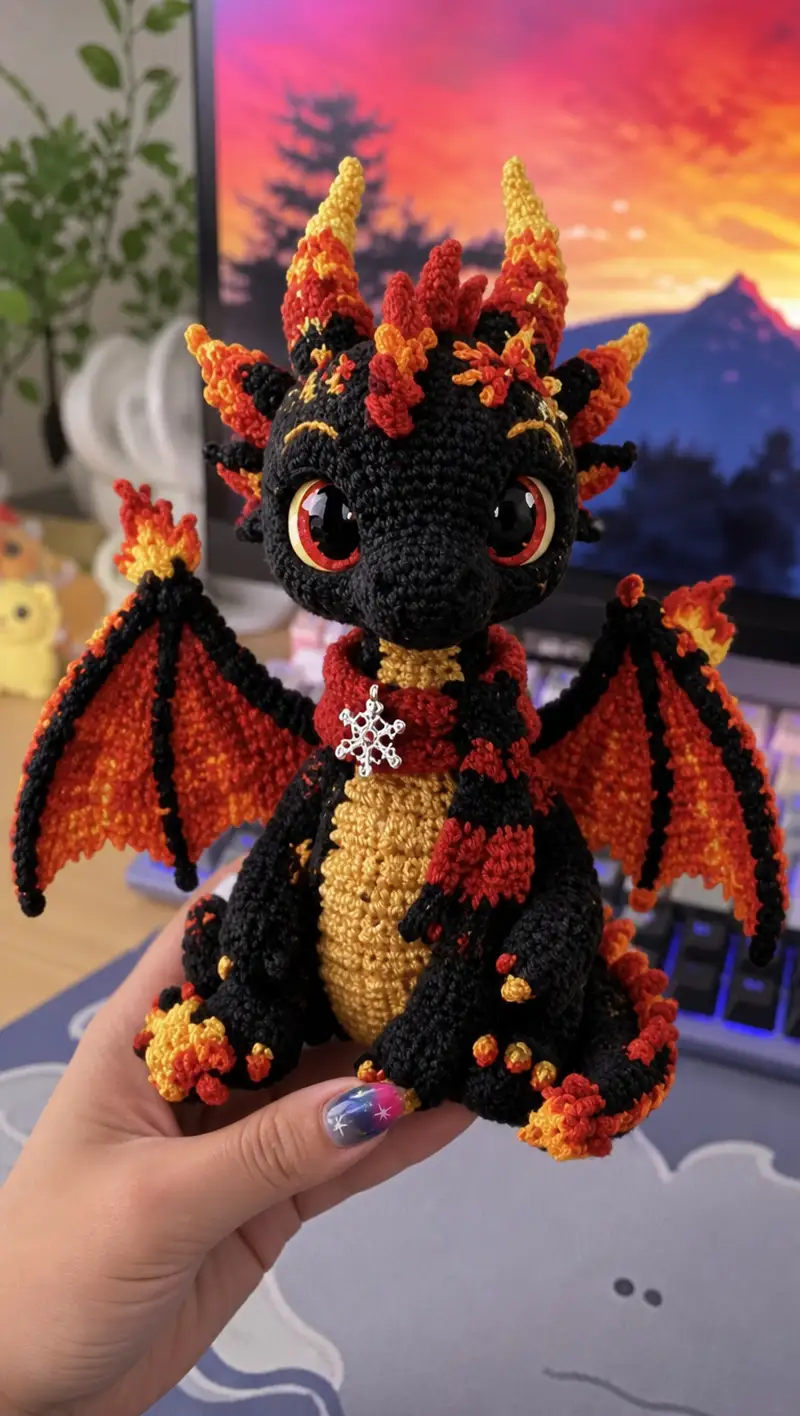
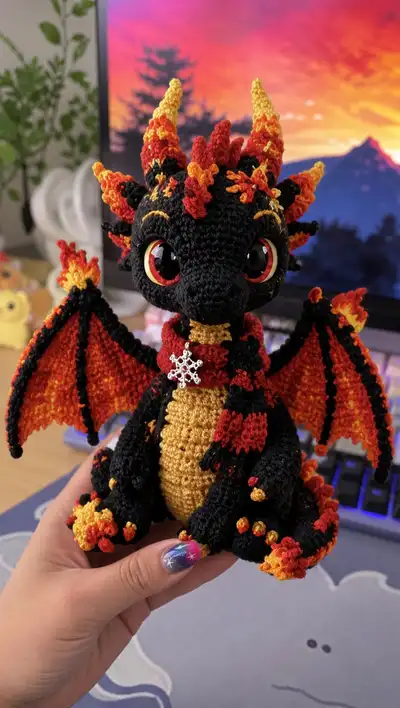
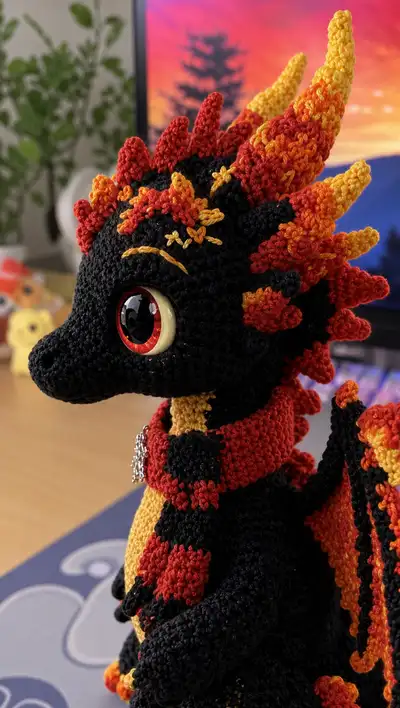
Bring a tiny blaze to life with this Fiery Spike Dragon amigurumi pattern. This black-bodied dragon features vivid flame-colored horns, spines, claws and wing membranes in gradients of yellow, orange and red, plus expressive large eyes and a cozy striped scarf. The finished toy is richly textured with layered spikes and embroidered flame details for a dramatic, handmade look that doubles as a collectible or gift.
Progress Tracker
0% Complete
— Head :
Round 1 :
6 sc in magic ring (6)
Round 3 :
(1 sc, inc) x 6 (18)
Round 4 :
(2 sc, inc) x 6 (24)
Round 5 :
(3 sc, inc) x 6 (30)
Round 6 :
(4 sc, inc) x 6 (36)
Round 7 :
(5 sc, inc) x 6 (42)
Round 8 :
(6 sc, inc) x 6 (48)
Round 9-12 :
1 sc in each st (48)
Info :
These even rounds build the crown of the head. Keep stitches tight for a neat finish and to prevent stuffing from showing. Place a stitch marker at round start and move it each round.
Round 13-14 :
1 sc in each st (48)
Info :
Position safety eyes between rounds 13 and 15. For the look shown, place eyes so their inner edges are 8-10 sts apart (measure 9 sts between centers). Mark the placement with pins to check symmetry.
Round 15 :
(6 sc, inc) x 6 (54) — slight increase to allow snout shaping
Round 16-17 :
1 sc in each st (54)
Info :
For the pronounced snout shape, we extend the head forward over subsequent rounds. If using large safety eyes (10-12mm), ensure they are installed and secured before adding bulk around the eye sockets.
Round 18 :
(7 sc, inc) x 6 (60)
Round 19 :
1 sc in each st (60)
Round 20 :
(7 sc, dec) x 6 (54)
Round 21 :
(6 sc, dec) x 6 (48)
Info :
Begin shaping the muzzle: these decreases move shaping forward while maintaining the eye placement. Start stuffing the head lightly now, adding firmness as you close later. Use small handfuls of fiberfill and press into corners with a blunt tool.
Round 22 :
(5 sc, dec) x 6 (42)
Round 23 :
1 sc in each st (42)
Round 24 :
(4 sc, dec) x 6 (36)
Round 25 :
(3 sc, dec) x 6 (30)
Info :
Add more stuffing to define the forehead and eye sockets. The front of the head should start tapering into the snout; check eye symmetry frequently and adjust stuffing to ensure eyes sit flush with surrounding stitches.
Round 26 :
(2 sc, dec) x 6 (24)
Round 27 :
(1 sc, dec) x 6 (18)
Round 28 :
(2 sc, inc) x 6 (24) — create a short muzzle extension forward to form the snout tip
Round 29 :
1 sc in each st (24)
Round 30 :
(3 sc, dec) x 6 (18)
Info :
Work a short cylindrical muzzle by adding a few rounds of even stitch before final taper. The combination of the earlier increases and this extension creates the long snout shape seen in the photos.
Round 31 :
(2 sc, dec) x 6 (12)
Round 32 :
6 dec (6) — close muzzle, fasten off leaving long tail for sewing to neck if working join technique
Info :
Finish stuffing head firmly now but not overpack—overstuffing will flatten the skull. If you prefer a sculpted look, insert a small disk of fabric or felt behind the eye sockets to keep eyes protruding and stable.
— Horns (Make 2) :
Info :
Horns are worked as tapered cones with color gradient. Start with red at the base, change to orange in the middle and finish with golden yellow at the tip. Carry color or fasten off and sew ends in.
Round 1 :
6 sc in magic ring with deep red (6)
Round 3 :
(1 sc, inc) x 6 (18)
Round 4 :
1 sc in each st (18)
Round 5 :
(2 sc, inc) x 6 (24)
Round 6-7 :
1 sc in each st (24)
Info :
Change to bright orange at the end of round 7 by joining new yarn in the last stitch of round; carry the red inside if you plan to crochet it in or weave ends later.
Round 8 :
(3 sc, inc) x 6 (30) — in orange
Round 9-10 :
1 sc in each st (30)
Round 11 :
(3 sc, dec) x 6 (24)
Round 12 :
1 sc in each st (24)
Info :
Switch to golden yellow at end of round 12 for the tip. Taper gradually so the tip looks flame-like.
Round 13 :
(2 sc, dec) x 6 (18) — yellow
Round 14 :
(1 sc, dec) x 6 (12)
Info :
Fasten off leaving a long tail to sew horns to head. Lightly stuff only the base of each horn; the rest should be mostly unstuffed for a tapered, upright look. Sew horns symmetrically on top of head near the crown, spacing them approximately 6-8 stitches apart according to head size.
— Flame Spikes (Make 14-18 small spikes of varying sizes) :
Info :
Spikes are worked in small triangular shapes, layered along the crown and back. Work colors in gradients (red base, orange middle, yellow tip) or use pre-variegated yarn. Make several sizes: small (6 rounds), medium (8 rounds), large (10 rounds).
Spike Small Round 1 :
6 sc in magic ring (6)
Spike Small Round 2 :
(1 sc, inc) x 3 (9)
Spike Small Round 3 :
1 sc in each st (9)
Spike Small Round 4 :
(2 sc, inc) x 3 (12)
Spike Small Round 5 :
1 sc in each st (12)
Spike Small Round 6 :
Sl st around edge shaping to a point, fasten off leaving long tail for sewing (12)
Info :
For medium spikes add rounds: Round 6: (3 sc, inc)x3 (15); Round 7: 1 sc each (15); Round 8: sl st shaping. For large spikes continue similarly to 18-20 sts before shaping.
— Eyeballs & Facial Details :
Info :
Use 10-12mm safety eyes with cream/yellow rims to replicate photographed look. Surround eyes with 1-2 rounds of black sc to seat them, then embroider the flame eyebrows with yellow/orange yarn using long straight stitches crossing above the eye.
Round 1 :
Once safety eyes are in place, embroider small X-shaped starburst details using yellow onto the forehead between spikes. Use short satin stitches to form stylized flames.
— Neck / Neck Join :
Round 1 :
Start with golden yellow for belly neck: 6 sc in magic ring (6)
Round 3 :
(1 sc, inc) x 6 (18)
Round 4-6 :
1 sc in each st (18)
Info :
This short neck tube will be sewn into the body opening later. If you want a detachable head, leave a longer tail to sew and fasten off now. Stuff lightly to give neck slight stiffness.
— Body :
Round 1 :
6 sc in magic ring (6)
Round 3 :
(1 sc, inc) x 6 (18)
Round 4 :
(2 sc, inc) x 6 (24)
Round 5 :
(3 sc, inc) x 6 (30)
Round 6 :
(4 sc, inc) x 6 (36)
Round 7-9 :
1 sc in each st (36)
Info :
Change to golden yellow in the next round to begin belly panel. Carry black inside or fasten off and switch colors. Working belly in a contrasting color gives the dragon the warm chest panel seen in the photo.
Round 10 (belly join) :
Change to golden yellow, work 18 sc across front stitches only to create belly panel, then rejoin black at sides (36)
Round 11-18 :
1 sc in each st (36) — work entire circumference in black except belly front remains golden yellow
Info :
Stuff body beginning from round 12 onward. Add stuffing in small bursts and shape the torso: firm in lower body, moderate in upper to allow head attachment. Remember to stuff before closing neck and attaching limbs.
Round 19 :
(4 sc, dec) x 6 (30)
Round 20 :
(3 sc, dec) x 6 (24)
Round 21 :
(2 sc, dec) x 6 (18)
Round 22 :
(1 sc, dec) x 6 (12)
Round 23 :
6 dec (6) — leave opening to sew to base/legs if attaching later
Info :
If you prefer to sew the body closed and then attach legs to the outside, fasten off leaving a long tail. Alternatively keep the bottom open to attach legs from inside for a cleaner finish.
— Arms (Make 2) :
Round 1 :
6 sc in magic ring (6)
Round 3 :
(1 sc, inc) x 6 (18)
Round 4-6 :
1 sc in each st (18)
Info :
Begin shaping paw by working short increases and then adding small yellow/orange claws as tiny picot or bobble details. Stuff paw area firmly and leave the arm tube slightly less stuffed for flexibility at the shoulder.
Round 7 :
(2 sc, dec) x 6 (12)
Round 8-12 :
1 sc in each st (12)
Round 13 :
(4 sc, inc) x 3 (15) — flare slightly for elbow
Round 14-16 :
1 sc in each st (15)
Info :
Embellish fingertips: use golden yellow to embroider 3 tiny claws on outermost row by pulling up a loop and securing it as a small bobble or work a 3-chain picot and sl st back into same stitch for raised claw effect.
Round 17 :
(3 sc, dec) x 3 (12)
Round 18 :
1 sc in each st (12) — finish arm length
Round 19 :
Leave a long tail, fasten off; stuff paw and lower arm firmly, upper arm lightly before sewing to body
— Legs (Make 2) :
Round 1 :
6 sc in magic ring (6)
Round 3 :
(1 sc, inc) x 6 (18)
Round 4 :
(2 sc, inc) x 6 (24)
Round 5 :
(3 sc, inc) x 6 (30)
Round 6-8 :
1 sc in each st (30)
Info :
Work foot shaping in these initial rounds to create a broad base. Add yellow claw bobbles at the toe edge: place 4 small bobbles evenly spaced across the toe for each foot using golden yarn and small bobble technique (work 3 dc cluster, close together).
Round 9 :
(4 sc, dec) x 6 (24)
Round 10-13 :
1 sc in each st (24)
Round 14 :
(3 sc, dec) x 6 (18)
Round 15-18 :
1 sc in each st (18) — leg length
Round 19 :
(2 sc, dec) x 6 (12)
Round 20 :
6 dec (6) — stop and leave opening for sewing; fasten off leaving long tail
Info :
Stuff foot firmly, ensuring toe area retains shape. Sew legs to body bottom evenly spaced approximately 6-8 stitches from front center to create stable seated posture.
— Tail :
Round 1 :
6 sc in magic ring (6)
Round 3-6 :
1 sc in each st (12)
Round 7 :
(1 sc, dec) x 4 (8) — begin taper
Round 8-12 :
1 sc in each st (8) — continue length
Round 13 :
(1 sc, dec) x 2 (6)
Round 14-16 :
1 sc in each st (6)
Round 17 :
Fasten off; attach flame tuft at tail tip by sewing a small medium spike (worked earlier) and secure with yarn
Info :
For extra poseability, insert thin floral wire into tail center before final stuffing. Bend wire away from body to avoid poking through fabric and wrap wire ends with a little yarn before stuffing.
— Wings (Make 2) :
Info :
Wings are worked flat and in strip panels: a black wing frame with orange-to-red membrane inside. Work the wing ridge in BLO for a crisp edge and add vertical ribs with surface slip stitch or embroidered black lines.
Round 1 (wing base) :
Ch 24, join to form ring with sl st, work 24 sc around (24)
Round 2 :
1 sc in each st (24)
Round 3 :
BLO 1 sc in each st (24) — ridge forming edge
Round 4 :
Change to bright orange. 1 sc in each st (24)
Round 5 :
(3 sc, inc) x 6 (30) — flare wing shape
Round 6 :
1 sc in each st (30)
Round 7 :
Change to deep red at outer edge and work 1 sc in each st (30)
Round 8 :
Work edge: *sc, ch2, skip 1* across to create scalloped membrane edge; finish and fasten off
Info :
Sew wing frames to body at back seam between rounds 10-14 of the body, spacing wings evenly. Add black ribbing by surface crocheting slip stitch lines from base to outer edge, 3 ribs per wing, using black yarn.
— Wing Ribs (Make 6 ribs total) :
Round 1 :
With black yarn, ch length of rib (approx 10-14 ch) and sl st back along chain to create a raised rib. Fasten off and sew onto wing membrane following photographed rib positions.
Info :
Stiffen wings slightly by adding a thin layer of interfacing or inserting a light plastic sheet inside wing before sewing closed. This helps wings hold upright positions similar to the photos.
— Claws & Toe Bobbles :
Round 1 :
Use golden yarn to embroider small bobbles at toes: insert hook, pull up long loop, yarn over and pull through twice to create a raised nubble; secure into same stitch and anchor with sl st.
Info :
Make three or four claw bobbles per foot and three tiny claw nubs on each hand’s outer edge. These decorative bobbles can be made by a small cluster of stitches or a tiny picot depending on your preferred texture.
— Scarf (Striped) :
Round 1 :
Using red, ch 60 (or length desired to wrap around neck), join with sl st to form loop, do not twist
Round 2-3 :
1 sc in each ch around (60)
Info :
Alternate 6 rounds of red and 6 rounds of black to make wide stripes (for chunky stripes, work 2–3 rounds per color). The scarf shown uses bold two-color wide stripes; join color changes neatly and weave ends inside scarf.
Round 4-18 :
Work stripes as desired, ending red. Fasten off and sew small fringe or ch-fringe ends if preferred. Attach a small charm to the front with a metal jump ring for the photographed snowflake charm look.
— Assembly & Finishing Touches :
Info :
Before sewing pieces together, pin everything in position. Block wings and spikes with pins so they sit symmetrically. Weave in all tails neatly and hide joins on inside where possible.
Step 1 :
Sew neck tube to body opening using mattress stitch or whip stitch; stuff neck to natural firmness before closing seam.
Step 2 :
Attach head to neck using the long tail from the closed muzzle (or sew through head/neck base) with evenly spaced stitches to prevent wobble.
Step 3 :
Sew arms to upper sides of body aligning top of arm with body rounds 10-12 for natural placement. Use ladder stitch for invisible seam.
Step 4 :
Sew legs to bottom of body. For seated pose, position feet slightly forward on rounds 1-3 of base; use pins to hold and stitch tightly for balance.
Step 5 :
Glue or sew safety eyes and check fit; embroider eyelids/eyebrows above eyes using yellow and orange to create stylized flame brows.
Step 6 :
Sew horns and spikes in place using long tails. Layer spikes starting with larger ones at the base and medium/smaller ones toward the front to replicate layered flame flow.
Step 7 :
Sew wings to back at body rounds 10-14 centered between shoulder blades. Reinforce by sewing several times along the wing base and add surface stitching to anchor ribs.
Info :
Embroider small decorative starbursts across the forehead with contrasting yellow. Use short satin stitches radiating from a center point and fix with a drop of fabric glue if needed to keep stitches flat.
Step 8 :
Place scarf around neck and secure by sewing a few invisible stitches at the back. Attach charm to front center; ensure charm is sewn on securely for durability.
Info :
Final shaping: give the dragon a steam-of-heat effect by slightly flaring and curving the spike tips with careful pulling and positioning. Trim and weave in any remaining ends and give a final stuffing adjustment if necessary.
This Fiery Spike Dragon combines sculptural shaping and bold colorwork to create a striking, collectable amigurumi. Layered flame spikes, gradient horns and expressive eyes give it a lot of personality and charm. Working this pattern rewards patience with a dramatic finished piece perfect for gifting or displaying. 🐉🔥🧶