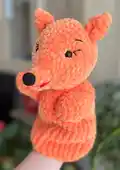
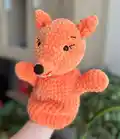
About This Fox Hand Puppet Amigurumi Pattern
This pattern teaches you how to crochet a fox hand puppet using plush yarn for a soft, kid-friendly finish. It includes full round-by-round instructions for the head, nose, ears, arms, and body, plus embroidery details for expression. You will find placement notes for eyes and easy assembly steps to stitch all parts neatly together.
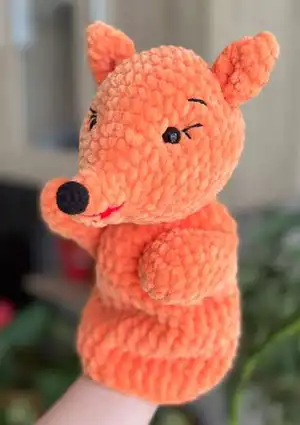
The pattern uses super bulky plush yarn for the main body and sport cotton for small details like nose and eyebrows. Detailed photos and how-to links are provided to help you close holes, indent eyes, and attach arms securely.
Why You'll Love This Fox Hand Puppet Amigurumi Pattern
I absolutely love this pattern because it combines cuddly plush yarn with classic amigurumi shaping to create a puppet that is both soft and playful. I enjoyed designing the elongated snout and expressive embroidered eyebrows that give the fox so much personality. I also appreciate how compact the project is — it is quick to make yet rewarding to finish. Sharing this puppet as a gift always brings smiles because it feels handmade and heartfelt.
Switch Things Up
I love experimenting with colors to give each fox a different personality; try softer apricot or grey for a subtler look.
I often change yarn weight and hook size to create mini or jumbo versions—switch to DK yarn with a 3.0 mm hook for a small keychain-sized puppet or bulky yarn for a large cuddly puppet.
I sometimes add felt or tiny crocheted accessories like a scarf or hat to turn the puppet into a seasonal character or gift-ready toy.
I recommend embroidering different expressions by shifting eyebrow placement to make happy, surprised, or sleepy fox faces.
For durability with kids, consider using securely sewn felt pieces for small parts rather than loose embroidery ends that could loosen with heavy play.
I like to make a set of woodland puppets using the same body but swapping head shapes and ear styles to make a whole puppet theater troupe.
You can replace plastic eyes with embroidered eyes for a fully soft toy, which is ideal for babies or toddlers.
If you want posable limbs, I sometimes insert a thin wire into the arms before closing, being careful to cover the wire ends safely inside stuffing.
Try gradient or variegated yarn for an interesting texture on the body; the plush yarn will make color transitions look soft and organic.
Finally, I always recommend trying a tension swatch and adjusting hook size to keep proportions consistent when you change yarn or want a different final size.
Common Mistakes & How to Fix Them
✗ Not placing safety eyes at the correct rounds can make facial features misaligned; fix by marking the start stitch and placing eyes between rounds 10 and 11 with 11 sc between them.
✗ Overstuffing the head will distort the facial shaping and snout; stuff gradually and evenly to maintain the intended silhouette while closing the head.
✗ Skipping stitch counts after increases or decreases results in wrong shaping later; count your stitches at the end of each round, especially during shaping rounds 10-20.
✗ Sewing arms in the wrong position can look awkward and unbalanced; pin arms between specified rounds and try on the head/body before final sewing to ensure symmetry.